Disclaimer – This post is sponsored by Floor&Decor. All opinions are 100% my own.
This post is going to document my favorite makeover to date. Seriously. This is my spot. every day. my spot that I sit and blog. And watch Survivor. And root for the shy guy on Bachelorette. And eat soft pretzels and drink sweet tea. And edit my favorite pictures of my kids. And for SO long, it has looked like this…
Or a very messy version that. And the whole room looked like this….
Well, no more! Now it is literally my favorite spot in the entire house and it’s GORGEOUS.
Okay…so over the summer, we went to Floor & Decor a lot to score the beautiful tile we used in the Pedraza’s house. And each and every time, I would find myself wandering over the to the ledger section of the store to stroke this beautiful stacked stone look tile. It is my spirit animal in tile form.
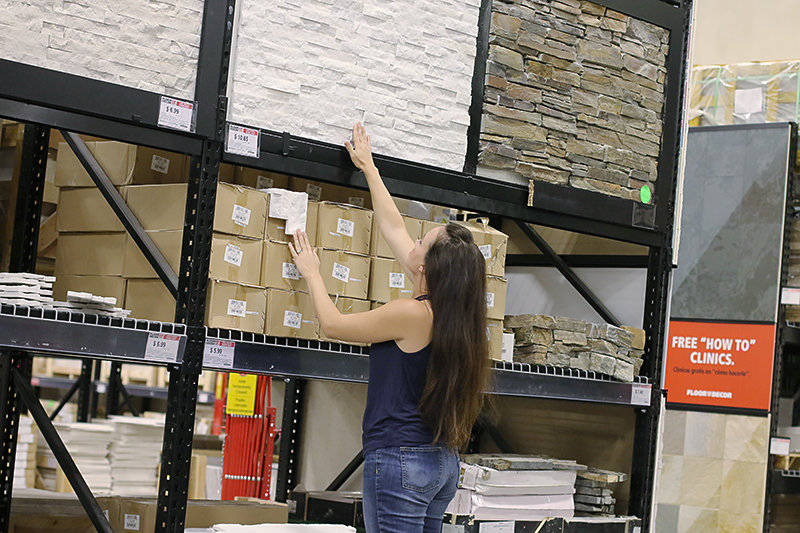
I did look at ALL the other options of course….which they have PLENTY. Floor & Decor is a great one-stop-shop for all flooring and tile….I highly recommend it because of the low-price guarantee and the selection is HUGE and then also because it is literally walk-out-ready. Most tile stores do not carry things in stock and you have to order, wait and get frustrated. But not here….you pick it out and then pick it up (or have one of their lovely associates do it!). You can ensure that the item that you are walking out with is exactly what you want….not just a similar item.
I just recently told my mom that it is always better to just go into the store because tile is something you definitely want to see in person. It can change your mind seeing it, touching it and holding it in your hand. I know that I sound ridiculously passionate about the subject….but seriously guys…tile is something that can MAKE A ROOM. This post will prove it. I promise.
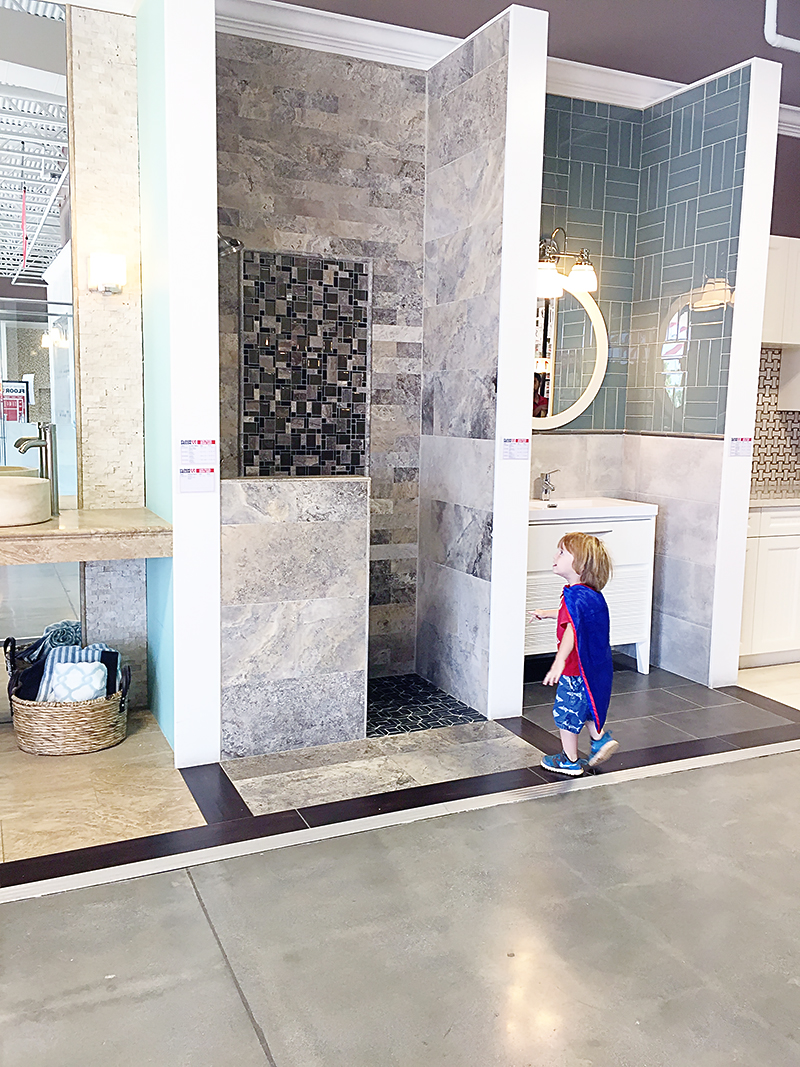
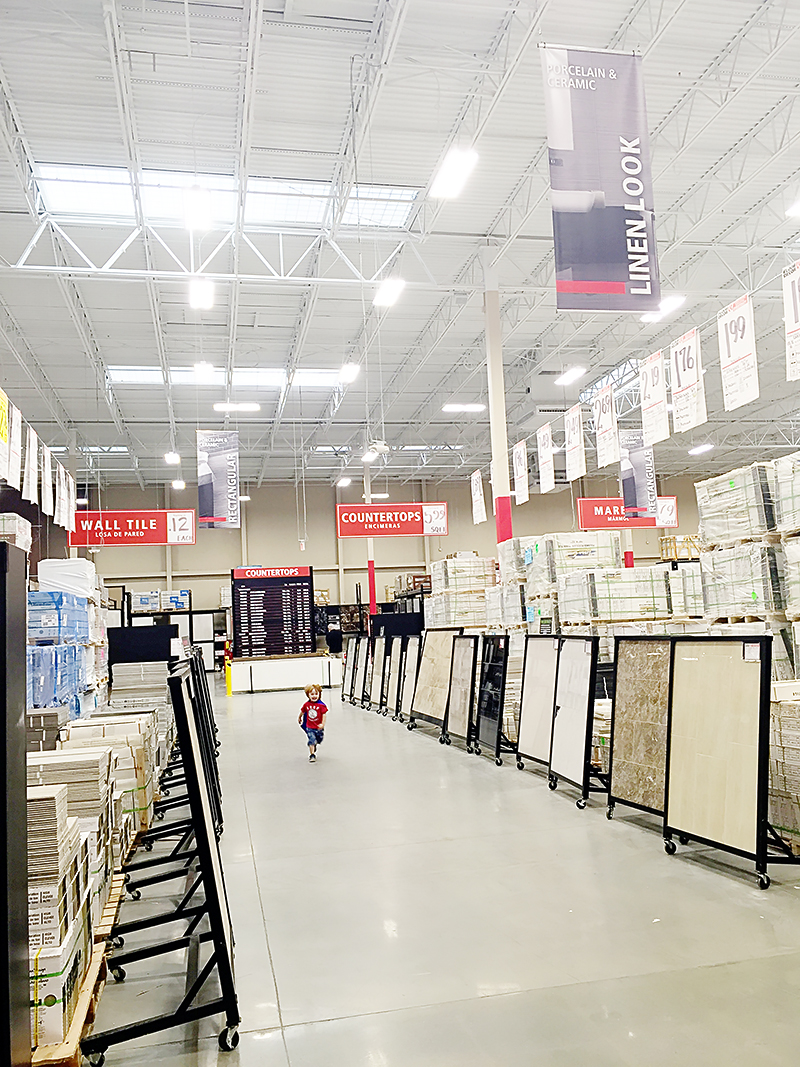
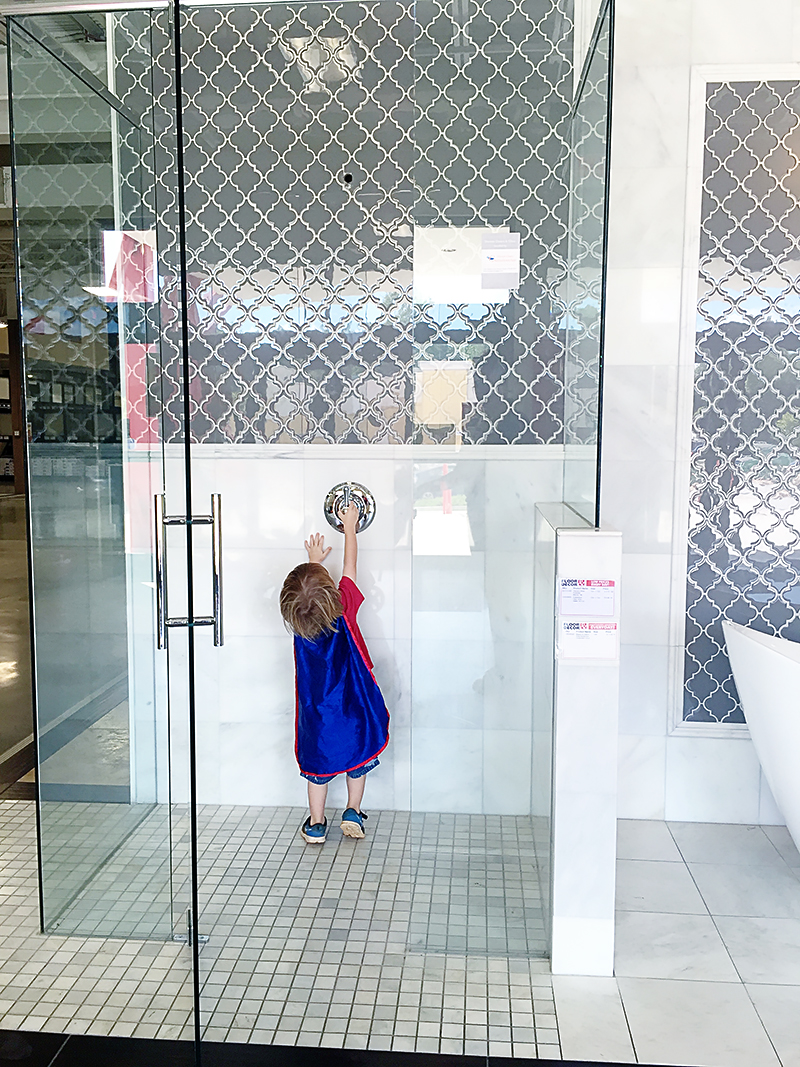
Speaking of rooms…I love the fact that the Floor & Decor foyer is filled with miniature rooms showing off different ways to use tile in your house.
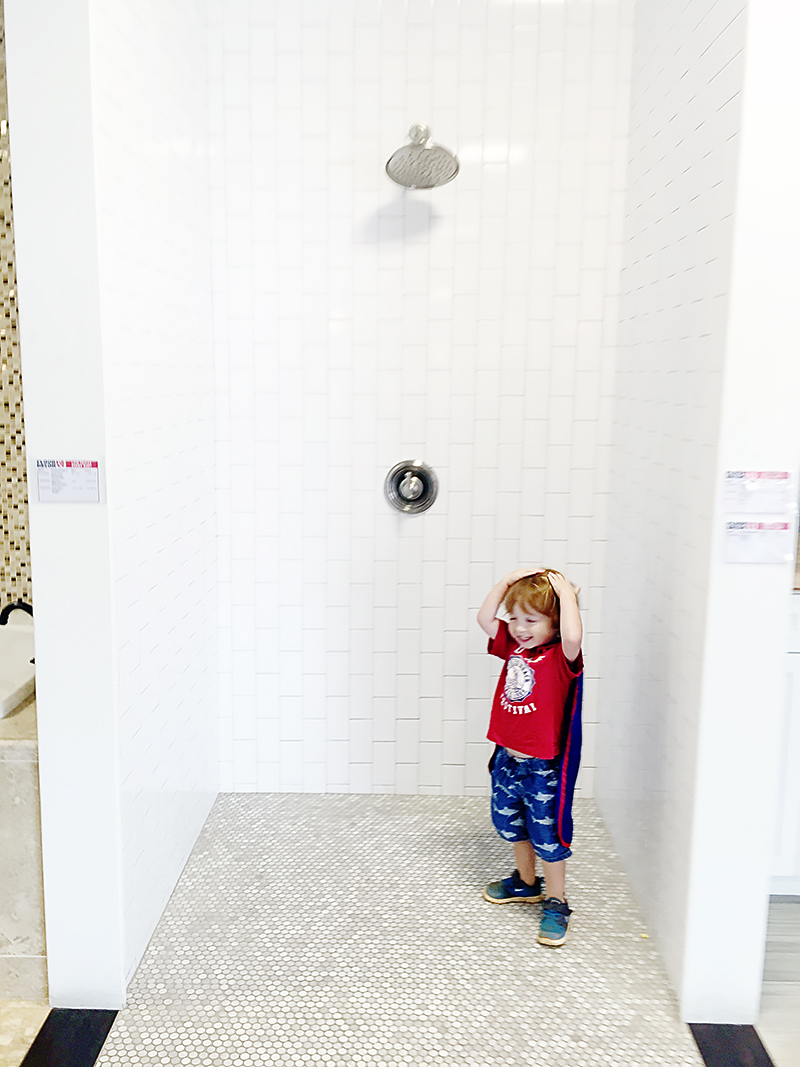
Also, it makes my day when LJ pretends to wash his hair 🙂
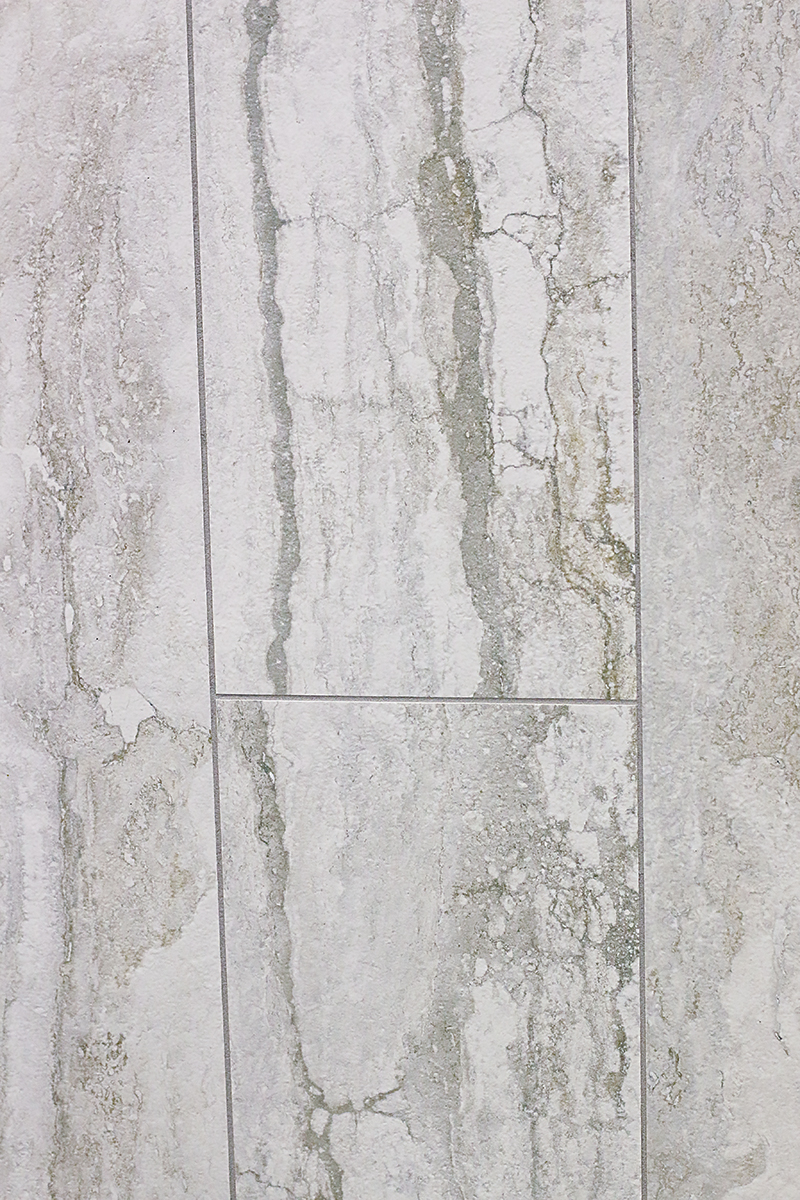
I knew that my initial gut said to go with the stacked stone but I wanted to check out the other options because this store is constantly getting new inventory and more options. This is AMAZING floor tile (only $2.99 a square foot!!!) that would look epic on a modern fireplace. Can you even imagine!?
It might look something like this when it’s finished…
And I also liked this option (called Sahara Sand) for the more modern vibe….
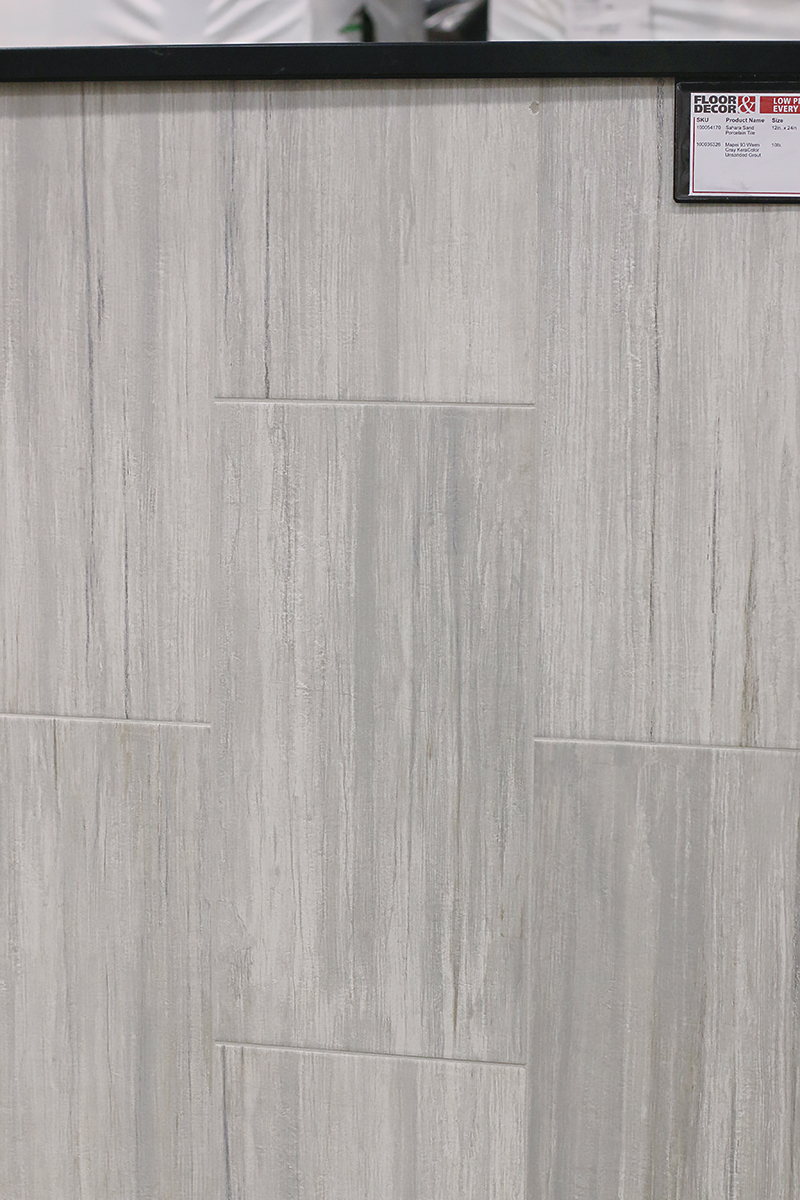
Laid on a horizontal, it could look really REALLY good. It would be similar to my fireplace with the no mantle and the higher fire box…
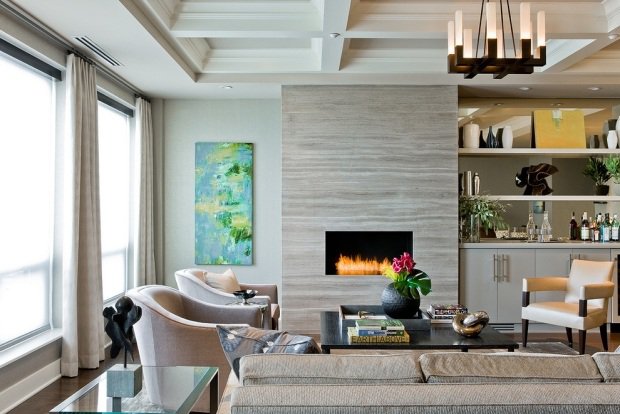
This is Orobianco White porcelain tile and it’s new and pretty much the love child of the previous two 🙂
I imagine it would look similar to this….
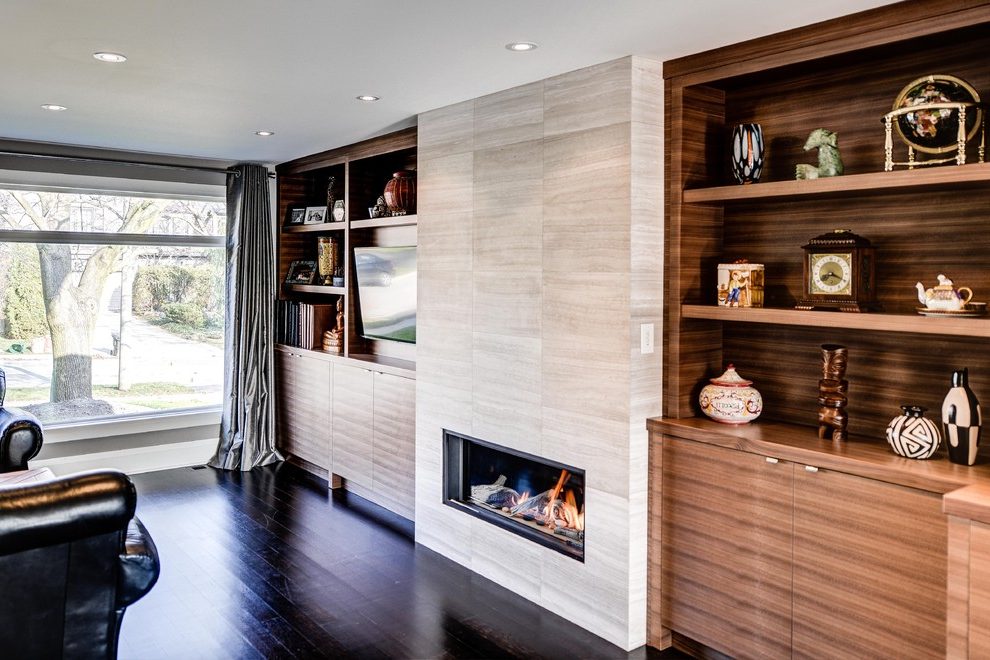
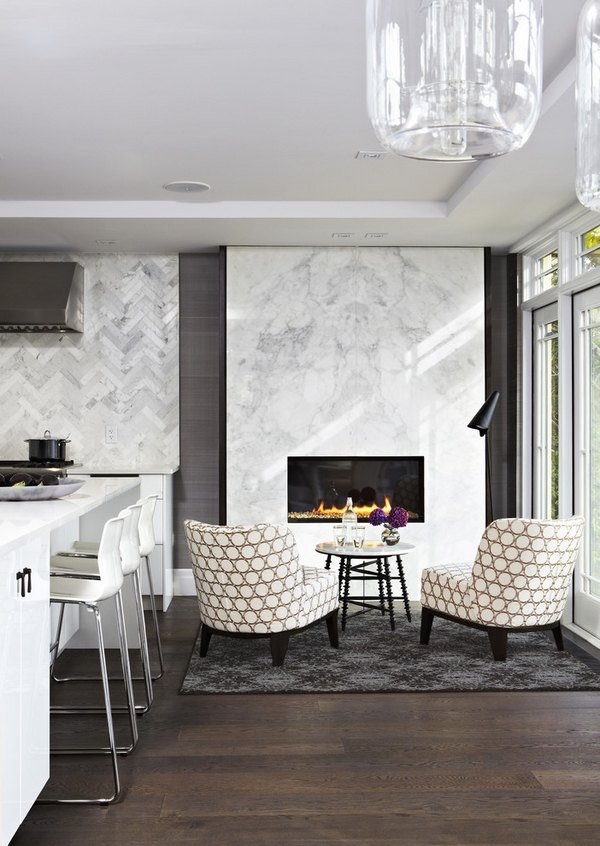
But in the end, I kept coming back to the image in my head with floating shelves and some really textural and clean looking stacked stone. Something like this…
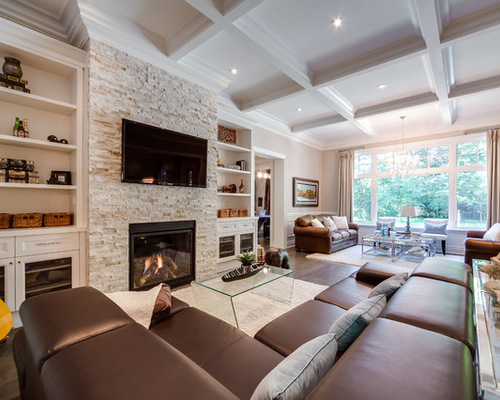
or this…
DELISH.
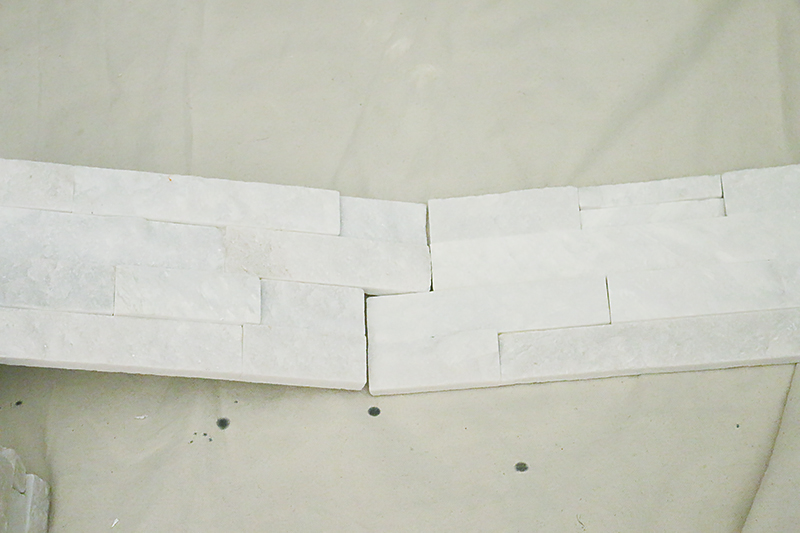
It was just something I knew I would NEVER get sick of. I just wanted to be sure to avoid stacking my tiles to make the seams all the same (like they did in the display) because I wanted it to look like REAL stacked stone….not like tile.
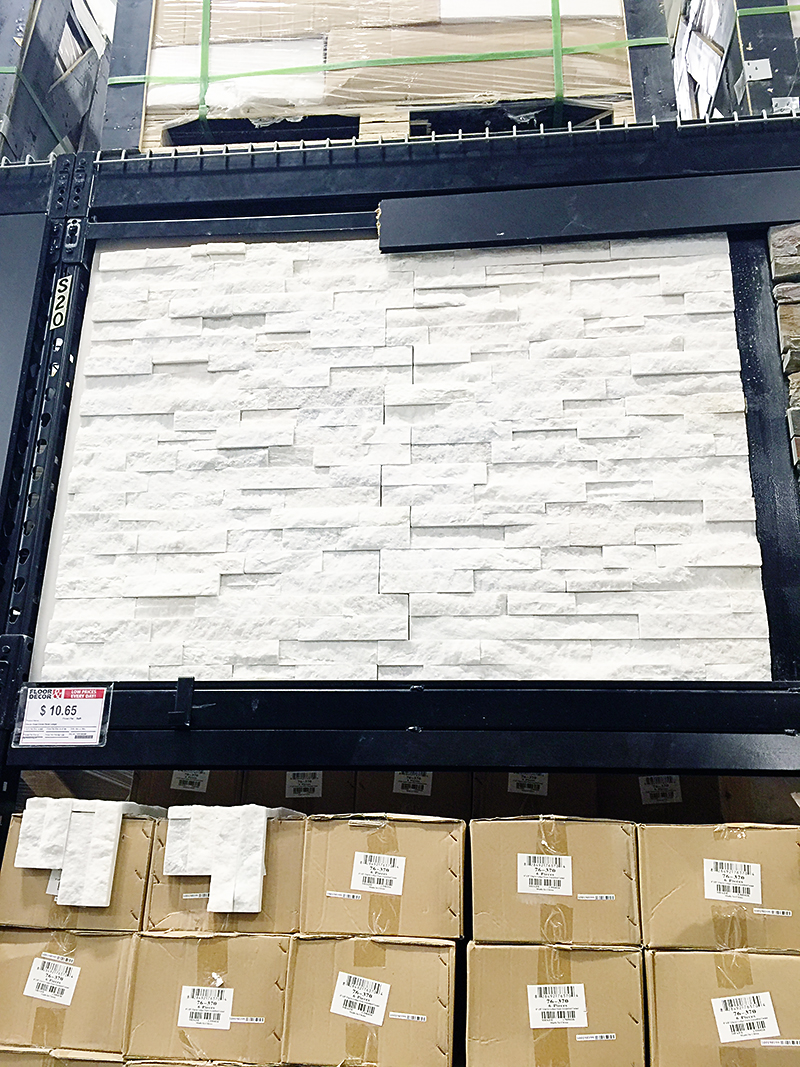
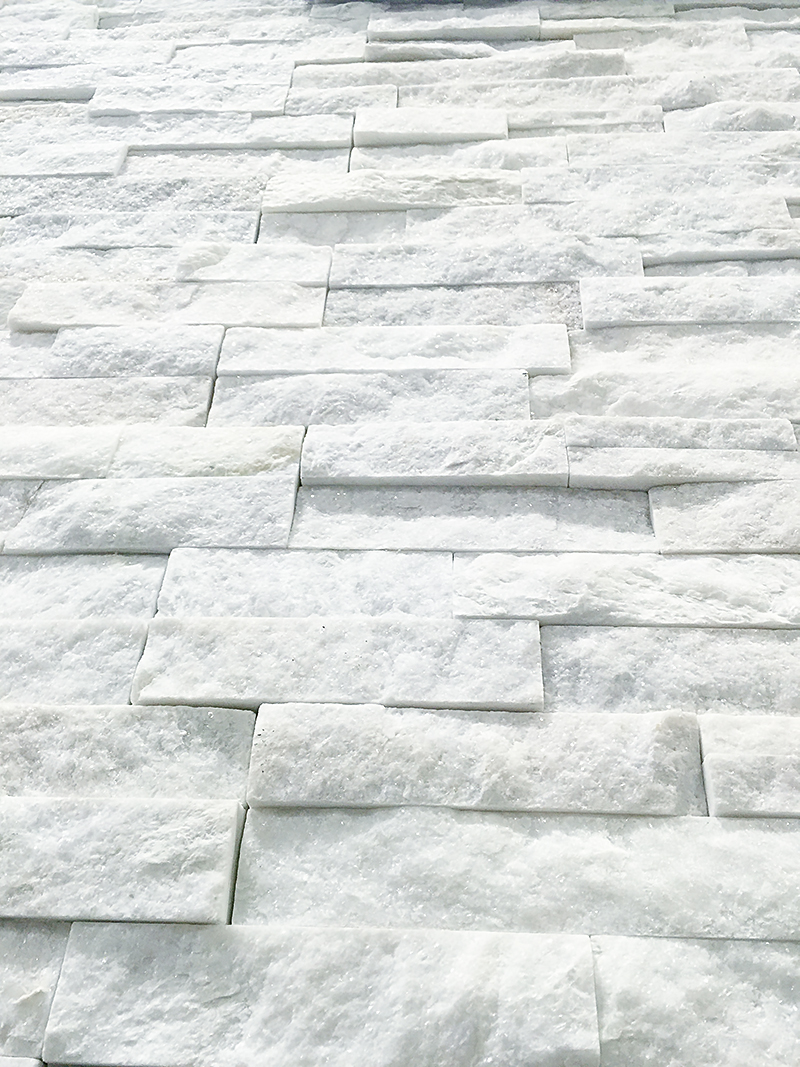
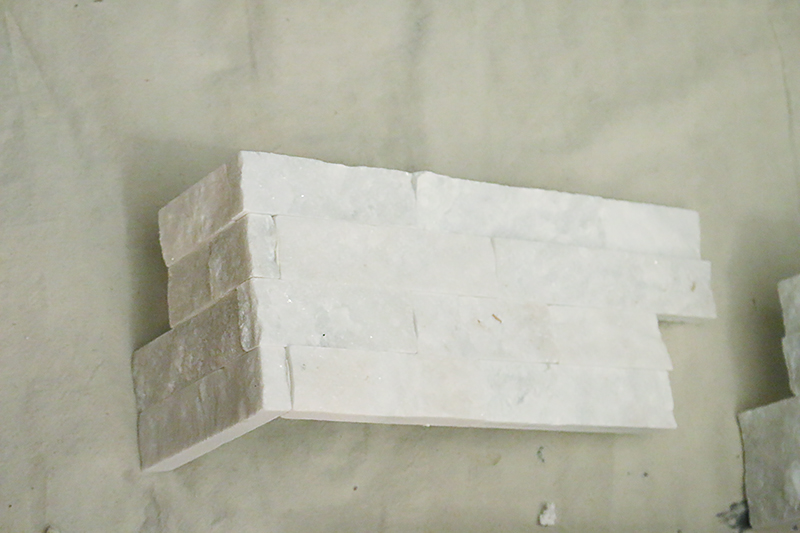
The tile is called Glacier Ledger stone tile and the absolute best part about it….IT SPARKLES. Seriously. Not in a hey I’m gonna blind you kinda way….more like a I have a million small fragments of diamonds and twinkle lights in my ore kinda way.
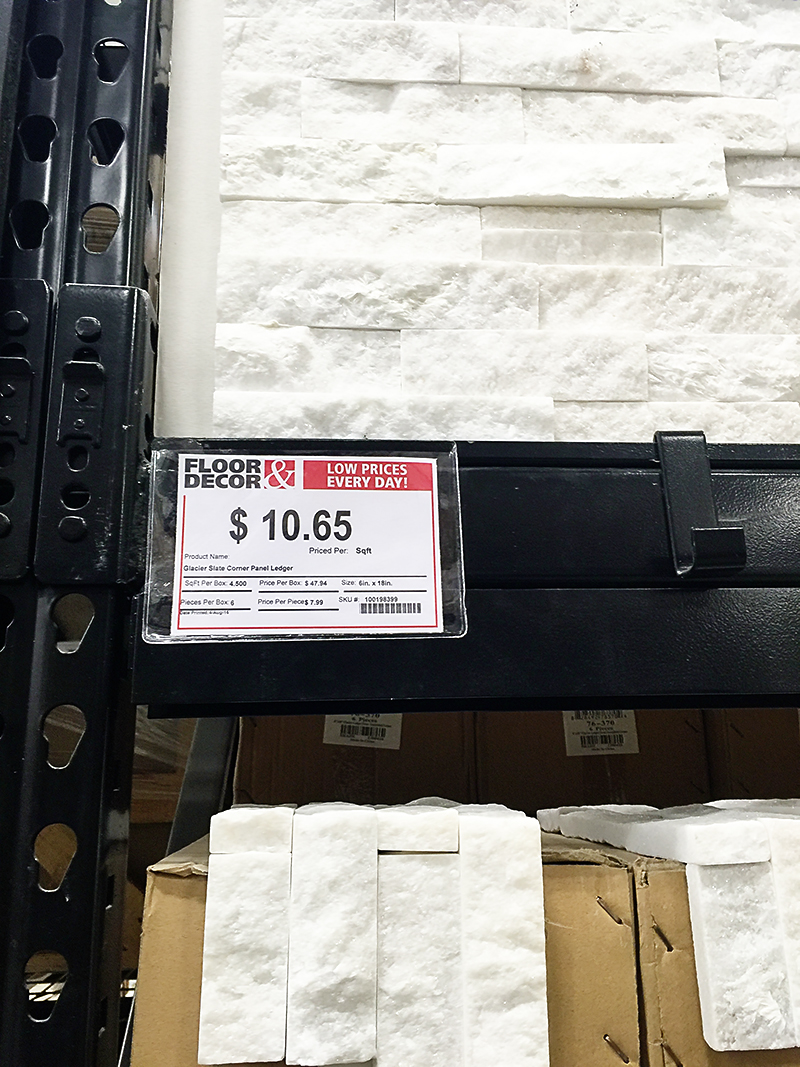
And the cost is on point! The tile has two separate types….the corner pieces and then the flat pieces. The flat pieces are only $5.99 a square foot!
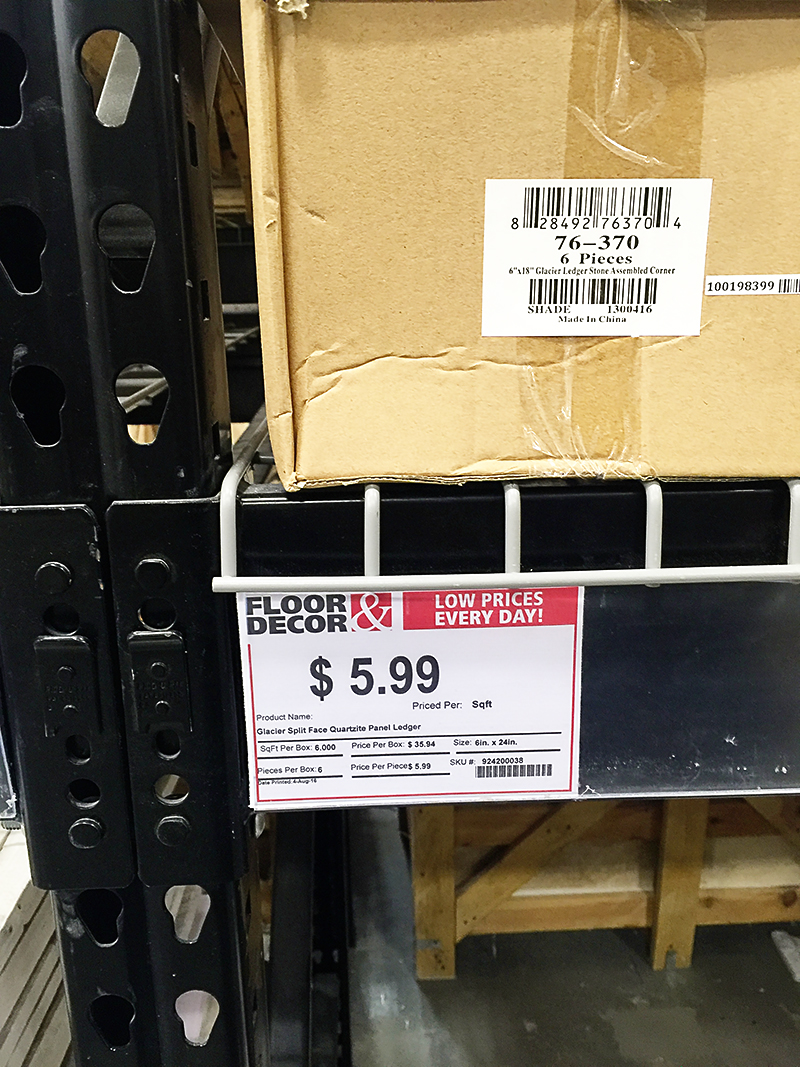
And the corner pieces are $10.65. Seriously….that is a great price for the quality of these. I usually pick marble for backsplashes and such so seeing this HUGE fireplace come in at an affordable price is super exciting.
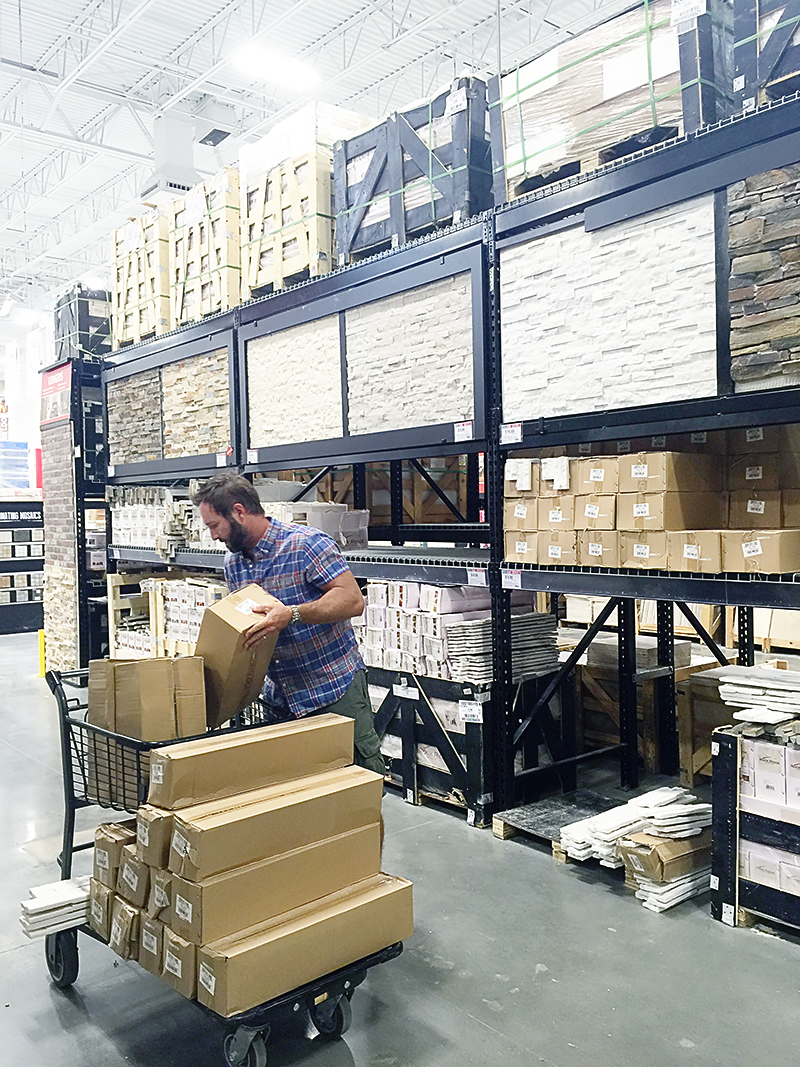
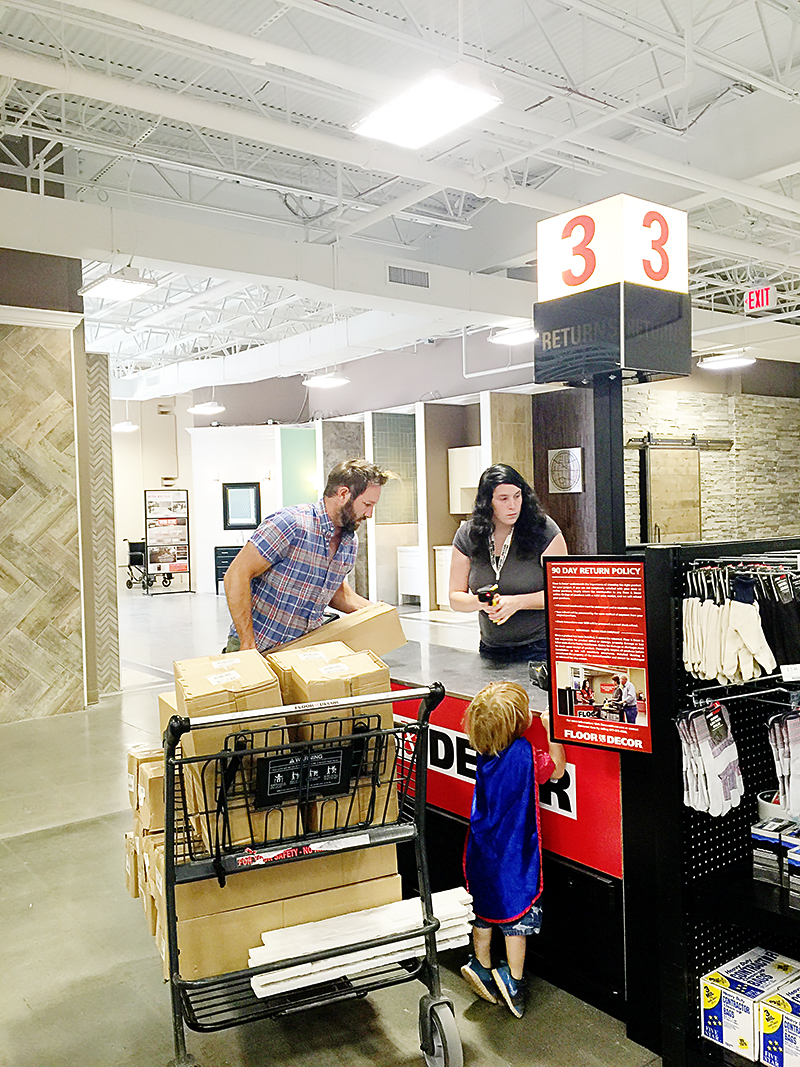
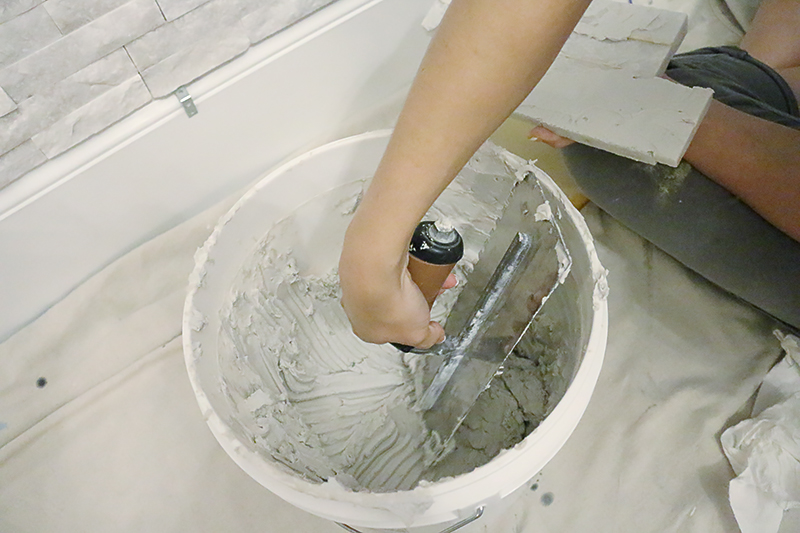
Jeremy loaded up our cart and we headed back through the aisles so that I could grab the mortar to meet him at the register.
I know that this sounds weird but if you do plan on going to shop at Floor & Decor, try to go on a weekday around 11am. It’s the best time to go with kids. And I’ve found that you can schedule your appointment to a designer (yes, they have designers available in the store! and yes it’s free!) without any trouble.
We loaded down the big white whale and we headed home…
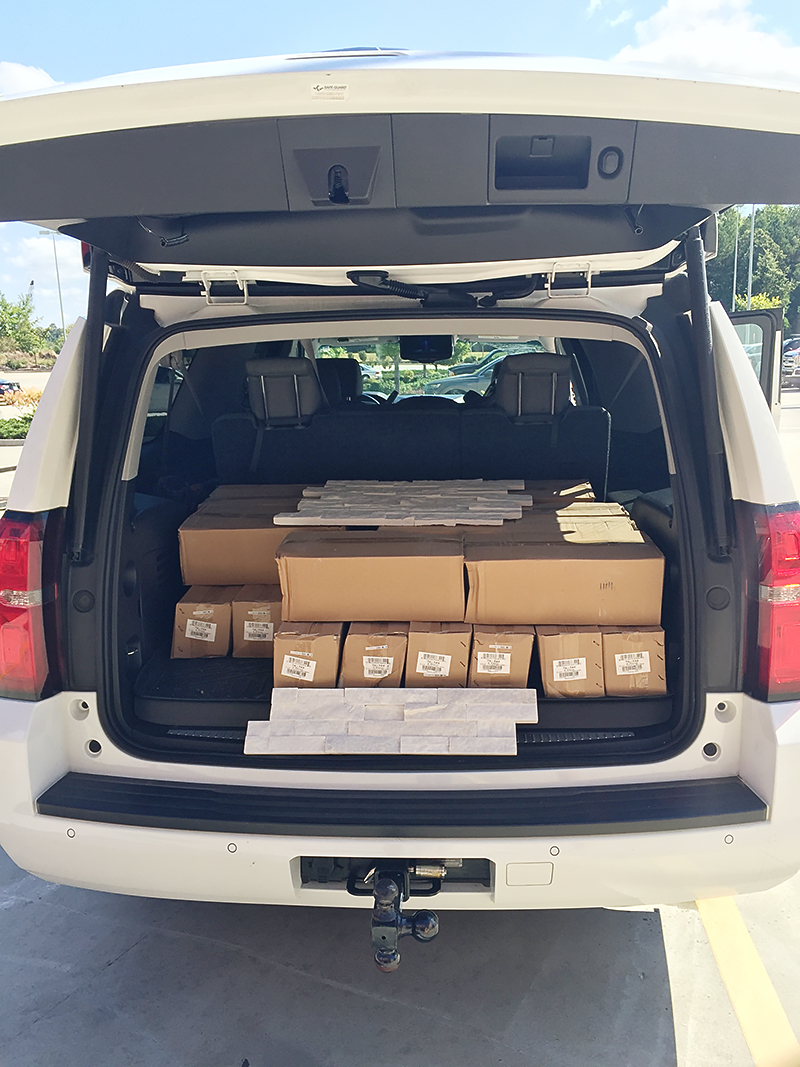
Well….after I got a celebratory jumping picture. I barely got off that curb. Don’t make fun 🙂

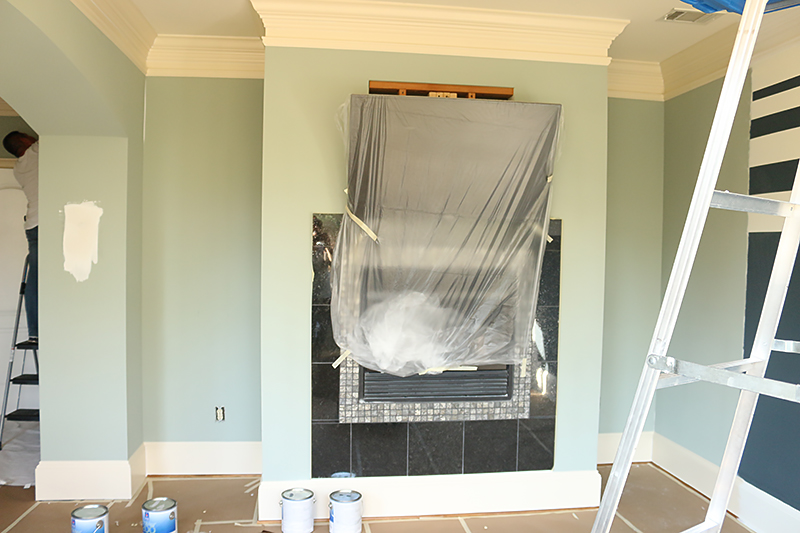
Okay….so back to the bedroom sitting area. As you know, we got the entire room – trim, ceiling and walls all coated with a fresh color and we were ready for demo. (see the finished painted rooms in this post)
Jeremy actually demo’ed during the presidential election…which we highly recommend. Any political news program is the perfect time to get out some aggression. That’s a bipartisan fact 🙂
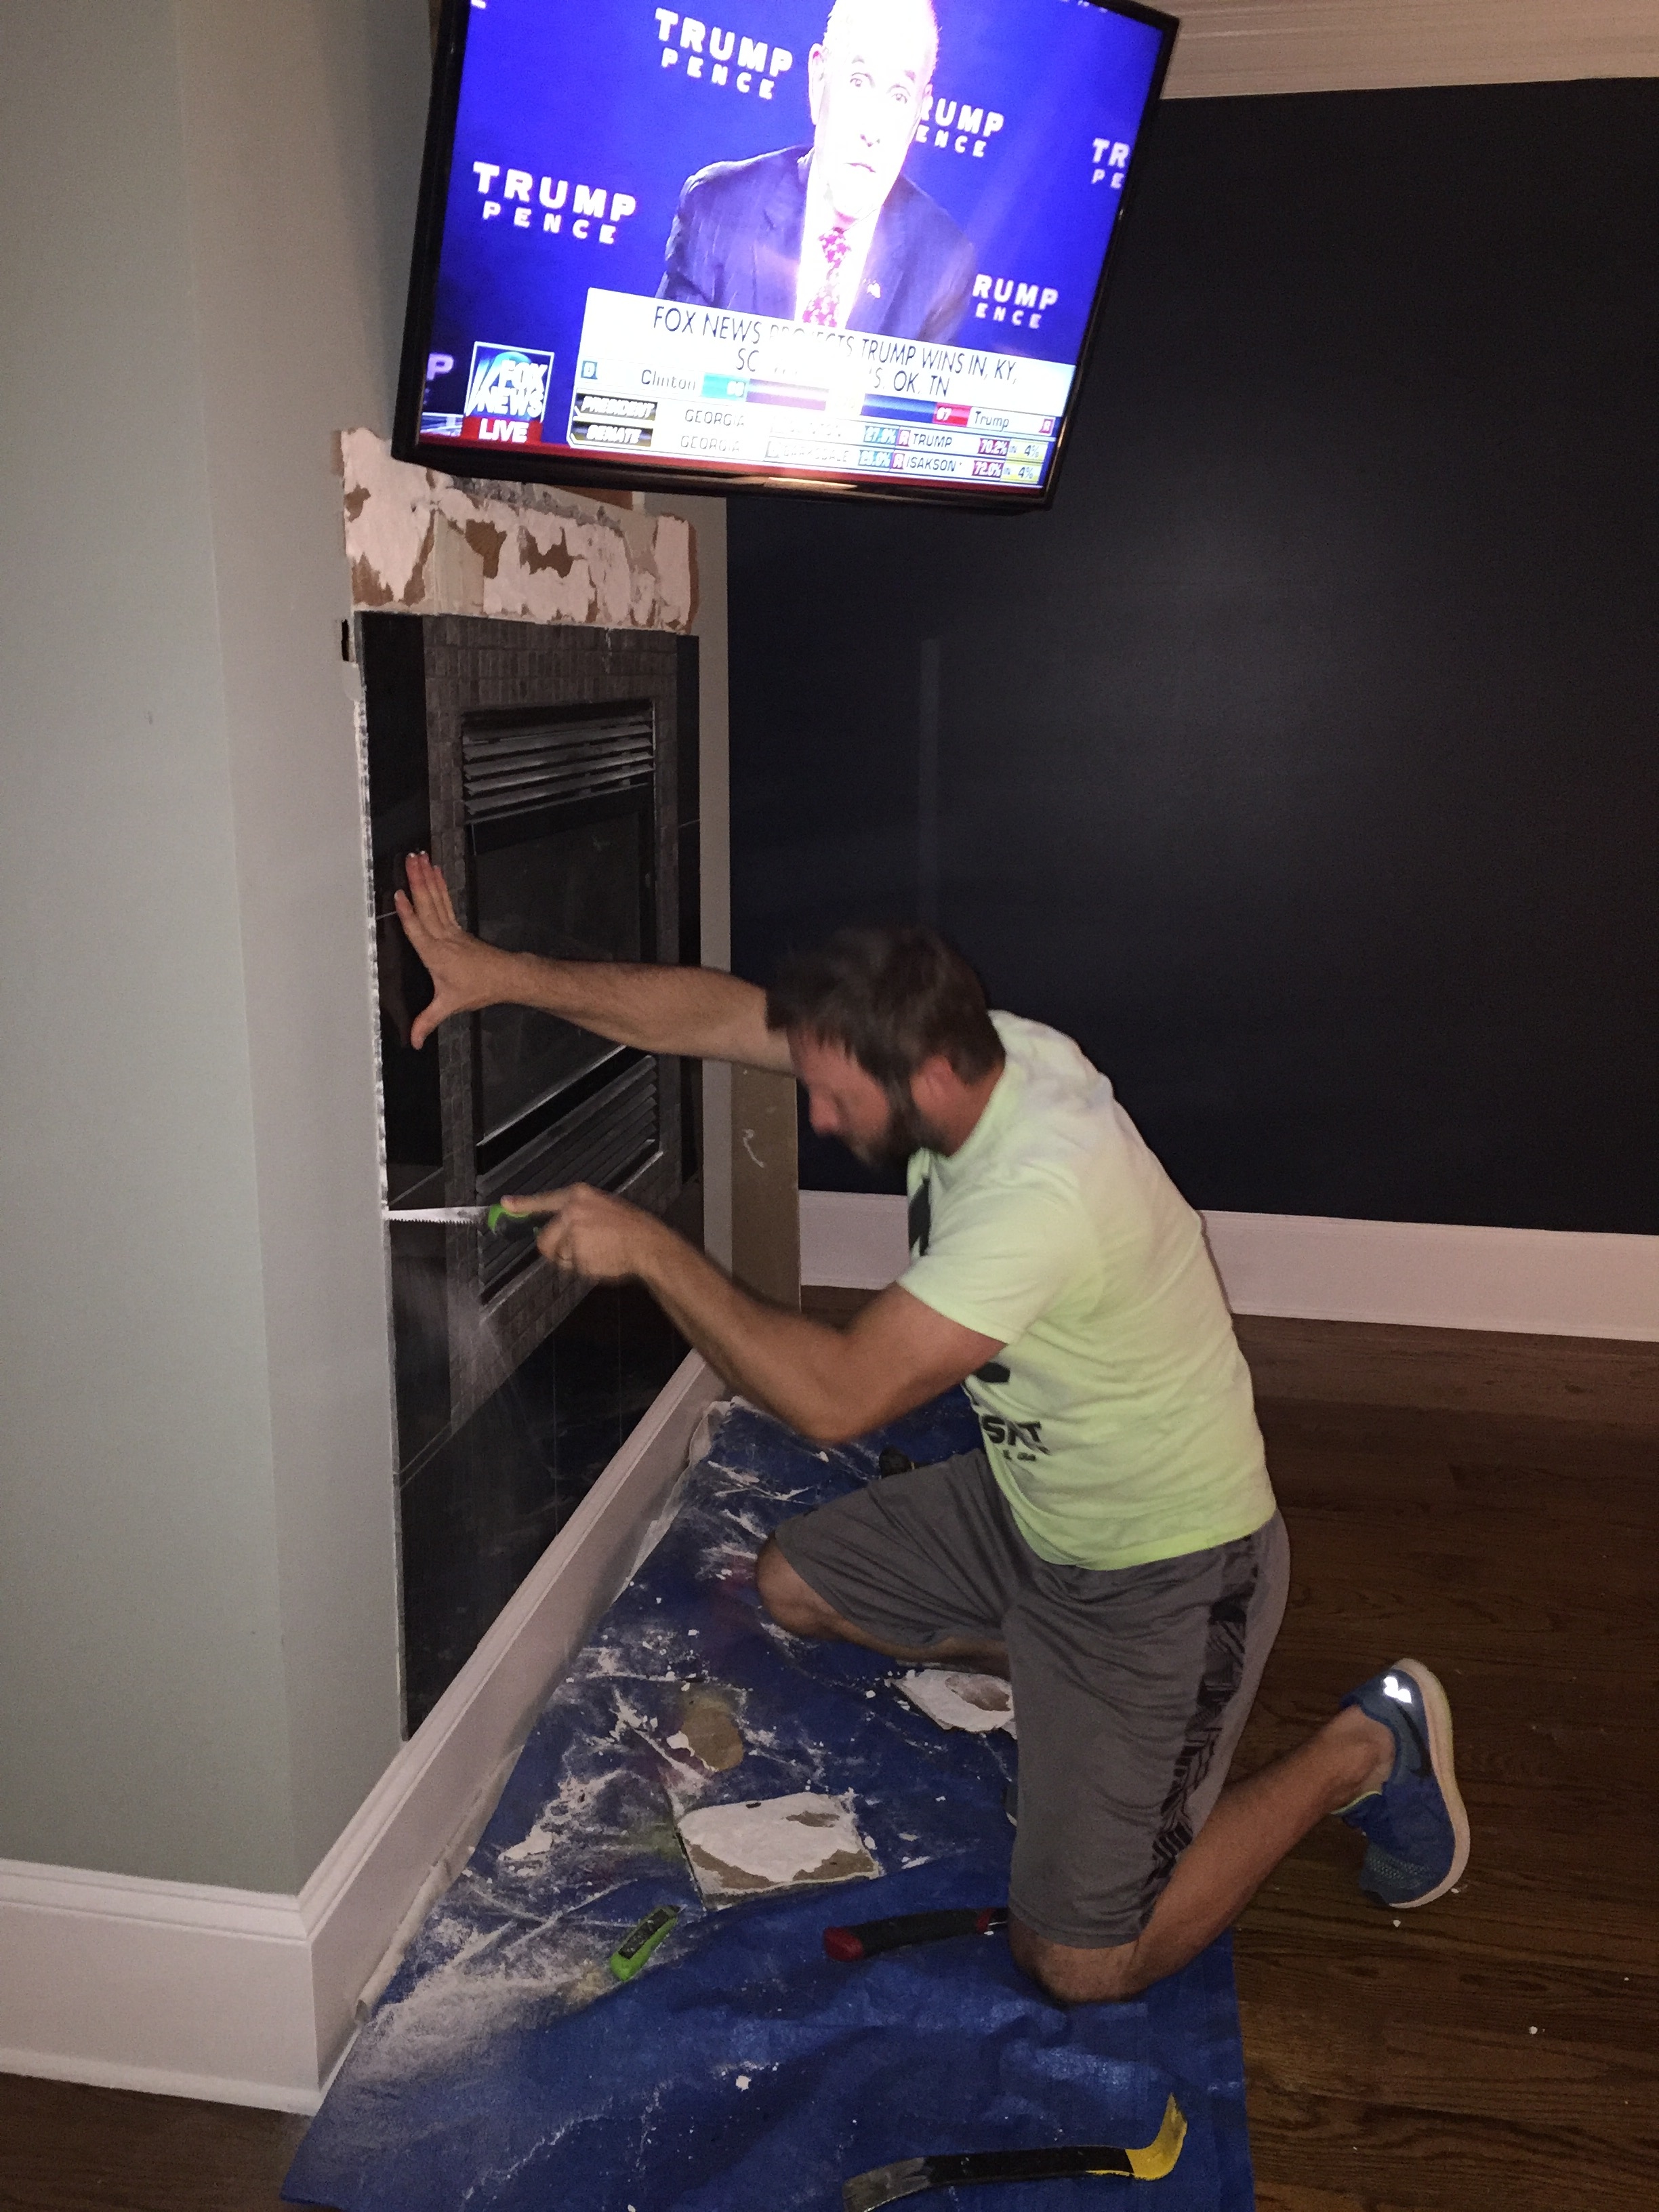
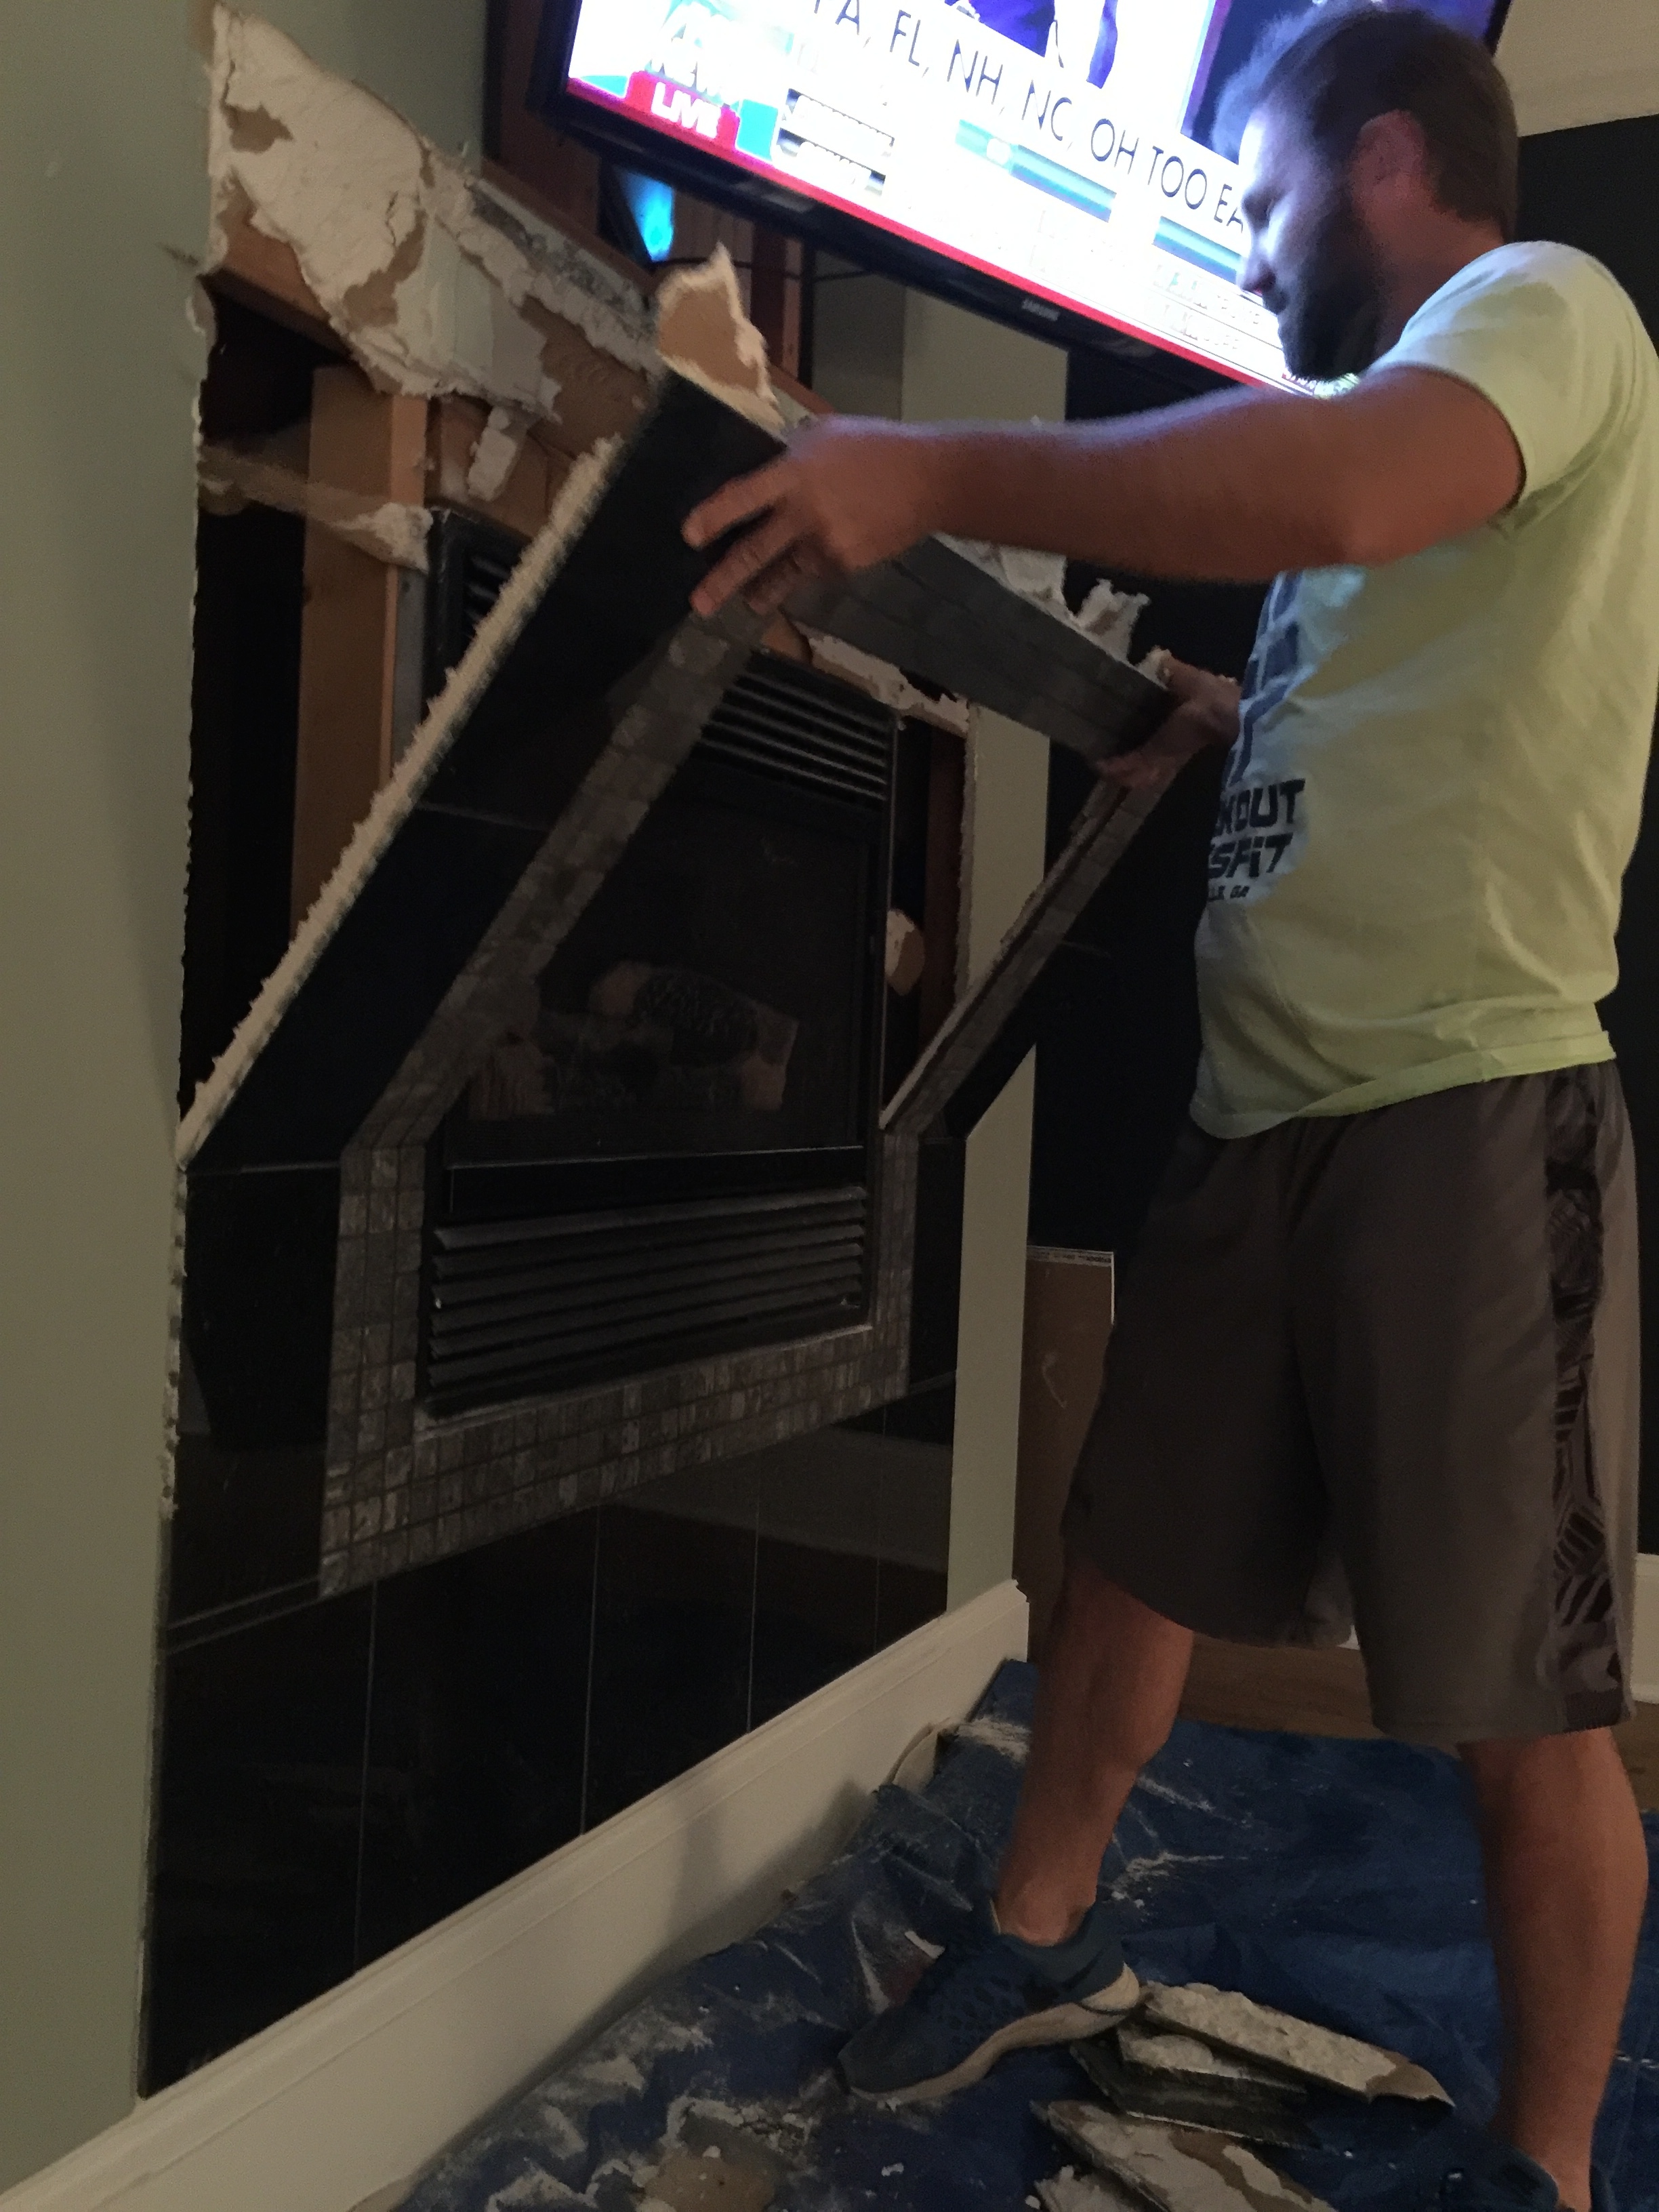
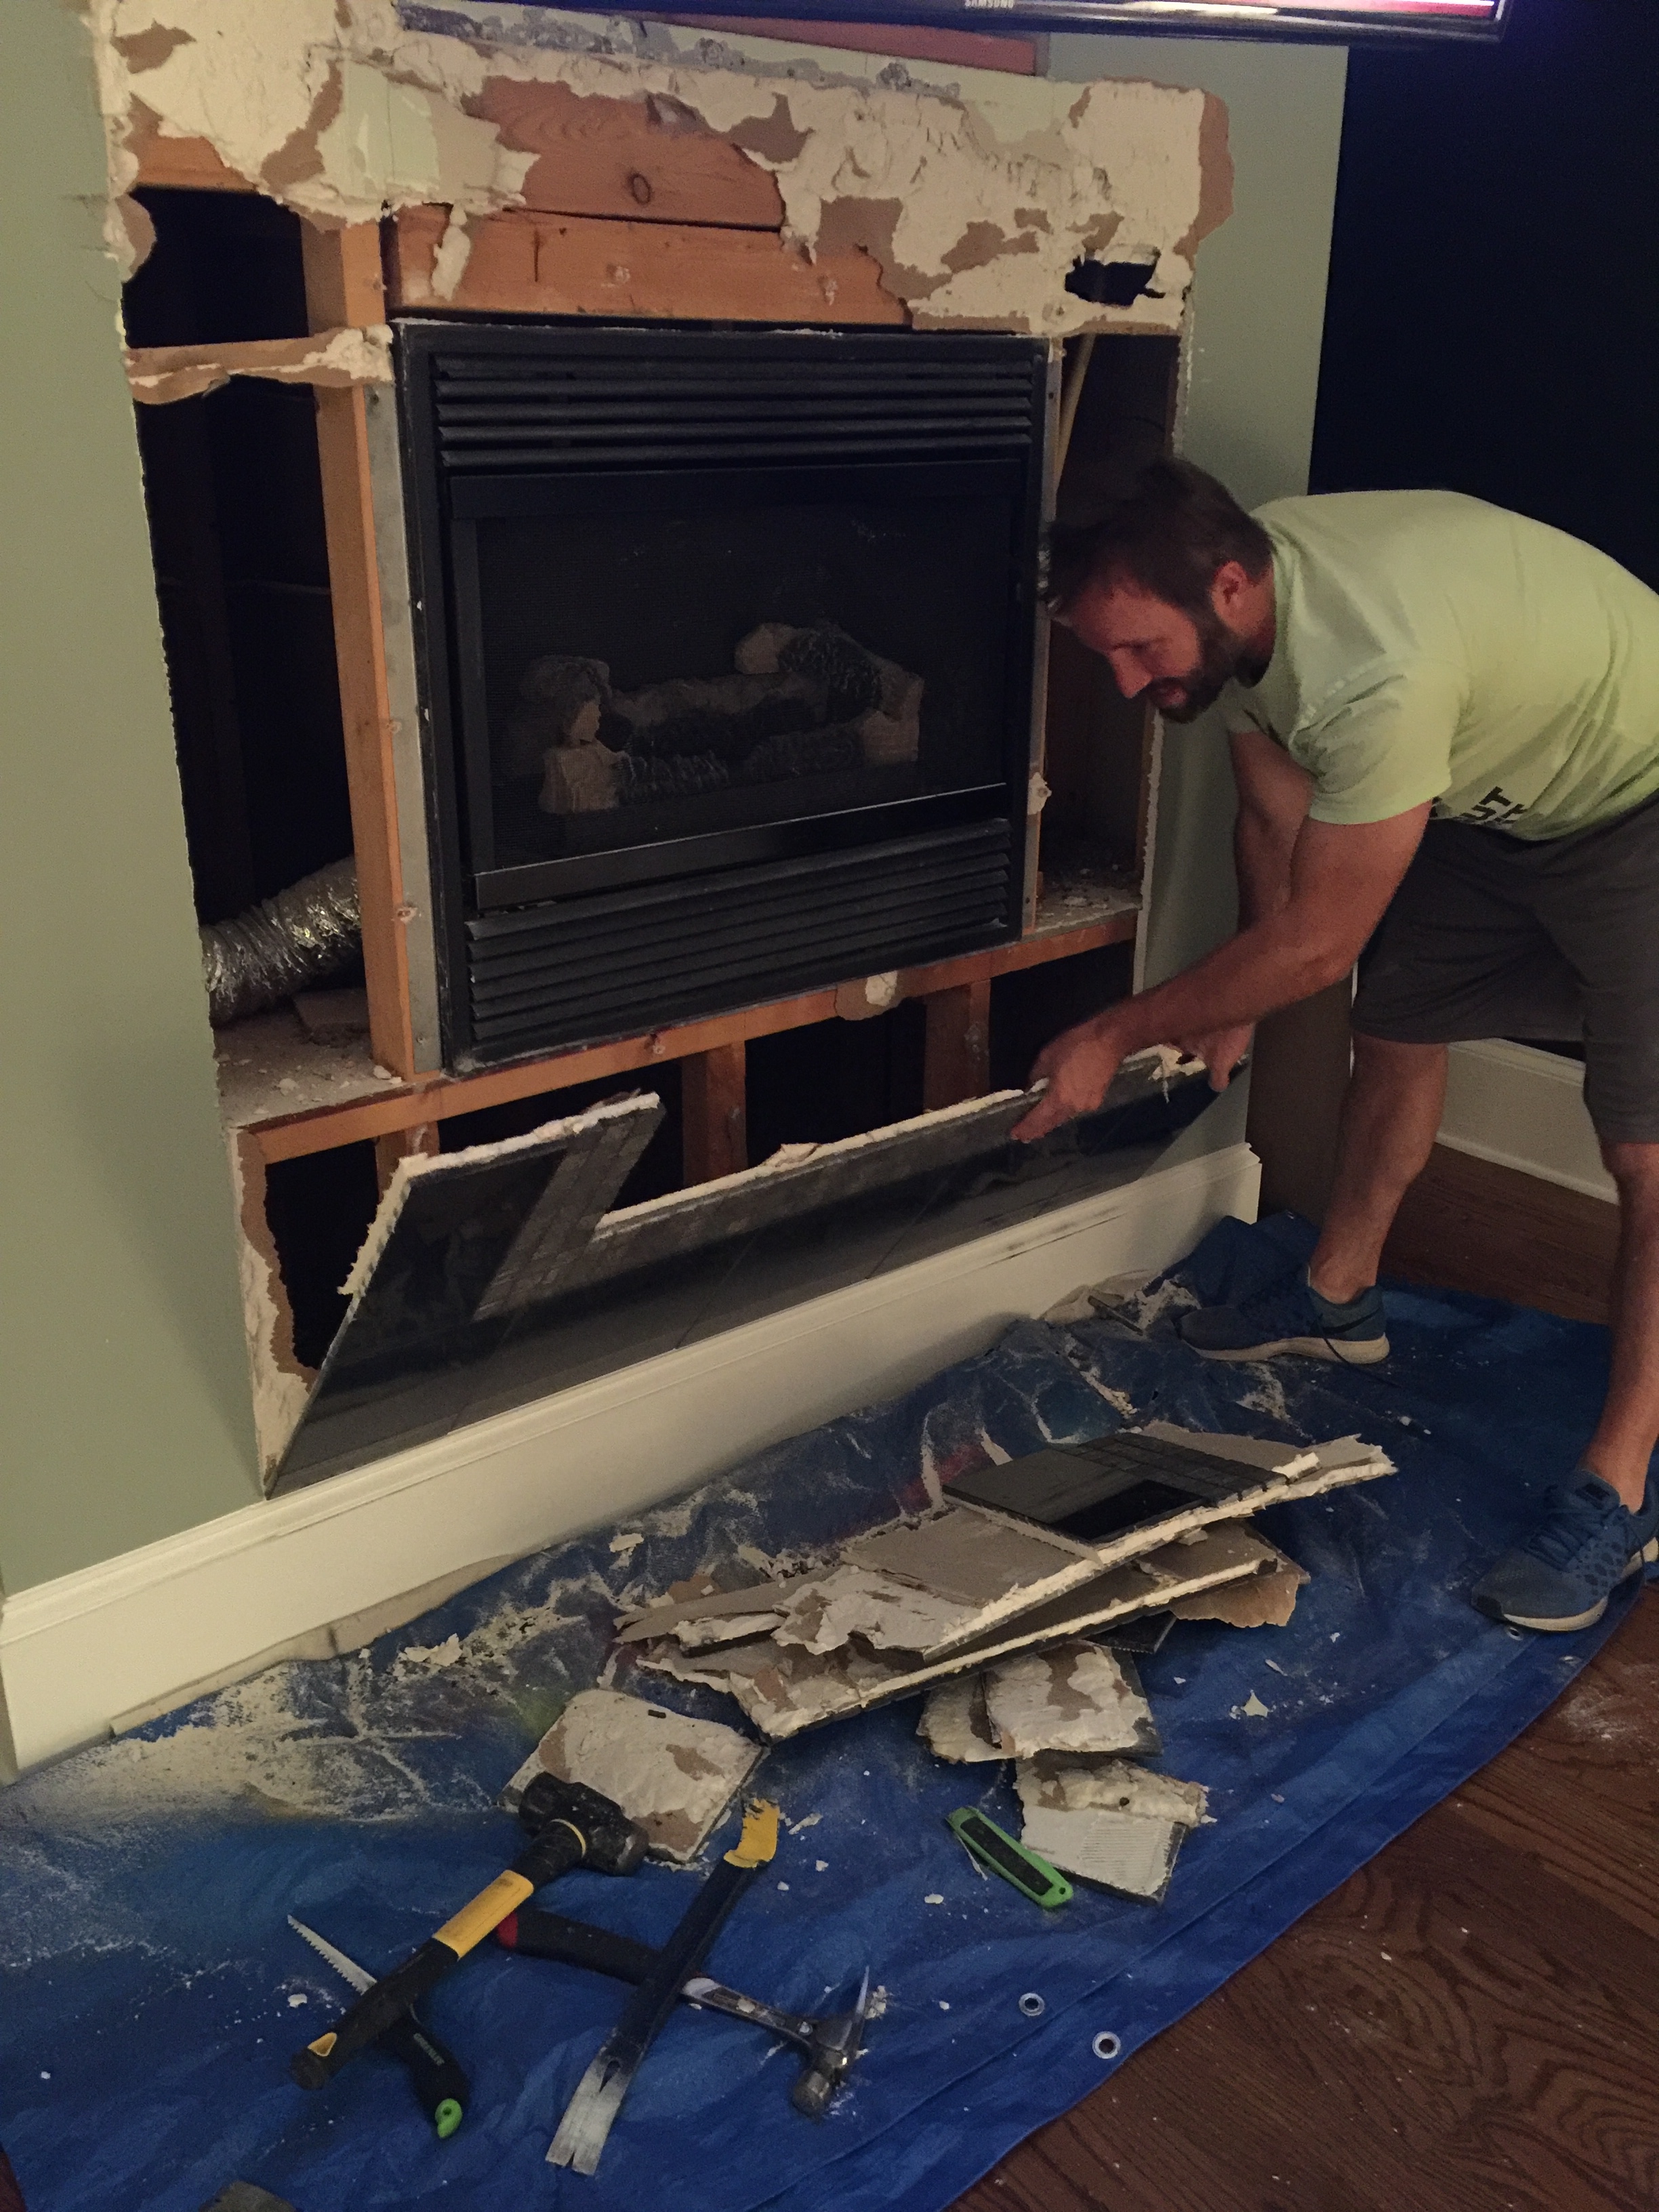
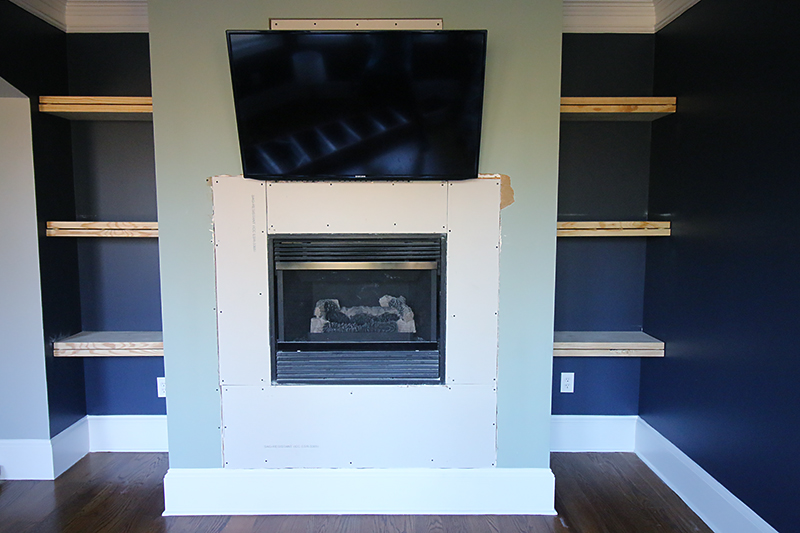
He then was left with a big hole around the fire place. At first, I questioned whether we should just rip out the whole thing so that I could have a mantle….but I AM SO GLAD I DIDN’T. Oh my goodness, I love it so much now…ripping it all out would have been a huge mistake.
Jeremy convinced me that we just needed to drywall. Way to go hubs!! Then we got to building the shelves. See the shelves? Yeah. So we went back and forth over and over and finally I decided that I wanted big shelves. Like if at some point I want to use one as a desk…I can put a full sized iMac on that bottom shelf and it’s the perfect desk height. I can simply build a pull out keyboard.
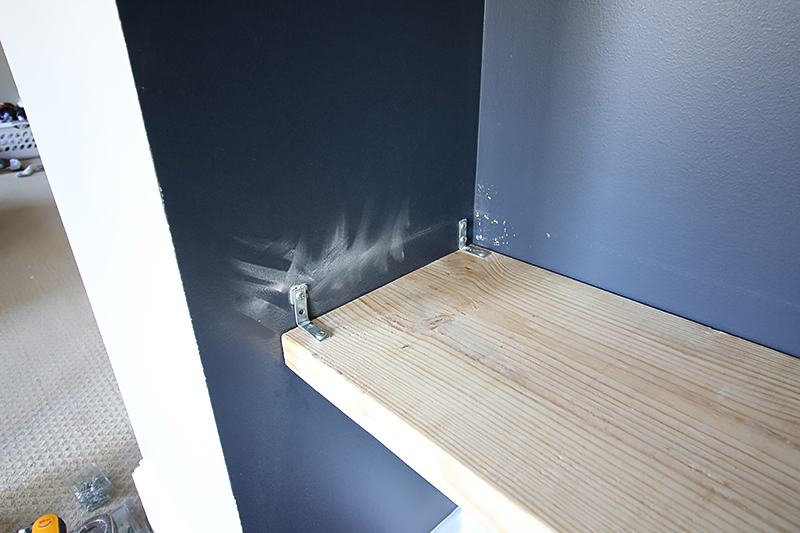
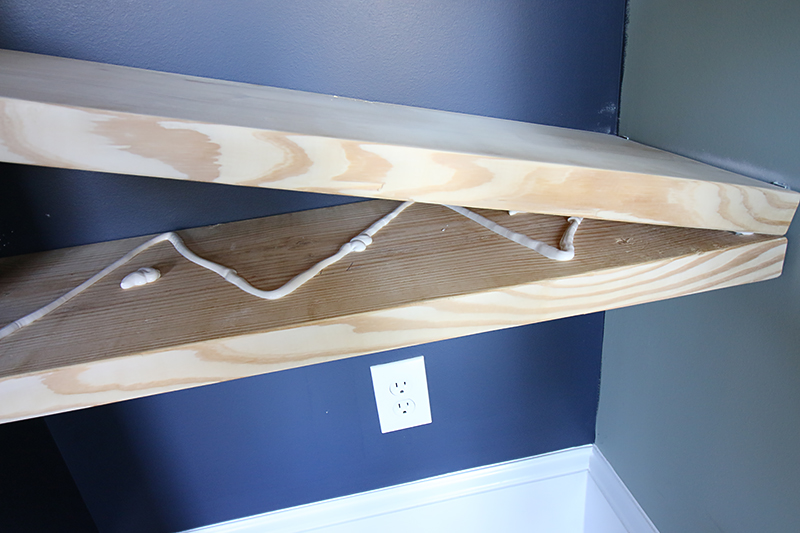
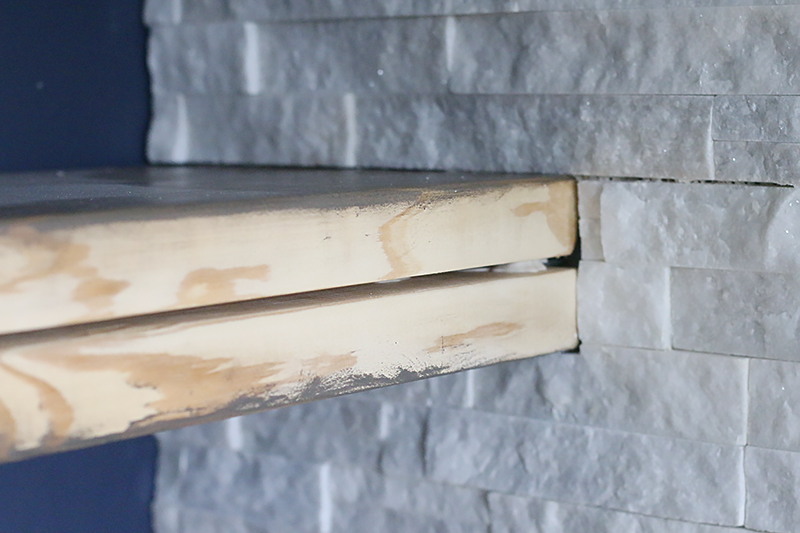
The shelves themselves were fairly straight forward. I wanted them to be solid wood on top and bottom and we couldn’t make a cleat because that would make them too chunky. So we attached an L bracket to studs on both sides and then screwed in a 2×12 cut to length.
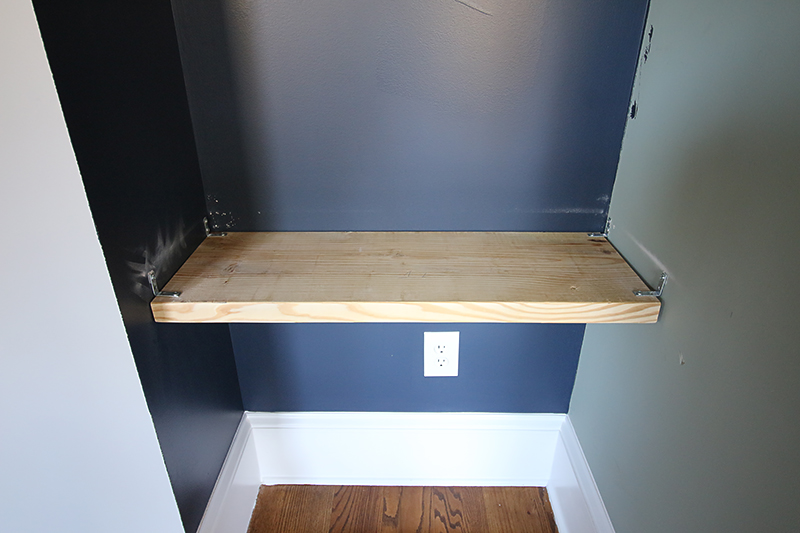
The L brackets are attached with very long screws into the wall studs so this is not going anywhere.
Then we broke out a new fun toy…the Ryobi caulk gun. Apparently this puppy is supposed to make caulking (and in our case Liquid Nailing) easy.
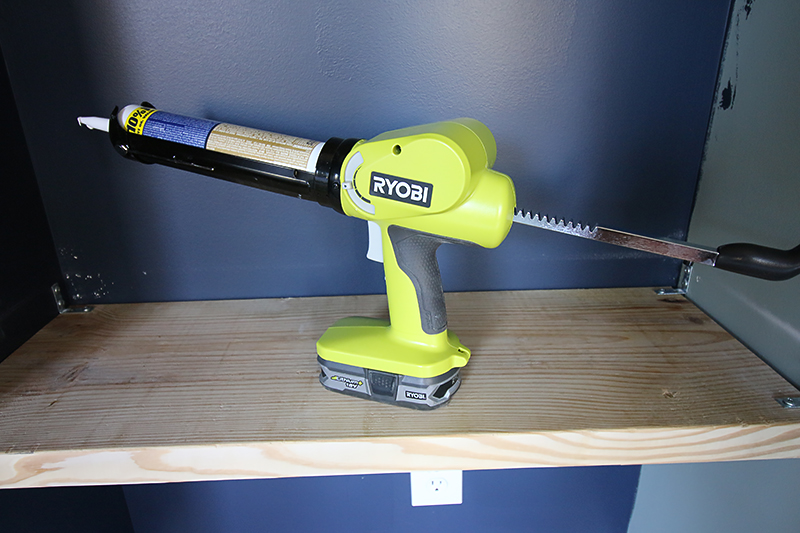
Boy did it! It worked great! We applied a thick line of Liquid Nails to the top of the board….
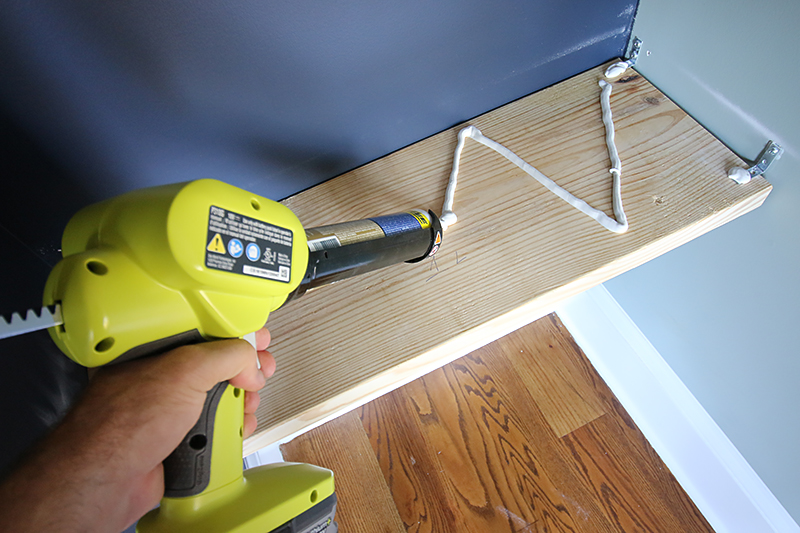
And then sandwiched another board on top.
Those shelves were all sanded and ready to be finished. Just keep that in mind before you attempt this at home.
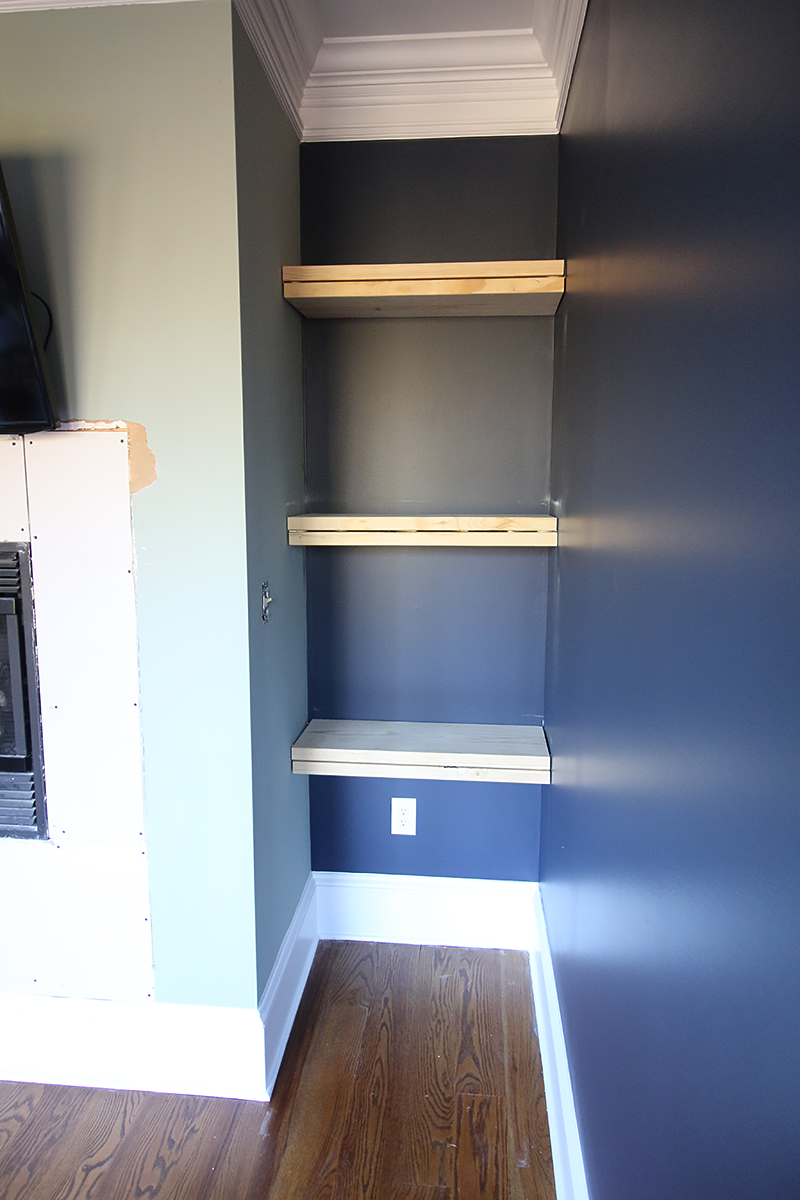
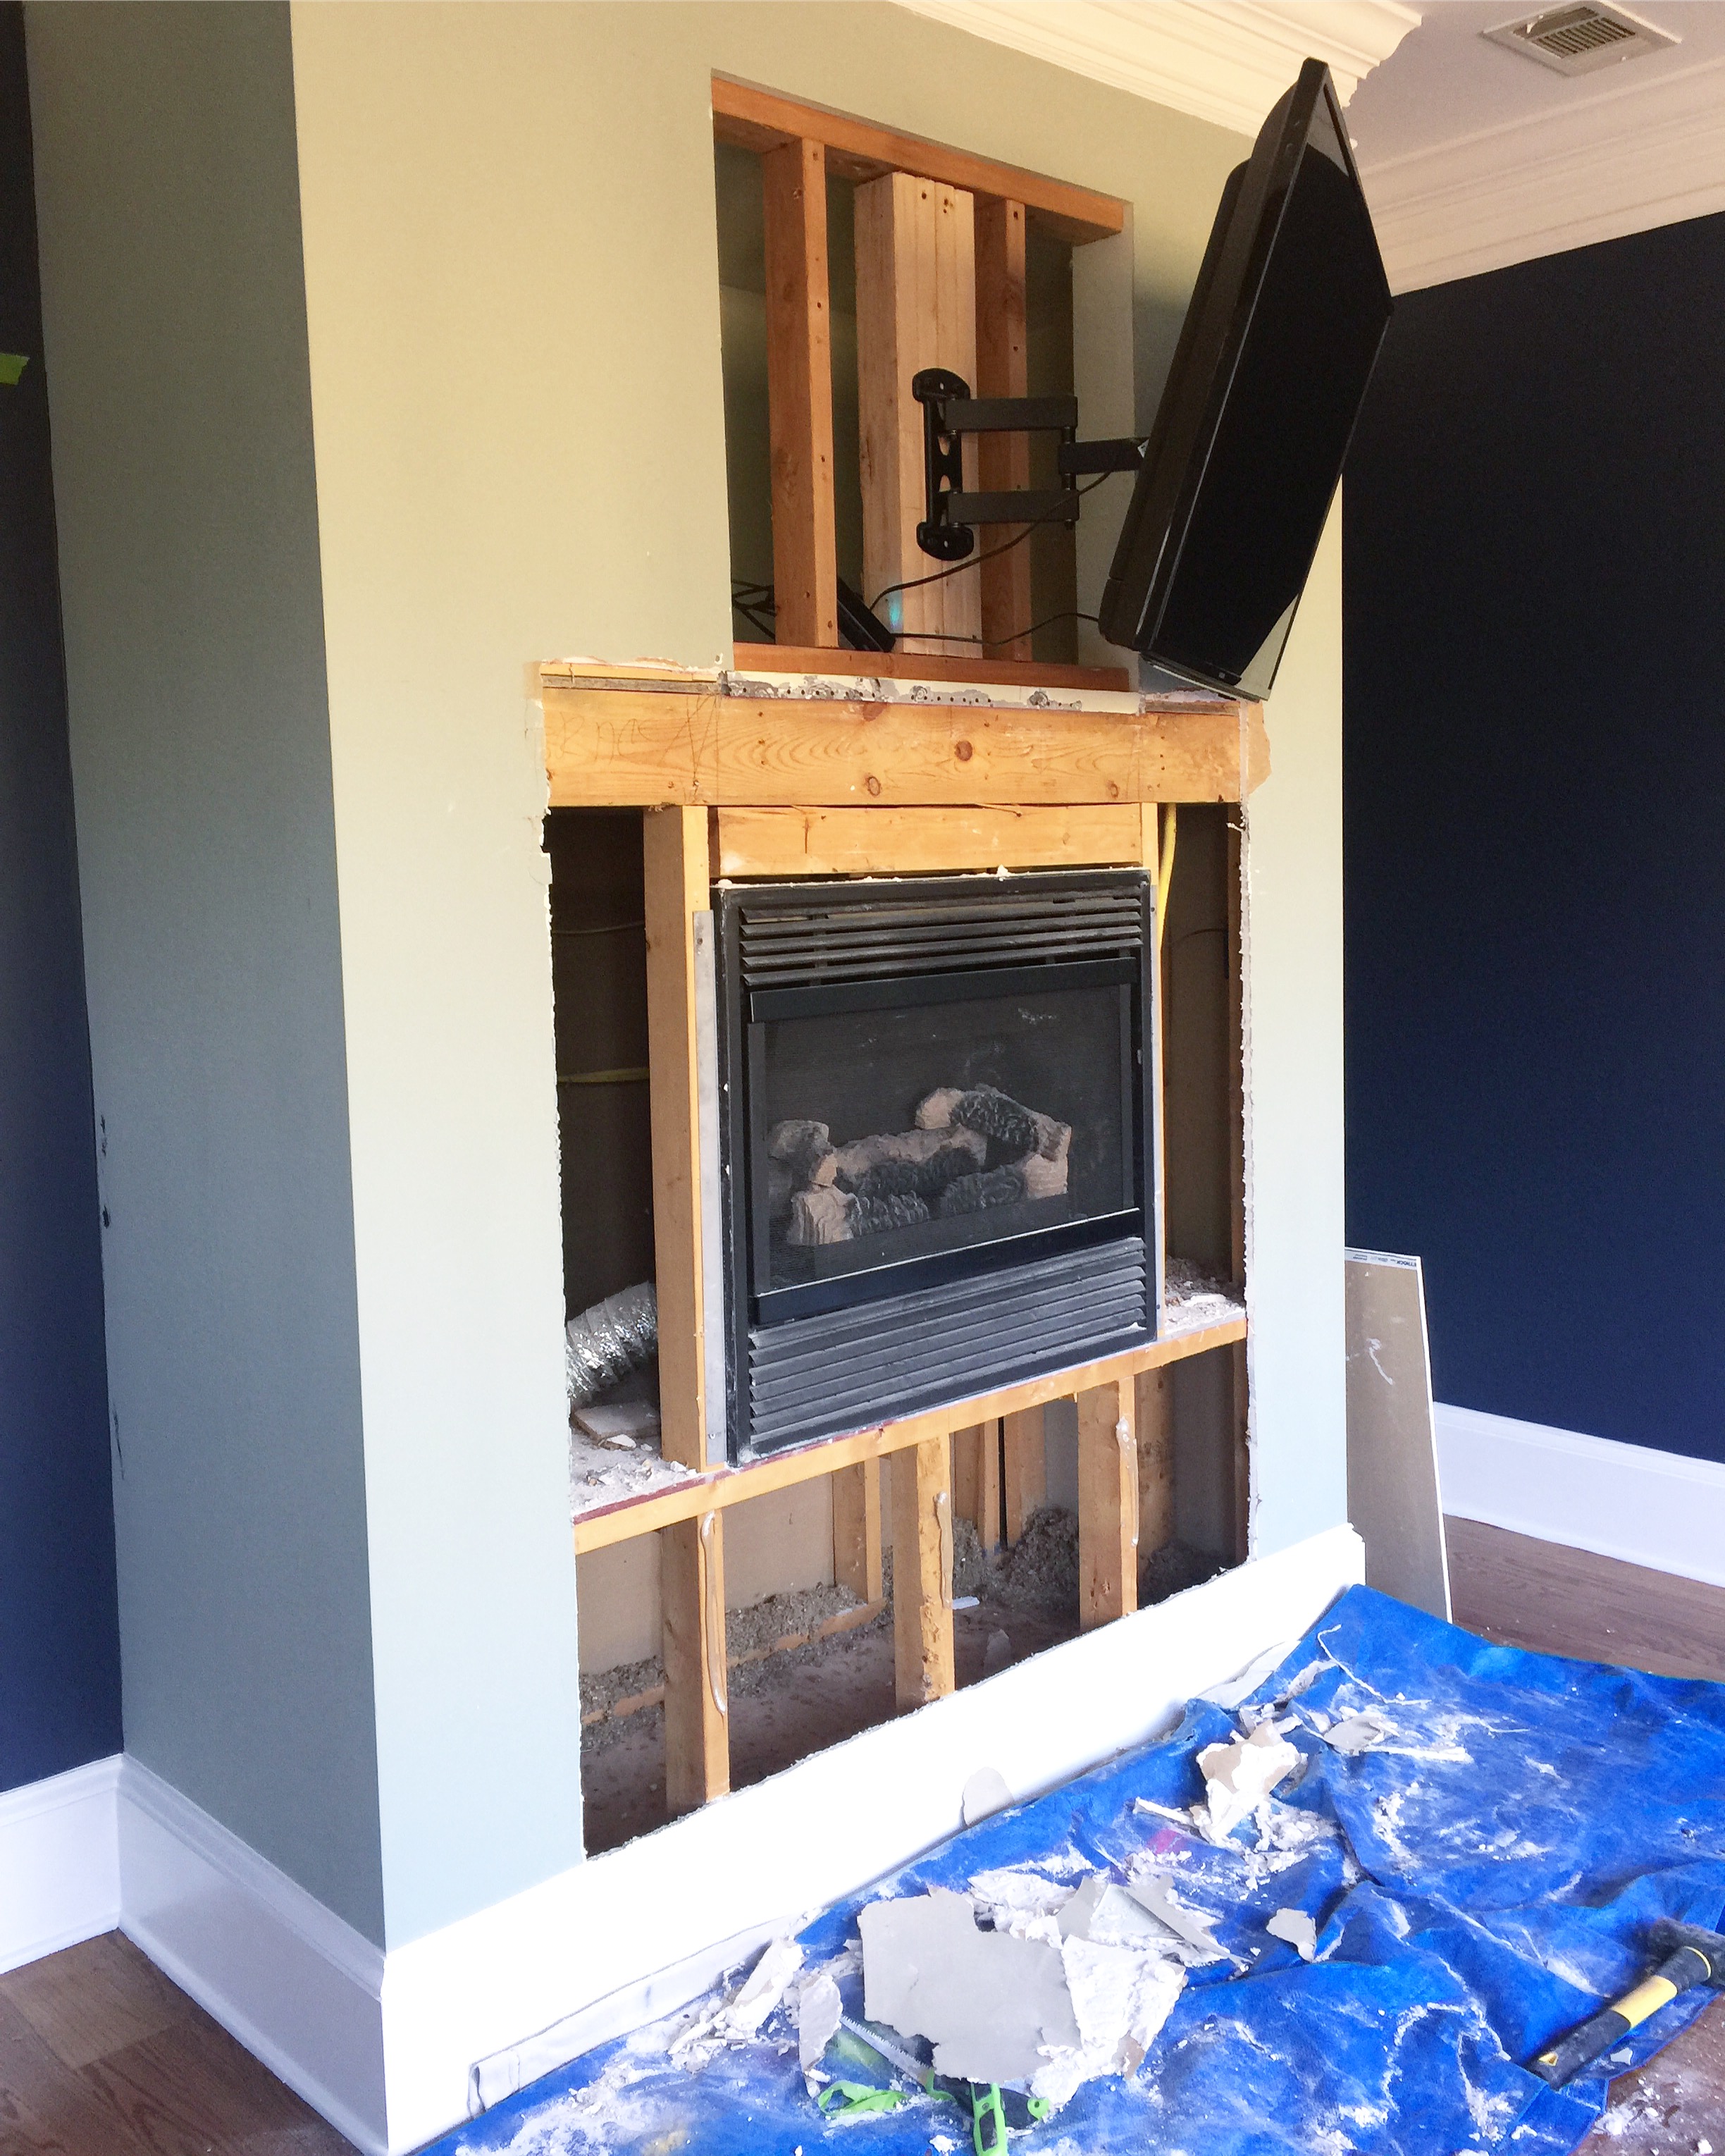
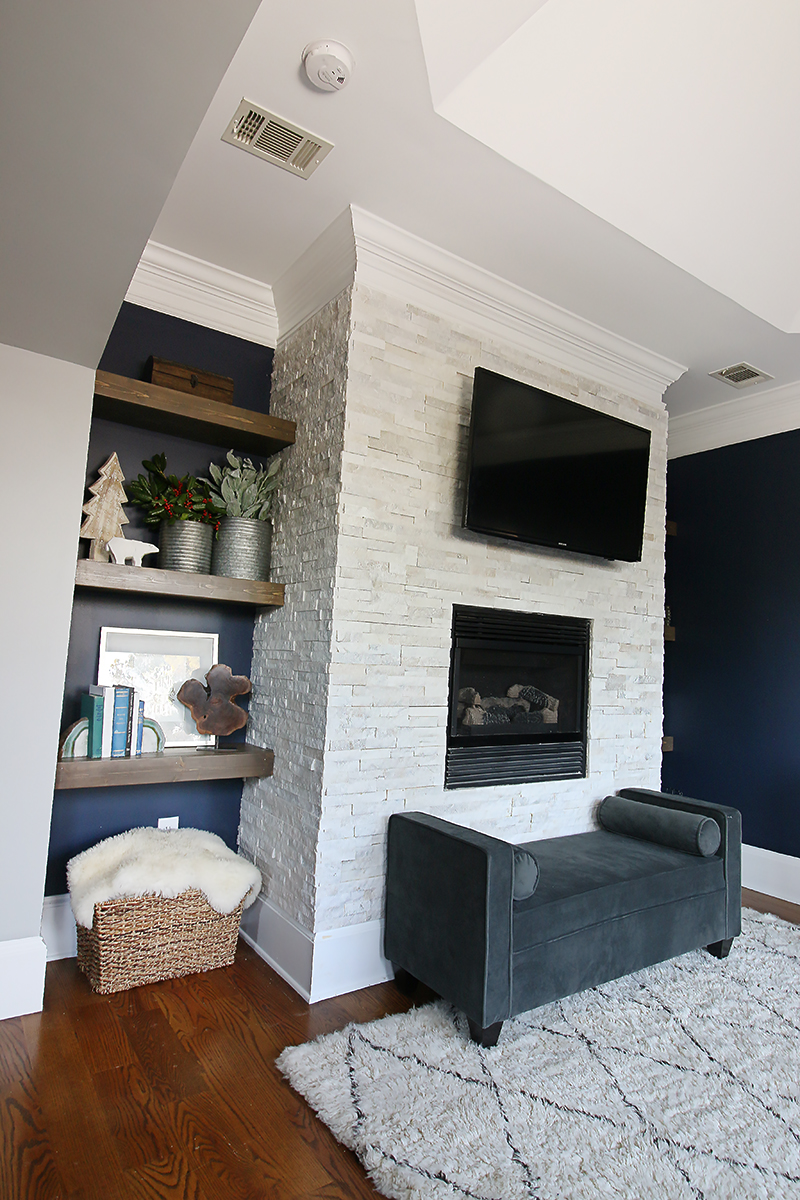
This house has a lot of bump-outs or cut outs that deserve shelving….it’s like the natural solution to the awkwardness. But I figured out that this room in particular REALLY needed shelving to balance out that fireplace. Now it feels so much more complete and I can’t tell you enough how adding MORE to a room has made it feel LESS cluttered. It’s now usable space which is so much nicer.
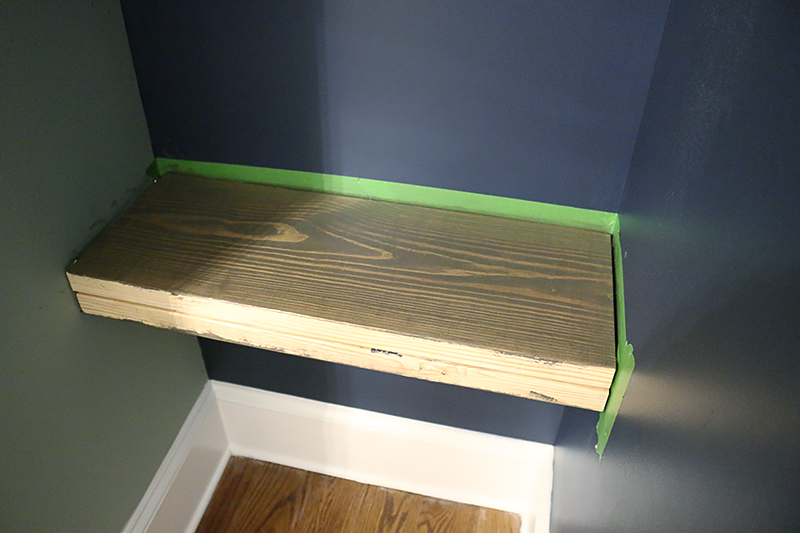
The best time to finish the shelves is now….before tiling…and we did the tops and bottoms with Rust-Oleum’s Briarsmoke stain. With a couple layers of the Triple Thick Poly on top, they are the best shade of gray brown. Not too warm. Not too cool. Not too chunky. Not too skinny. These shelves are my FAV.
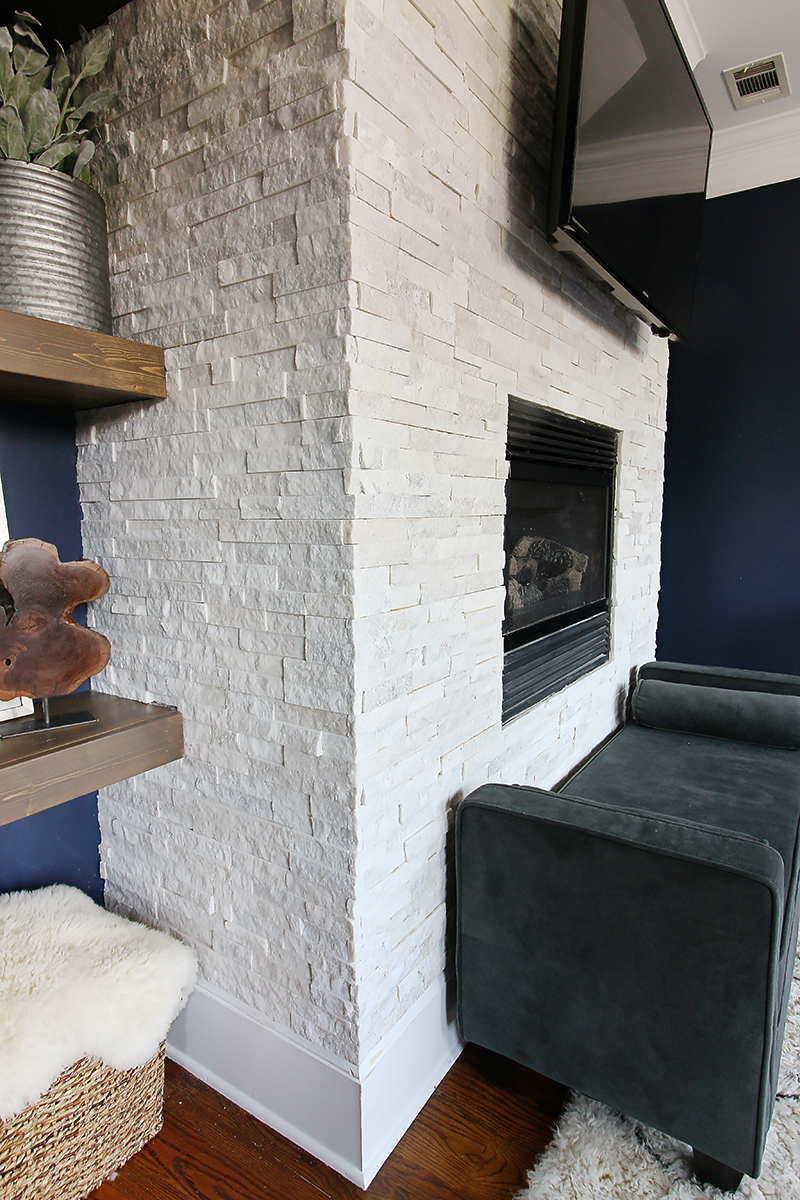
Okay. So now that the shelving is done….let’s talk tile. Admittedly, this is the first time I have ever done an entire wall as a fireplace surround. I did the fireplace surround and hearth in our first house (see that post here) but this was a much bigger task and one that makes a HUGE impact. The key to success is all in the corners and staggering seams. The corner pieces are super beefy. Each one has a metal bracket on the inside and this stabilizes the corner and makes it strong and perfectly square.
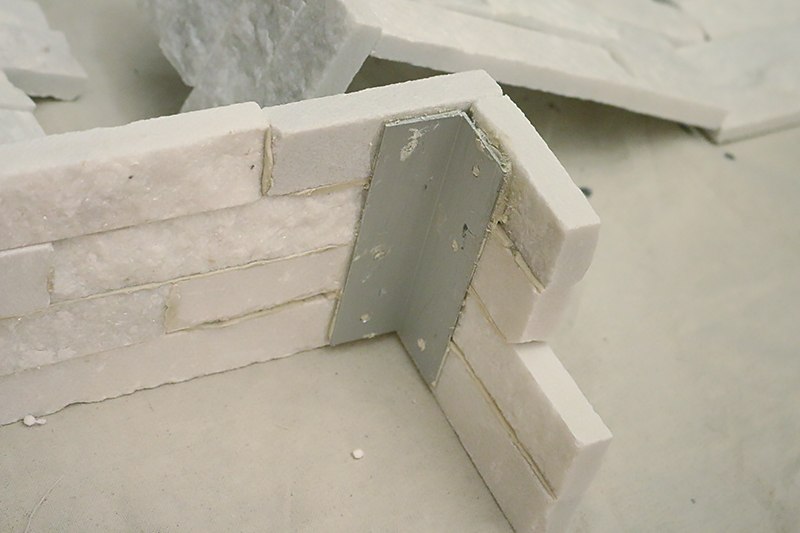
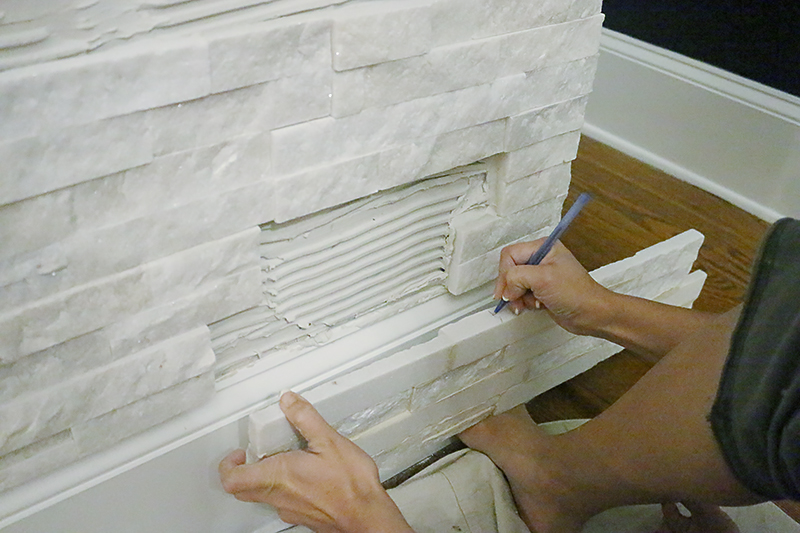
The seams are where two pieces of tile meet. Sometimes they will show more space….like a little crack. If you stagger them appropriately, you won’t be able to tell where the seams are. It’s also really important to back butter the tiles so that the seams are less noticeable and you can work with the tile to get the right depth.
The other thing to think about is that the corners have a long side (below to the right) and a short side (below to the left). You want to alternate using the short side and the long side on the corners of your fireplace by rotating the tile.
I started at one corner and worked all the way to the shelf wall. Then I worked out on the face of the fireplace about half way. Then I did the same row but the opposite corner. This inevitably left me with a gap.
This gap needed to be filled with a trimmed tile.
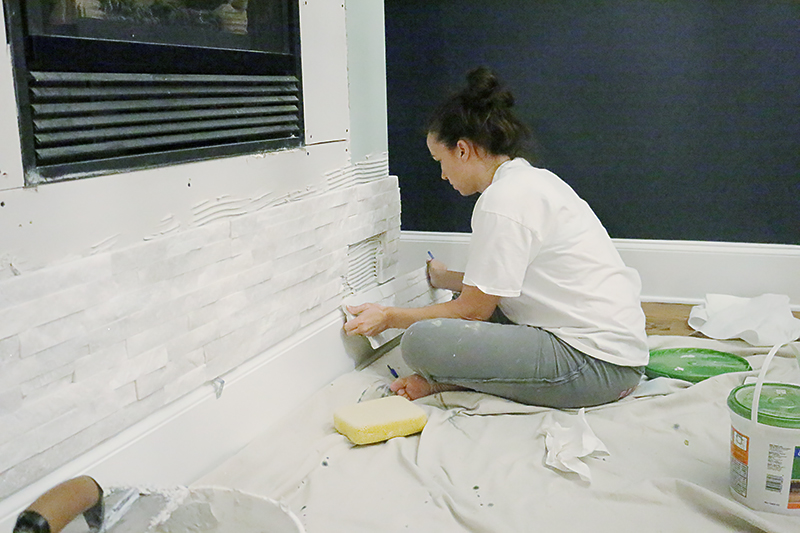
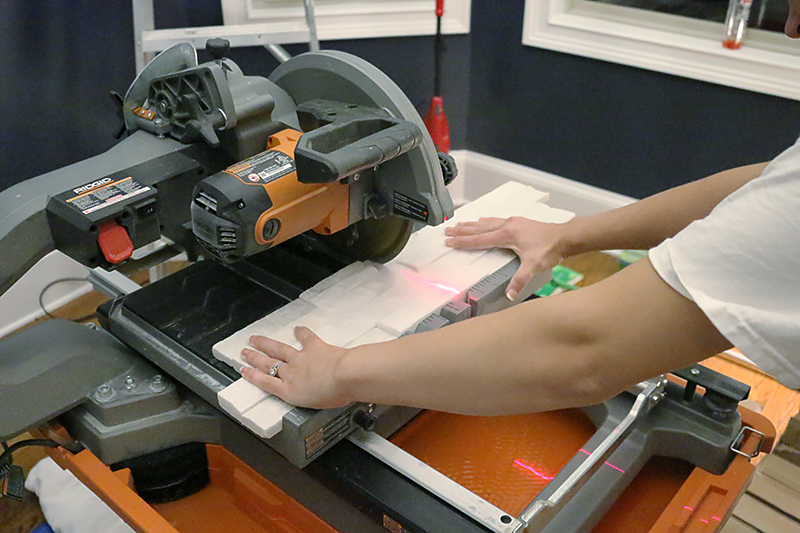
These tiles require pretty exact cutting and if you don’t feel confident with your skills with the tile saw, practice on a piece until you know how to mark it and cut it precisely.
We moved the tile saw up to our bedroom so that I could do this DIY….honestly I don’t know how the kids slept through it but they did. It took me SO LONG….like four hours one day….6 another and then the last day was close to 8. My mom and Jeremy both watched the kiddos and I could not be more grateful. Also…Jeremy did the clean up and brought me massive amounts of lotion for my hands at the end. Husbands take note. If your lady friend is tiling….bring her the lotion 🙂
After the piece is cut….dryfit it to make sure it fits before loading up the back.
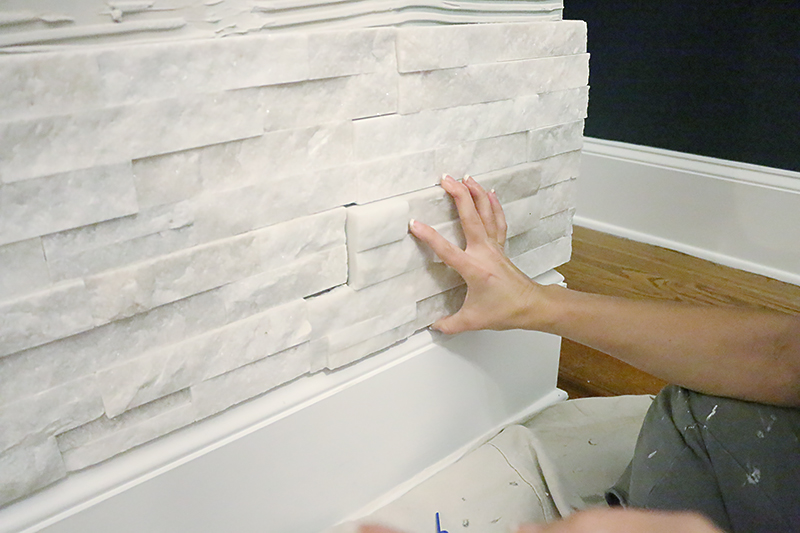
I got my premixed mortar at Floor & Decor too. They have everything! This project didn’t require grout so once I had the last tile in place….I was DONE 🙂
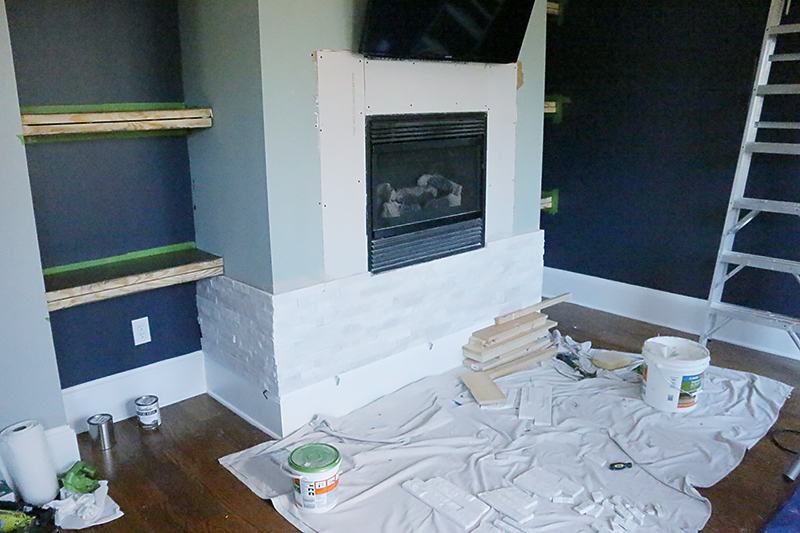
Here we are at the end of day one…
end of day two….
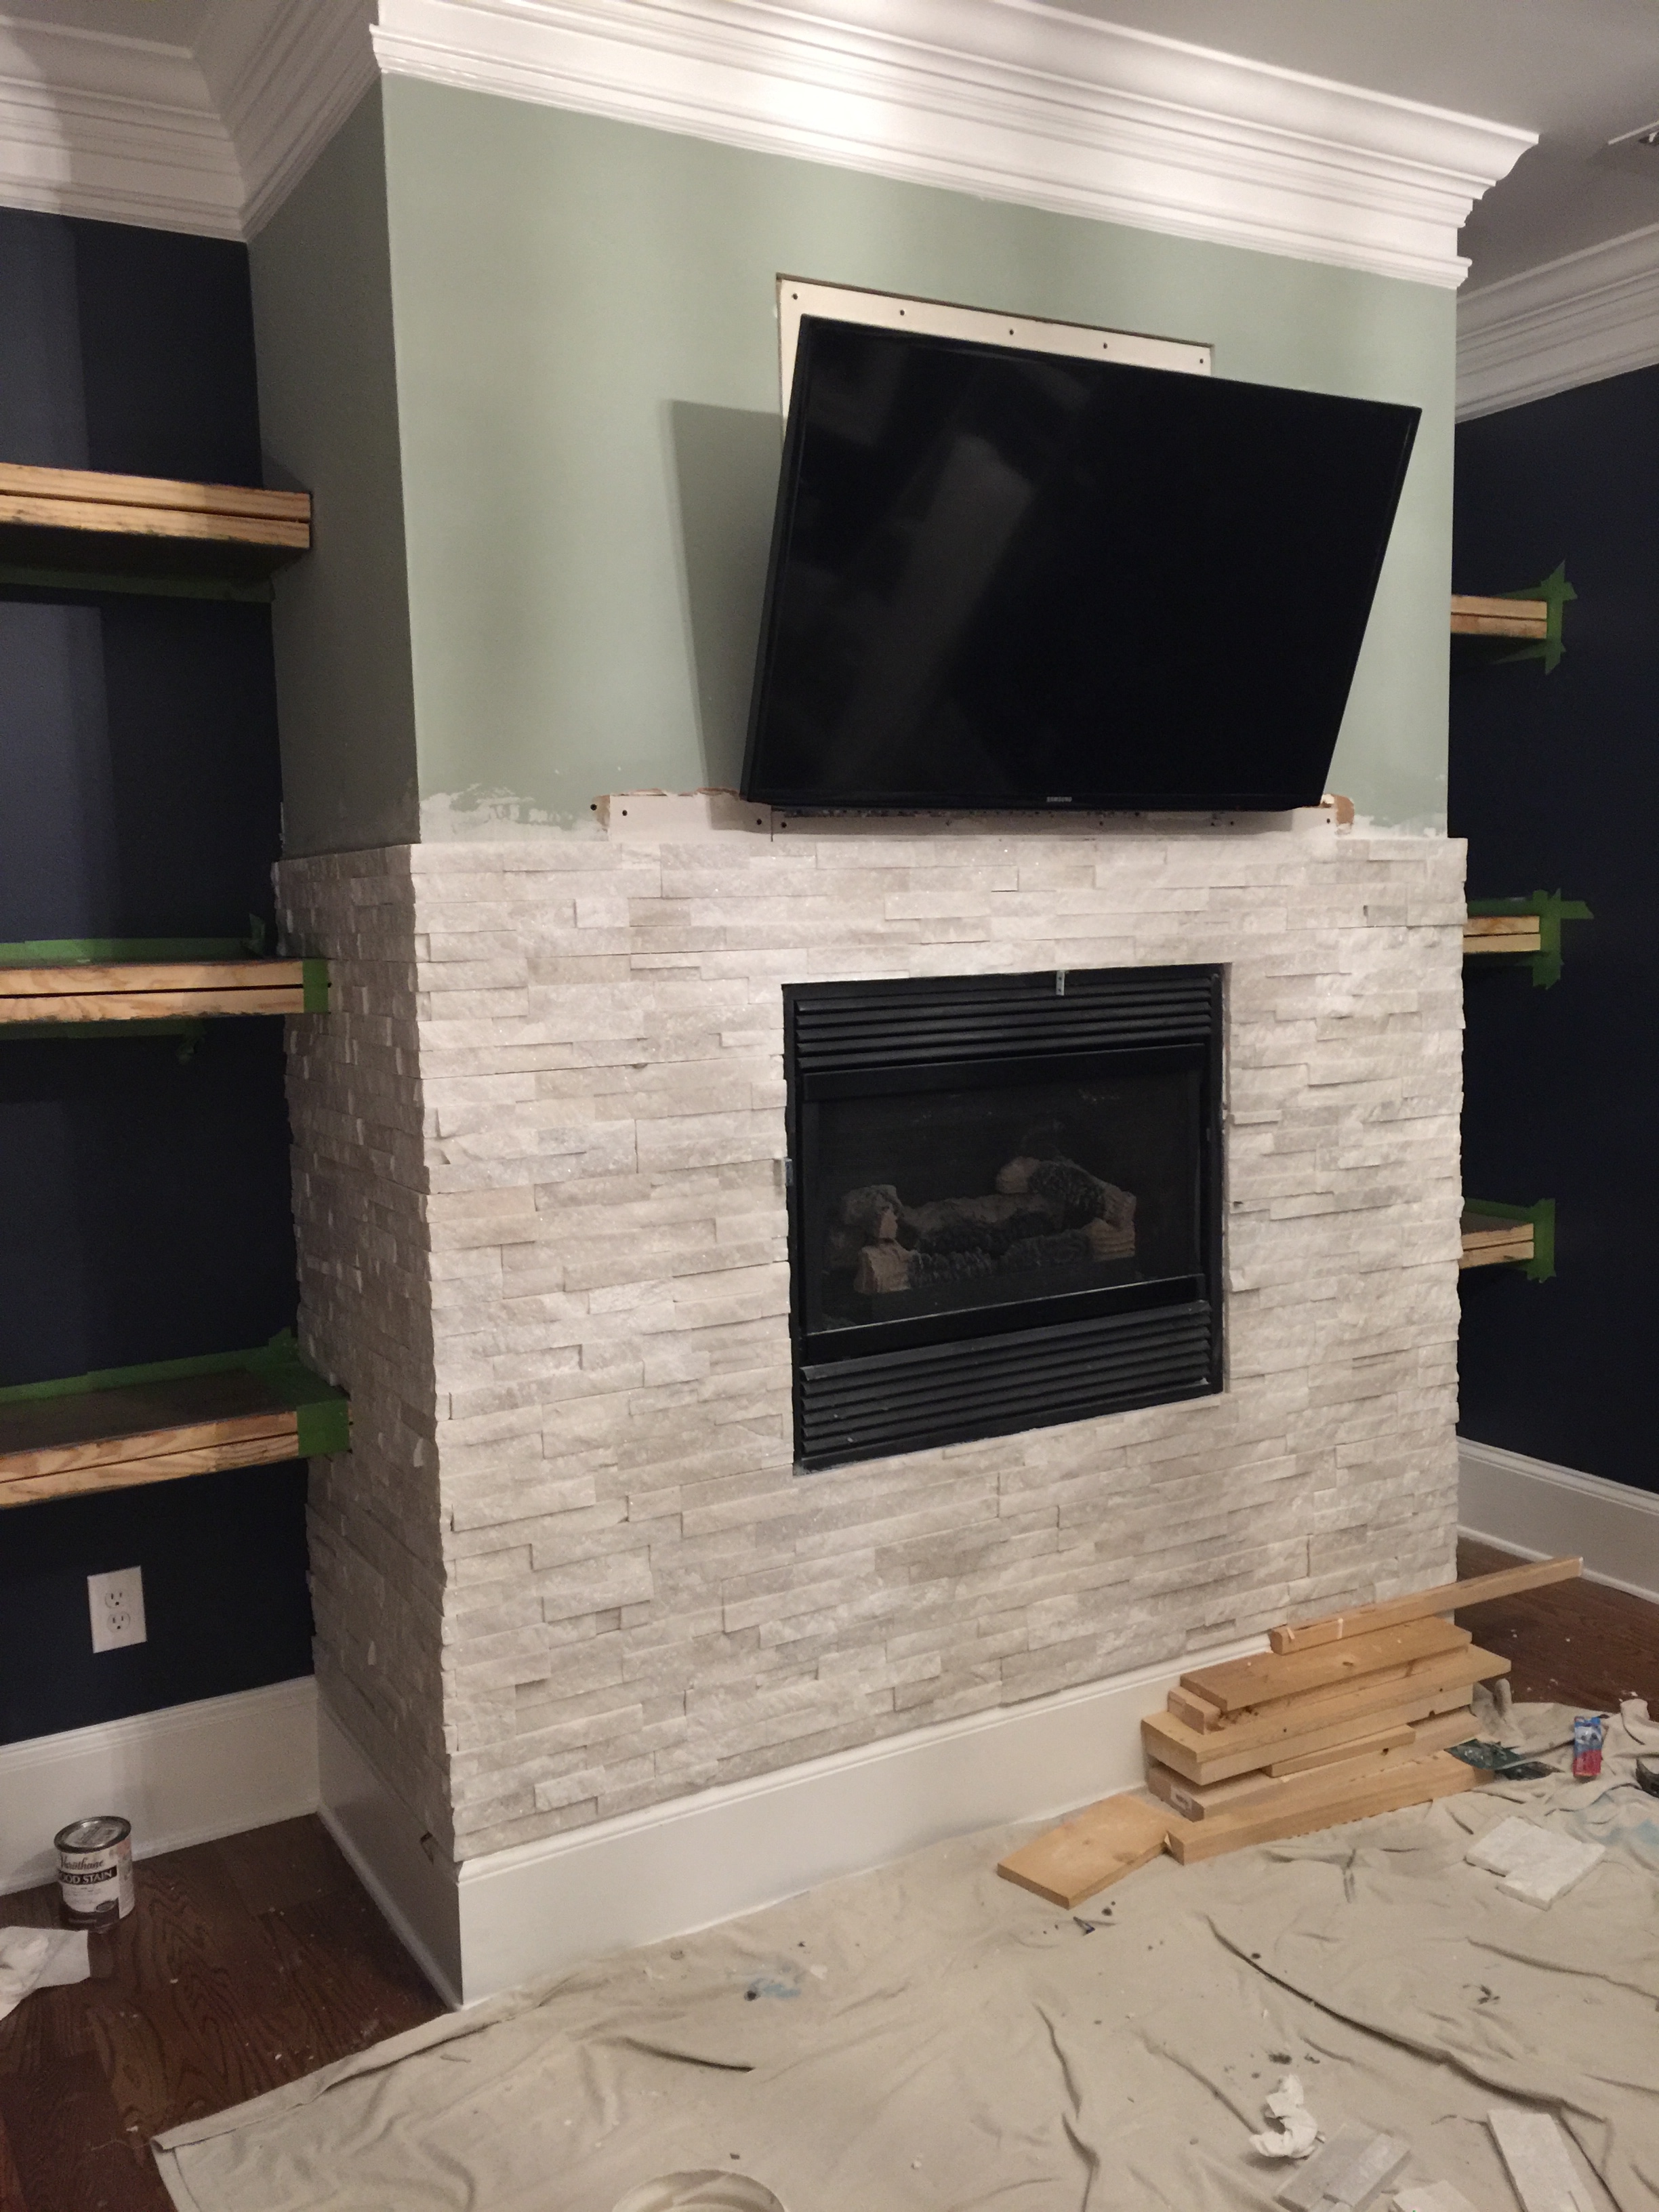
and then finally on the last day…
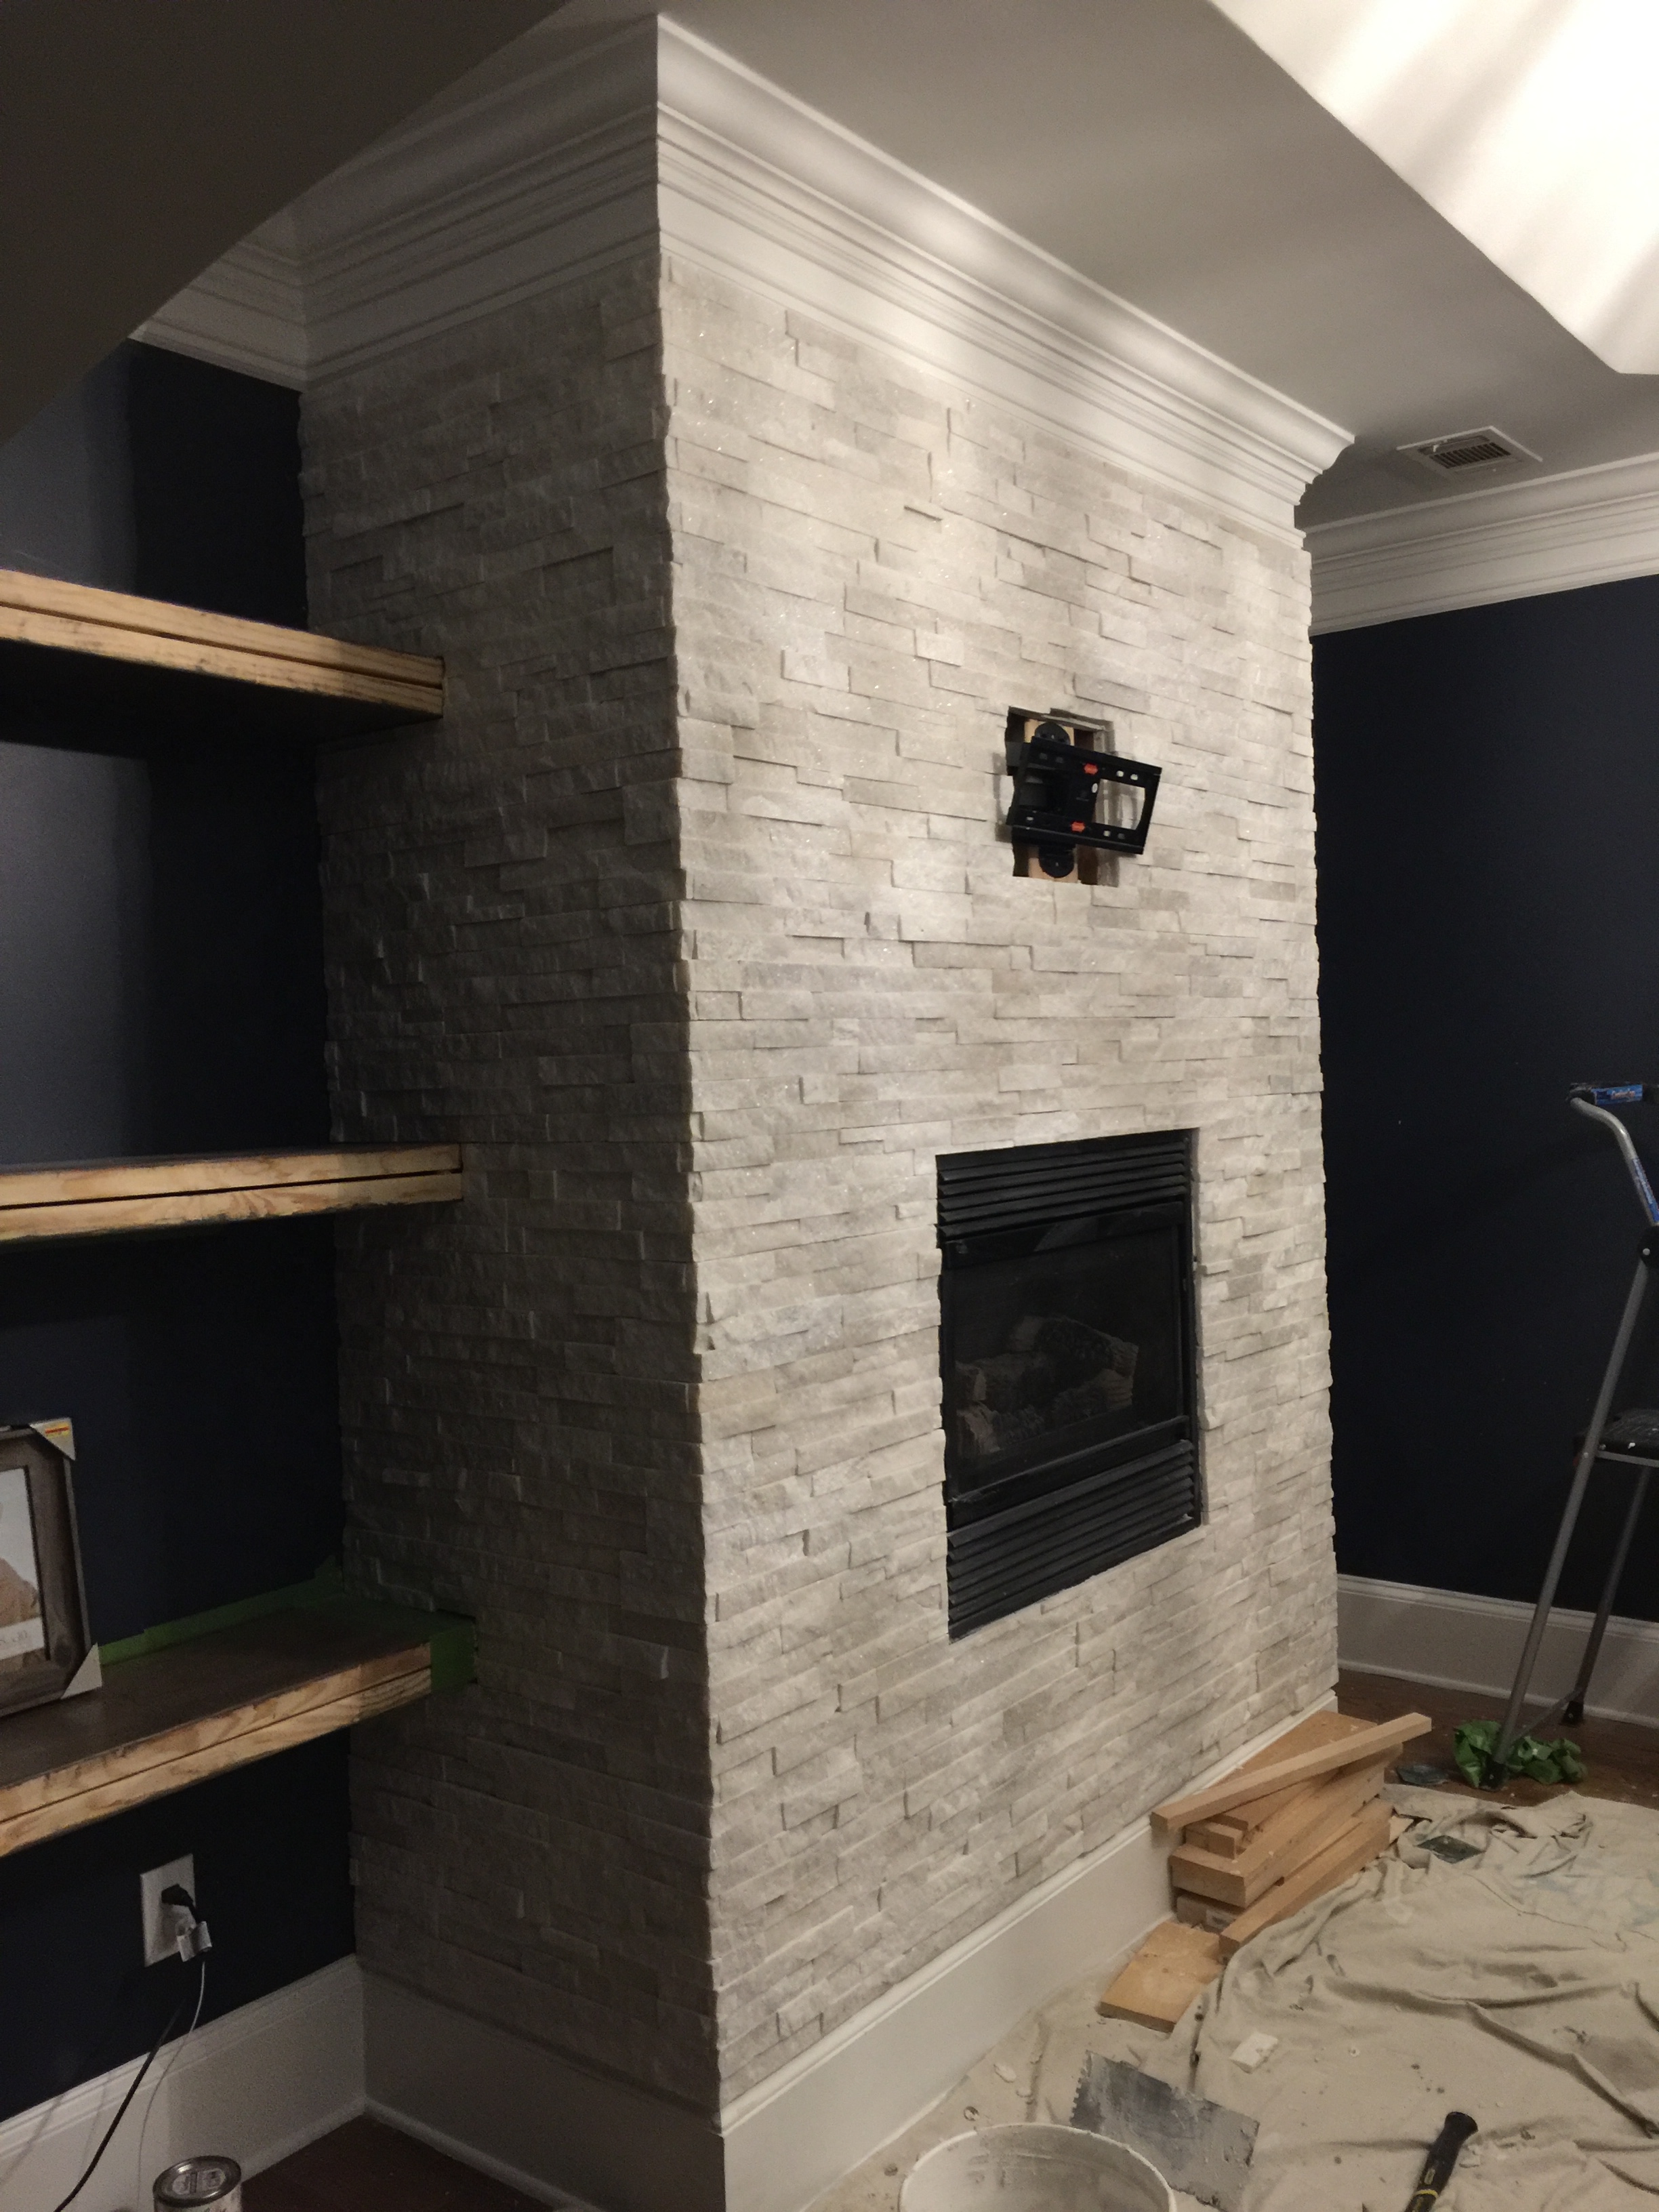
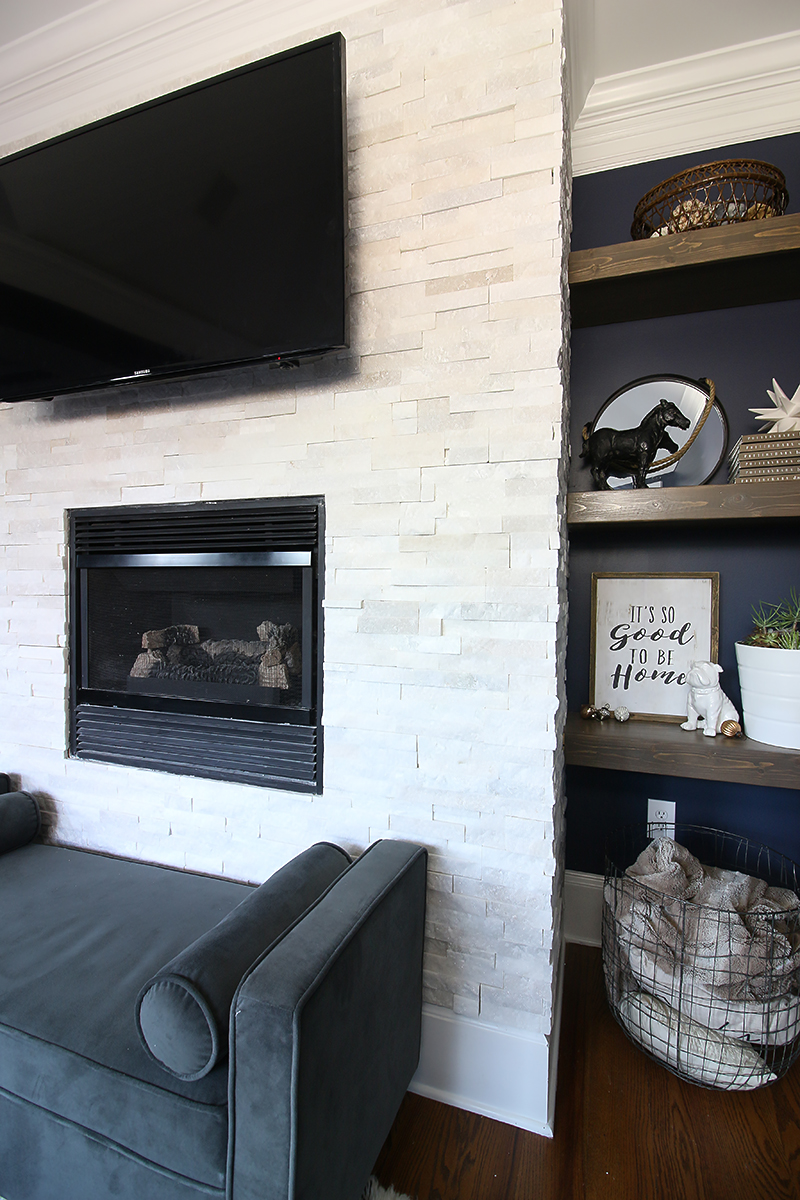
The tile does wrap around the sides and then it also wrapped around the shelves so they are very ‘built-in’. I love the effect it gives. And the face of the shelves was finished off with a 1×4 cut to length. We sanded those and stained them to match and then they were attached with a Ryobi cordless brad nailer. (you want that thing on your Christmas list btw. just sayin.)
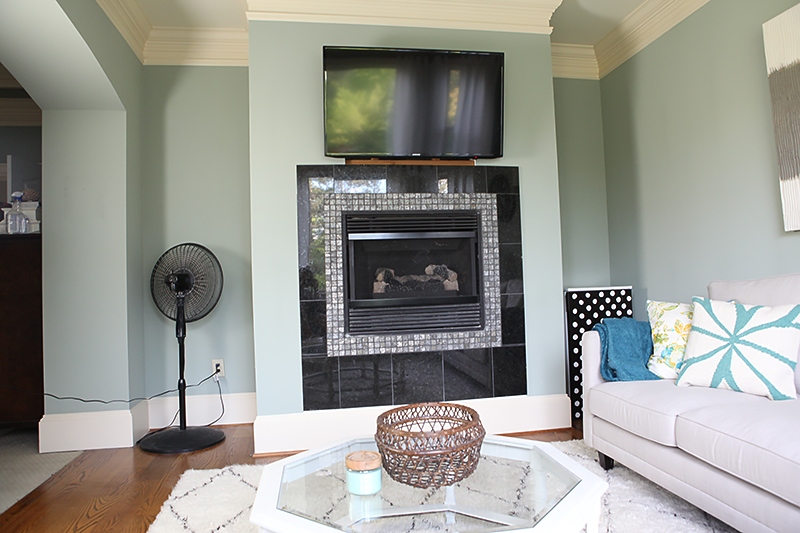
Okay….are you ready? Did I make you wait long enough? Okay….so the very bare befores….complete with shiny black tile and weird side spaces….
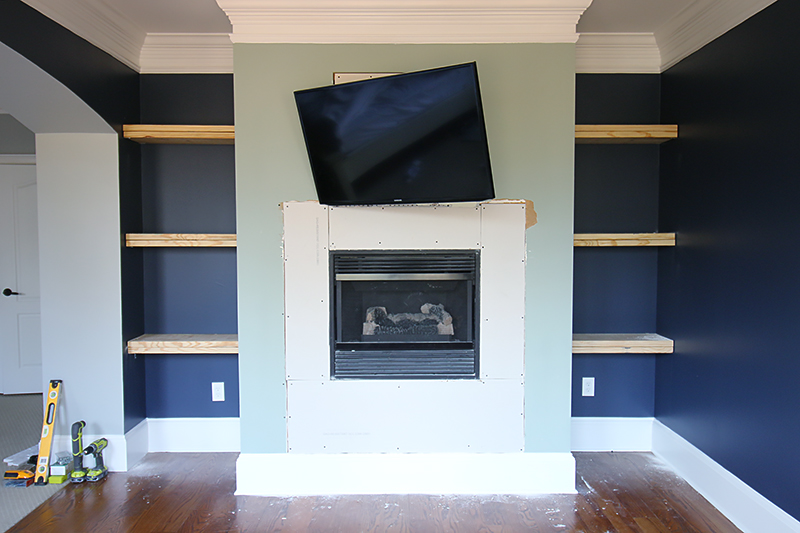
And now it looks pretty darn fantastic complete with shelves and a whole lot of style and loads of texture and display space.
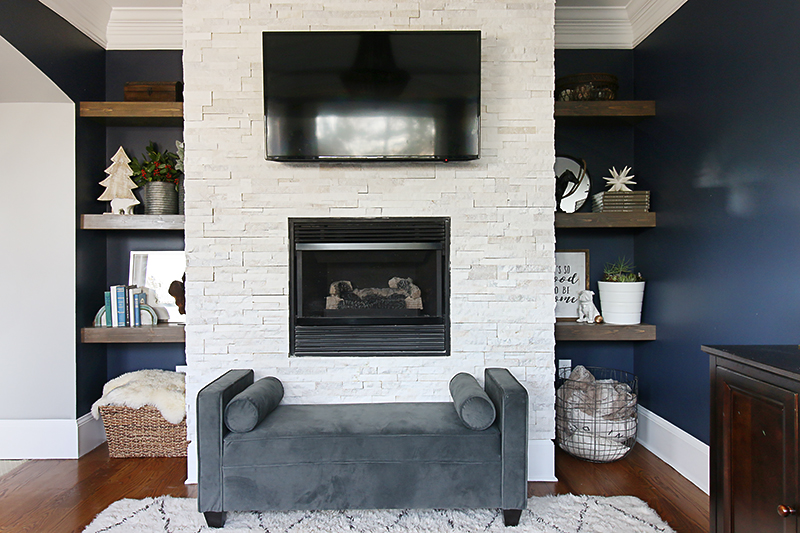
Do you see my face right now?! It’s full blown ear to ear smiles. Who knew one wall could make that happen!?
The biggest impact is definitely the shelves and the tile itself. I think that having the shelves flushes out the ‘awkward’ space and makes it feel intentional. The stone tile is the visual draw. It seriously is the one thing that I can’t even imagine being different. It’s perfect.
Look at all that texture! I love how it’s white….but it’s interesting and begging to be touched and sparkly and very chic all at once. The best part is that we wrapped the entire fireplace. If I had just done the face of it….I would have serious regrets.
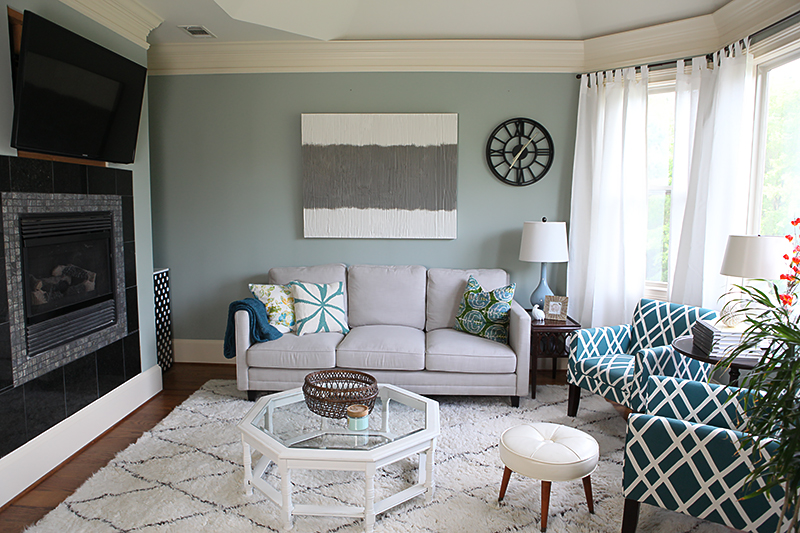
We sit in here all the time…we got new chairs and a new light and are actually finishing a room (hooray!) so that is all to come. But for now…just know that my view is the best BEST. I am obsessed. It’s exactly my style…something I have been trying to find in this house….but for whatever reason (maybe pregnancy brain? maybe post pregnancy brain?) I just couldn’t find. Until now 🙂
It gives me the sense of urgency to finish a few other spaces too. #aboutdangtime
I just am glad to have some motivation because Christmas is coming up….as is a big birthday for my main squeeze….and I just am so thankful that we have this space to enjoy. I mean…we both collapse after every day into our chairs and we seriously ooh and aww over this view. A stacked stone fireplace is the way to go people. The way to go.
p.s. And for those of you wondering what color of paint is on the walls….it’s Hale Navy by Benjamin Moore. And for those of you asking about all the other things in the room…the metal floor basket is from TJMaxx, the aluminum pots & horse are from Hobby Lobby, the wooden Christmas tree is from Home Goods and the rest of the stuff (and alternatives) all have links below….

This is a sponsored conversation written by me on behalf of Floor & Decor. The opinions and text are all mine.