I’m back with an update on our basement laundry room. We actually completed the tile floor! (insert me doing the Elaine dance here!)
And of course, we wouldn’t have gotten the chance to tile if our basement still leaked like a politician’s indescretions. So here’s the Bowers sending a big thank-you shout-out to True Value for helping us get our basement sealed up tighter than the skin on my big ole pregnant belly. And all that watersealing worked too – we had flash flood warnings all over Georgia last night…and our basement floor was dryer than a saltine cracker in the Sahara. YAY!

After reading your comments after the watersealing post, I knew that you diversity-lovers would be thrilled with the next stage in our dream laundry room…installing a tile floor. And of course, right after we knocked out the Drylock, we ran back over to True Value to pick up all the supplies we needed with a couple coupons in hand. Hey, every little bit helps right?!

As soon as we had all the shopping outta the way, we allowed a few days for the basement to dry/air out, and then we headed back downstairs to begin. Here is a step by step recap (and a how-to for future tile-ers) of our tiling adventure.
1. PLAN YOURSELF
We already had an idea of WHAT we wanted our basement laundry room to look like:
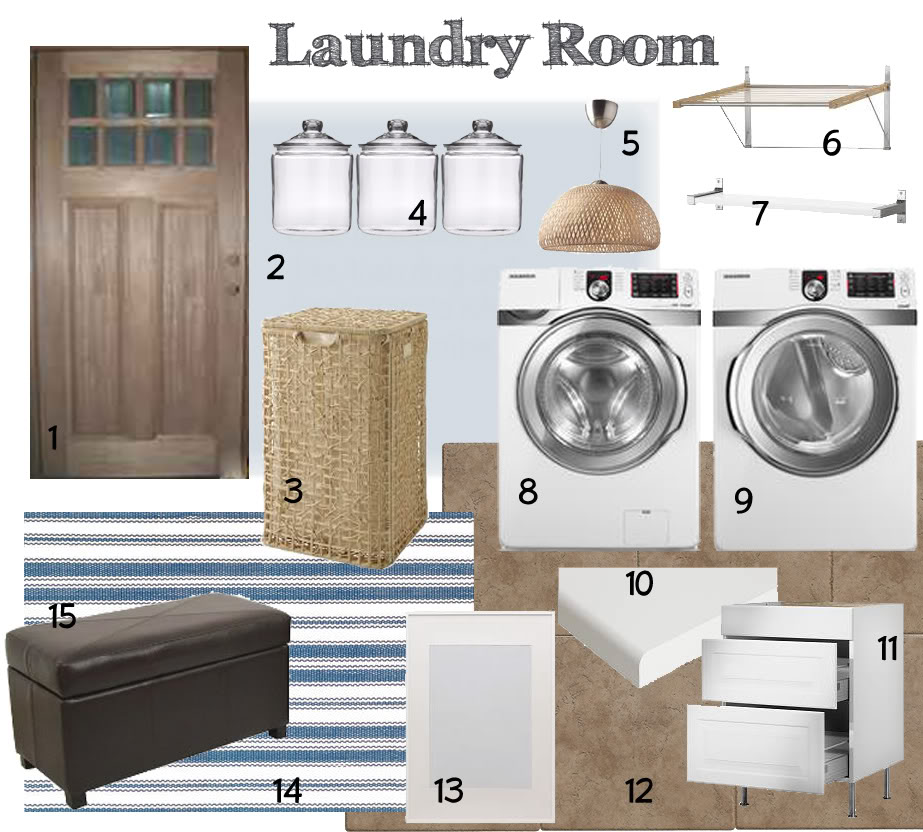
But what we didn’t have was a plan. Picking design elements is alot different than actually having a plan to put into action. So the first thing we did was measure the space and mark our limitations (such as the water heater, furnace, electrical box, and water supply).
**Note that these layouts are NOT to scale.
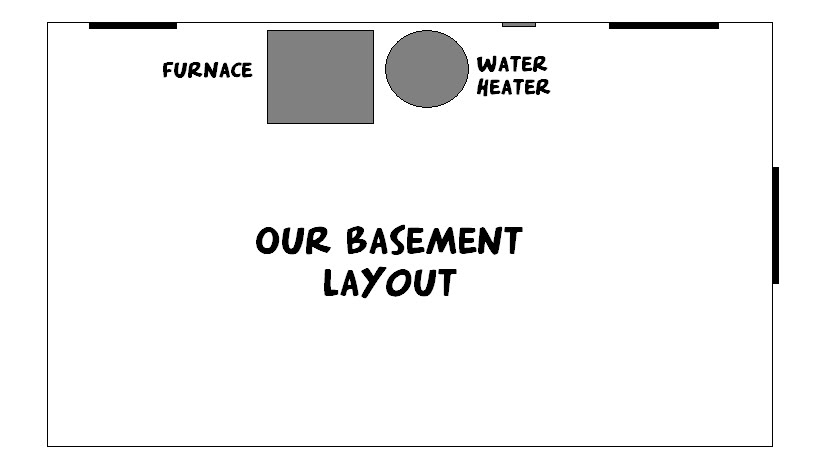
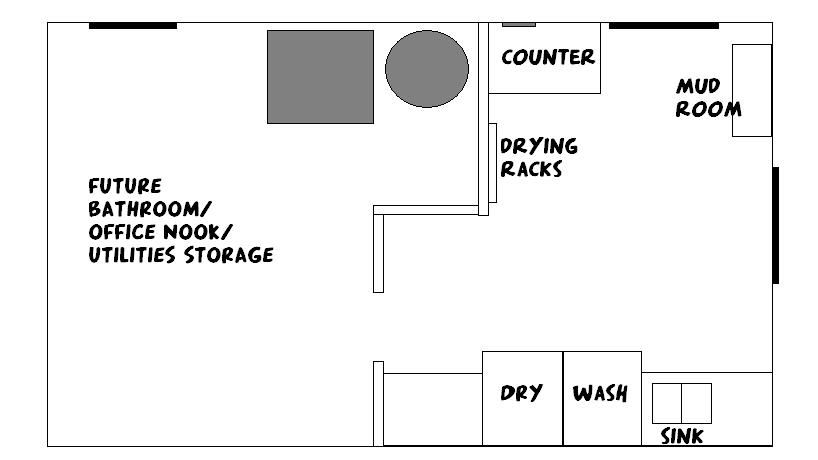
In order to get the maximum amount of space from our future layout, we decided that we would need to build walls around the furnace and water heater. After a quick call to my brother (who happens to be a master plumber) we were informed out that the walls needed to provide ample space for access to the utilities (and sport louvered doors) and still allow for our laundry room must-haves, namely a washer/dryer, a sink, counter space, and drying racks. Quickly we said that we needed to switch the washer & dryer (the washer was on the right before) so that the doors (which aren’t switchable) would be opening away from each other. Nothing is worse for laundry morale than banging the brand new washer door on the brand new dryer door…I speak from experience.
And realizing that the washer was now going to live on the left hand side made it easy to decide where to put the sink. In my mind, a sink goes next to the washer. To aide in the washing. And believe me….I need all the aide I can get.
And lastly, we knew that we needed some counter space – for folding clothes. So anyplace that we could squeeze in some Ikea cabinets, we planned to make available.
Then we measured out for the wall locations and marked all our layouts directly onto the floor with a Sharpie marker.
2. PREP YOURSELF
Step 2 is the first step you actually get to do stuff. Boys usually like this step because it involves demolition. In our case, we had to prep our floor by removing the door threshold and performing the first step of roughing in our walls.
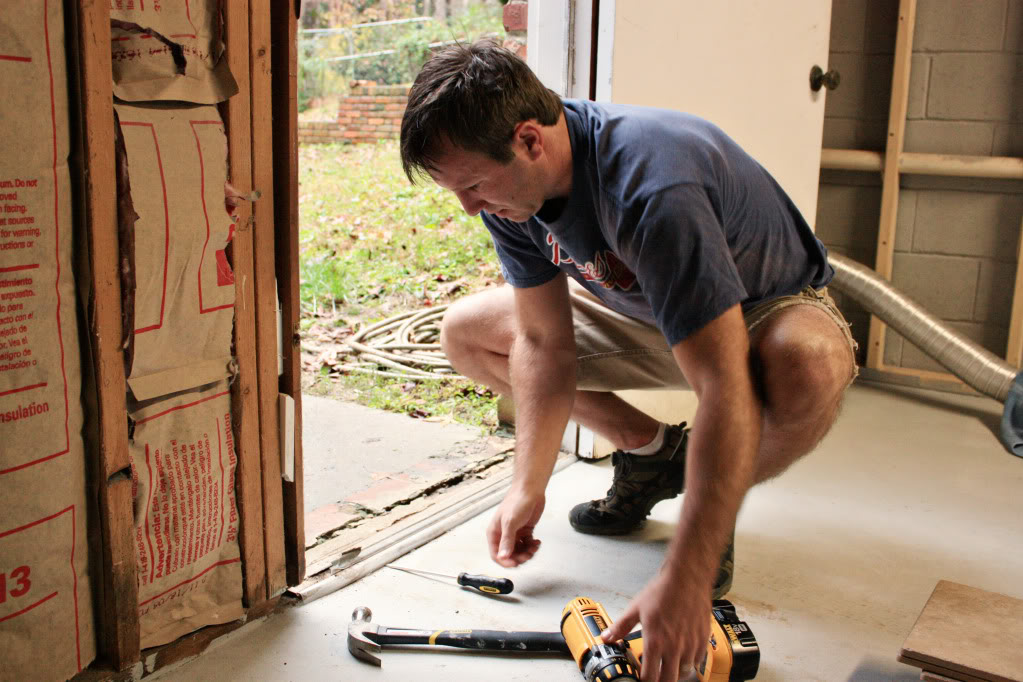
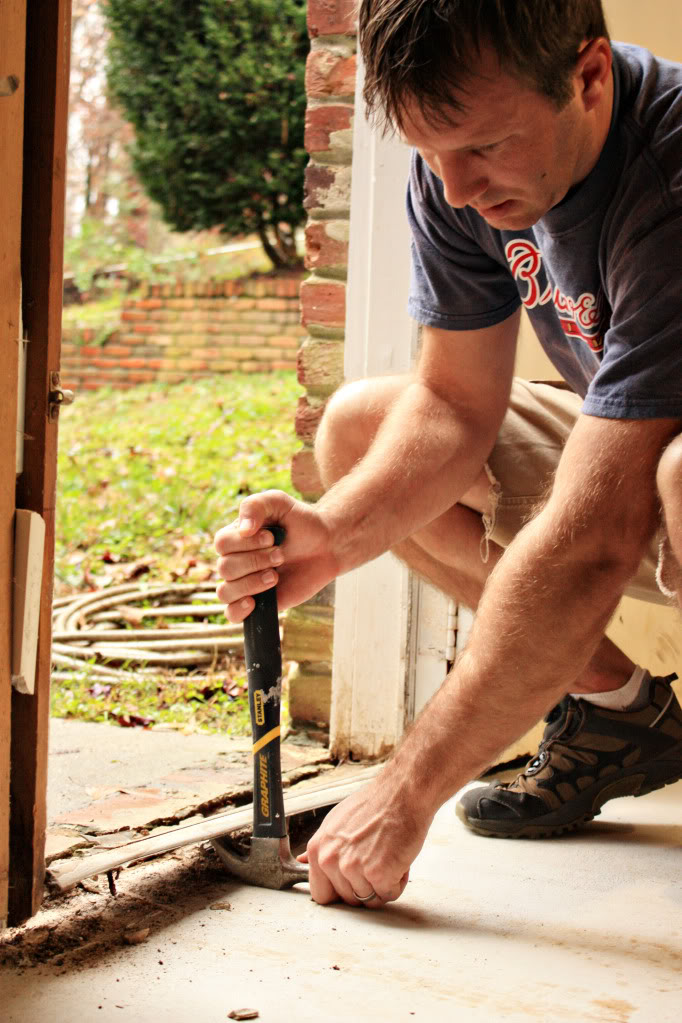
Jeremy used a hammer to wedge a flat head screwdriver underneath the cheap tin threshold and then pryed it up. It was really easy. Then we cleaned the edge – afterall, the tile would go right up to this area and a new door would be installed later to go over the tile. This meant removing the old threshold and installing a new one later.
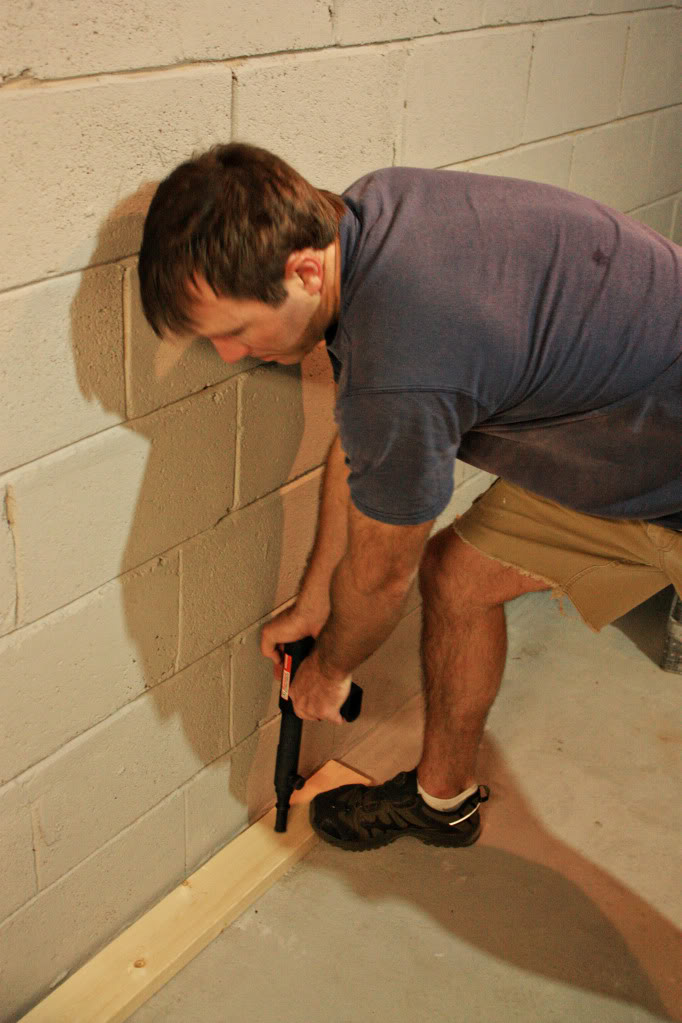
My boyfriend also needed to lay the first 2×4 for the base of all our walls. Our cinder block wall would have a finished wall in front of it, so ‘roughing in’ meant fastening the base stud to our concrete floor using a PAT (powder-actuated tool). This gun drives pins down through the stud and into the concrete, creating a base for future vertical studs (where you hang drywall). It also creates a barrier for me when the tiling begins.
After the base stud was in and the threshold was removed, a quick brush with the broom removed any dirt or debris left on the floor.
3. SUPPLY YOURSELF
Now that your floor is prepped, it’s time to gather supplies. Supplies for tiling are pretty basic and affordable. The most expensive items are the tile (ours was called Rialto Noce from Lowes and cost about $2.08 a square foot), the thinset (also called tile adhesive which we scored at True Value) and a wet tile saw. We have the most basic tile saw (it cost us about $80) and we have used it for three projects so far and lended it out to friends and family for several other projects, so it is well worth the investment if you are looking to save time, energy and have a bunch of tiling to do. Or if you just want to be popular.
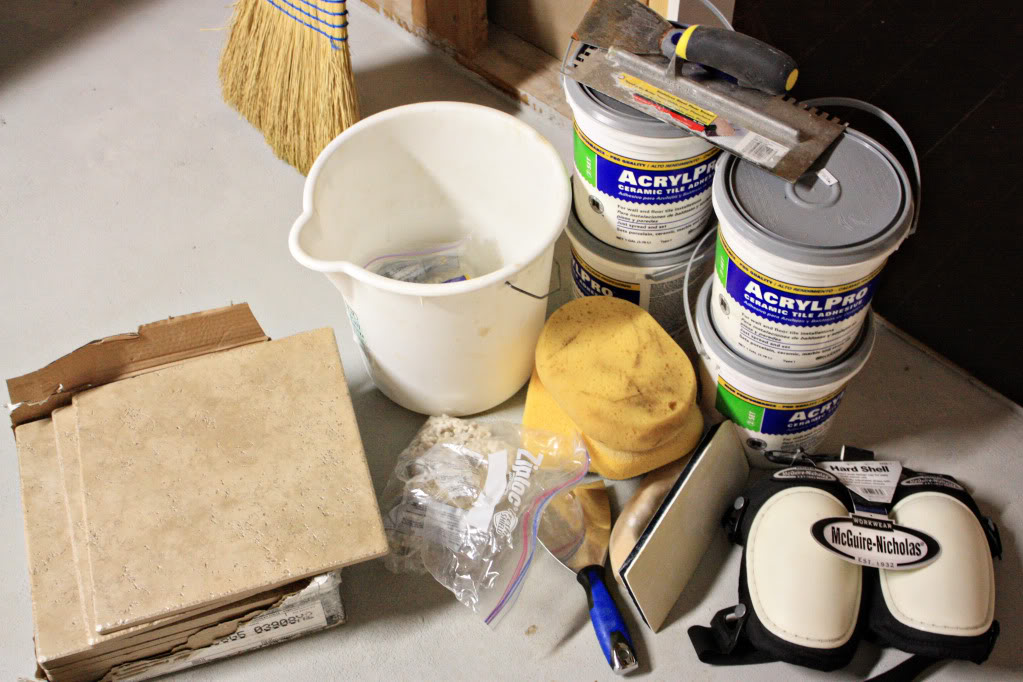
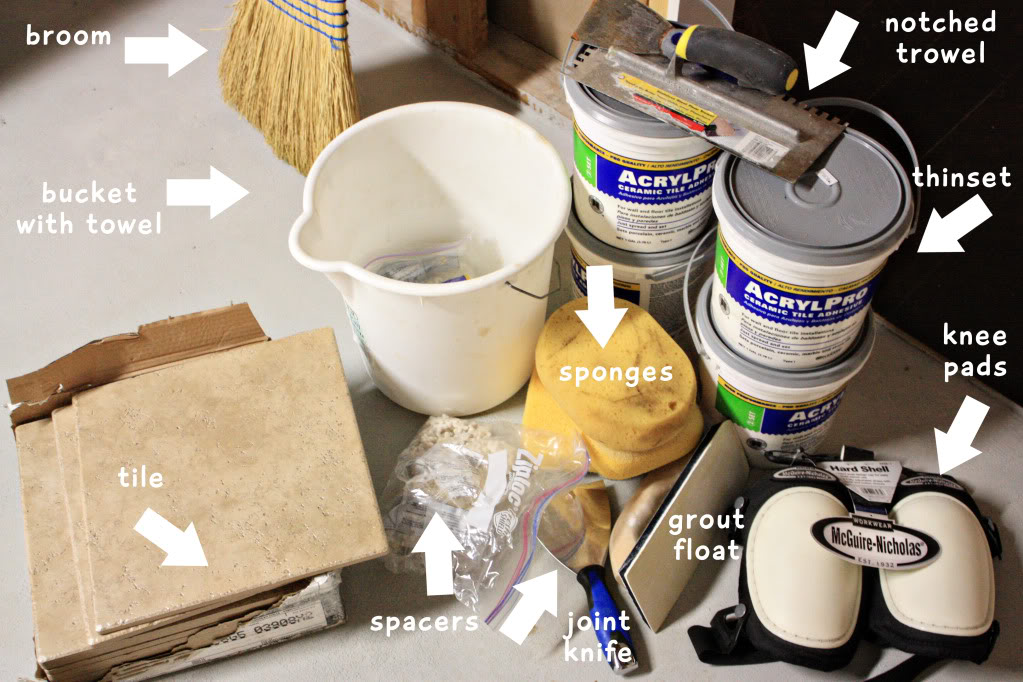
All the supplies that you need to tile a floor include:
Tile
Tile Saw (either manual tile saw or wet tile saw)
Thinset (or tile adhesive)
A Notched Trowel
Spacers
Kneepads
Broom
Grout
Grout float
Sponges
Bucket and towel
Joint compound knife
A measuring tape
A floor
4. SHMEAR IT YOURSELF
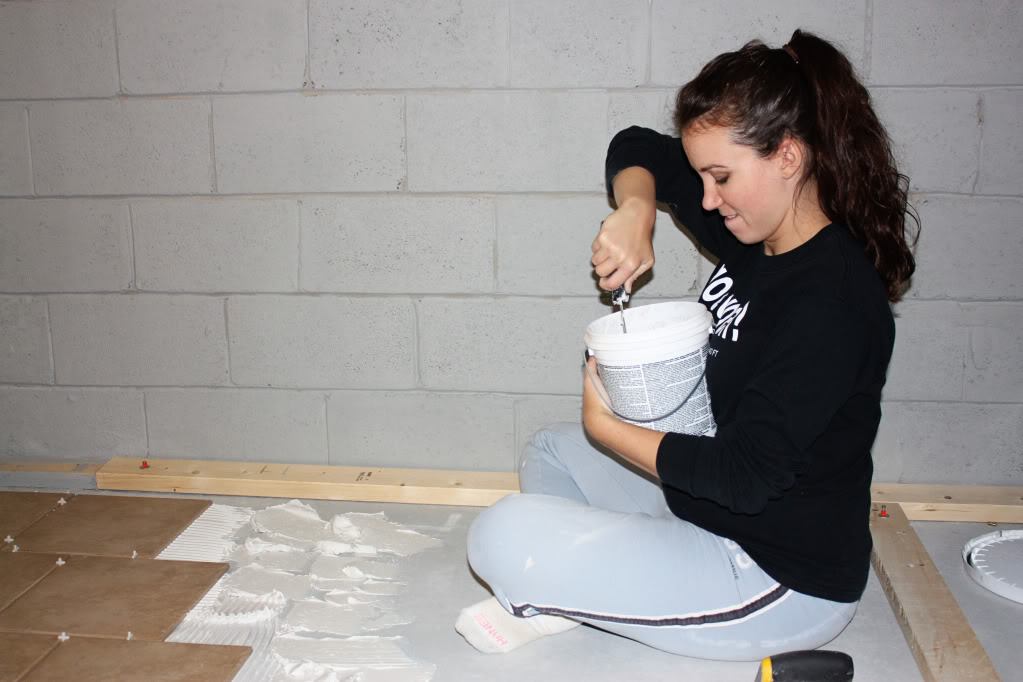
Using our joint compound knife, we dug into the thinset and shmeared it directly onto the concrete floor. Since we had already established that our exterior wall (the one with the insulation already installed) would be our guideline for straightness and since we knew that this area of the floor would be visible (where as if we started in the opposite corner, our tiles would be hidden underneath cabinetry), it was an obvious choice.
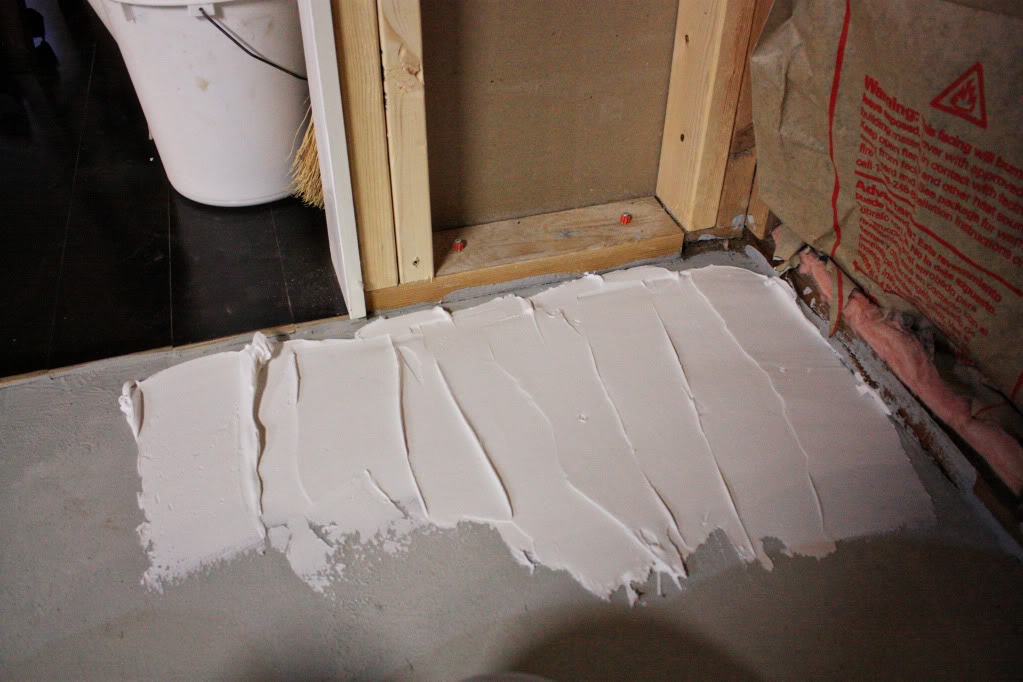
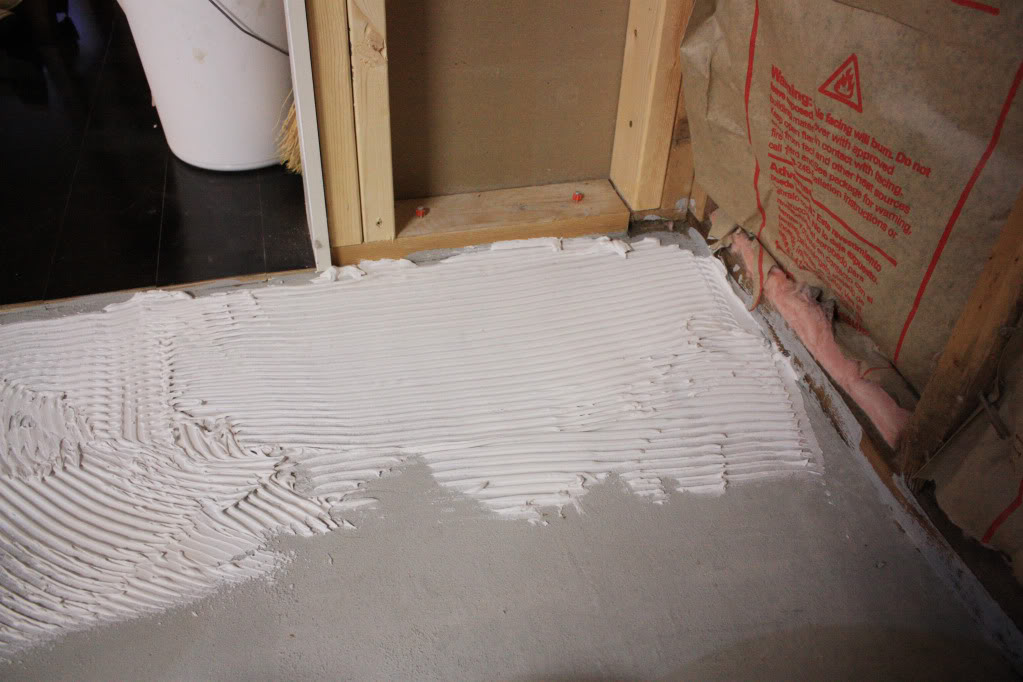
Then using the notched trowel, I scraped any excess off the shmeared thinset and created the ‘ripples’ in the surface. Many times tiling experts say to hold the trowel at a 45 degree angle…but I worry less about the angle and more about the ‘ripples’ being uniform. The ripples are gonna get squished down and really grip the tile as you shmoosh. Plus the uniform thinset will keep your tile from having one low corner or one high side.
5. PLACE IT & SPACE IT YOURSELF
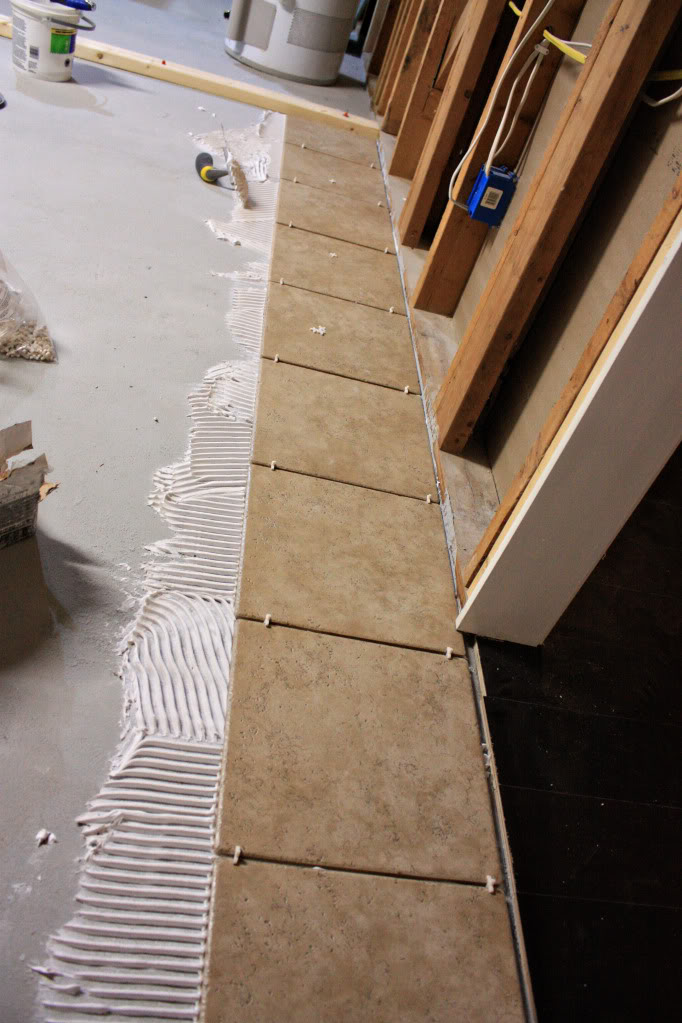
As you place your first tile, make sure it lines up with the guide wall or guide line that you are using.
After I put my first tile down, I repeated step 4 for my second tile. A small spacer (we used 3/16″) can be used to keep the tiles in uniform distance…hello even grout lines! I use two spacers per side. Also it helps to have the spacers placed like little crosses between the tiles. The cross helps keep your grout space even but also will help you ensure that the tiles are not higher than their neighbor.
6. PATTERN YOURSELF
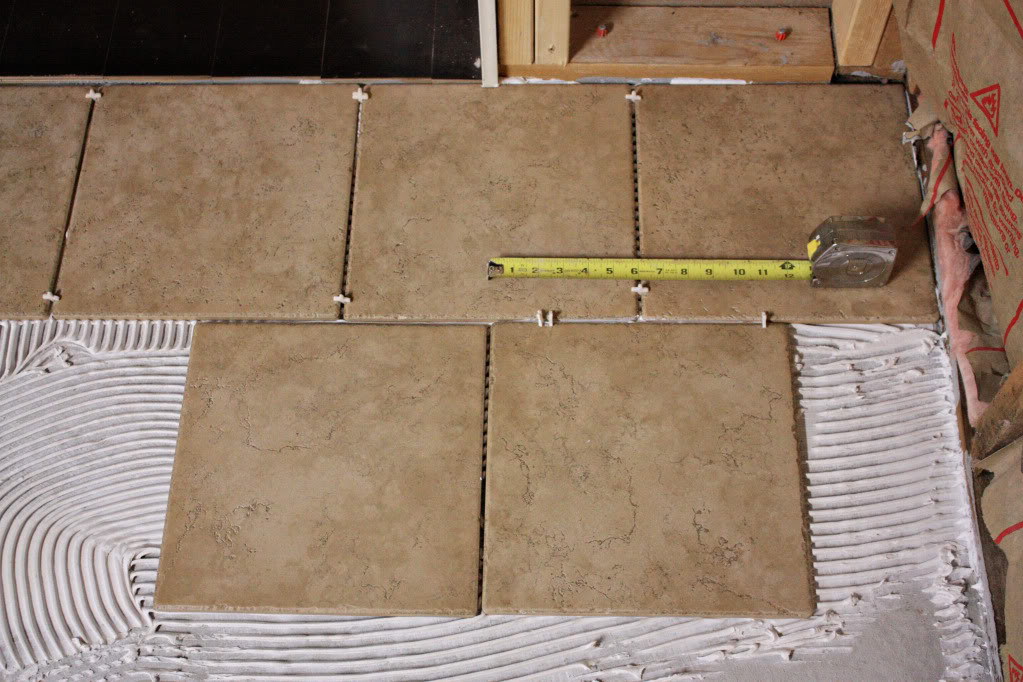
I wanted to use a brick pattern in this space. Therefore, each tile of my second row had to be centered directly on the grout line of the previous row. I double checked my eye-balled attempt with a tape measure. Then I repeated steps #4 and #5 for the rest of the tile row.
The gap next to the ‘guidewall’ was filled with a tile cut by my supa-fly boytoy. And because he is a pro that makes my tiling heart aflutter – he knew to leave a little extra wiggle room for the spacer to get inserted.
7. REPEAT YOURSELF
Methodically, you will repeat steps #4 – #6 until all the tile is down. Over and over and over. This is why the kneepads come in handy. And a whole lotta patience.
8. TROUBLESHOOTING IT YOURSELF
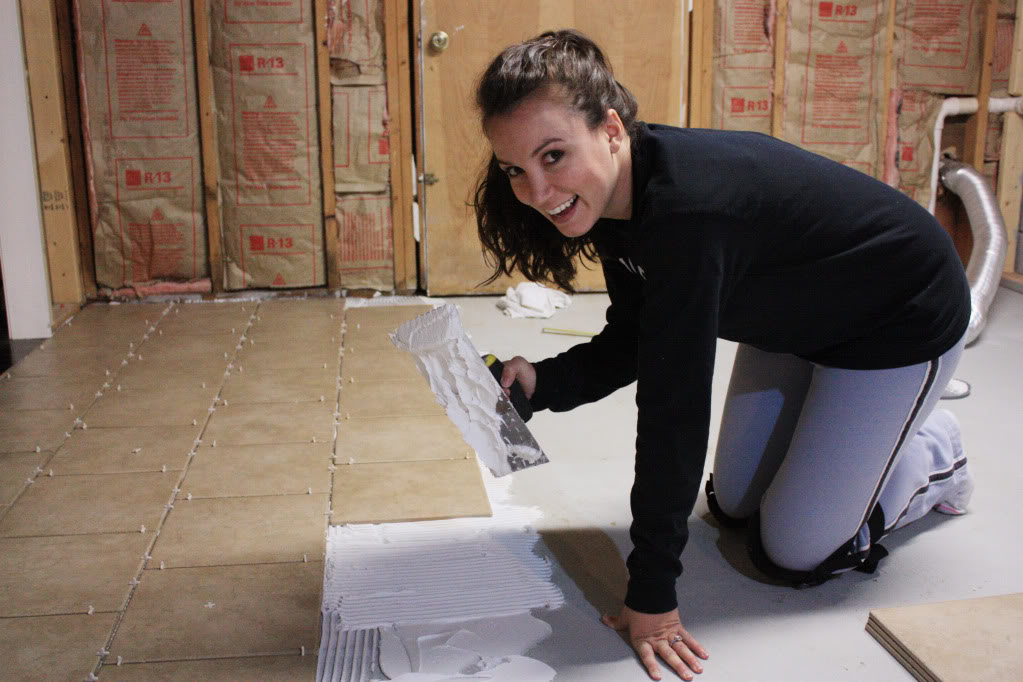
Sometimes there are little problems that pop up with tiling projects. Some of them include tricky cuts, or a uneven floor….but more frequently there are just little annoying debacles that stall out your progress. One of them has to do with the excess thinset.
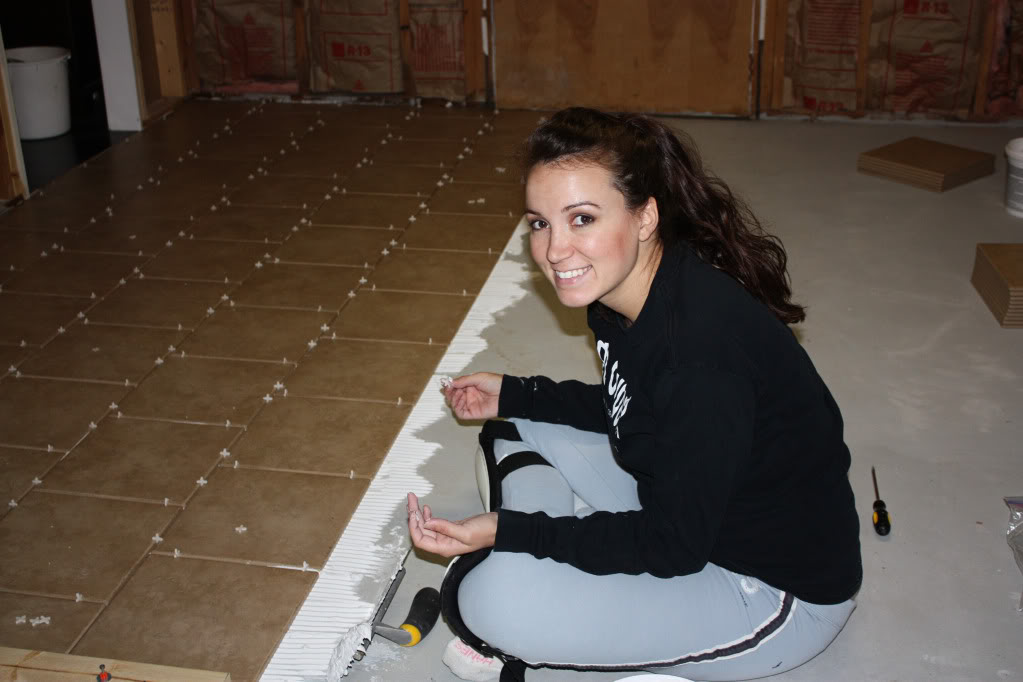
Excess thinset can squish up through your grout spaces. This is not good. If you have excess thinset occuping the grout line, then your grout won’t have a good chance because it’s got a limited amount of space. Soooo the thinset has got to be removed. One way is to take a spacer and run it down the grout line. Then take a towel and clean up any thinset that got on the surface of the tile. Your grout will thank you later 🙂
Another little irksome event is when you are tiling next to a door and the door frame is different depth than your wall. Instead of cutting your tile to fit around the door jam…
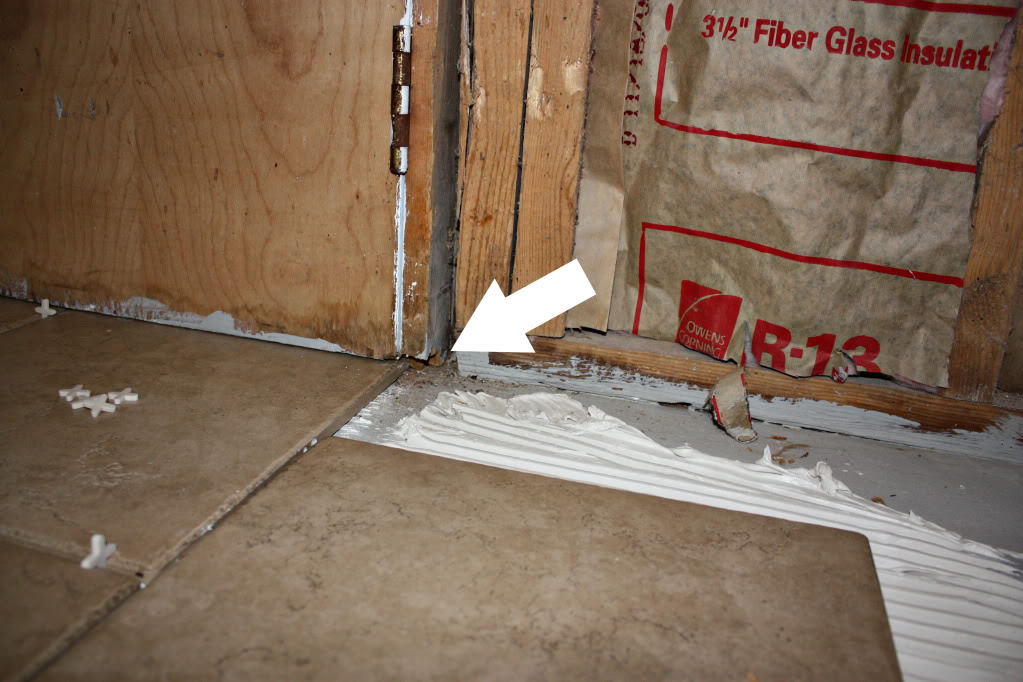
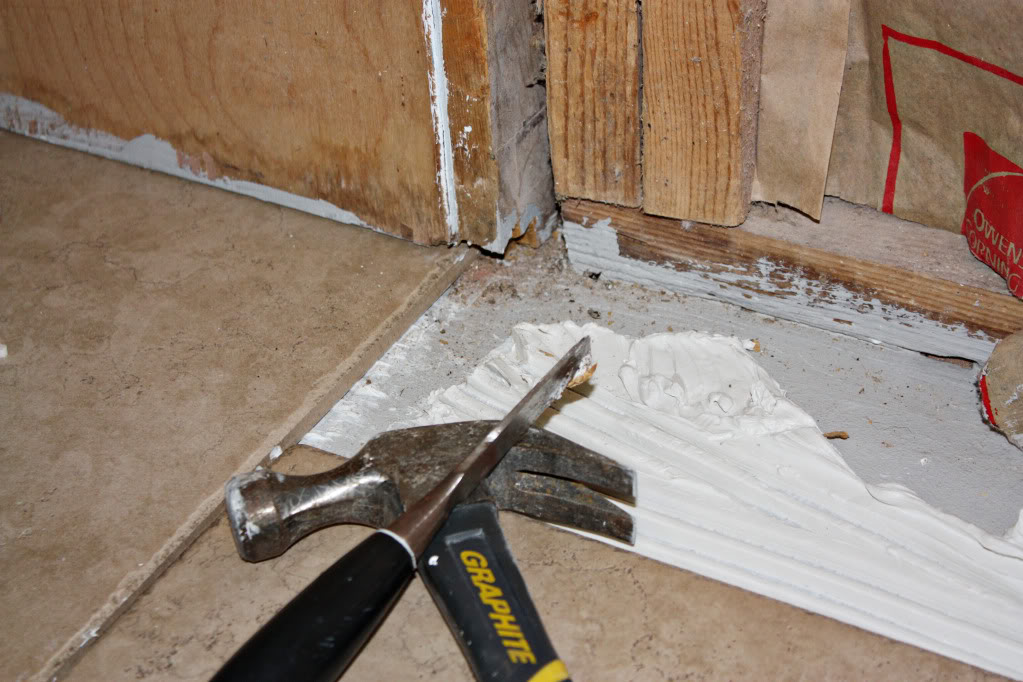
…use a chisel and a hammer to remove the bit of wood in your way. Then you can put your tile underneath the wood frame and along your guidewall.
Lastly is the exit issue. In our space, I actually had to tile the last three rows at the same time to ensure that I would have a way out. Planning your exit (without stepping on your tile that has wet thinset still setting up) is very important. If you happen to walk on the tile after you already made sure it was level, it can create uneven surface that will make any future skateboarding a little rocky. Did I mention we are having a boy?! 😉
9. LEAVE IT ALONE….YOURSELF
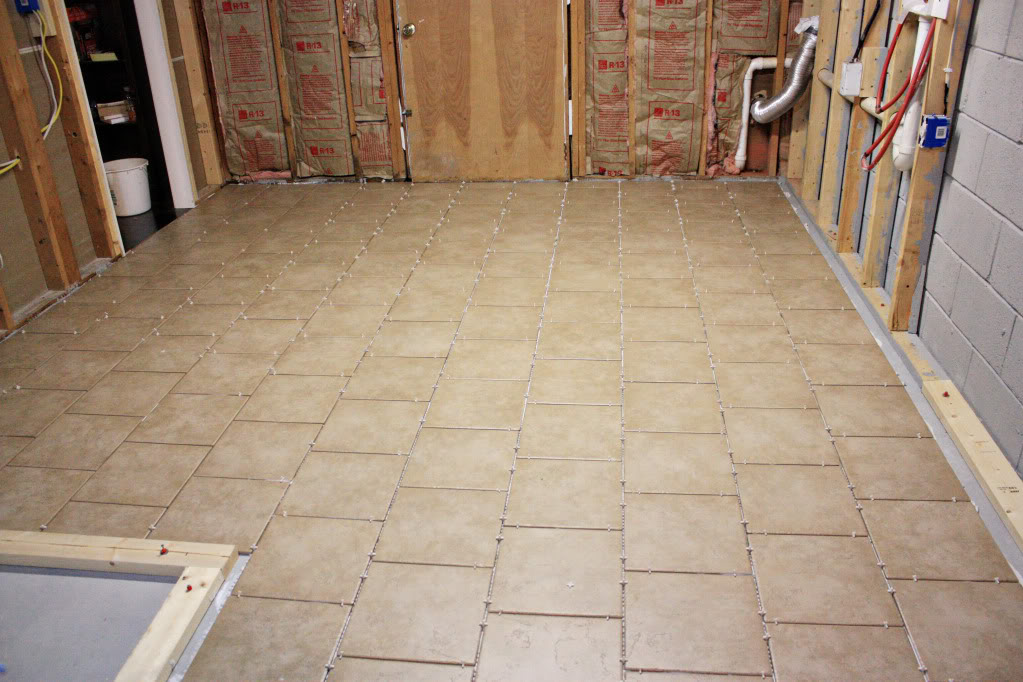
Our tile adhesive (thinset) recommended at least 24 hours to set up (dry). But because it was cold down there, we figured that a couple extra days of dry-time wouldn’t hurt.
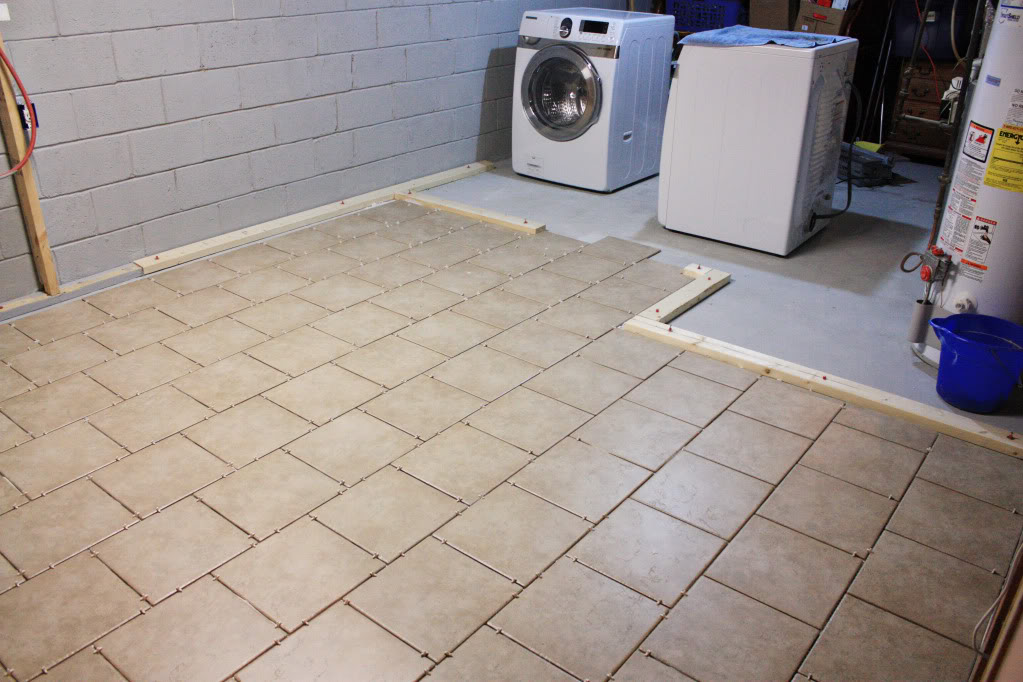
As you may have noticed, we left a pretty big gap between the last row of tiles (next to the cinder block wall) and the floor stud. Instead of spending the time to cut all the tiles (and actually have to PAY for each gapfiller)…we decided that this area didn’t need tiled. Call us crazy. Go ahead. You know you want to.
But the fact of the matter is, we are gonna have cabinets and a washer/dryer along this entire wall. And a little shim if the cabinets back legs need additional support will cost a whole lot less than the tile. Aaand if we got totally crazy and ripped out the cabinets and washer & dryer one day, we could always add another piece of trim to beef out the wall (which would then have drywall, layers of floor trim and quarter round and would make that gap invisible).
10. BE A GROUT PUSHER
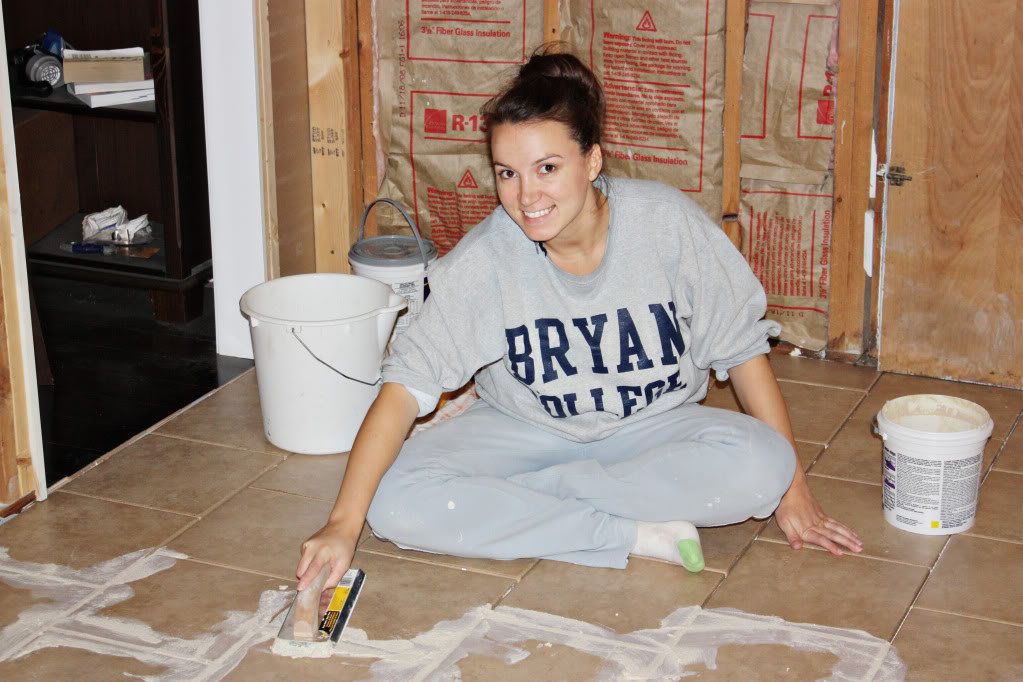
After your thinset has dried (here’s a clue – you won’t hear it squish if you apply pressure to the tile!) and right after you forget to apply any makeup (washed out, pregnant, and dirty tiling clothes = HOT), break out your grout float and your grout. We chose pre-mixed grout. I read all about the headaches that powder grout can cause if it is mixed improperly, so for me, it was a clear and obvious choice.
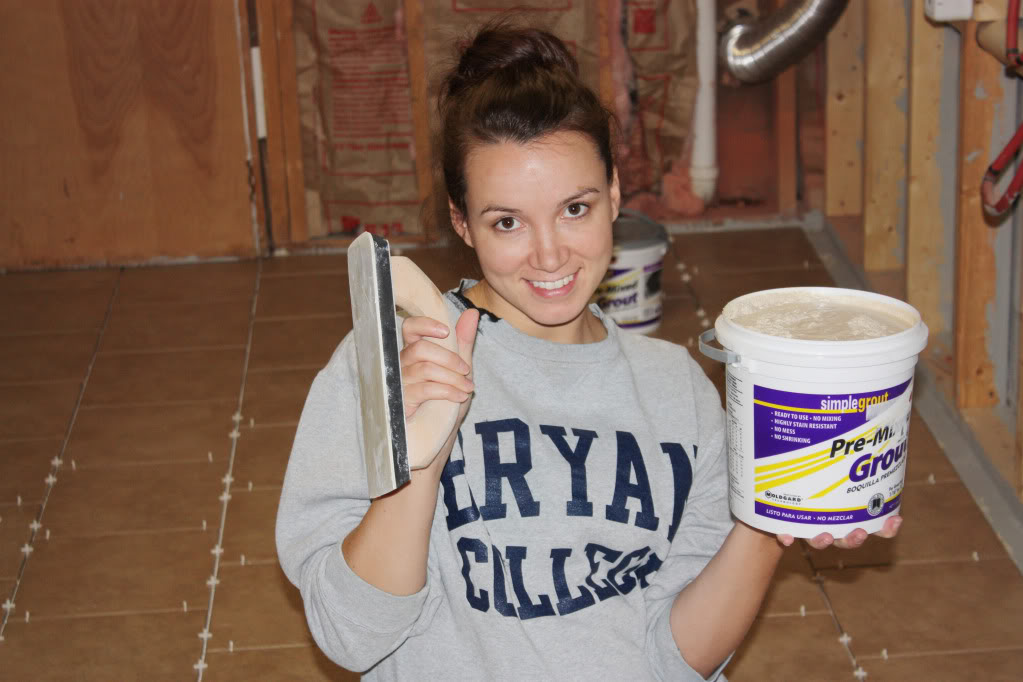
First I removed my spacers. Then, using my grout float, I PUSHED the grout into the space between the tiles. This takes some forearm power. Having excess is okay…I was just making sure that all the space got the maximum amount of grout packed down into it.
11. REMOVE EXCESS GROUT
This is the hardest part of tiling to me. It is the grout evening. Through our adventures in grouting, we have found the best way for us to remove excess grout is to have one person on bucket patrol and one person on grouting/washing. As I would get to a point where I couldn’t reach over my baby bump with the grout float, then we would start removing the grout with a sponge.
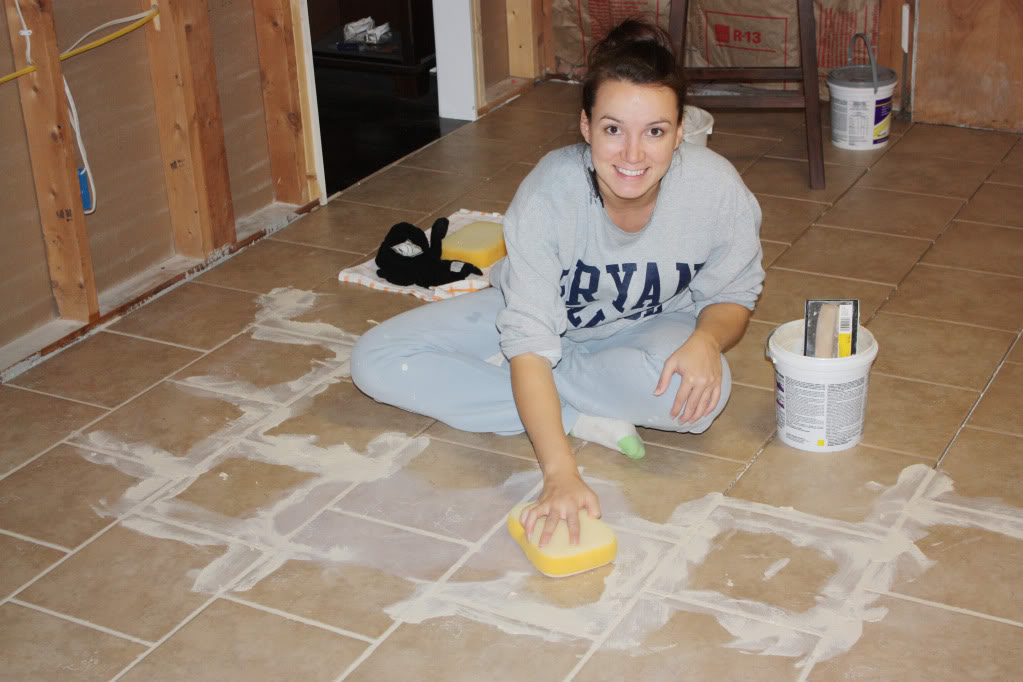
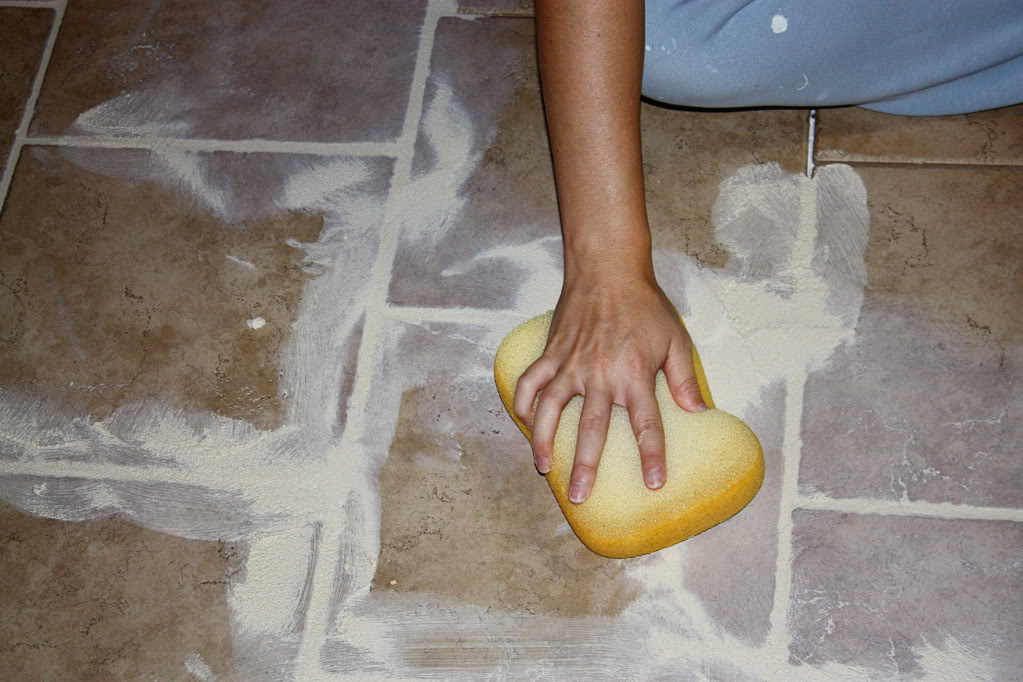
Using a lightly DAMP sponge, I would swipe the top of the grout lines until the excess has been shmeared around. NO PRESSURE IS NEEDED. My boyfriend hates this job because he wants to use those massive muscles to push on the sponge…which in turn can screw up your grout line. So I am the grout-swiper. As the sponge picks up excess grout, it will get the grout onto tile tile. Don’t worry. It’ll be ok. After the sponge has a few shmears of grout onto it, it is time to switch. I hand Jeremy the dirty sponge and then he hands me clean lightly damp sponge #2 which has been rinse in the water bucket, squeezed and then blotted on a clean towel.
Then it continues like that until the grout line is even and there is only a slight haze on the surface of the tile.
12. GROUT YOURSELF OUT
Again – make sure you give yourself an exit route. Grouting is long and tedious…but in the end, it is well worth it.
Also, after the grout is dry, you will want to use a grout sealer…which is available at any home improvement store…it basically just gets wiped onto the grout to seal it from picking up stains.
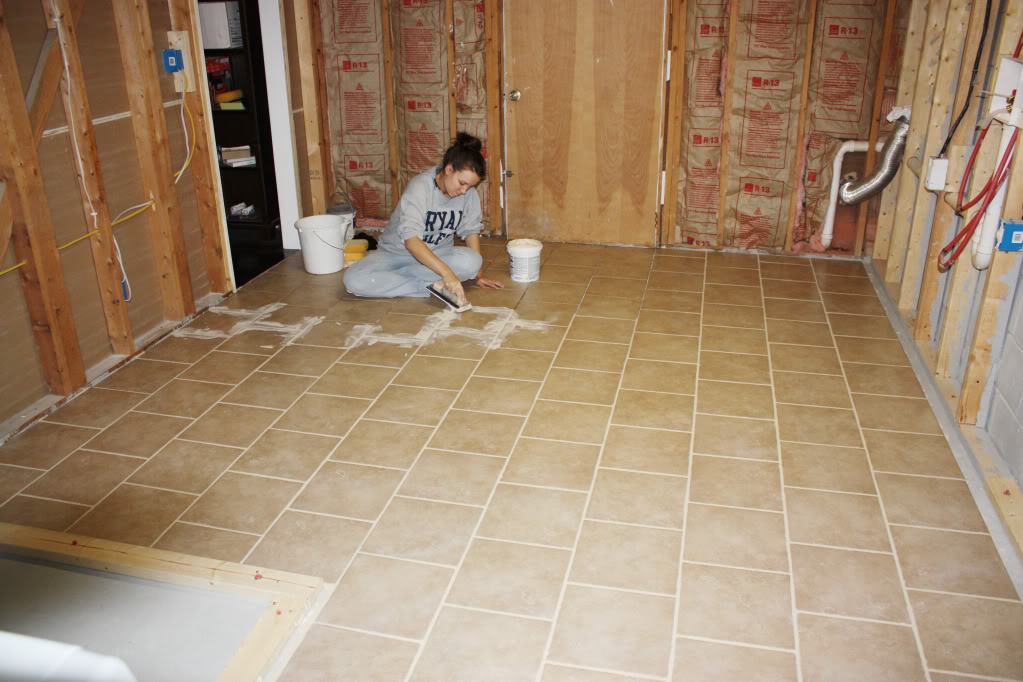
So there you have it. There it is. One finished tiled floor. And one 12 step process to getting the tiled floor of your dreams.
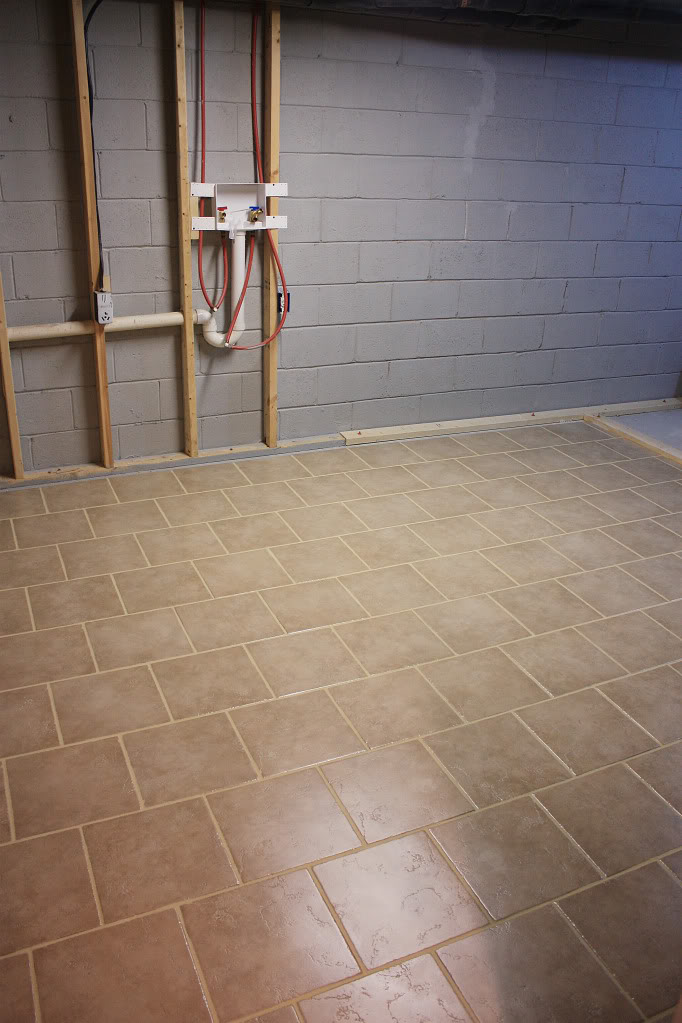
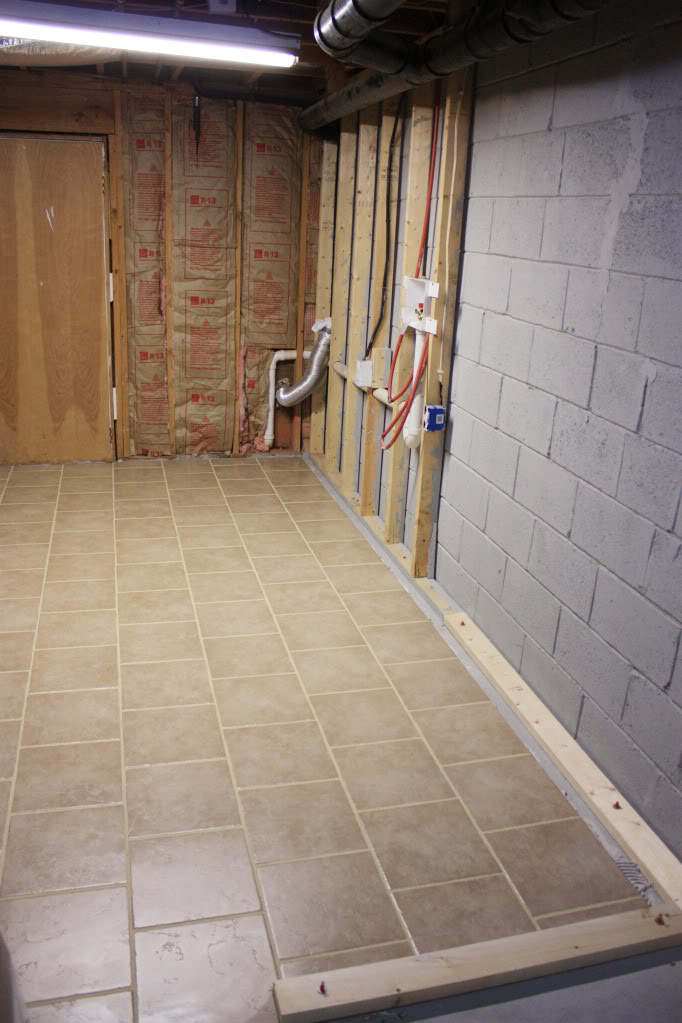
So are you a newbie to home improvement or tiling? Because welcome if so. And if you are an old pro, please let the helpful hints fly. Maybe you have something important to share about the how-to’s of tilework, or maybe you just finished a tile job in your bathroom or kitchen, or maybe you just wanna comment about how wonderful the tile looks with gray cinder block walls. Oh wait. That’s right. It doesn’t. I guess that means we need to get a move on with the drywall 🙂
Anyhoo…young or old, rookie or experienced, oxygen lovers and food eaters, tell me your tiling woes or victories. Maybe it’s a complicated pattern or an intricate tile job….whatever it may be, I am in the mood for some good ole tile yarns 🙂

For more tips on tiling, check out this oldie-but-a-goodie post with hints for a happy tile experience. Or check out this fun trial-by-tile post or this before&after post when we tackled our kitchen backsplash.
“I was one of five bloggers selected by True Value to work on the DIY Squad. I have been compensated for my time commitment to the program and my DIY project as well as my posts about my experience. I have also been compensated for the materials needed for my DIY project. However, my opinions are entirely my own and I have not been paid to publish positive comments.”