Our boys all share a room. The big boys share a room (you can see that reveal here) and then the little boys share a room. And I swear to you on all that is holy that one day I will share the reveal of the little boys room. It’s actually one of my favorite spaces because it has so much personality….and even though the color scheme is rather chill (gray, navy, white and dark brown accents)…it’s one of those spaces that still feels like a kids space.
The one thing that I have really learned with kiddos sharing a single space is that storage is EVERYTHING. Like it will break you as a parent if something does not have a designated spot. Not that I have meltdowns. Like ever. Like not even this morning over a few books under the bed. Never. That doesn’t even sound like me. But I’ve heard rumors.
Anyhoo…the room can get messy faster than a Krispy Kreme donut gets eaten by a pregnant woman. Not that I would do that either. No way. I would much rather have kale and beet smoothies. Yum. So in order to utilize all the space in our little boy’s nursery, I decided that I would finally get my donut-loving act together and put up a little hook spot for all of LJ’s and Max’s favorite things. Check out how cute!
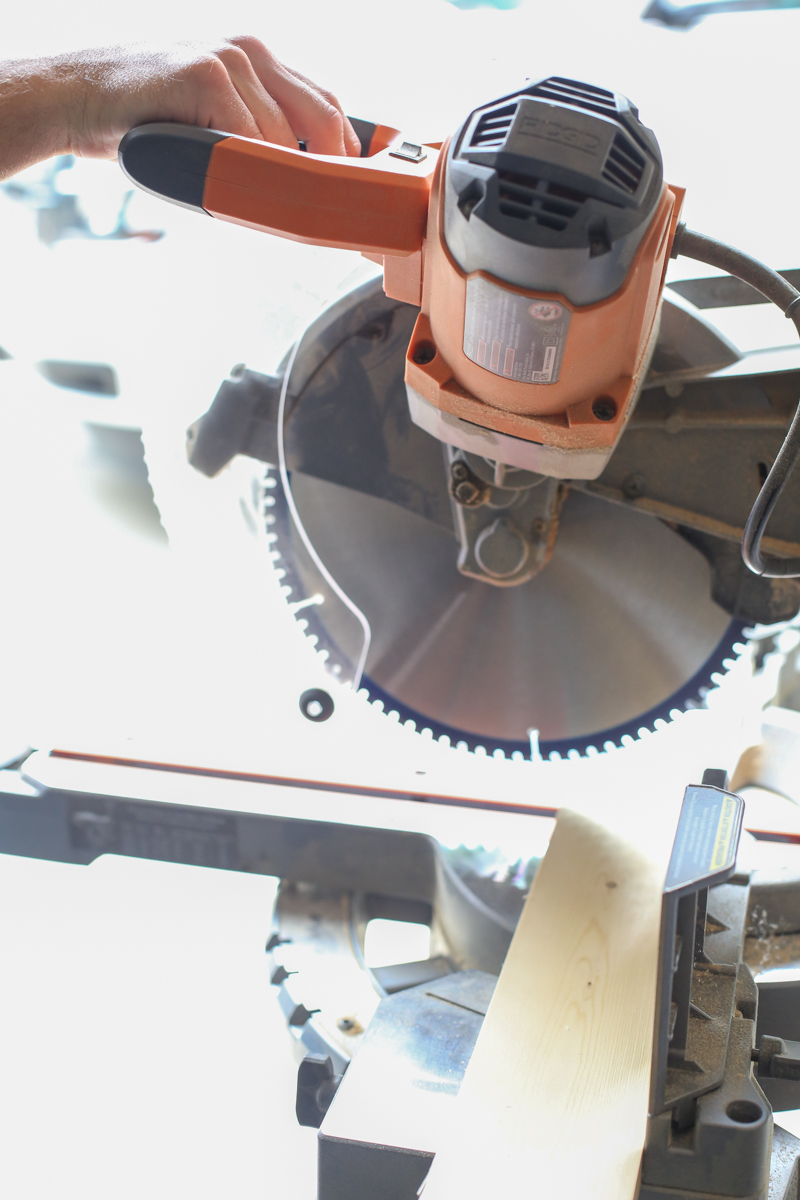
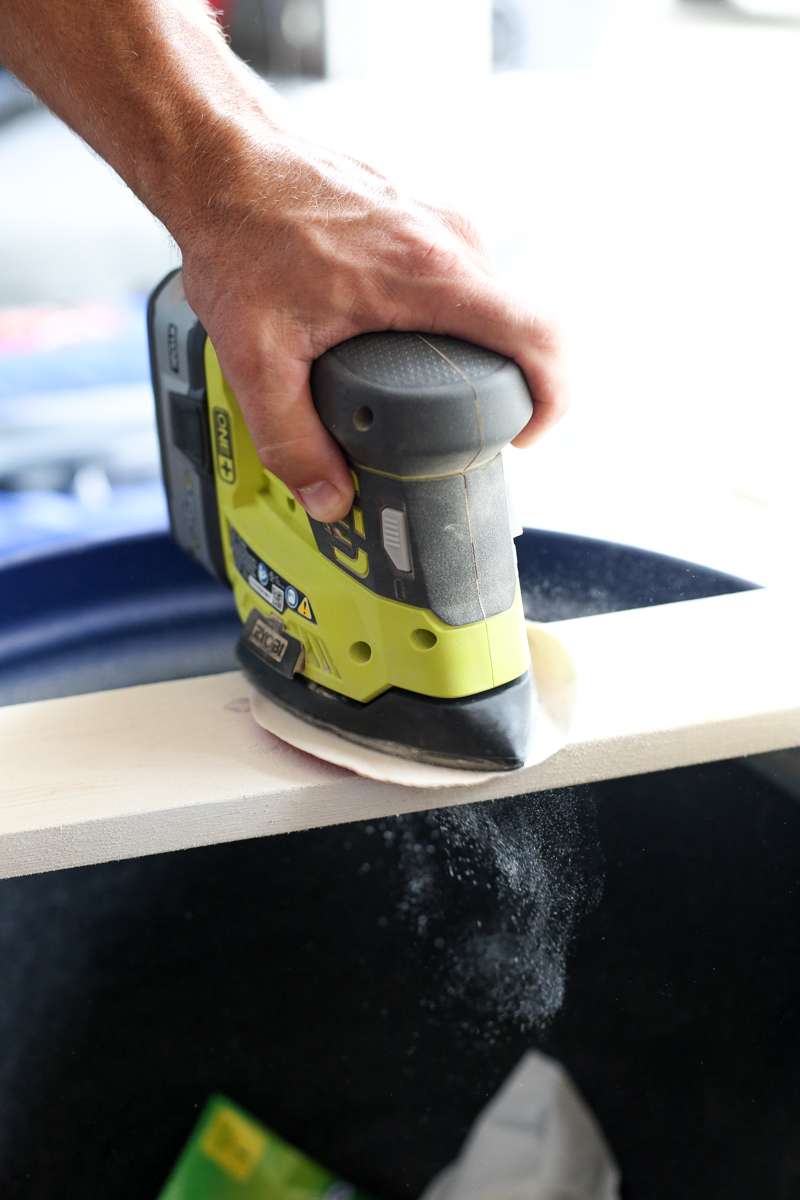
The process was really simple. I took a 1 x 4 board and cut it to the length of this space. Don’t let the hands fool you….I completely forgot to take pictures of myself doing this so I made Jeremy come back out and act as my hand-double.
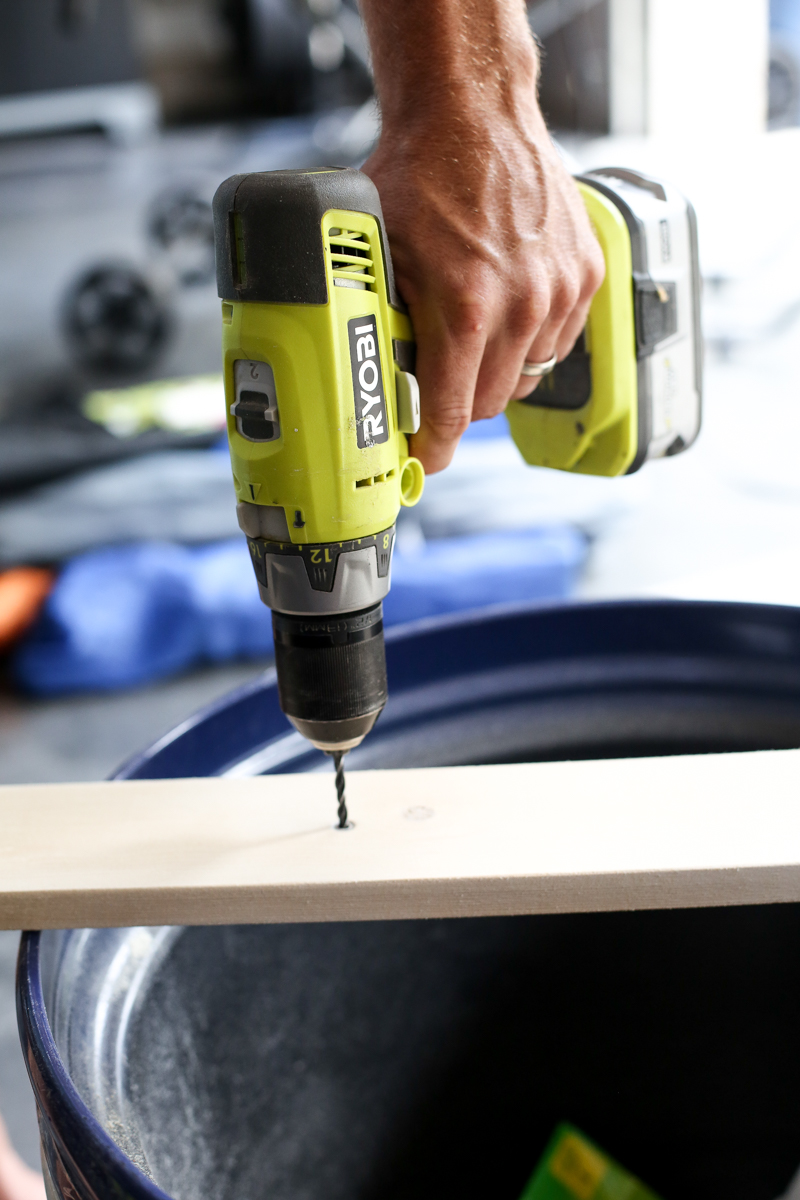
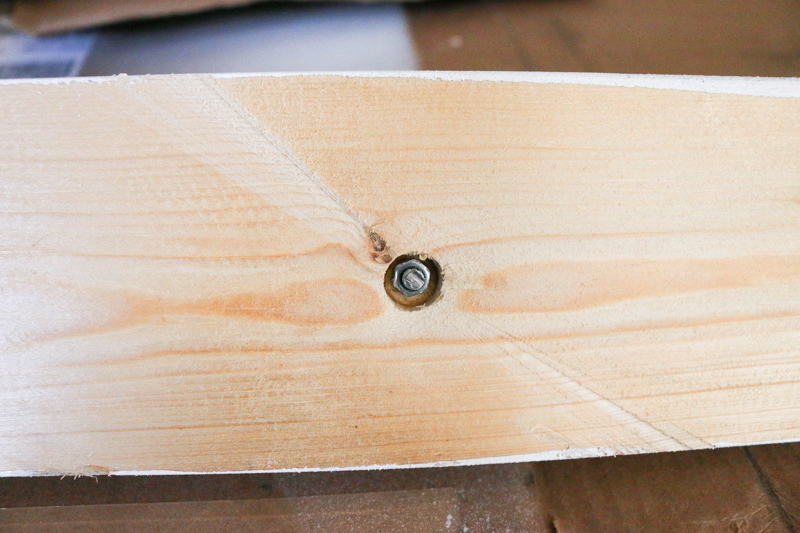
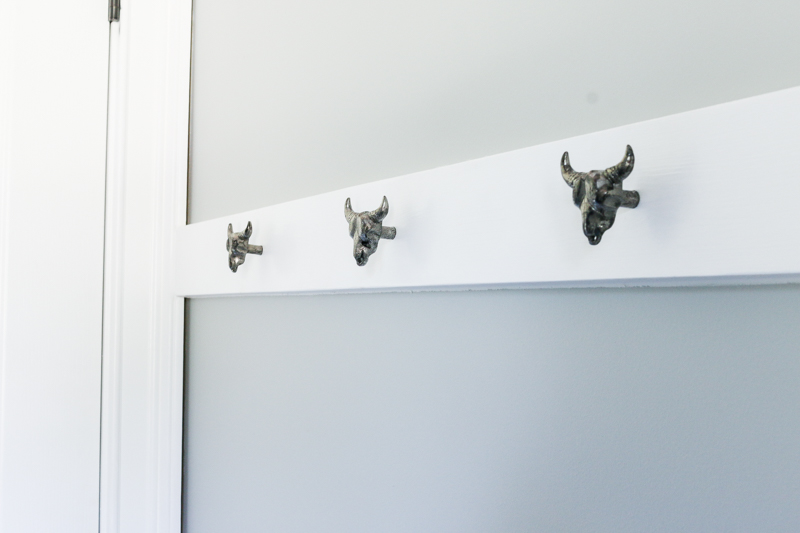
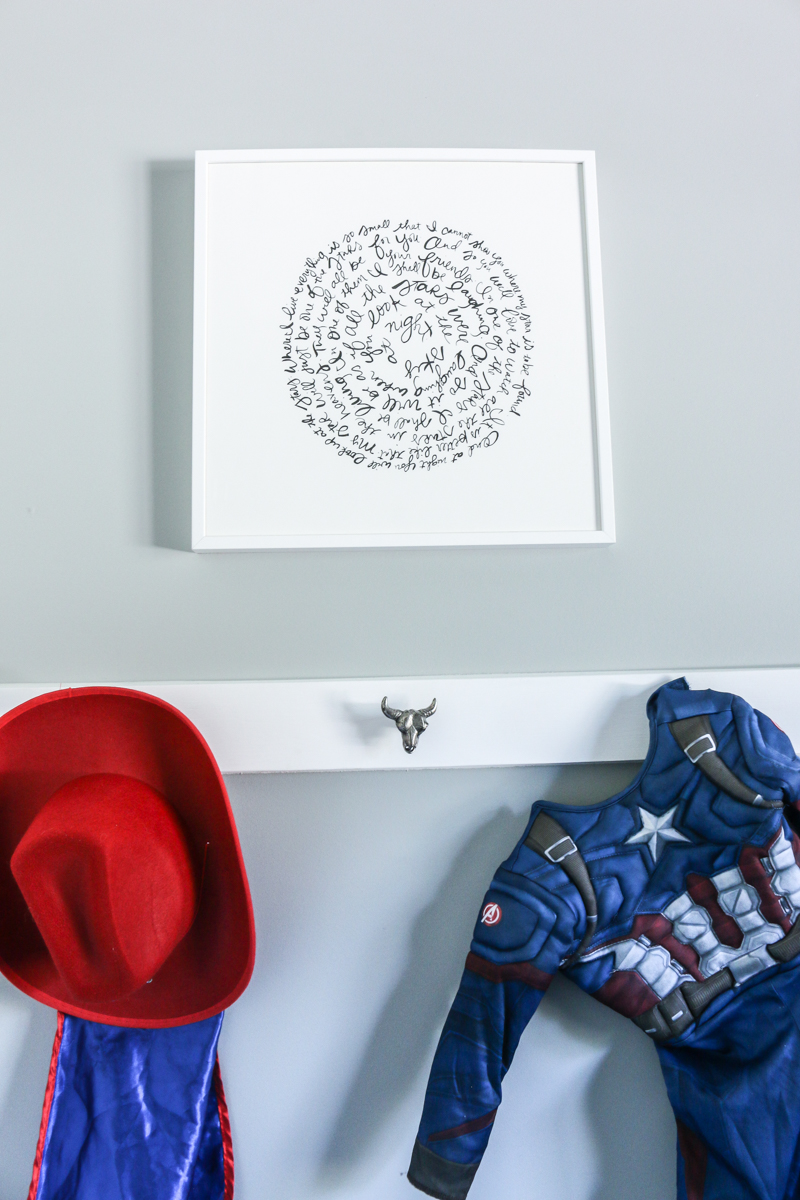
Then came time for the hooks. I bought these cute masculine longhorn skull hooks at Hobby Lobby a while back and decided this was the perfect spot for them! (here is an etsy listing for them!!!) I found the drill bit that was slightly larger than the bolt that goes into the knob….

And used that to drill holes for the hooks. I did mark my center of the board and then just spaced evenly on either side….it was 11″ for my space.
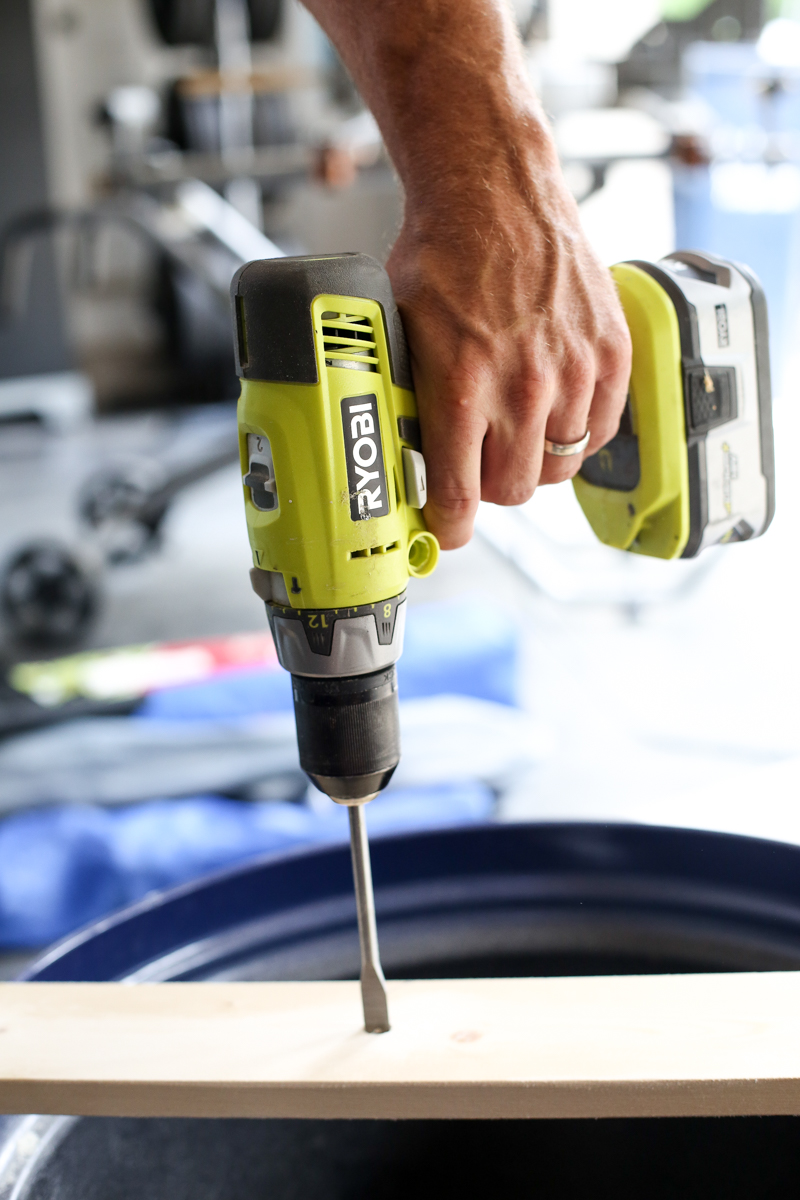
Then on the back side I needed the holes to have a recessed area for the nut. I used a small paddle bit and made that part of the hole bigger….this will make sense later.
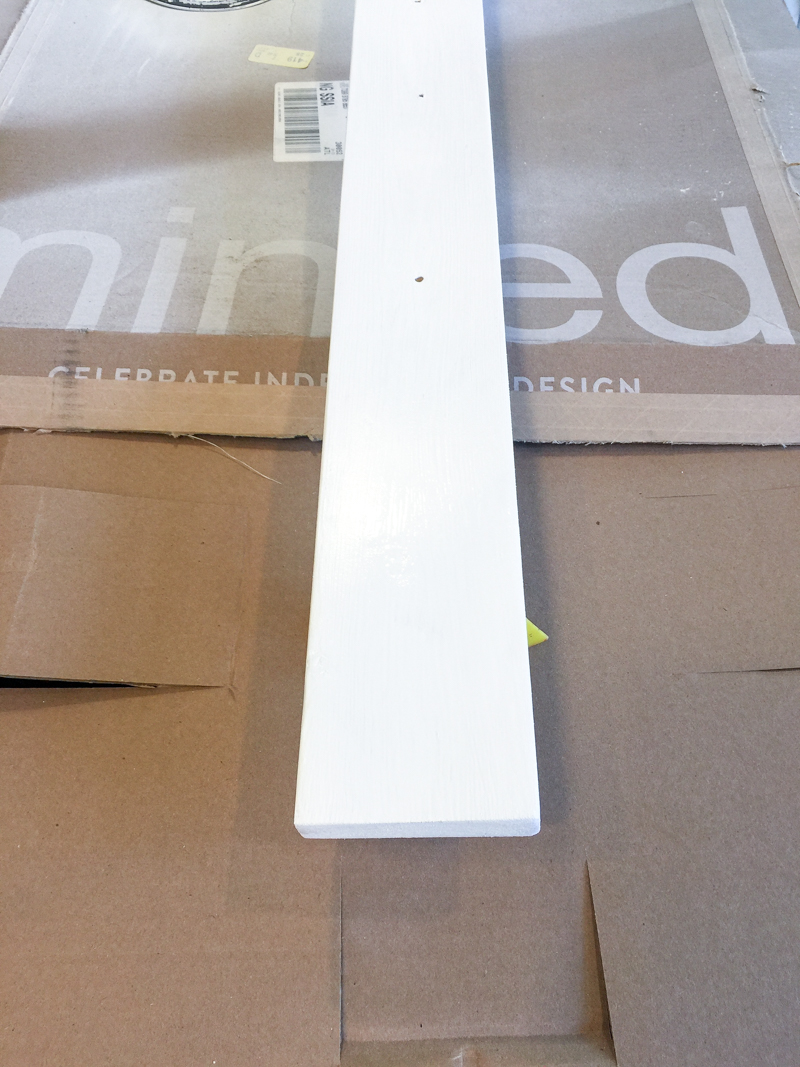
Then I sanded the board. Front, top, bottom, edges.
Once the board was sanded, I used semi-gloss trim paint in bright white to make it match the door trim.
Then came time to attach the hooks. The hook and bolt went through the front and then the nut went on the back….this is where that slightly recessed area came into play. I didn’t want my nut to stick out. (sorry…that’s a total that’s what he said moment.) So that is why I used that bigger paddle bit. Now the nut is recessed into the board and the board can sit flush. The bolt was a little long so I did have to trim those down with a hacksaw but if I can do it (hot and preggo as I am) anyone can!
Then came time for installation. Jeremy used two screws to go through the board and drywall and directly into studs. This hook board isn’t going ANYWHERE.

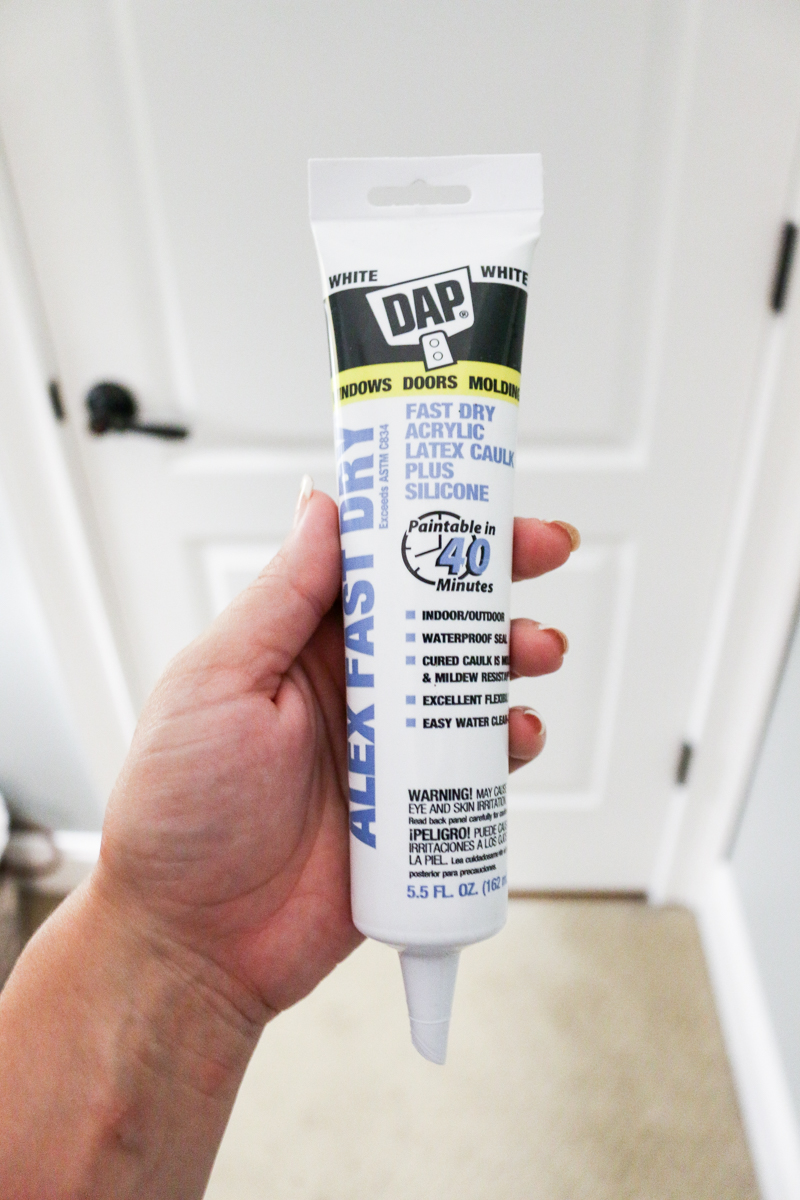
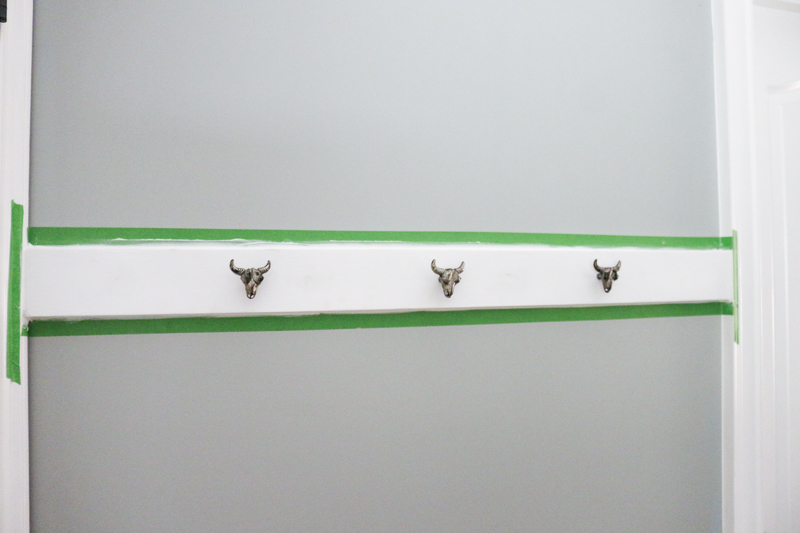
You may be wondering what’s up with all that green tape. Well…it was time for caulk!
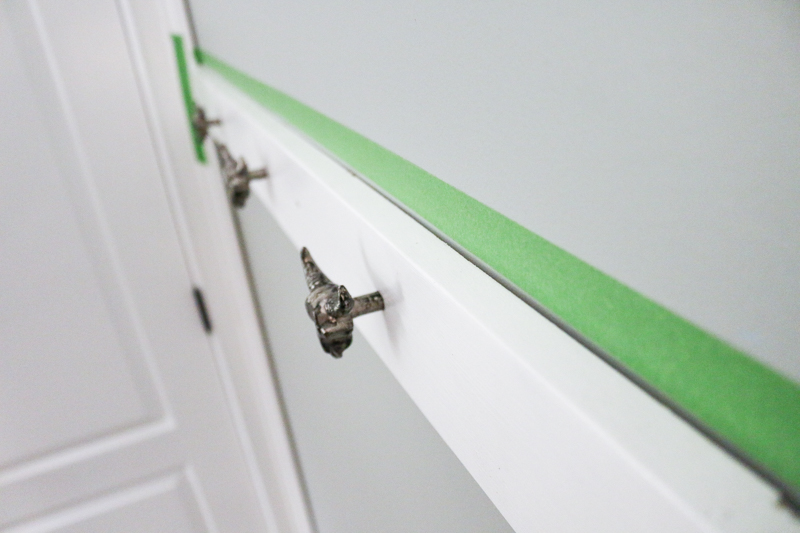
I used this DAP molding caulk (it’s one of my FAVORITES) and I always use these little squeeze tubes for small projects….it’s so much easier to handle!
The painters tape allows for easy cleanup and super clean lines. I also smeared some spackle into the screw holes that Jeremy left behind before touch up painting.
Then we were in real business. I mean YEEHAW!
Forgive the weird color balance thing that is happening in the room. This room is not painted ombre I SWEAR.
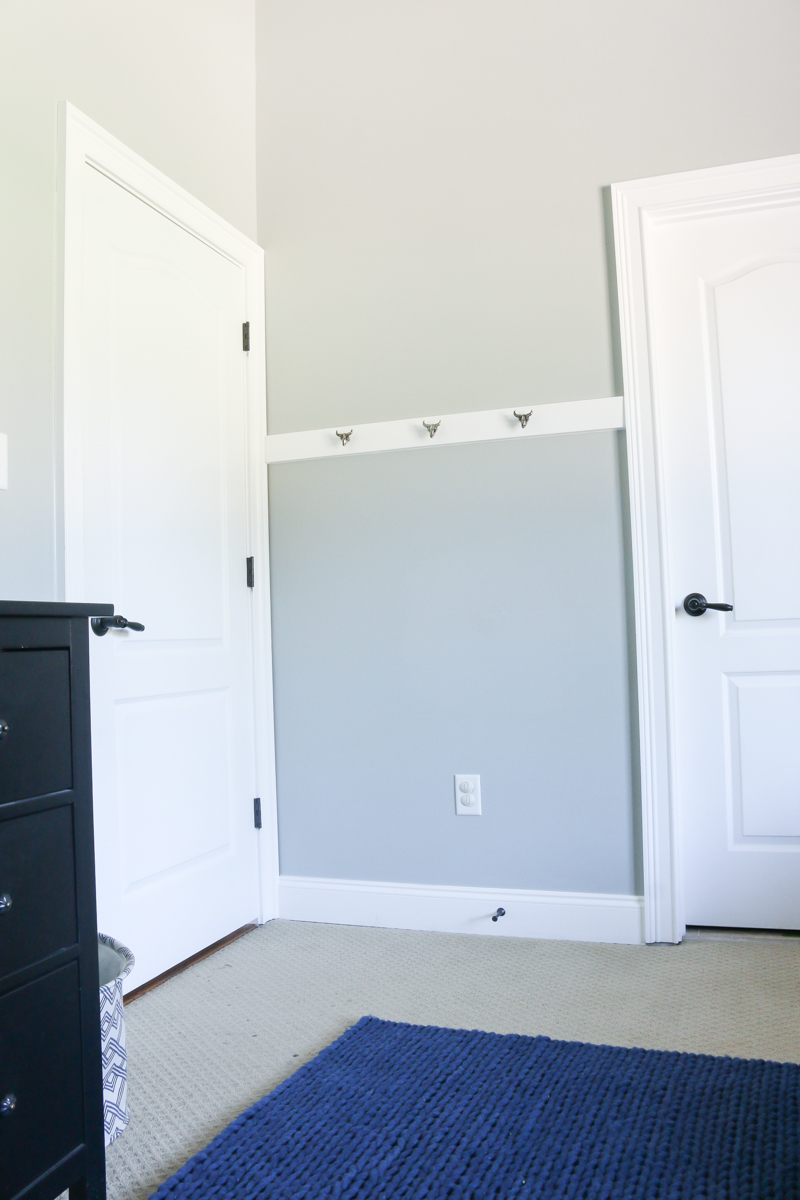
Okay….so the whole thing felt really great as is….but I wanted to spruce it up a little. This room has massively tall ceilings so I wanted to make the hook area feel taller too.
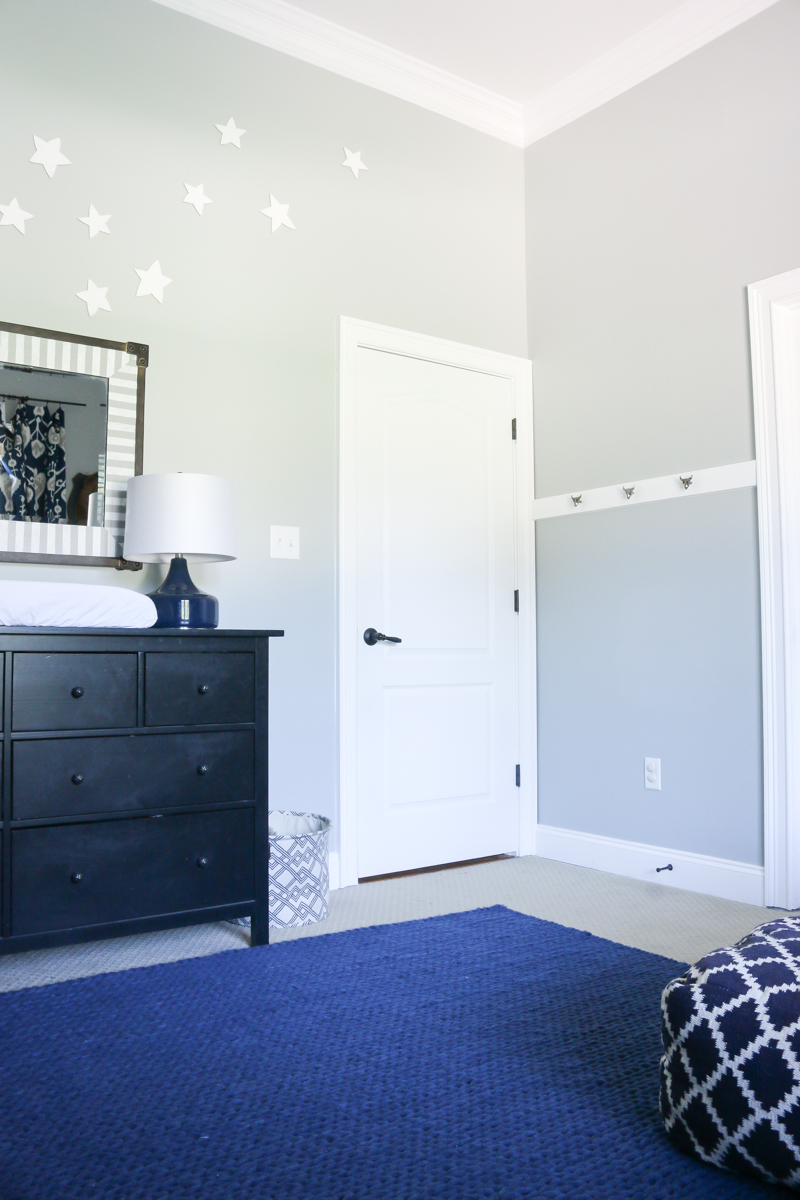
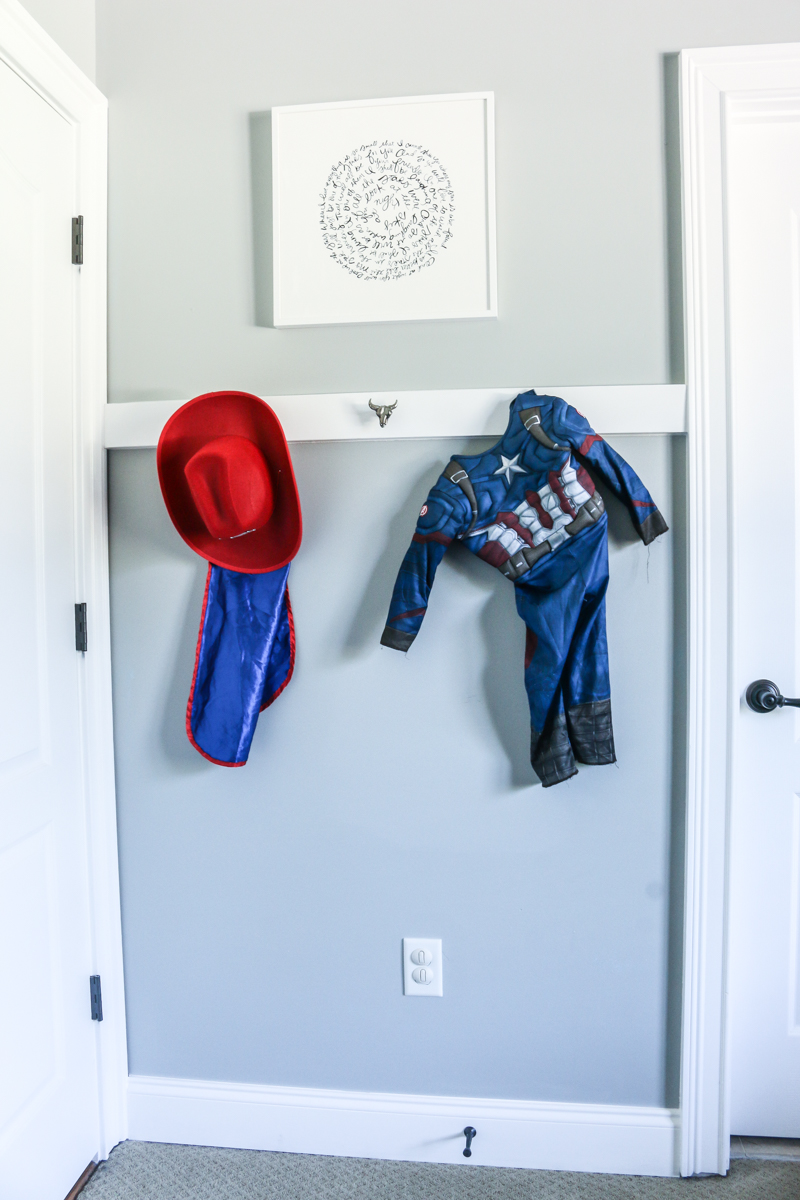
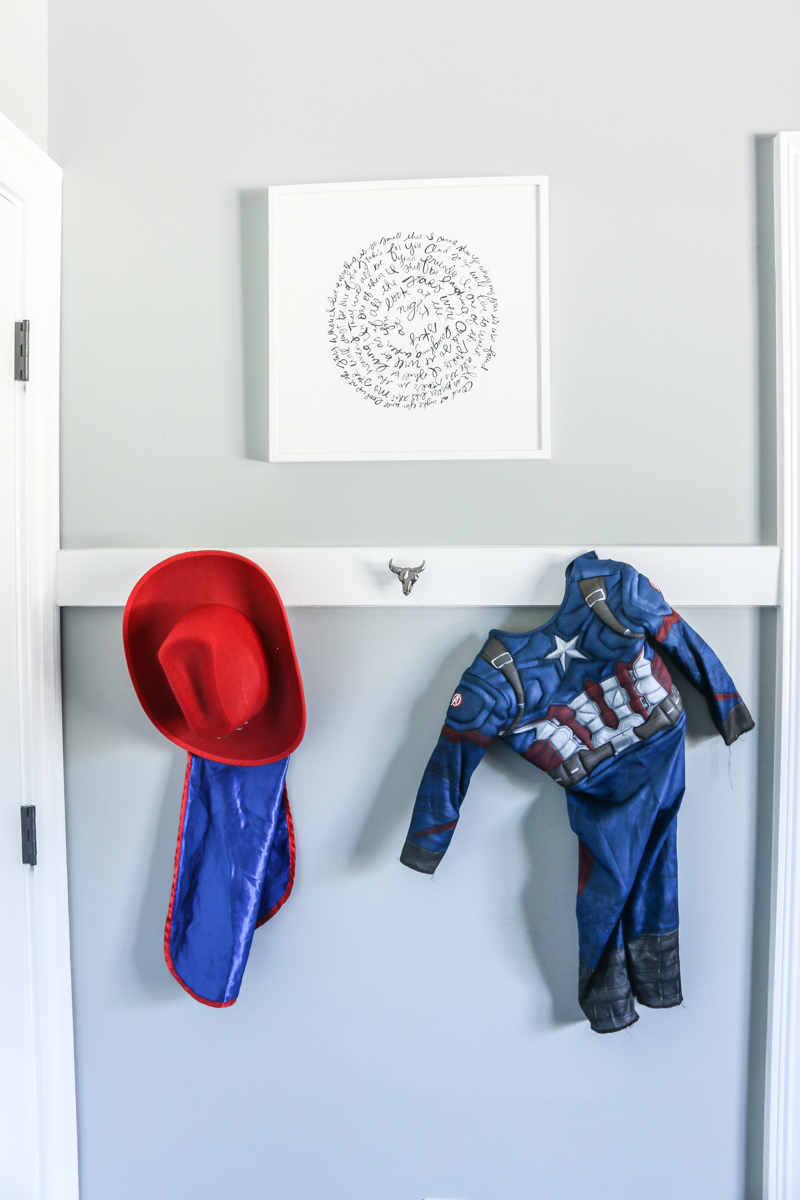
I got this art from Minted and I am OBSESSED. It has a quote from The Little Prince….which is such a bittersweet and poetic and all the feels kinda book. It’s one of my favorite quotes from that entire story and it’s perfect paired with my spray of stars that I put on the wall next to it.
See the stars? If you missed how I installed these, here is the post.
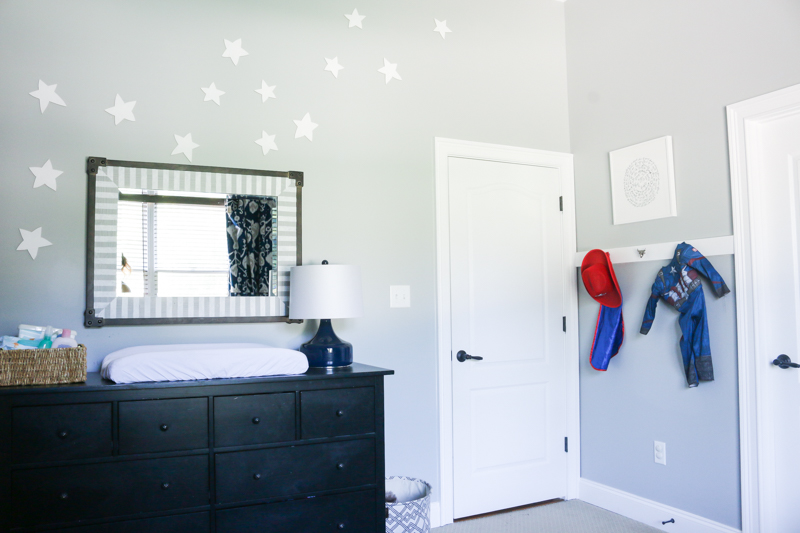
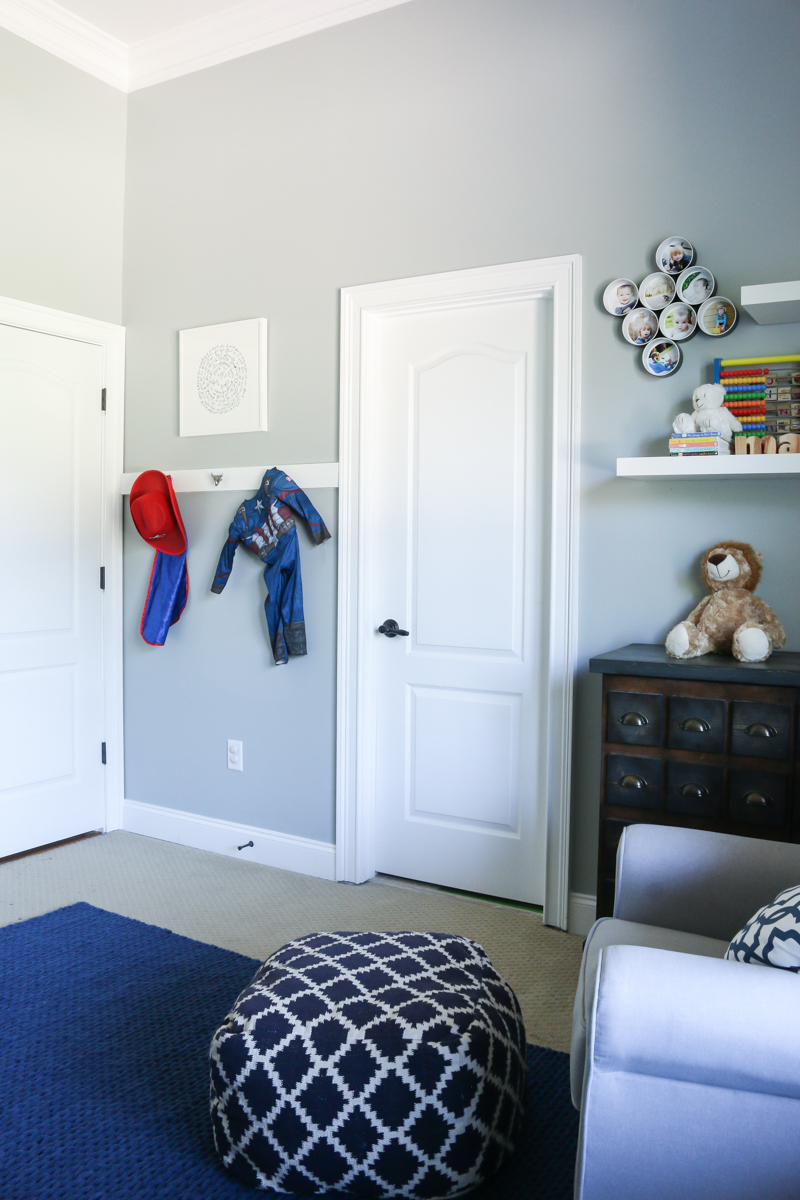
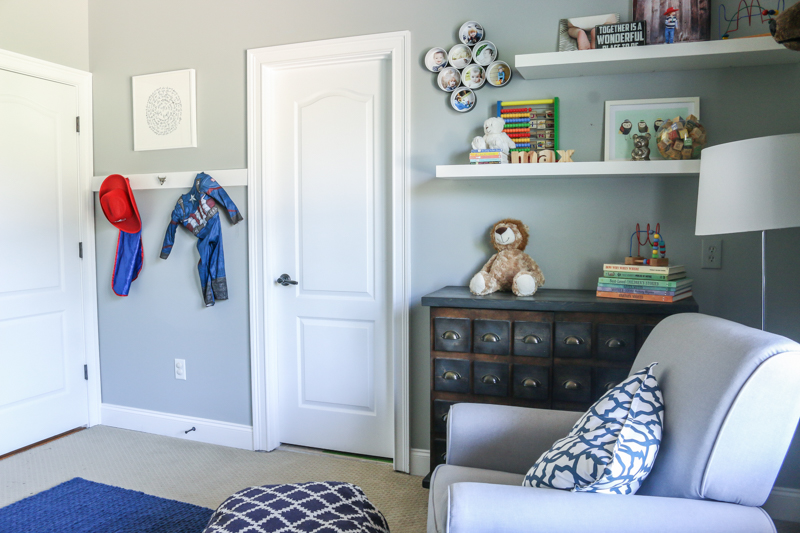
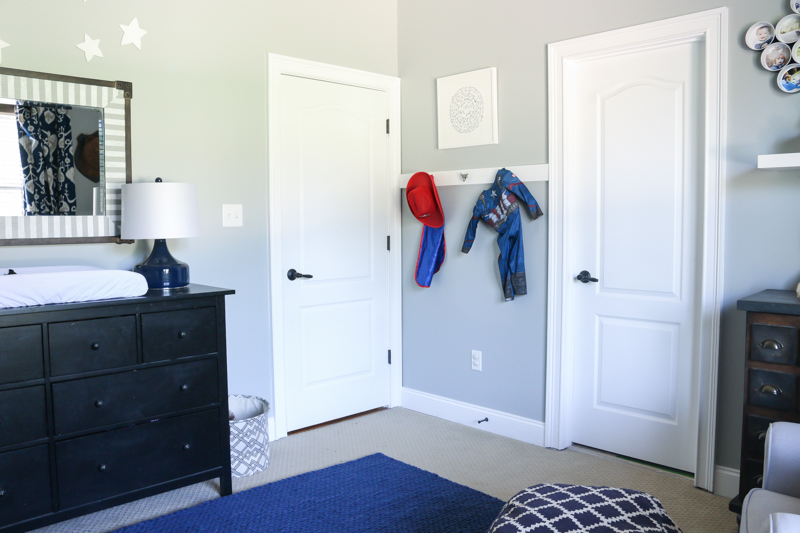
I couldn’t help but also make sure that LJ’s signature cape and red cowboy hat got a place on the hooks….as well as Max’s Captain America costume that he wears every other day 🙂
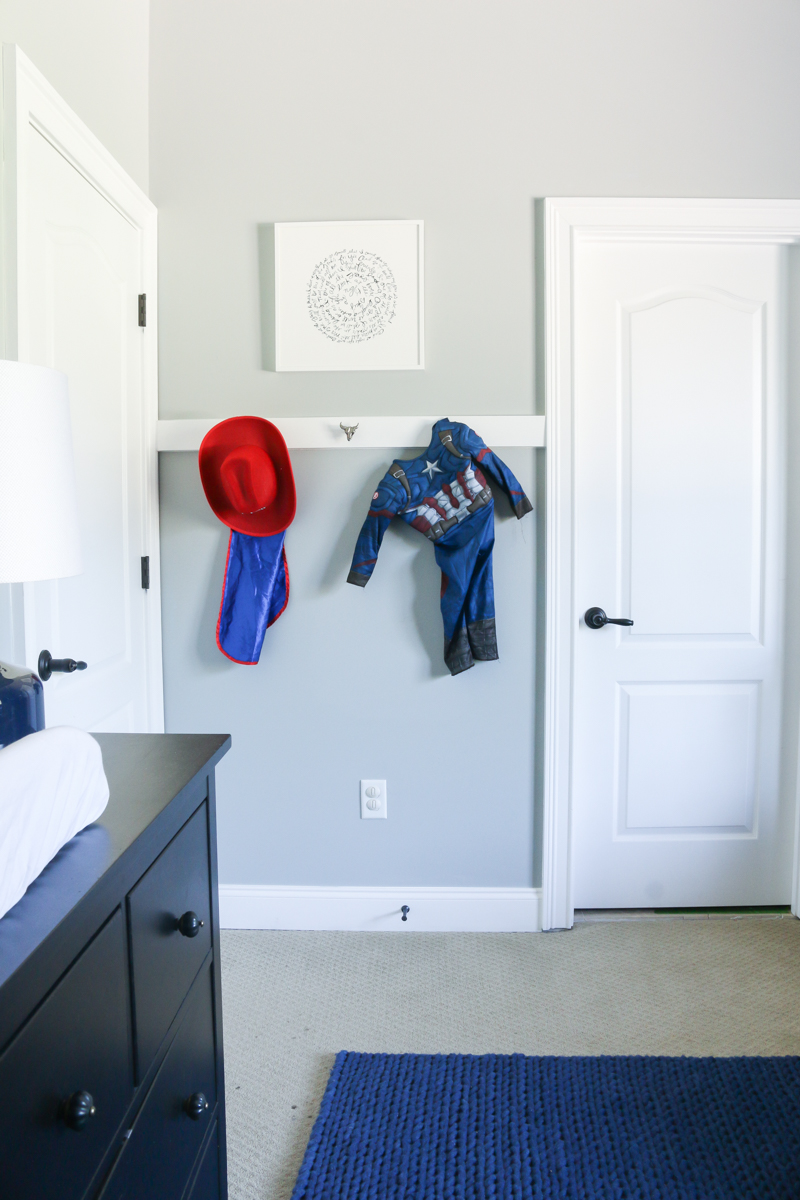
As far as placement went, I wanted to make sure that it didn’t compete with the floating shelves on the same wall. So when Jeremy installed it, he made sure to align it with the lowest shelf.
See the stars? We always sing twinkle twinkle at bedtime (among the thirty other songs! ha!) so the boys love them. If you want to see that DIY, here is the post.
More shots of the room….
So that is the DIY longhorn hook wall! I absolutely love it and so do the little boys….and I think it will grow with them too. Except it won’t be capes and costumes….its gonna be sweaty socks and jock straps 🙁 But let’s not think about that….because then I’ll become a hormonal mess about a hook board. And nobody wants that. Trust me.
p.s. I’m going to be at The Haven Conference tomorrow! And I’m teaching a class all about a couple tools that you may have never tried out….so if you are going to the conference, I hope you come see me! It’s already half full and we have a capacity so if you want a spot, you may want to get there a little early 🙂 LOVE YOU GUYS!!!
SHOP THIS SPACE
