I can only blame myself.
I mean….technically speaking, I could blame anyone….I could even blame you with all your irresistible wit and incredible good looks….it’s the internet after all…..but I’m gonna own up to it and embrace my mistakes…it really is all my fault.
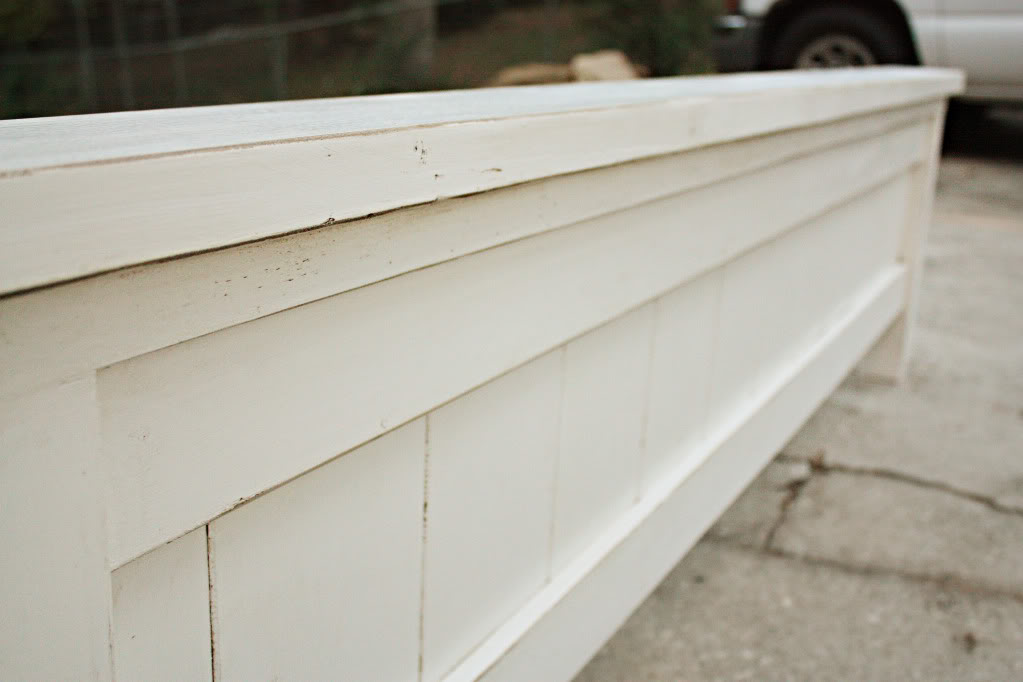
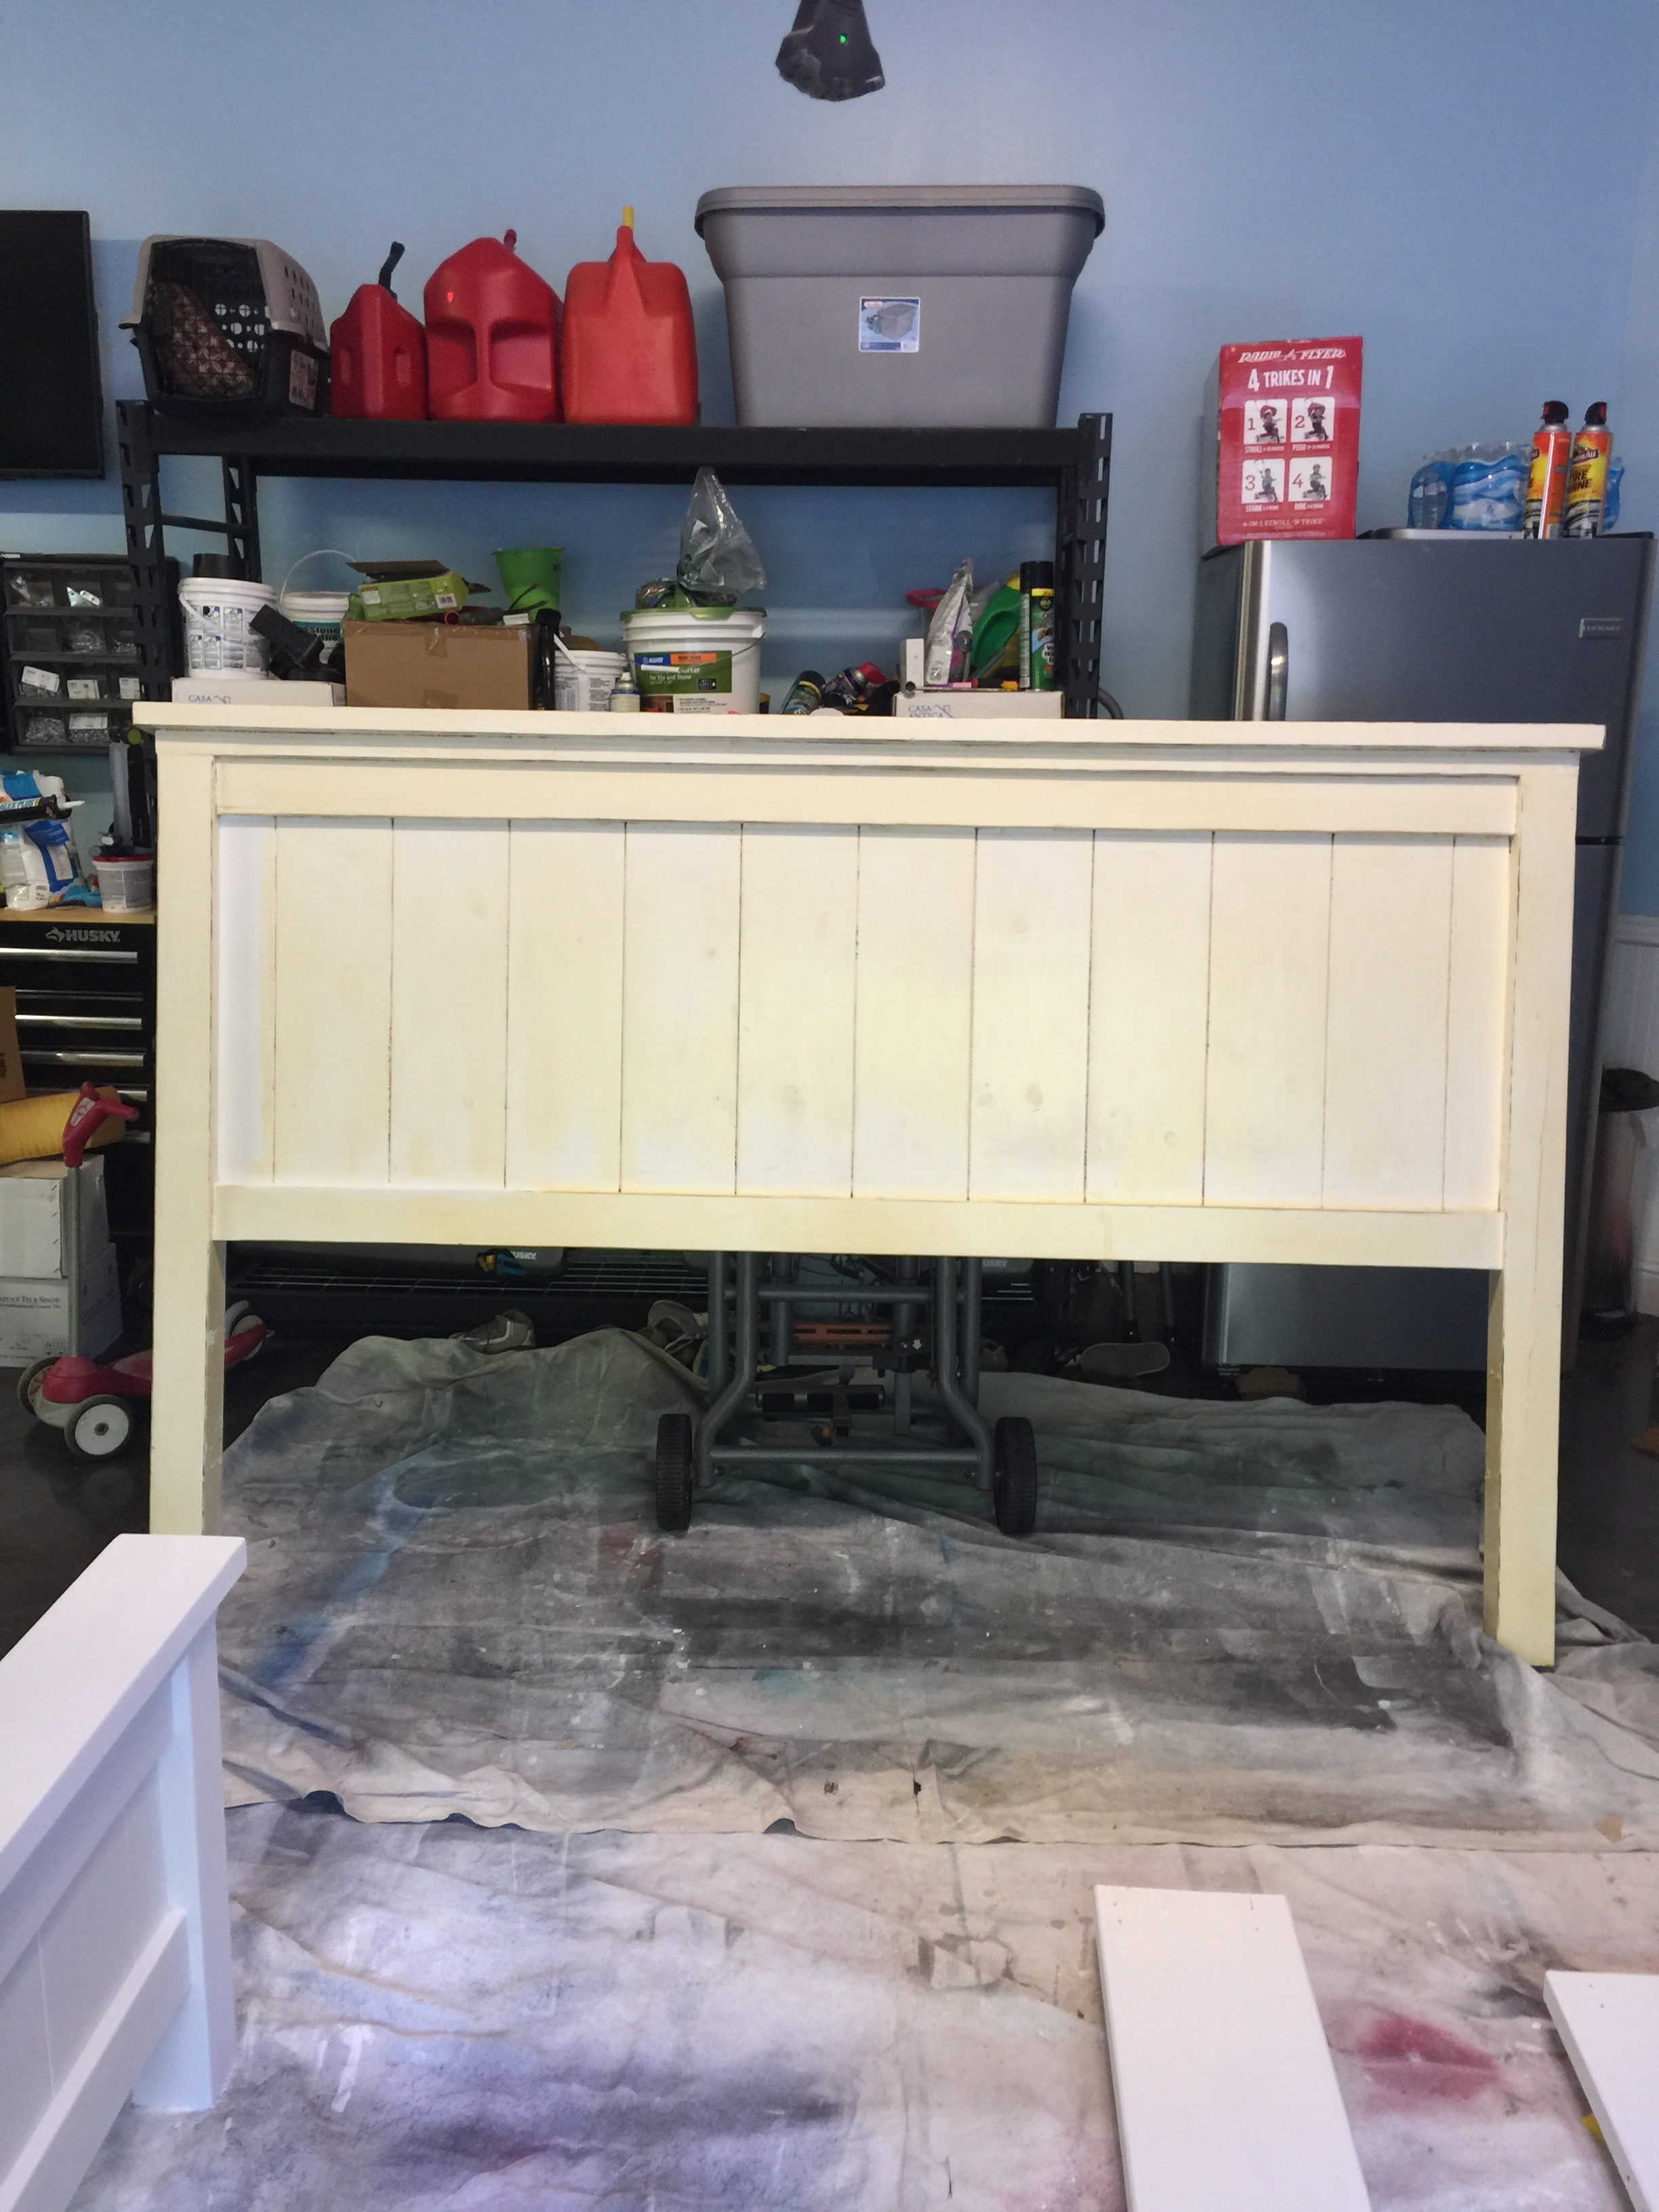
So our bed turned yellow. Not vibrant newly sharpened pencils and taxi cab yellow….more like urine in a cup yellow (pregnant much Katie?) And in this case, we saw it yellow and let it mellow.
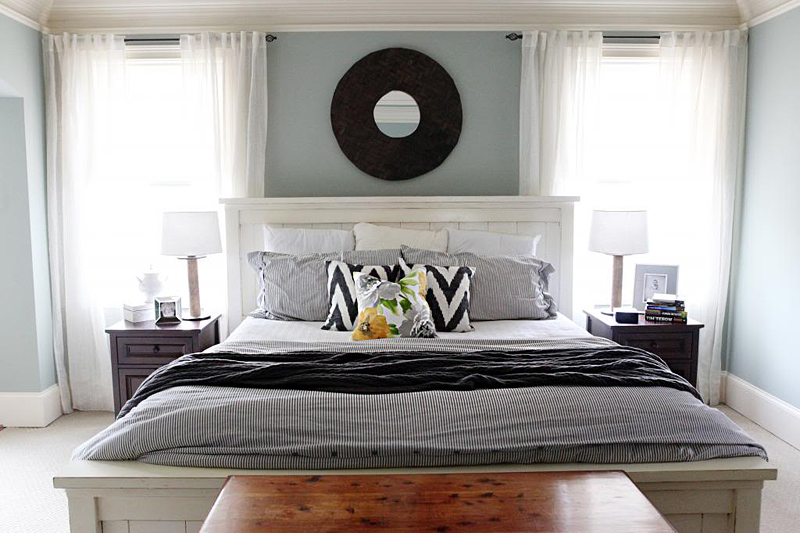
Back in the day, Jeremy built his first ever piece of furniture and it was a king sized farmhouse bed adapted from an Ana White plan. Proud wifey moment right there! He knocked it out of the park for his first build and we have slept so many great nights on that thing. And yes….done many other great things too 🙂 (Ewwww!!! But also hey HEYYYYY!)
I blogged about the building process and how we chose to use Antique White paint and glaze it with a dark brown and then apply a polyurethane because (AND I QUOTE) “we wouldn’t mind if it turned a little more cream colored. I think it would only add to the antique look.”
WHAT THE WHA????
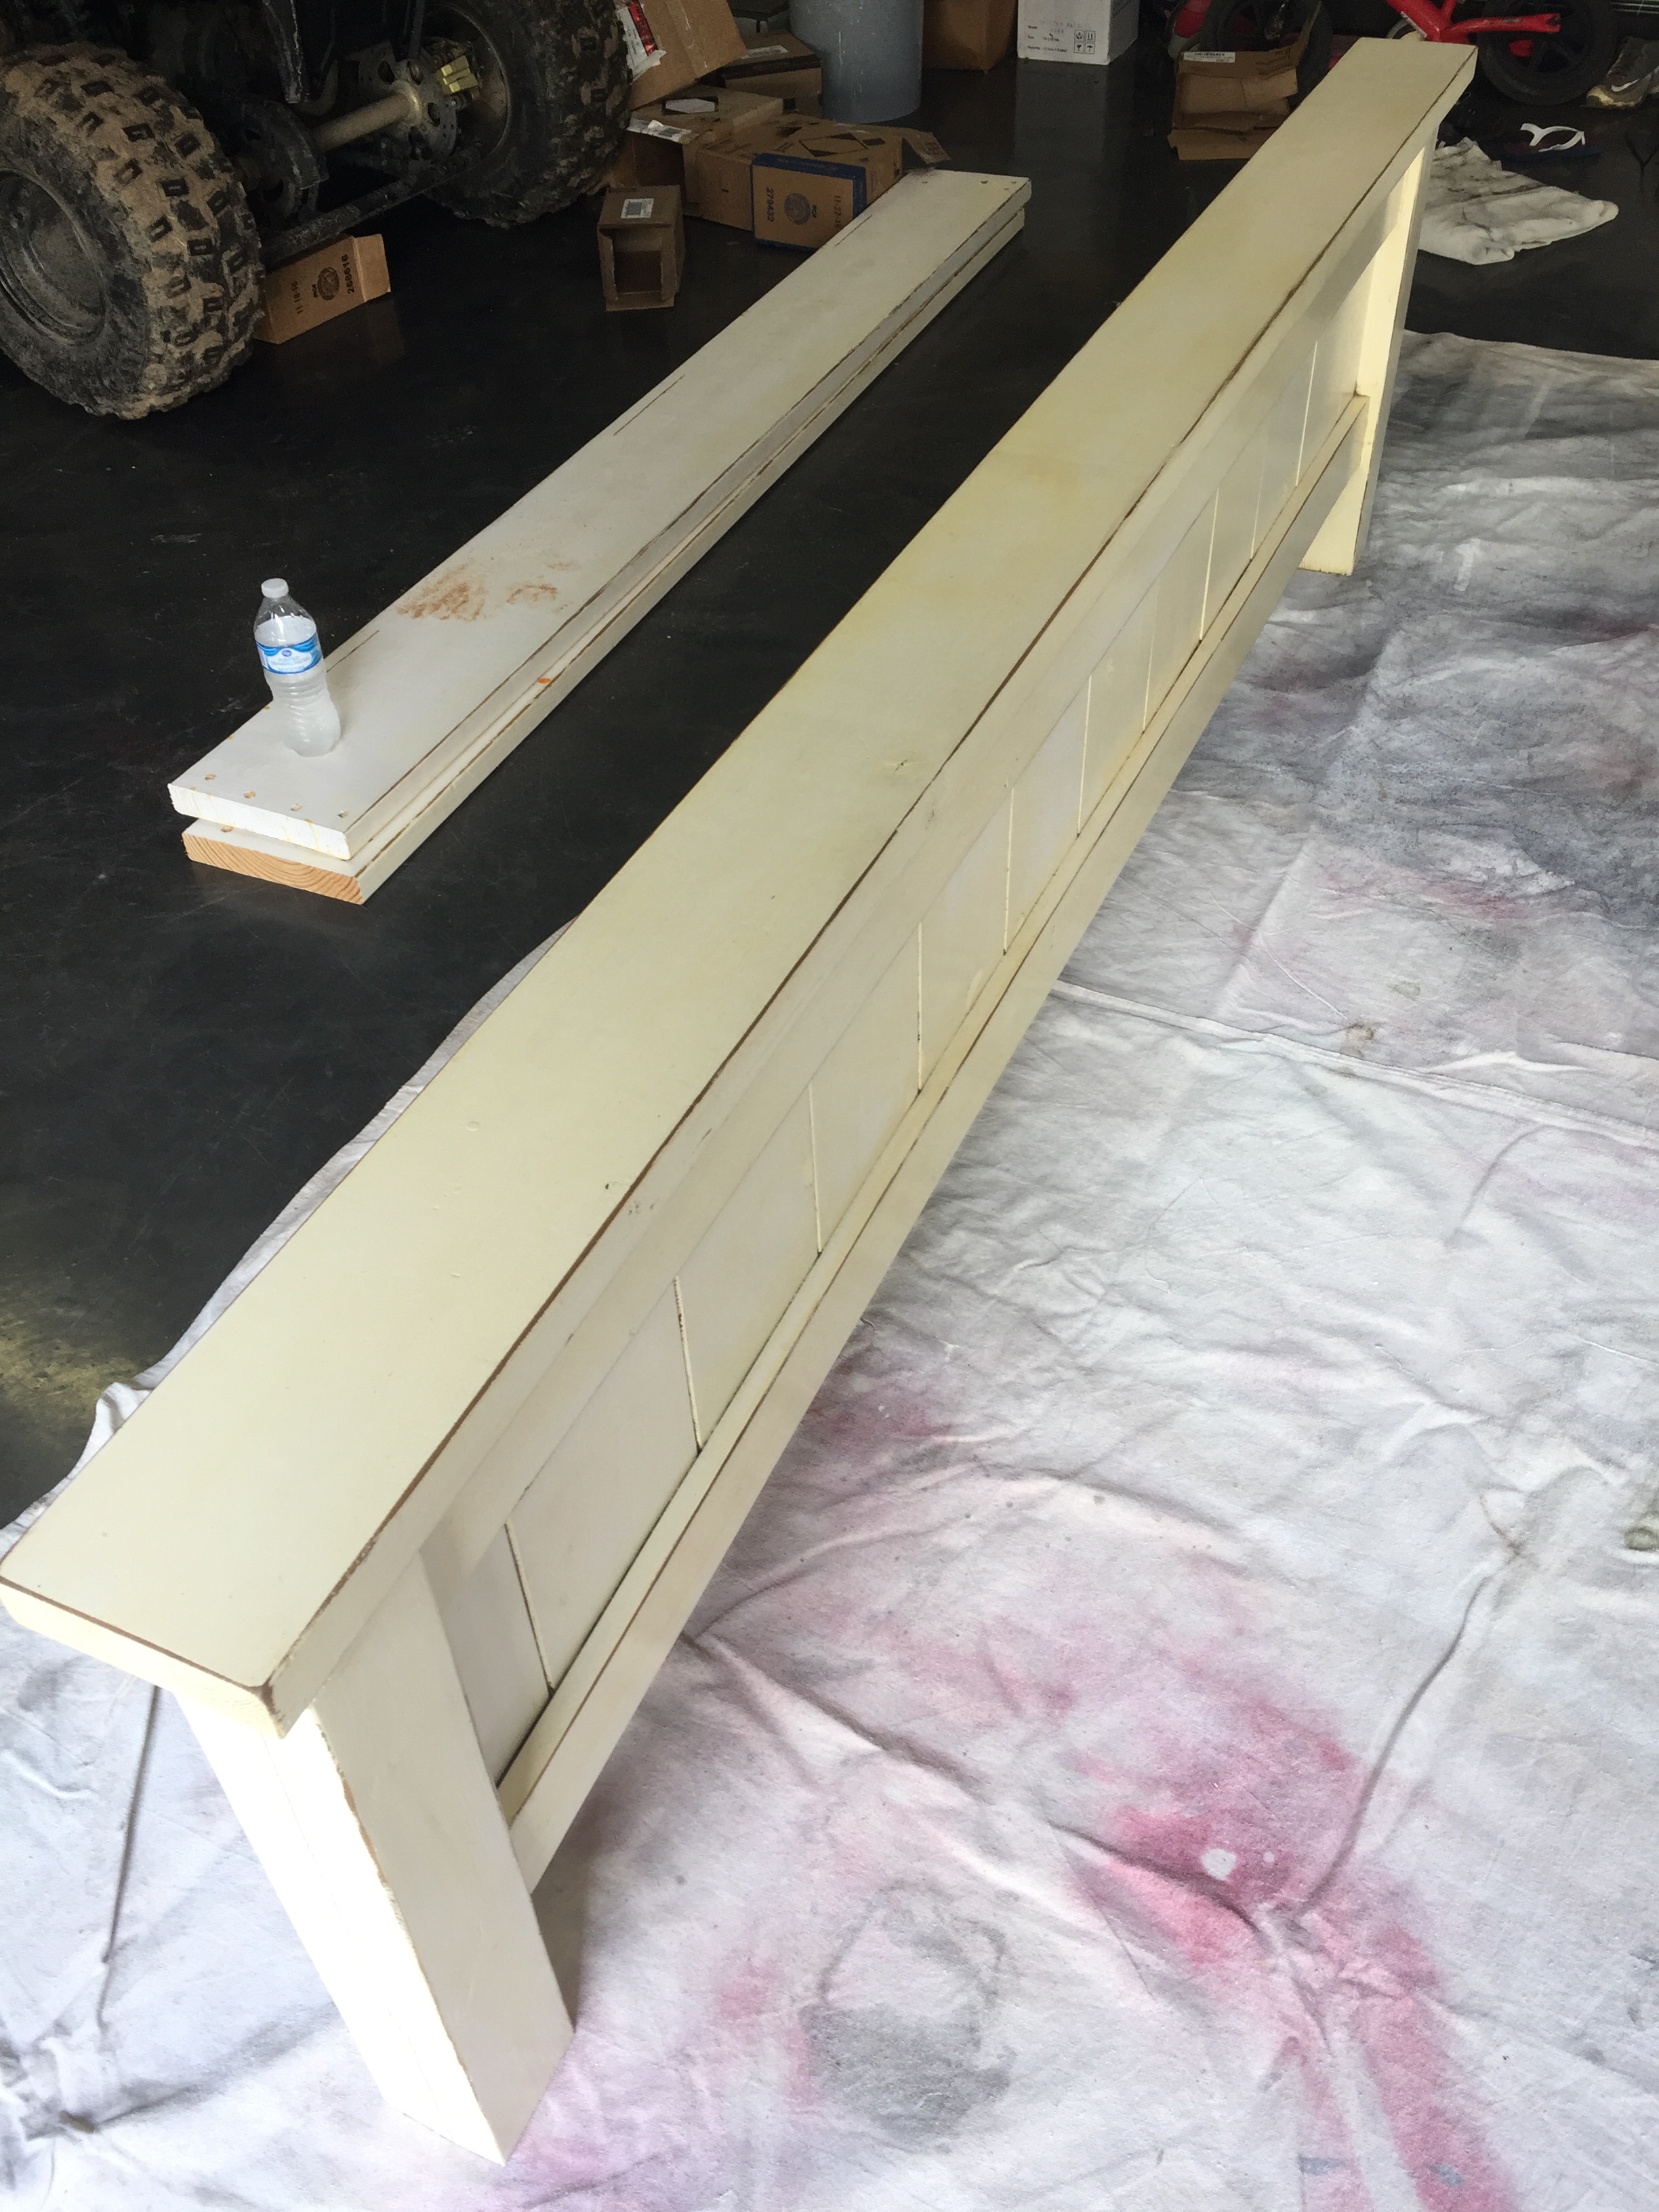
When you say something like that, you have to expect it to turn straight up yellow. Which it did. Unevenly.
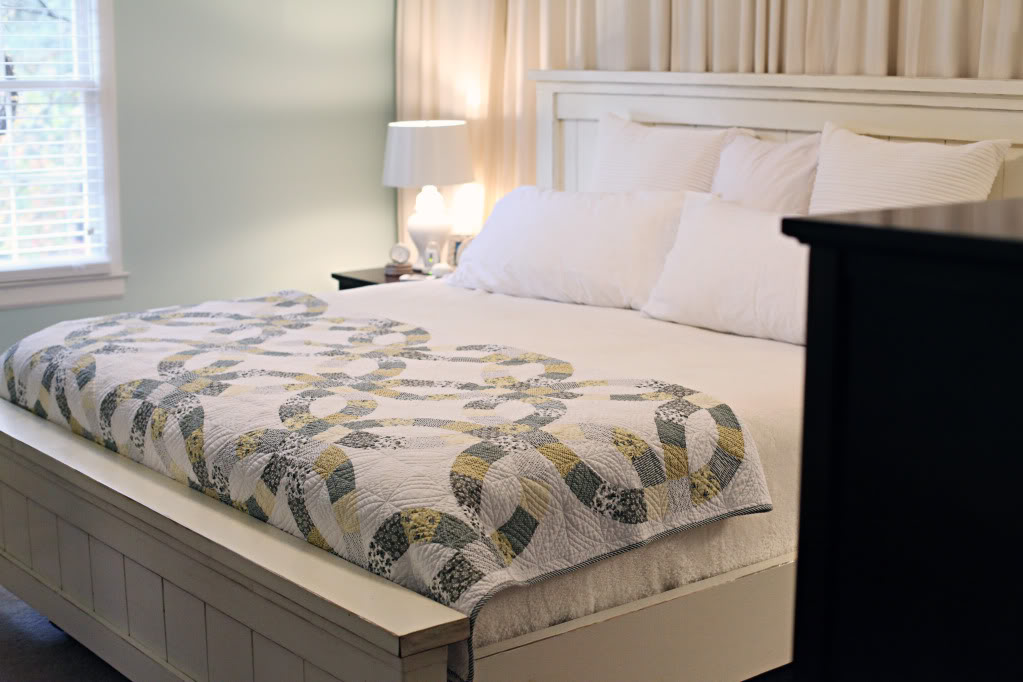
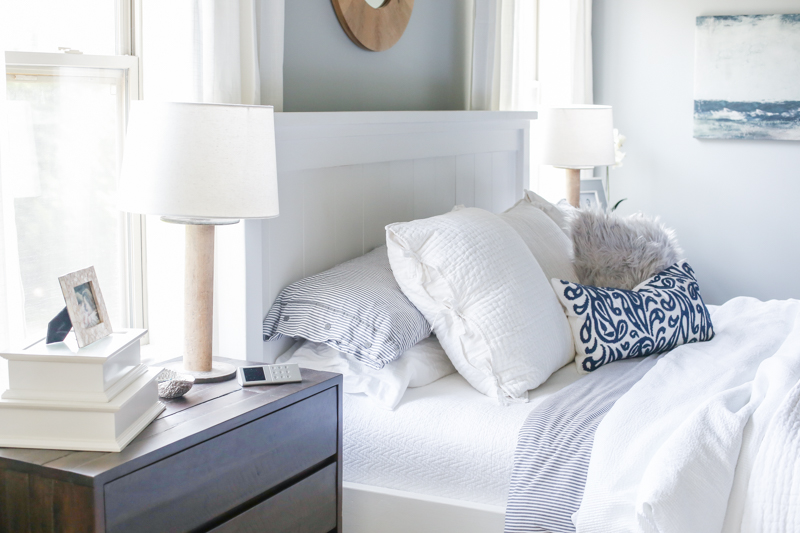
You guys really couldn’t tell much from the previous photos of our bedroom…..probably because those are lightened and cooled down in photoshop. I mean…I’m a blogger. I’m gonna cheat.
So anyhoo…when we decided to give the space a makeover, Jeremy said specifically that we absolutely had to repaint the bed. I felt like in my current state repainting it was completely optional….I mean…the uterus decides, right? Well, he took the bed apart and then I realized how right he was…there was no way we could NOT repaint the yellow bed.
I wanted it to be white but I also realize the style of this space is different than our old bedroom. In that space, we had a floor to ceiling wall of curtains, fresh turquoise walls, and more traditional lines. Now we are creating a more modern/coastal space with lots of grays, some industrial touches but overall it was going to be more clean and less warm.
So keeping that fact in mind helped me decide the finish. In my brain, modern is more matte. So I wanted a fresh white color to go with the grays and white bedding and matte finish to make the farmhouse bed more coastal modern. Warmer colors are definitely more inviting, but since the stacked stone fireplace is really close by (and it’s a cooler white), we knew that matte white would be a great choice. No glaze.
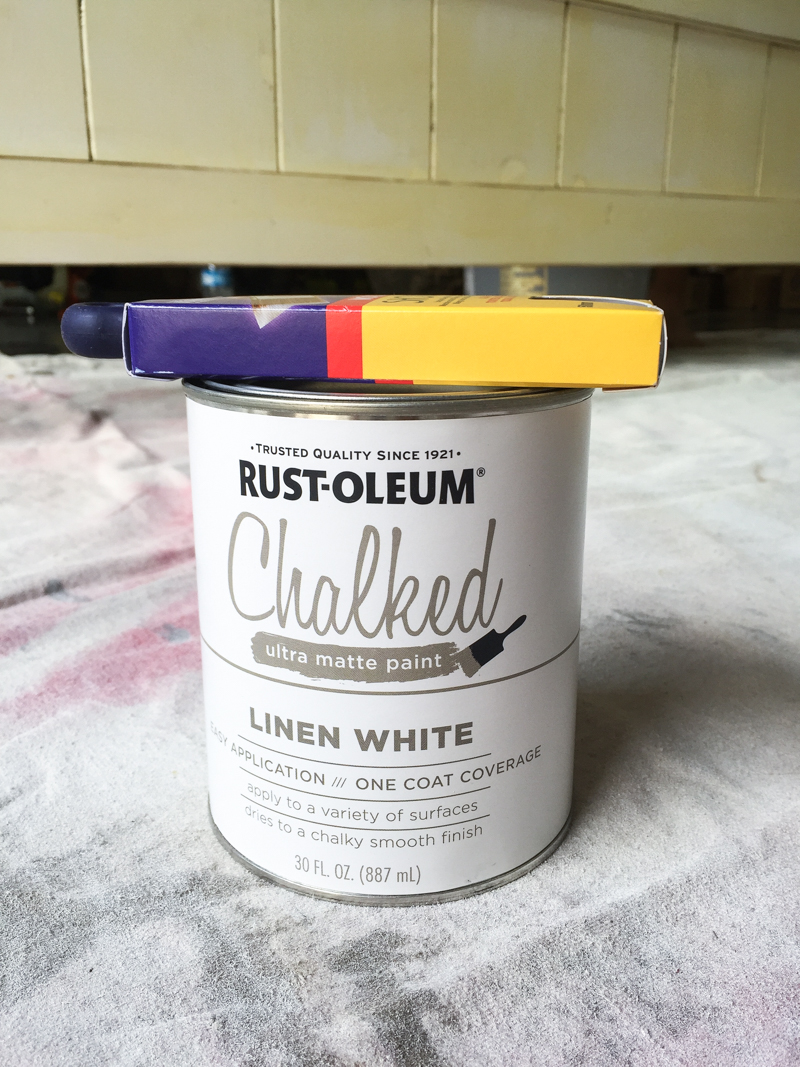
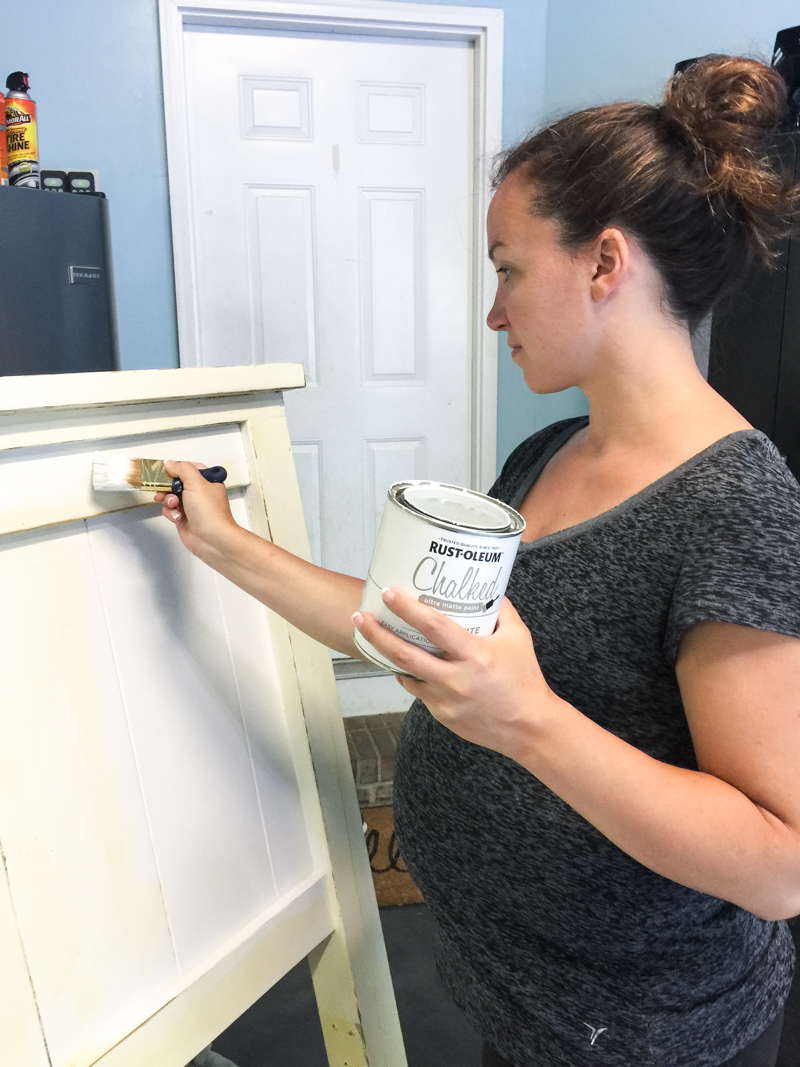
I went with Rust-Oleum’s chalk paint because the minimal work involved (aka because I am lazy and literally never want to sand ANYTHING) and also because I really like the finish…ever use chalk paint? It’s velvety smooth.
JUST LOOK PEOPLE….LOOK WITH YOUR EYES. It’s incredible how color blind I was before. I mean…that’s not warm antique white….that’s straight up bananas. Like as in yellow. But also like as in BANANAS.
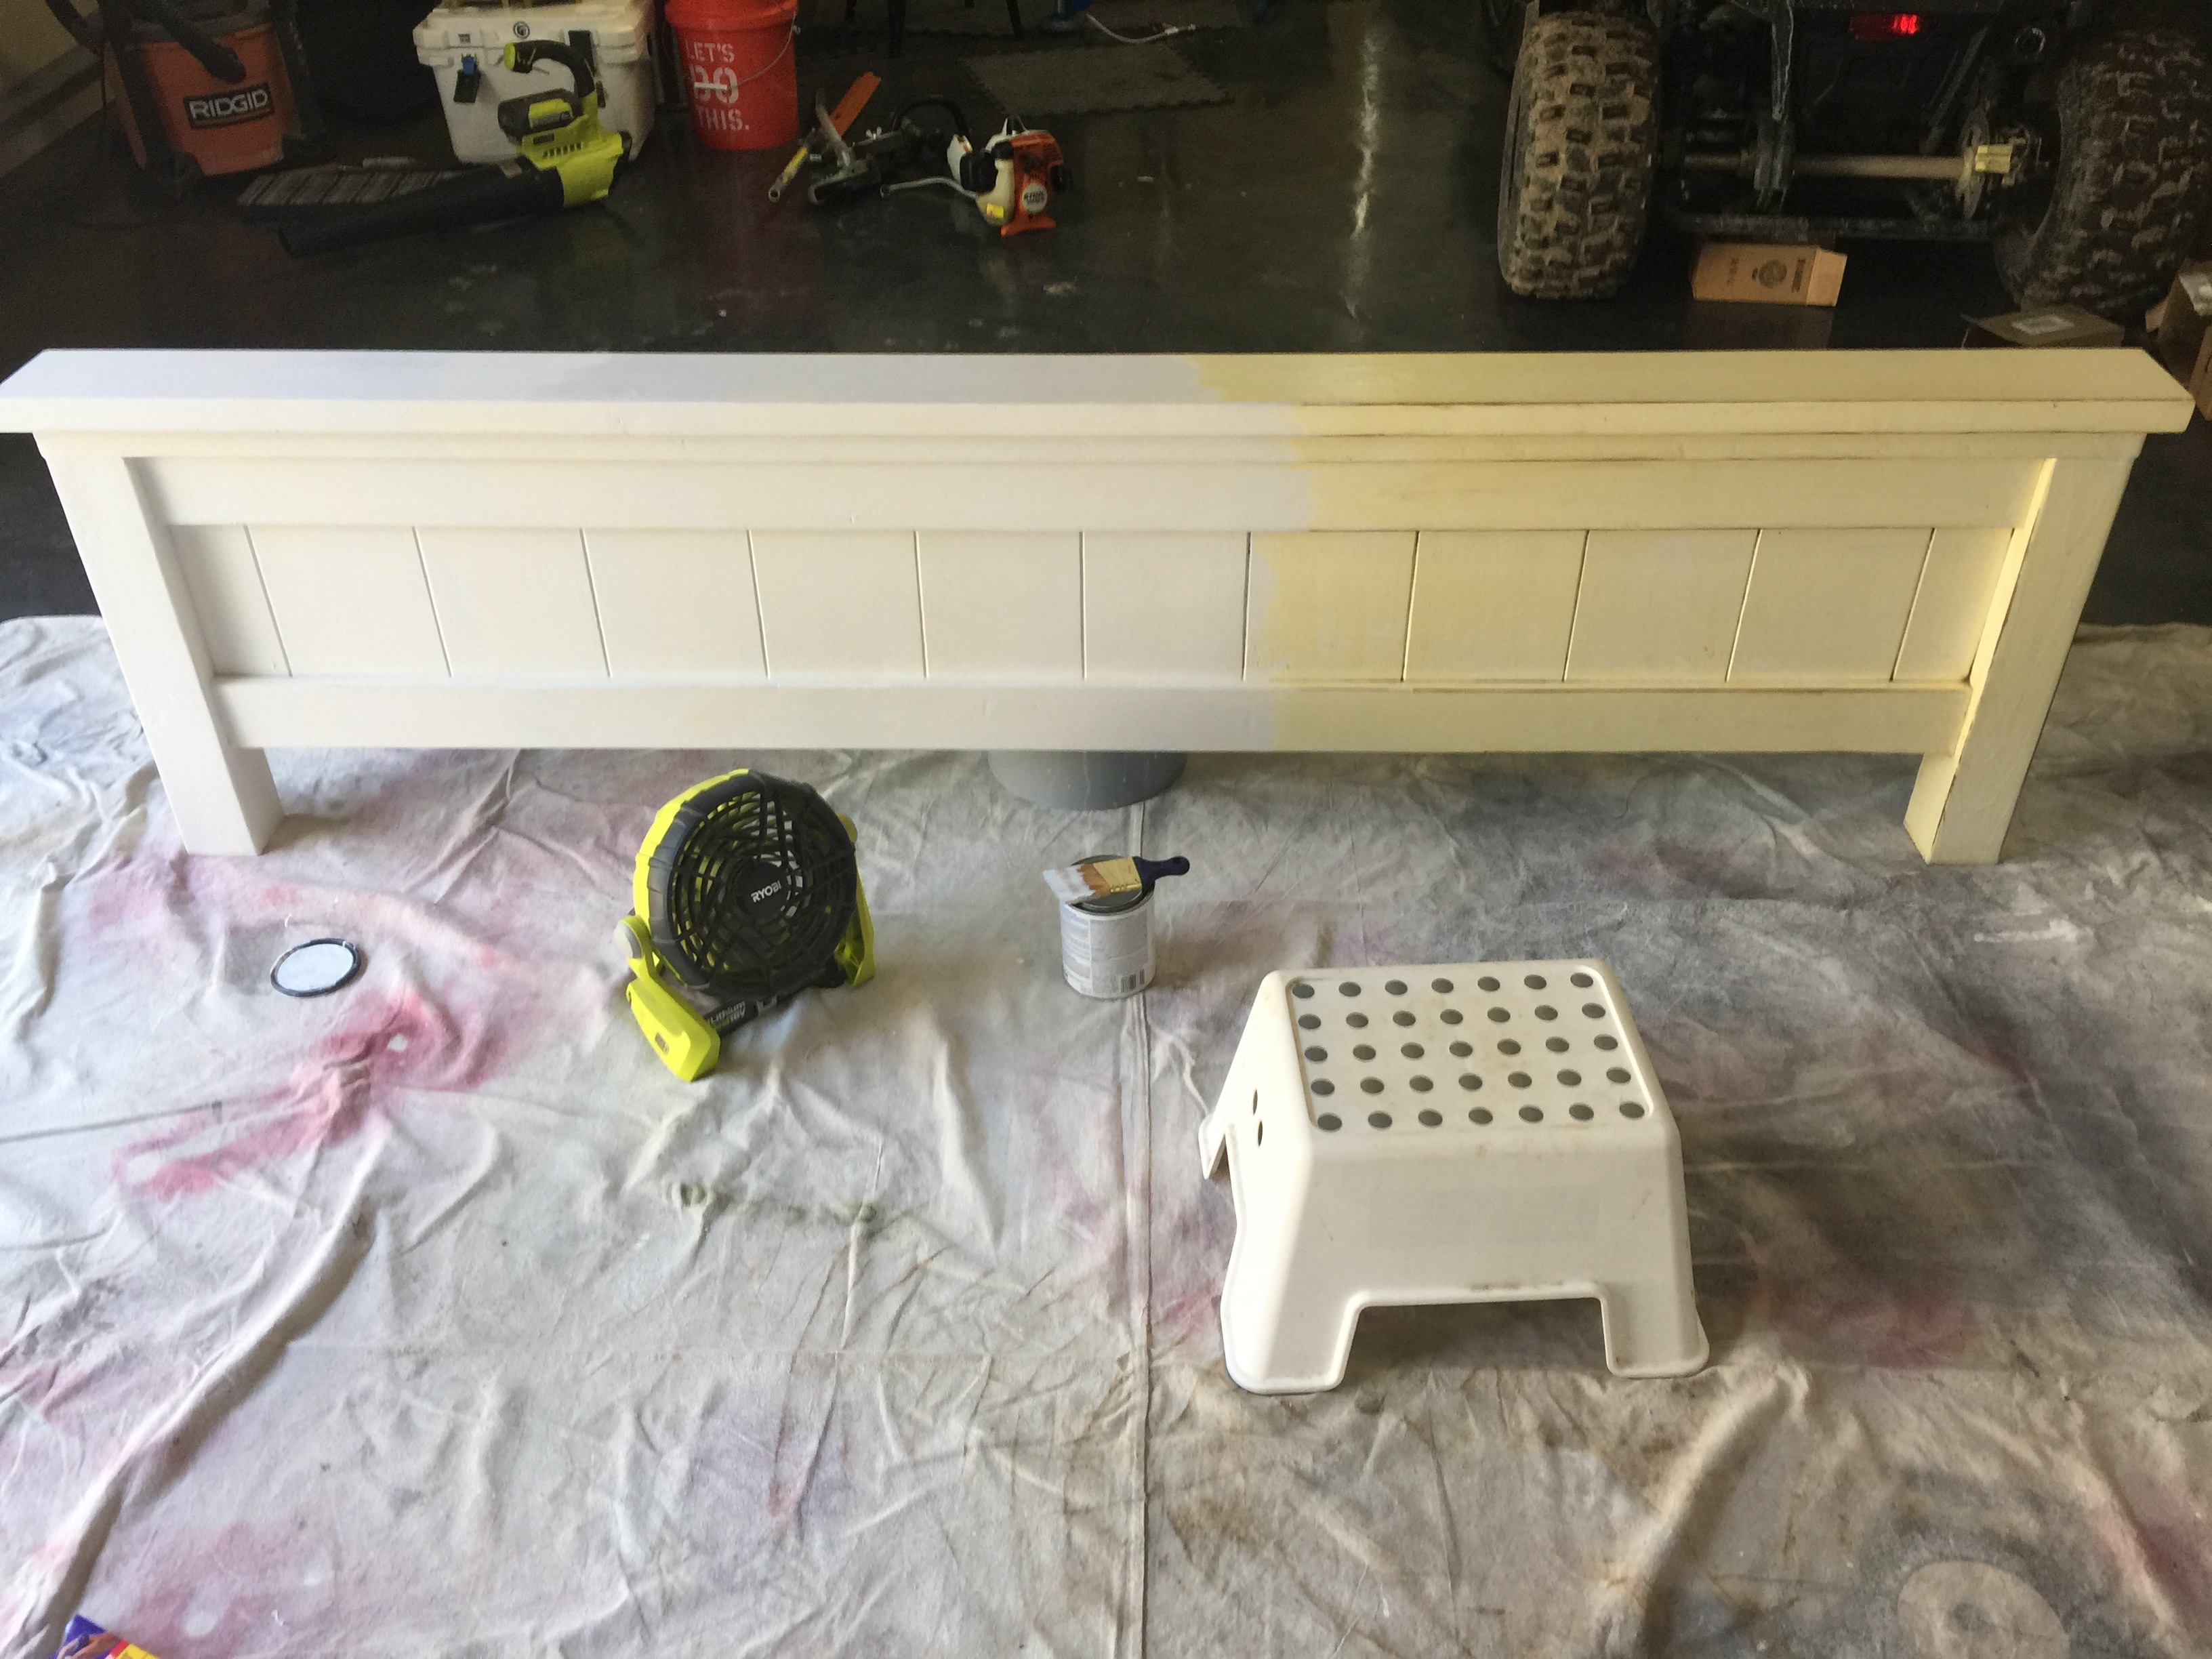
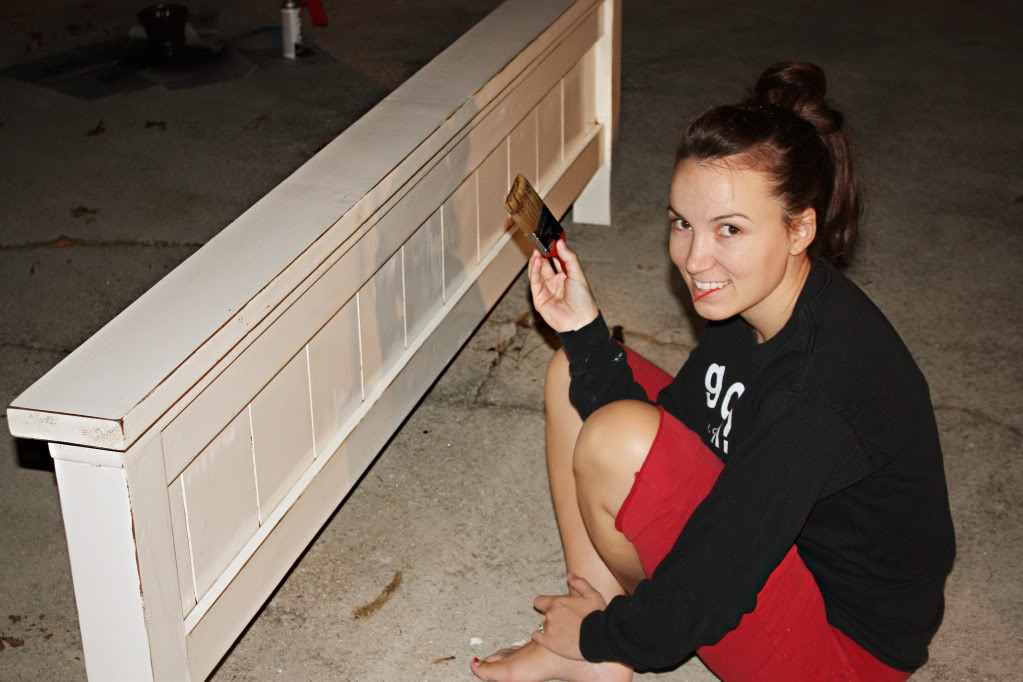
I do have to admit that I like to apply the coats of chalk paint on the thin side so that I don’t have any drips. Also it was a hot day and the american flag shorts just had to come off. It’s called Naked DIY and it’s the next hit show on HGTV.
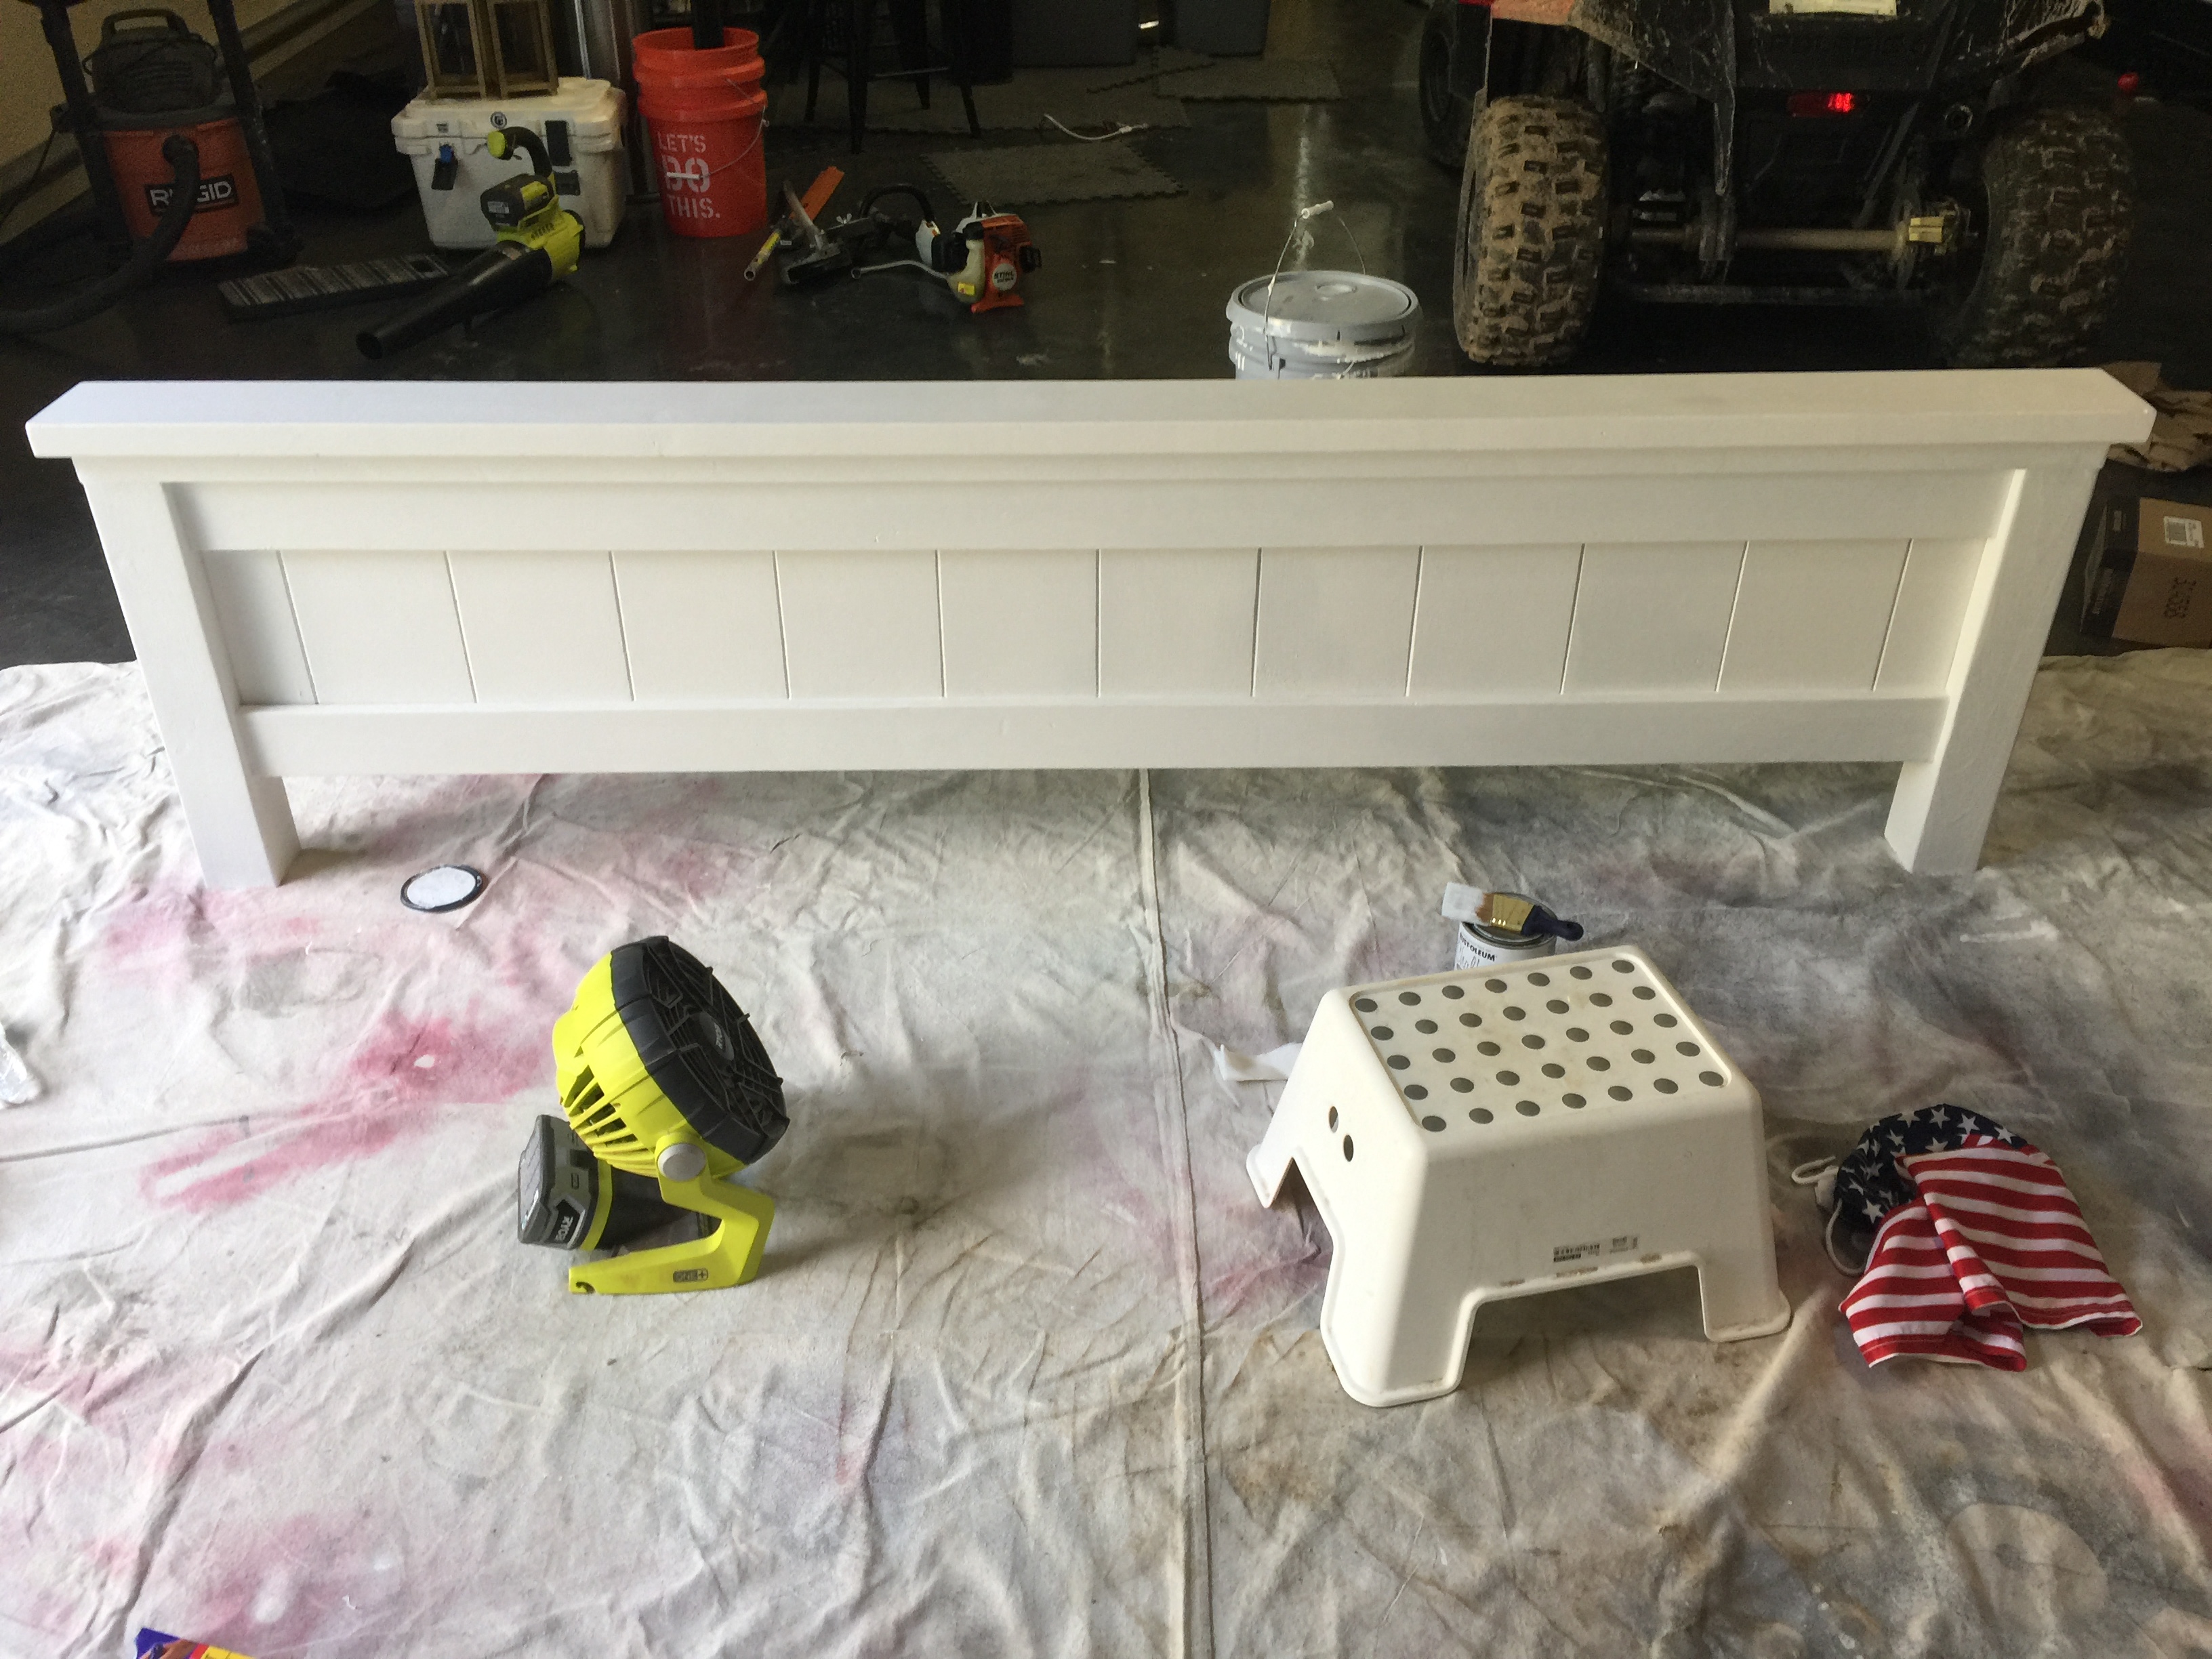
Once I finished the footboard, I put a coat on the headboard.
So the headboard, side rails and footboard both got two very thin coats of chalk paint and they looked SO good immediately. The best part about Rust-Oleum’s chalk paint is that it is a one-coat-application and it literally doesn’t require sanding or prep. I simply made sure my furniture was dust bunny free and went to town.

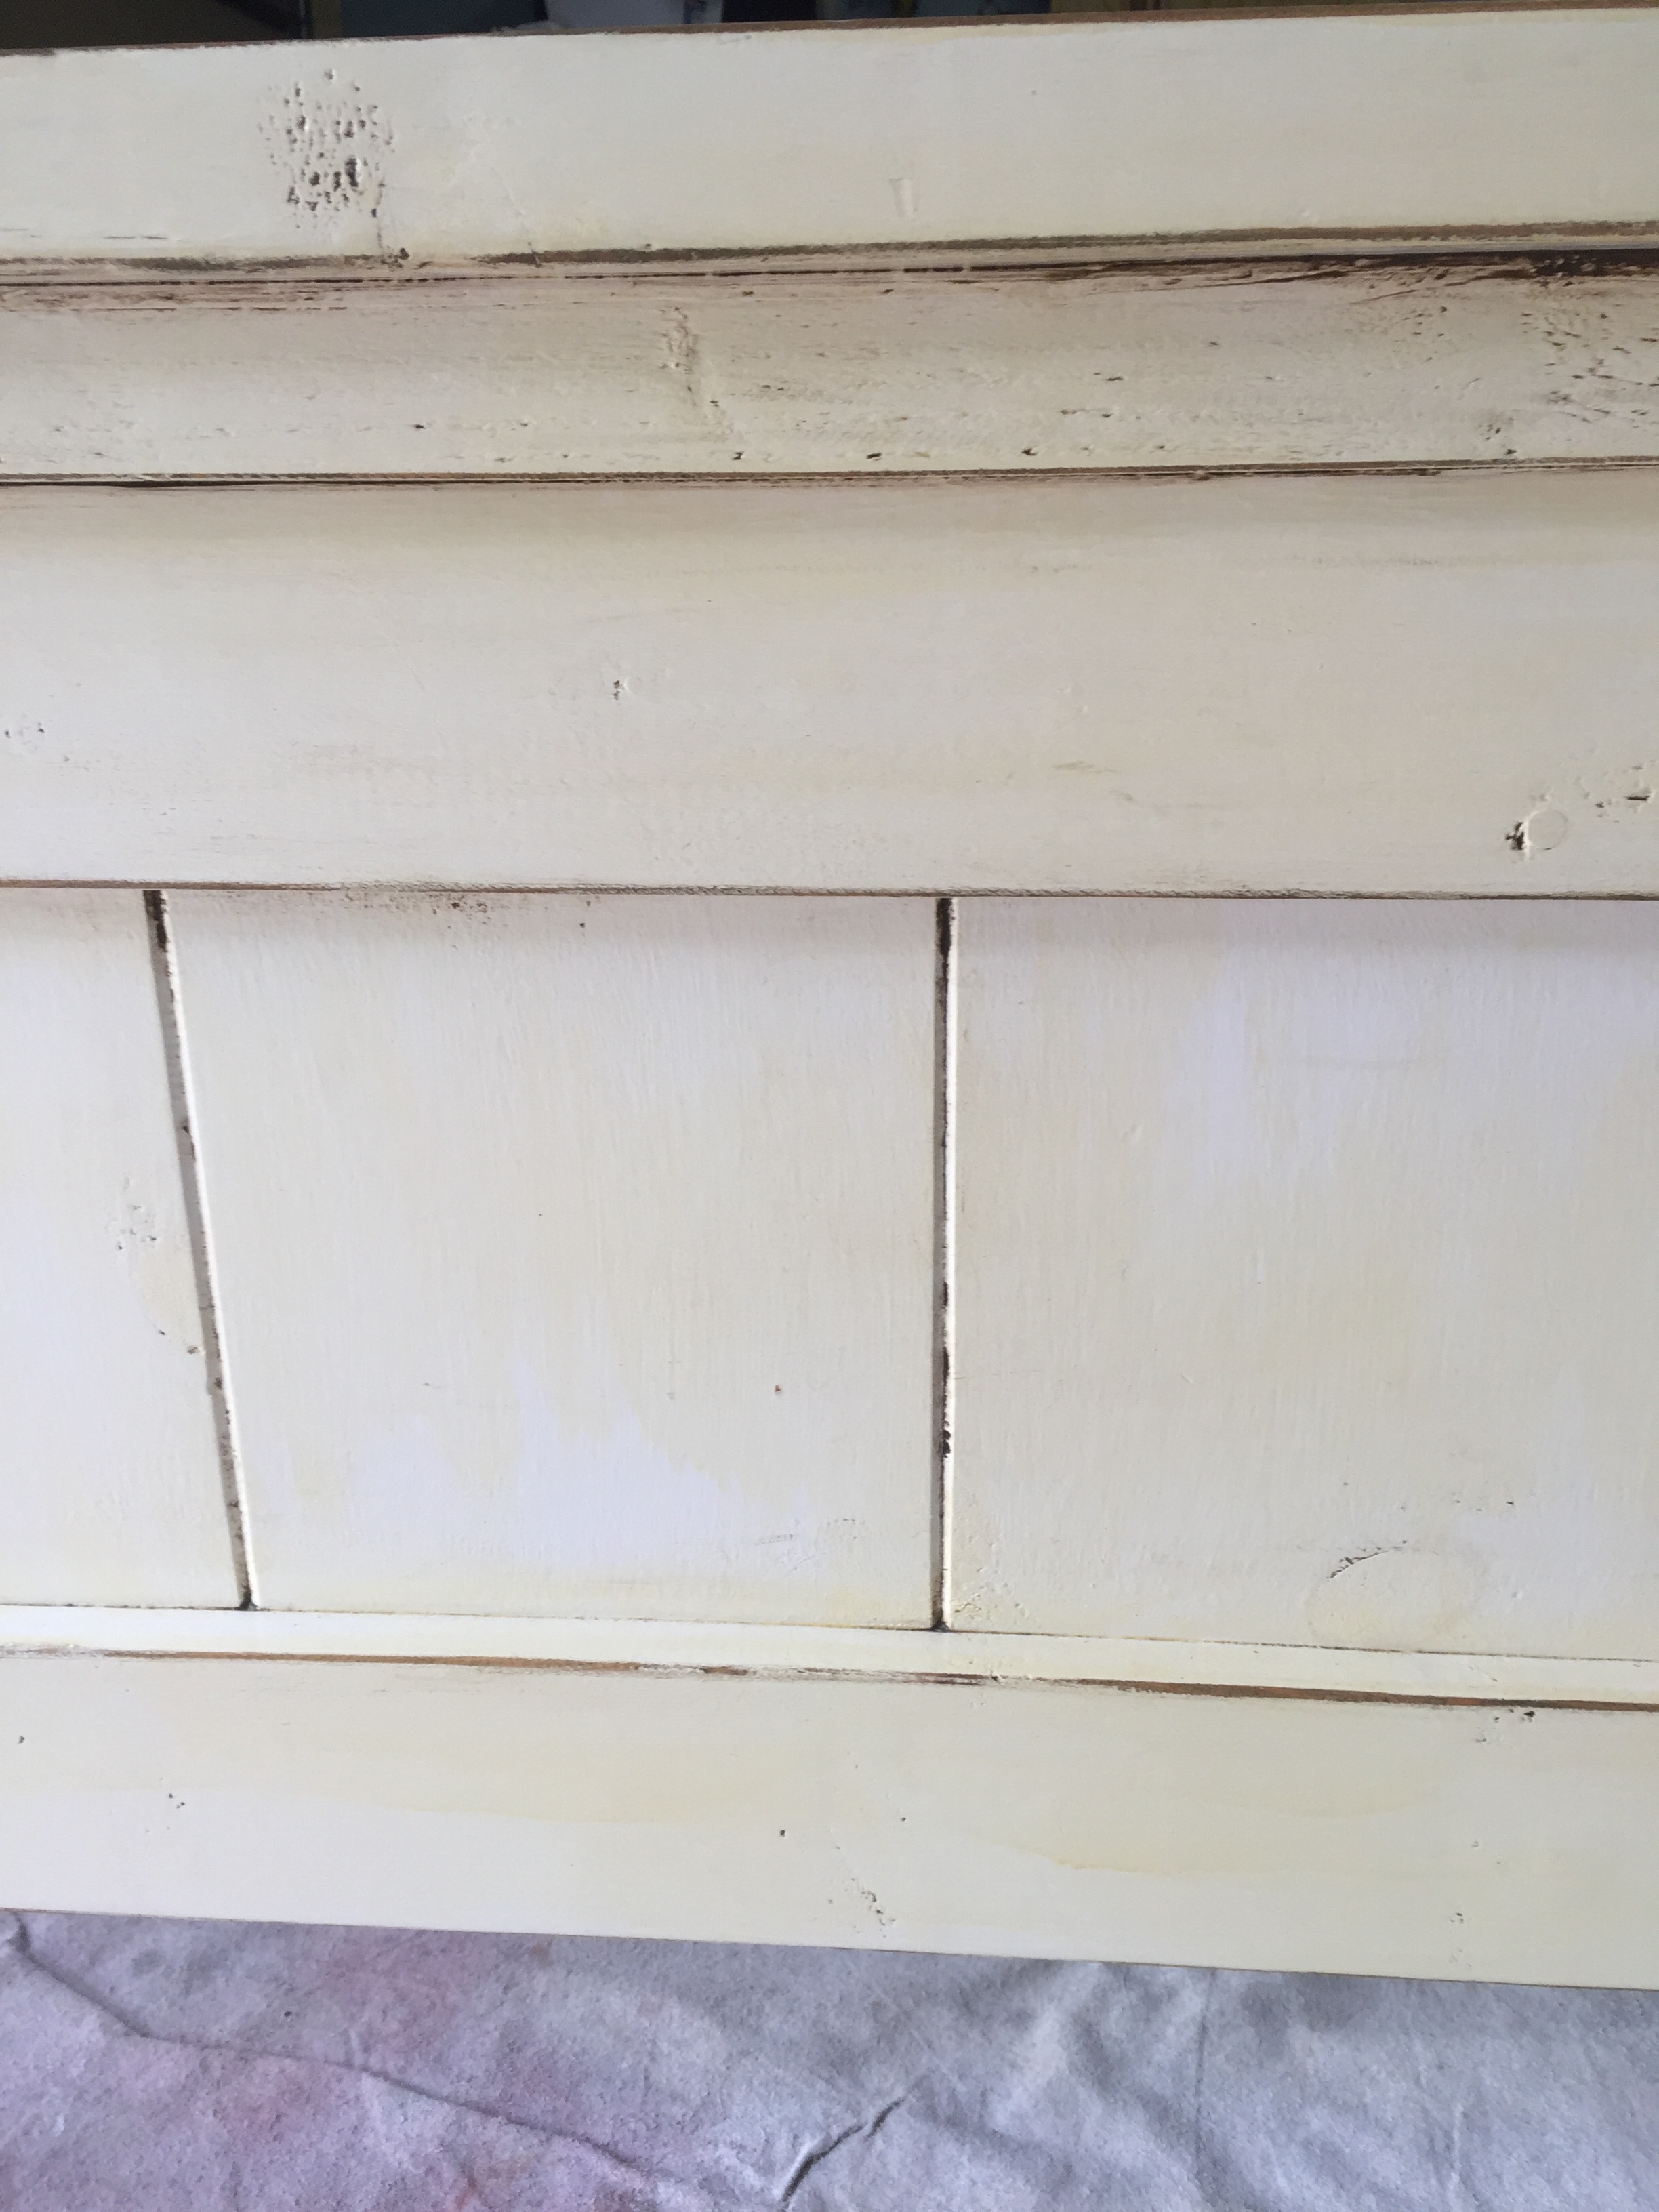
Then we used 220 grit sandpaper BY HAND (that’s important to note) to smooth out the finish. Chalk paint is really, well, chalky…so expect some dust when you sand. I like to use a blower after it’s all sanded and then go back with a dry clean paintbrush to remove any bits left over. You can also use a microfiber cloth to remove the dust but WHATEVER YOU DO, DO NOT USE A DAMP RAG. Trust.
Once my bed was all clean and white, I realized that it was time to seal it properly. Since I learned my lesson the first time, I was NOT about to use an oil-based polyurethane…..not going down in that yellow submarine again. So instead I grabbed the can of chalk paint matte top coat made specifically for this chalk paint by Rust-Oleum. After a little research, the actual properties of the product makes it a water-based acrylic….which is different than a water-based poly. I’m gonna do a little test sometime in the future but for now I’m trusting the pros.
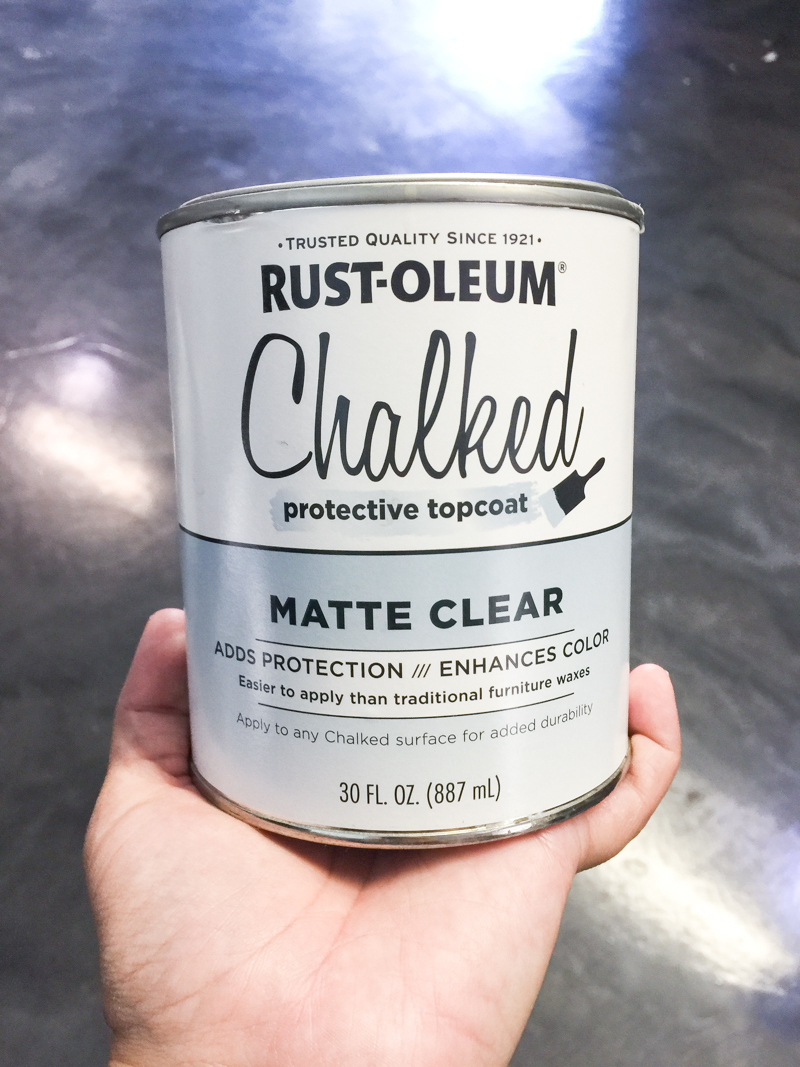
After two super thin coats of the top coat, we were ready for reassembly and now it looks and feels incredible. I absolutely LOVE the new fresh white bed. It never should have even been a question….it absolutely needed to be painted. And the finish is still definitely matte after the topcoat…which I love. PLUS, it goes so much better with our new bedding….which I will link at the bottom of this post.
So there you have it – a complete tutorial on how we used (and loved) chalk paint and what the easiest solution to yellowing polyurethane is! Can’t wait to tackle something else with it 🙂

p.s. Here are the links for the bedding – striped duvet – textured euro shams & quilt – fur pillow – similar white & navy pillow