Nothing is more obscene in a kitchen than seeing all the dirty cleaning tools. Except maybe the dirt. And poop. Trust me. Poop is way more obscene. I should know. I have a new puppy and two kids in diapers. My whole world revolves around poop. WHO AM I BECOMING AND WHY ARE WE TALKING ABOUT POOP?!
ANYhoo. Or anypoo. (I crack myself up.)
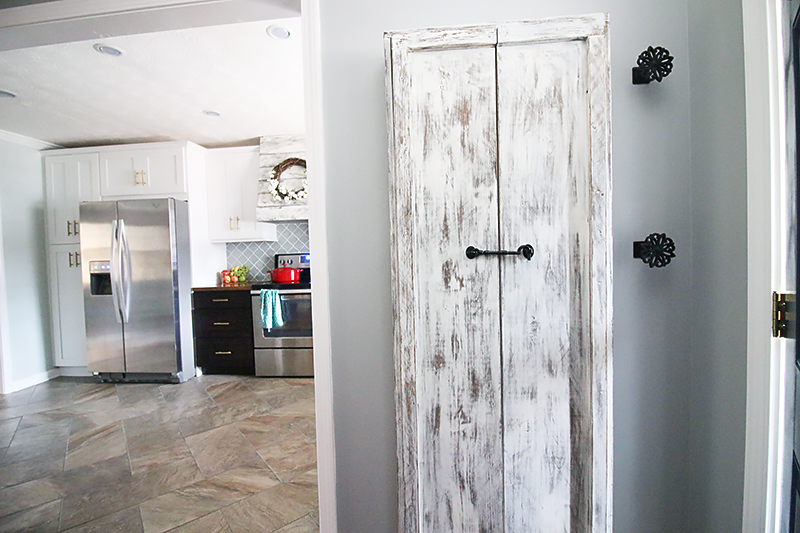
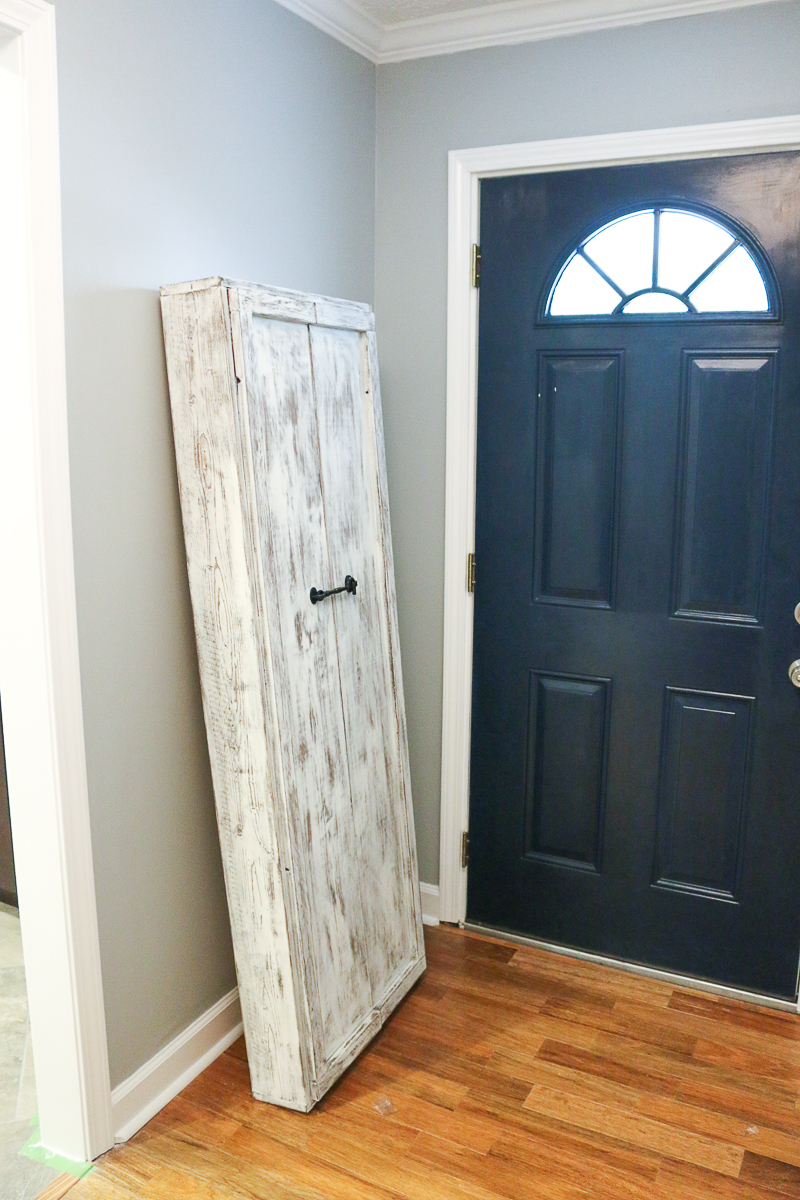
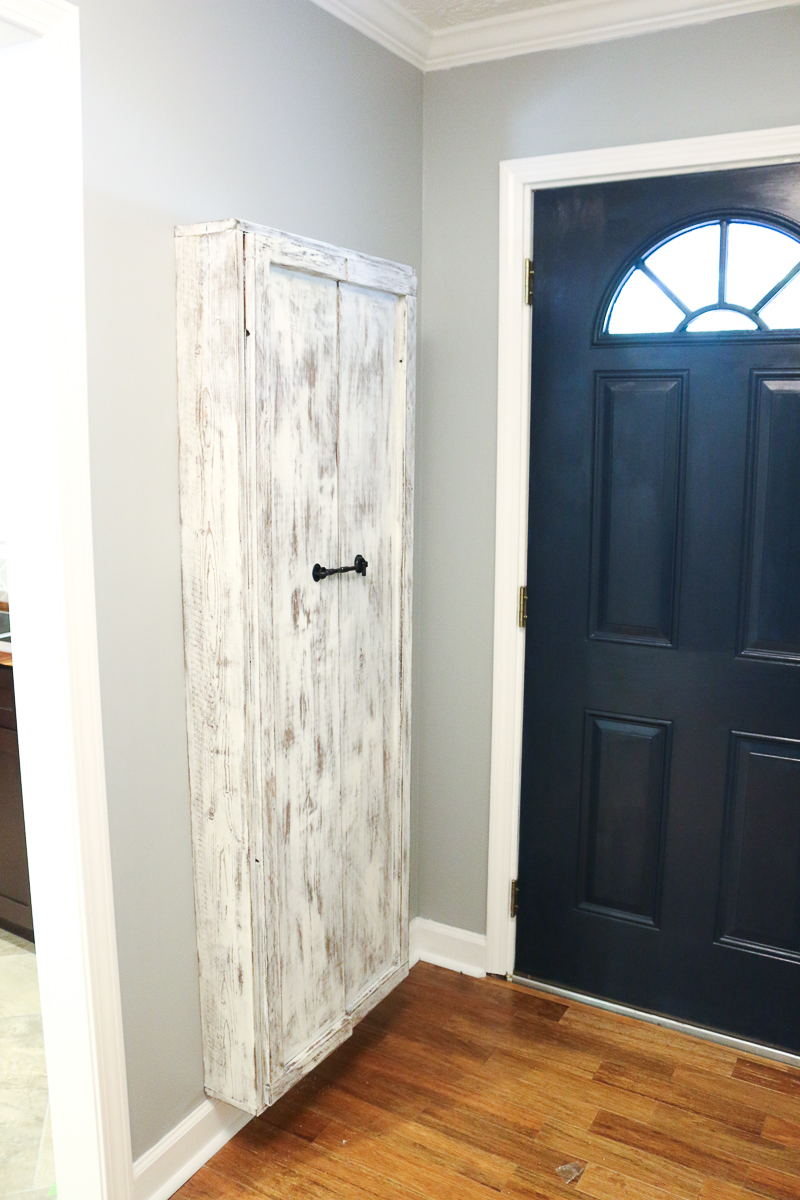
The post today is all about this dandy handy broom closet perfect for holding all those brooms and swiffers and mops in your life. It’s wall mounted to make it even easier to clean around and it’s a fun decorative storage solution when closets are in demand. I built it for the Pedraza’s house but you can bet your bottom dollar I’m trying to figure out a spot for one in my life because truly….we all need our cleaning supplies…we just don’t want to see them all the time or have them near our food.
I didn’t think of this as a formal build – it was just a gift I made for Charity so I didn’t even write down the measurements but I’ll do my best if you want to recreate this at home. I snagged one of her longest brooms and used that as my length and then added about six inches. So the length of my unit was about 62″.
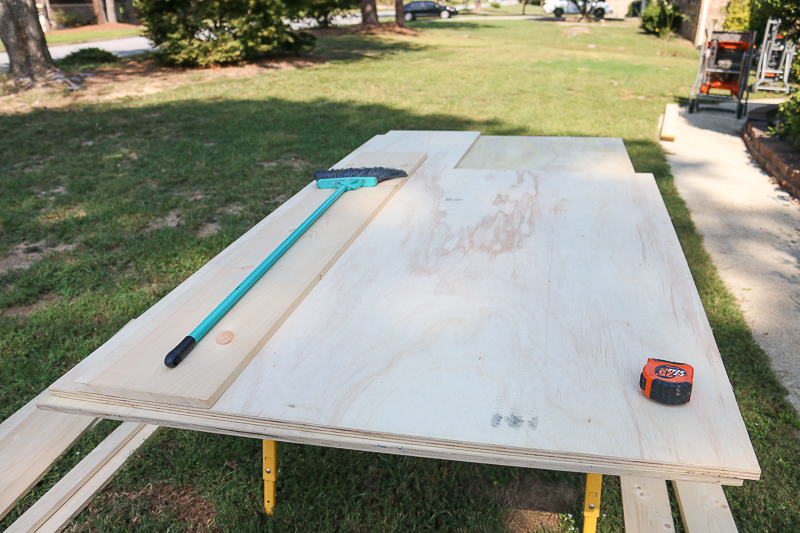
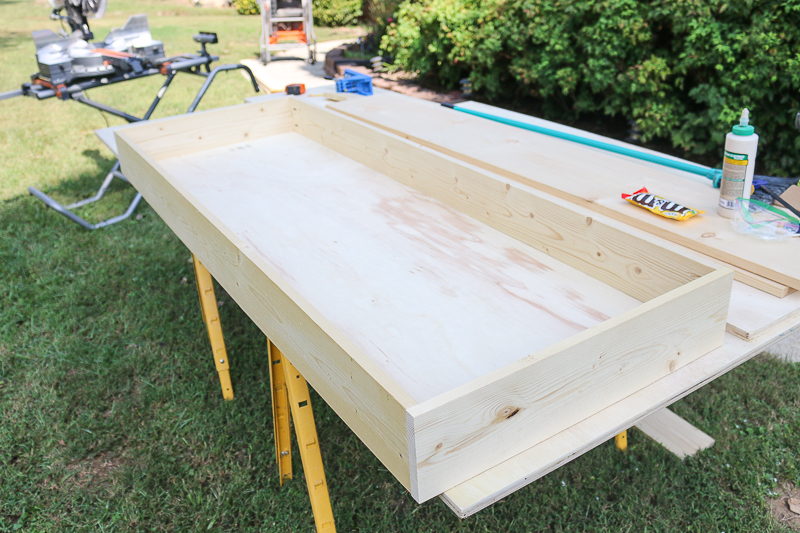
I used 3/4″ plywood for the back and some 1×6’s for the sides/top/bottom.
Here is a cut list for the pieces –
- 3/4″ plywood BACK – 62″ x 26″ (put pocket holes all around)
- 1×6 SIDES – 62″ (pocket holes on both ends)
- 1×6 TOP & BOTTOM – 63.5″ (no pocket holes)
- 3/4″ plywood DOORS – 61 3/4″ x 12 3/4″ (cut two of these)
- 1×6 INSIDE DOOR STOP – 2″ (you will attach these on the inside)
- ANY DECORATE DOOR TRIM – I used 1×2’s but you can cut any design you like to fit the exterior of the doors
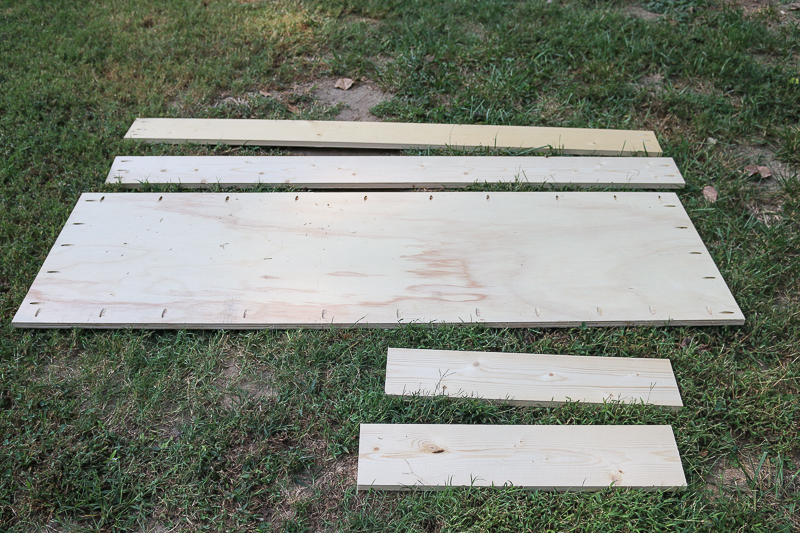
I modified the cut list above to show what I should have done. In actuality, I used 1×12’s for the doors but I wouldn’t recommend that as it is cheaper to just use plywood for the doors and it would have been nicer if it was just a inch or so wider. It wouldn’t have affected the functionality of the closet. Since you don’t see the insides of the door panels, it wouldn’t have mattered to see that plywood edge either. Lesson learned.

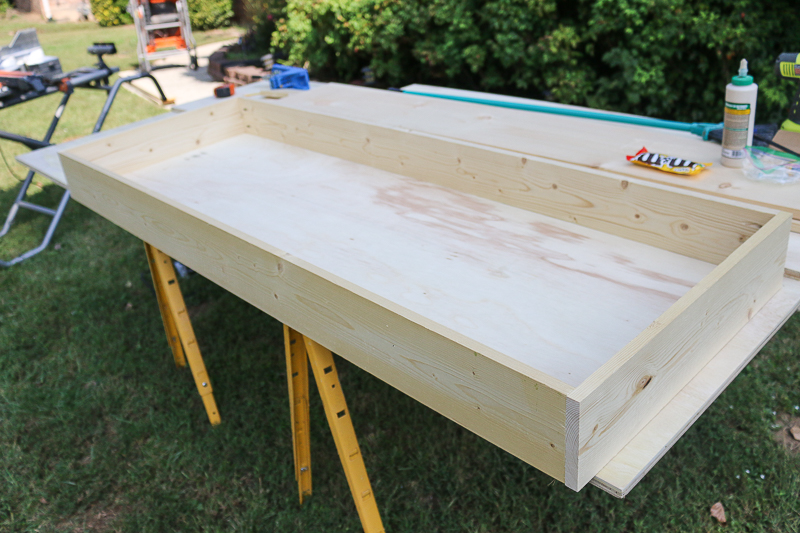
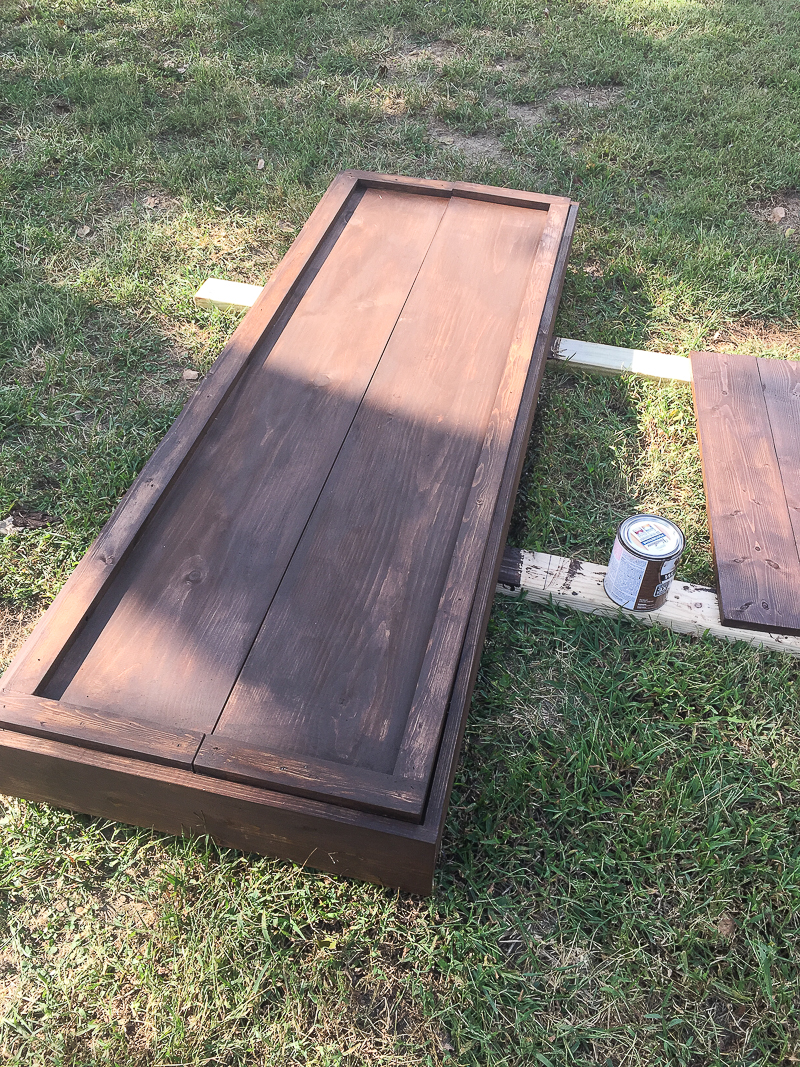
Okay…so the first thing you do is construct your box. Or when the kids ask you….tell them its a coffin 🙂
Peanut M&Ms are absolutely necessary for this build. If you are allergic to nuts, just have them handy while you finish your broom closet and then mail them to…
PO Box 2357
Loganville GA 30052
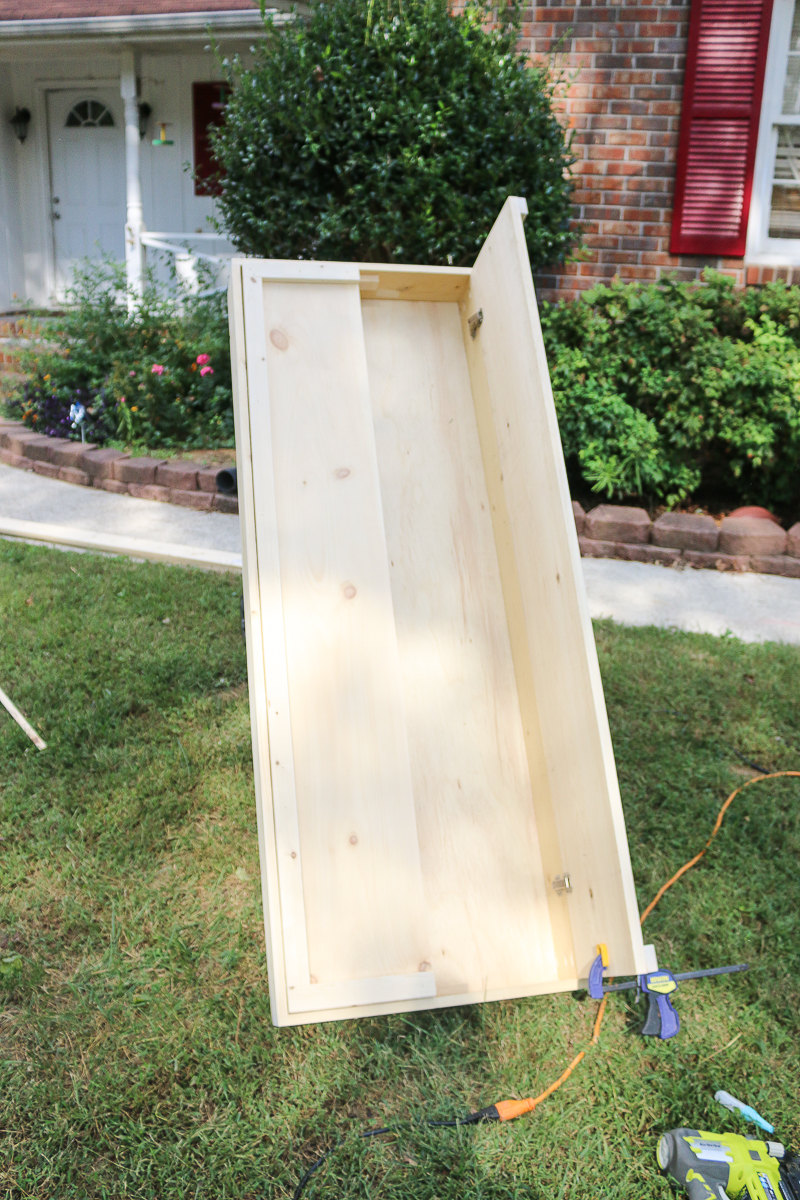
Once your main box is built, you can attach your doors and your stop blocks.
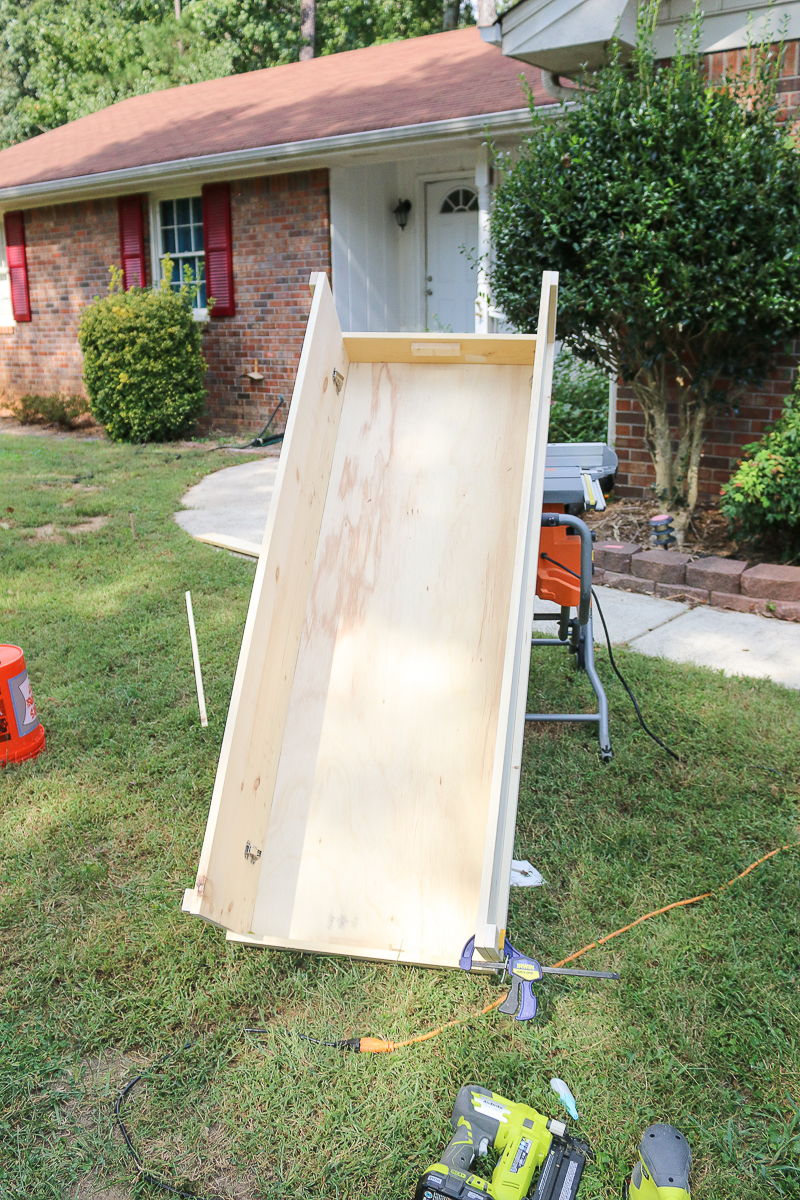
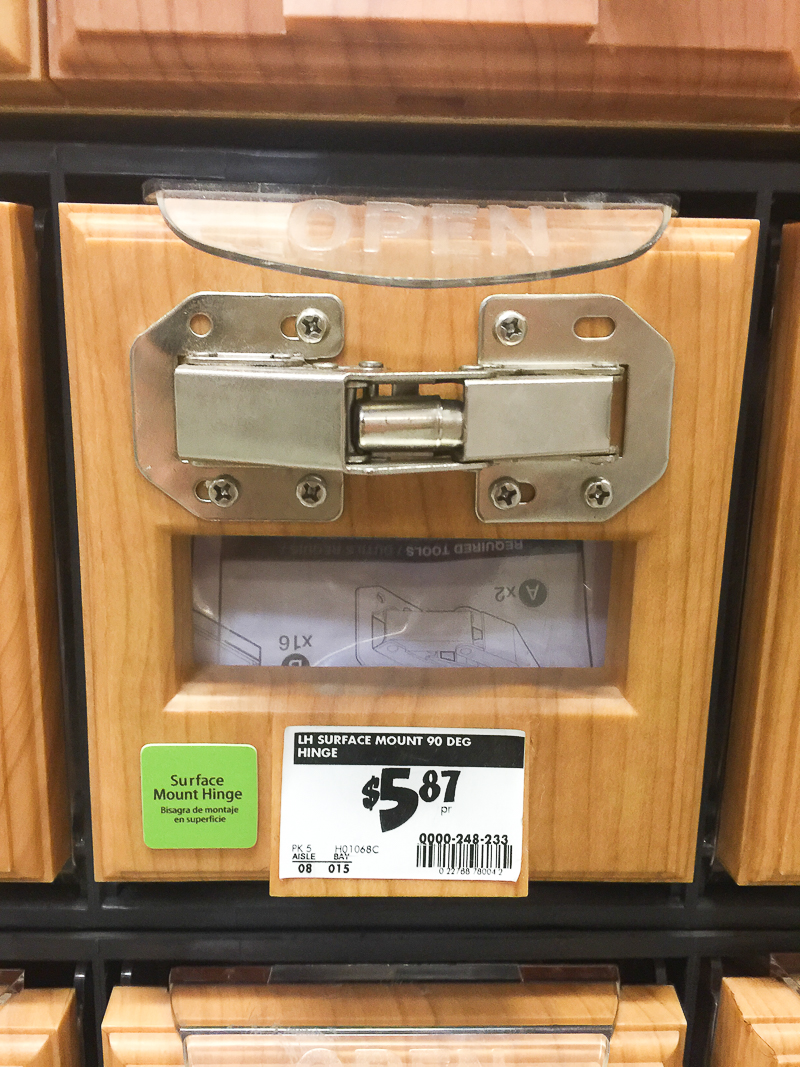
I used four of these hinges for the doors. I’ll be honest….I don’t build a lot of things with doors….hinges are a little intimidating for some reason…but these are easy.
Then I had attached the trim on the doors with glue and a brad nailer.
Time to finish this baby! I used Rust-Oleum’s American Walnut for the base. It’s a super simple 1 time application. Use nitrile gloves and a rag….trust me. The latex gloves are a waste of time and a waste of a good manicure.
Then use a brush to do an imperfect coat of semi-gloss or eggshell interior paint in white. It doesn’t need to be completely coated because this is a distress finish.

After your paint is dry, you will want to sand the entire thing by hand. I used 220 sandpaper and just went at it. My shoulder now looks like I use steroids because it is a WORKOUT. But you will want to hit the edges and the face fairly uniformly. Step back once in a while to make sure that you didn’t miss areas.
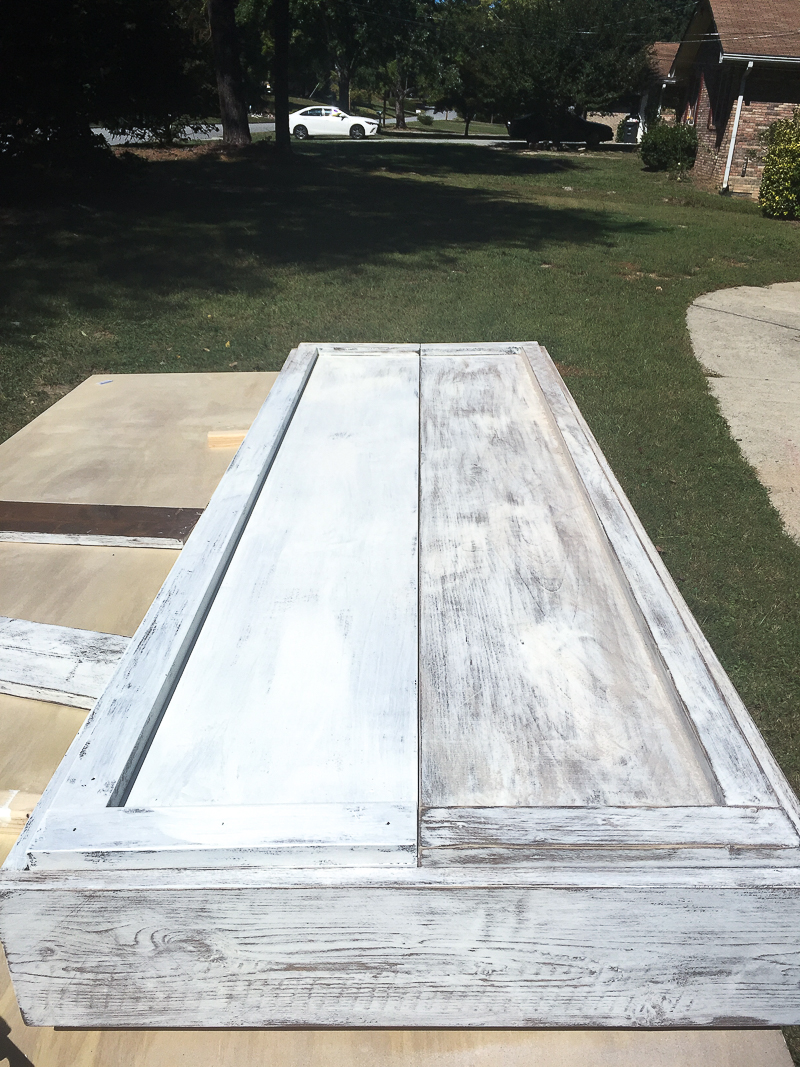
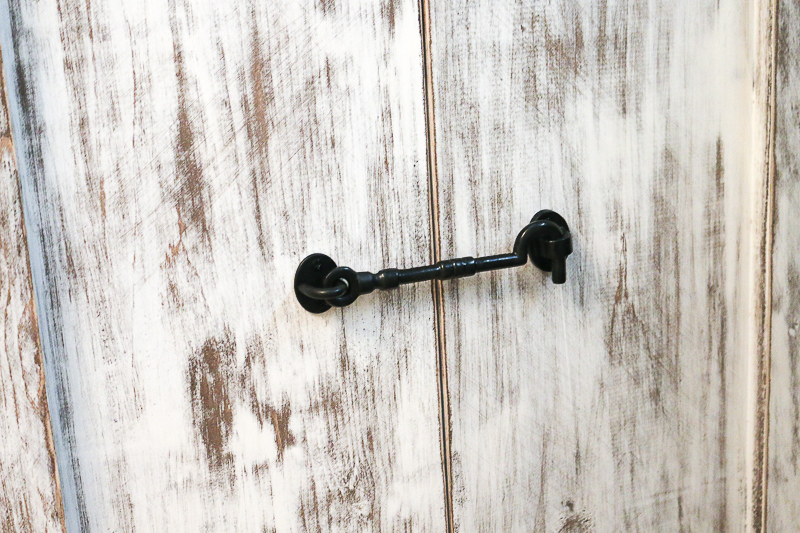
Attach that dark hardware for contrast and BOOM….you are almost done 🙂
The plan was for this to be wall mounted and so we had to bring it inside and determine where the studs were at.
Then Jeremy used 2″ long screws to go directly through the back and through the drywall into the studs. I attached cup hooks on the inside for the brooms to hang and now Charity can hide all her cleaning stuff!
The hood is within viewing and they both have the same finish and I think it ties everything together. They are like wood cousins on a playground.
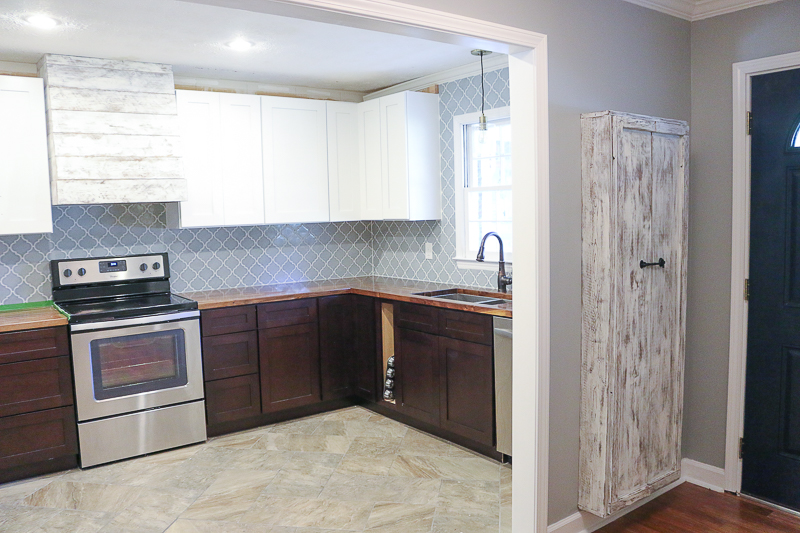
And that’s it! I wish I had gotten a shot of the inside so if I ever go back and get that – I’ll update this post to show the hooks. But otherwise…it’s a great little solution to a very common problem. I mean…even I have that issue…where to hang the brooms and the vacuum! Where do you guys put yours? In a coat closet? In the garage? In the laundry room? We have our vacuum in our laundry room (eyesore) and then the Swiffers are in our pantry (gross). I feel like they should have their own spot in our garage but we build so much out there that it might actually be even dirtier and dustier if we take them out there. Seriously…why haven’t builders made cleaning closets yet when they build the house?! I need that in my life!