Guys, I never in a million years thought that I ever would build a door. Much less a SECOND door. But I gotta tell you. It’s surprisingly easy the second time around.
This time I went with a completely different method and it was SO much easier and faster and I truly believe that anyone could do this one. Yes mom. I’m looking at you.
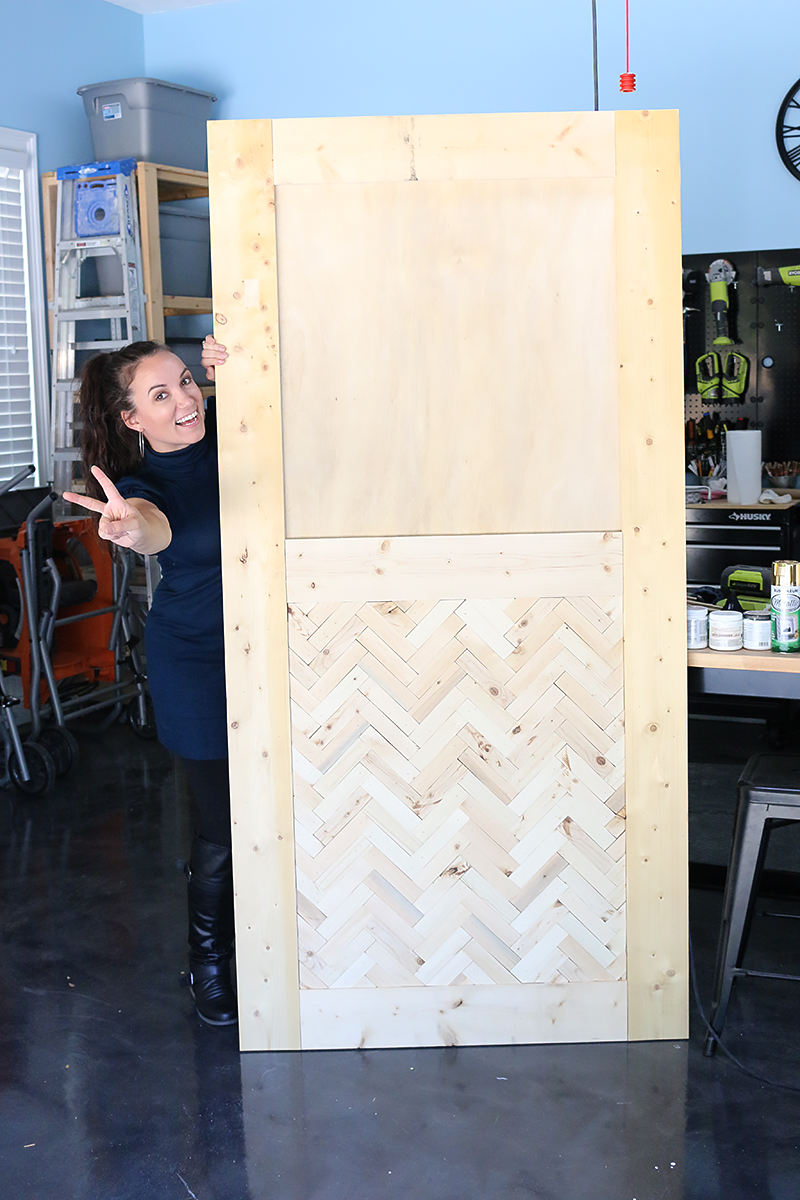
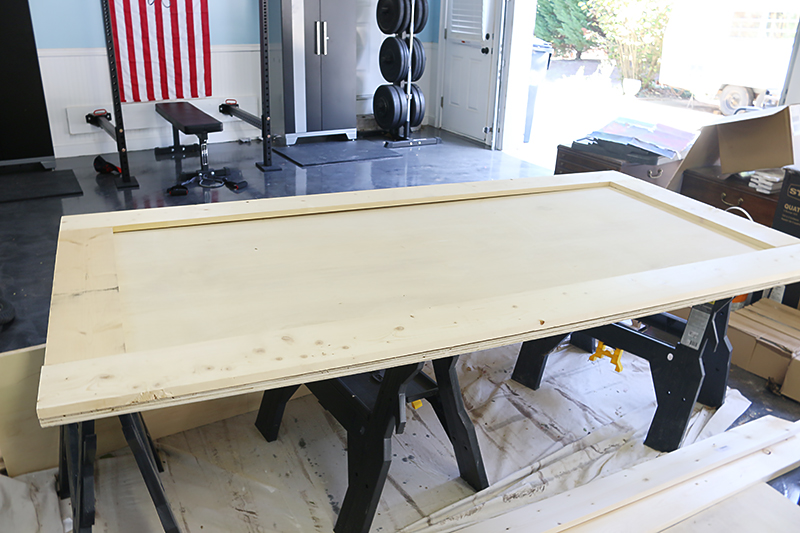
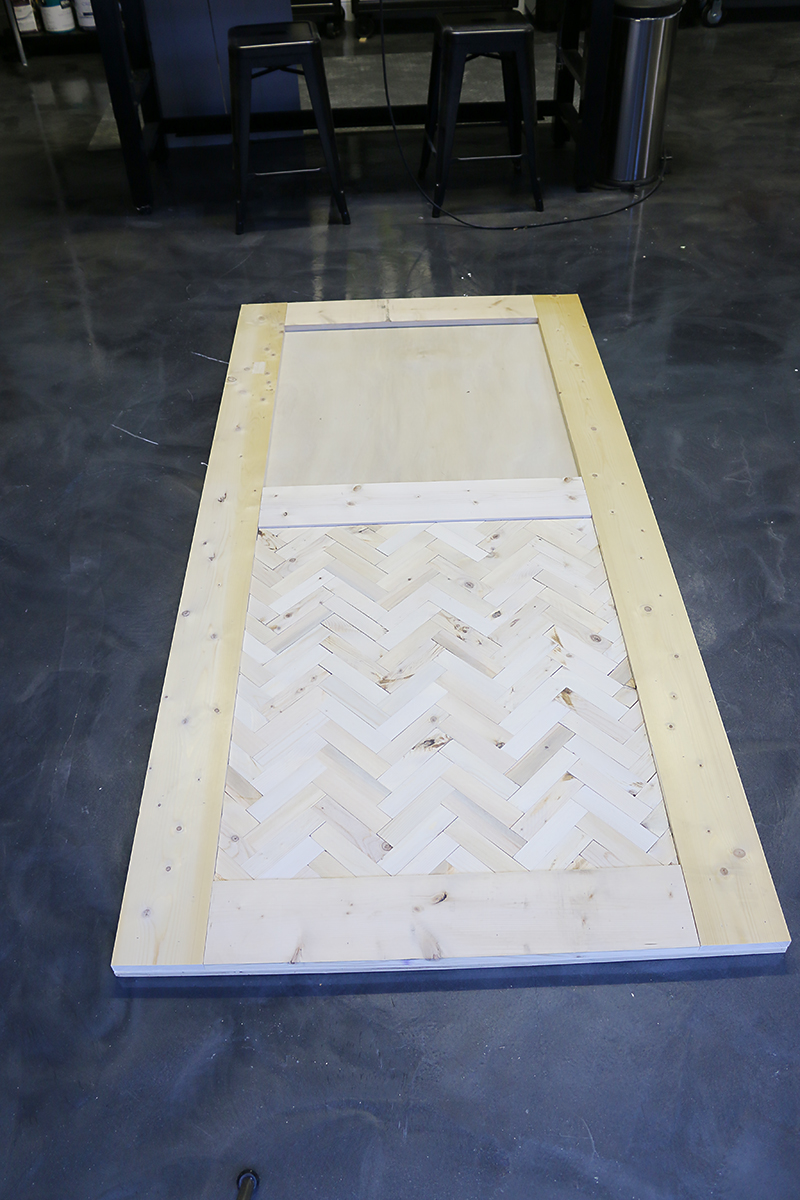
Last time I built a door, I used 2x’s and pocket holed them together and then filled all the holes. It was kind of a huge pain in the you-know-what. This time I went with a plywood door base and trimmed it out to make it unique. If you are gonna make a door for your own space…this is the way to do it.
Just simply measure the size door you need and have a sheet of 3/4″ plywood cut to size. Then you are gonna need some 1×6’s to trim out the edges and create details.
For this particular project, I wanted to fancy it up just a little. It’s like adding the sequins on Gaga’s Super Bowl outfit. Without it, it’s just a long sleeved body suit with shoulder pads. And we all know how boring that is. #wheredidallthepantsgo
If you recall our crosscut countertop project, Jeremy made about 3.7 million cuts to trim down the wood. And we had a lot of scraps left over that I did not want to waste.
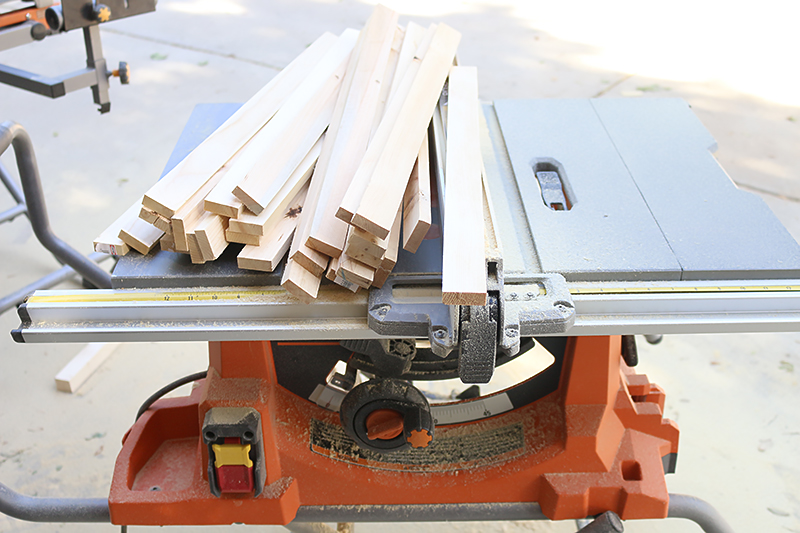
So I pulled out the wood that we trimmed off the 2×4’s – they are basically 1 1/2″ by 1/2″ if you want to replicate this at home.
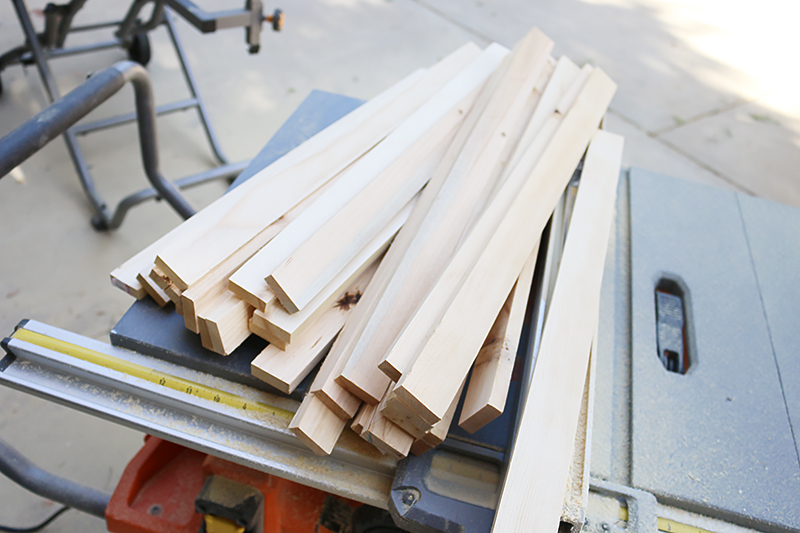
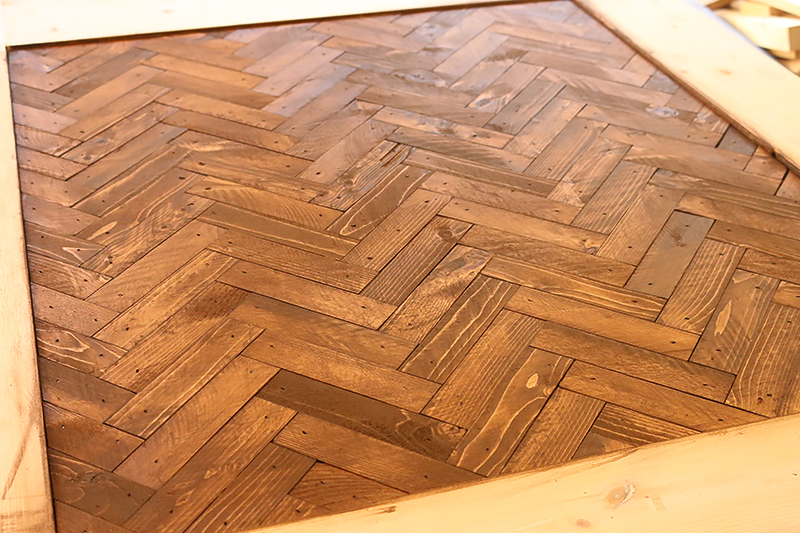
Then I went to work to cut them up into a million 4″ long pieces. I call them wood tiles at this point because that is basically what I am creating….little wood subway tiles.
**Note that I clamped down a stop block on my saw….it helps so much to make multiples of the same cut.
After all my wood was cut, I decided that before I do all the weird corner cuts, I would need to glue and nail my trim pieces.
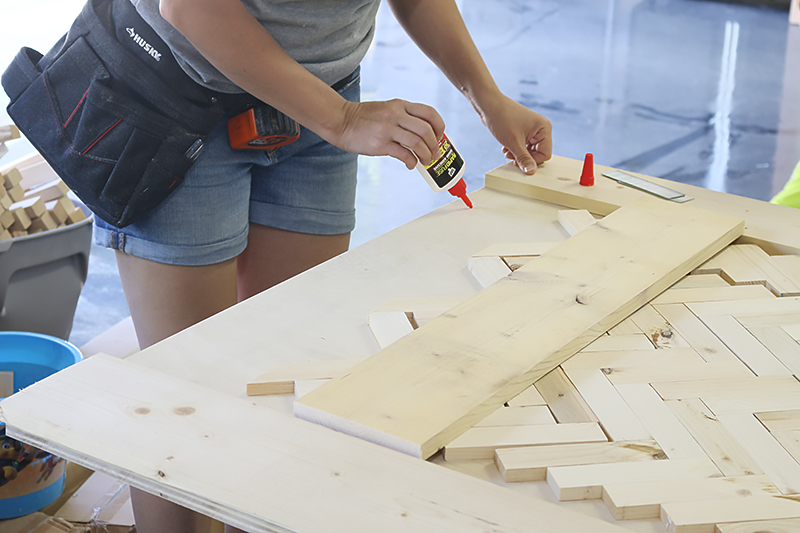
I have been using this DAP RapidFuse lately and I have had really good results. I don’t do a whole lot of glue ups and I like the fact that it works fast. For projects like this, it’s a great option.
Then I used my Ryobi brad nailer to fasten the trim pieces down. If you don’t have this tool yet….I really think you should consider asking for it for Valentines day…or give it to your spouse. I know that sounds weird….but just imagine how much you can build with it!
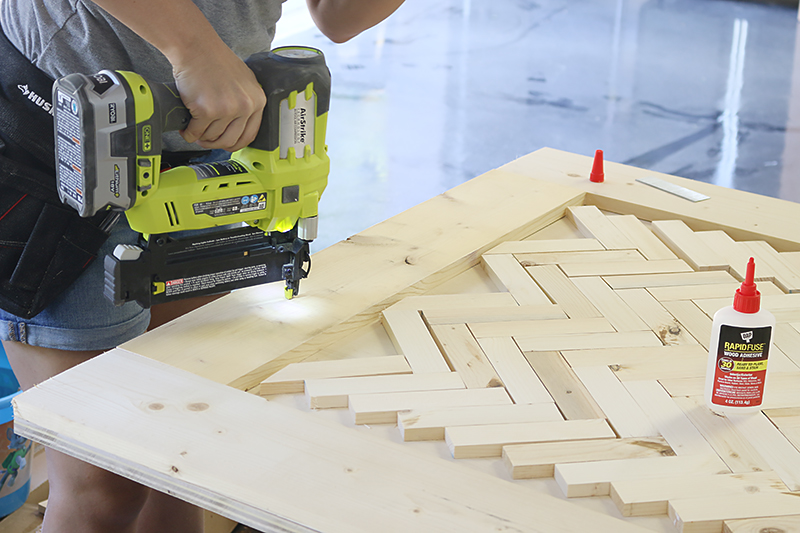
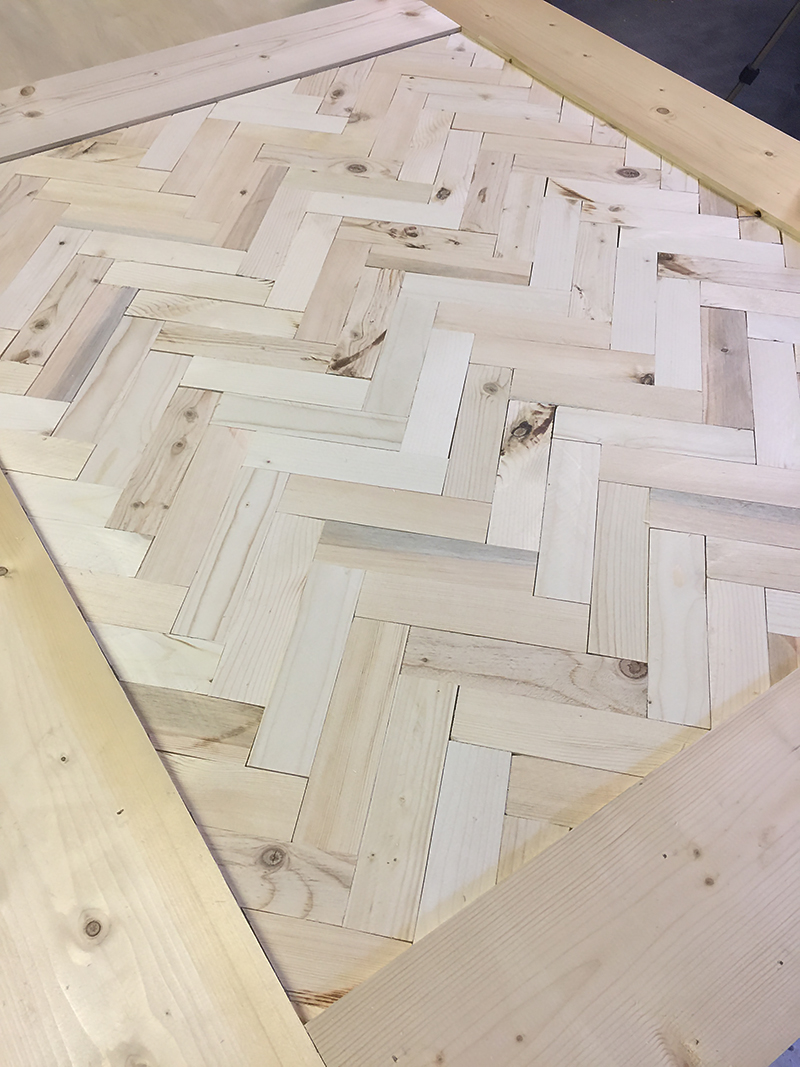
After doing all my outer trim, I went to work cutting all the rest of my tiles.
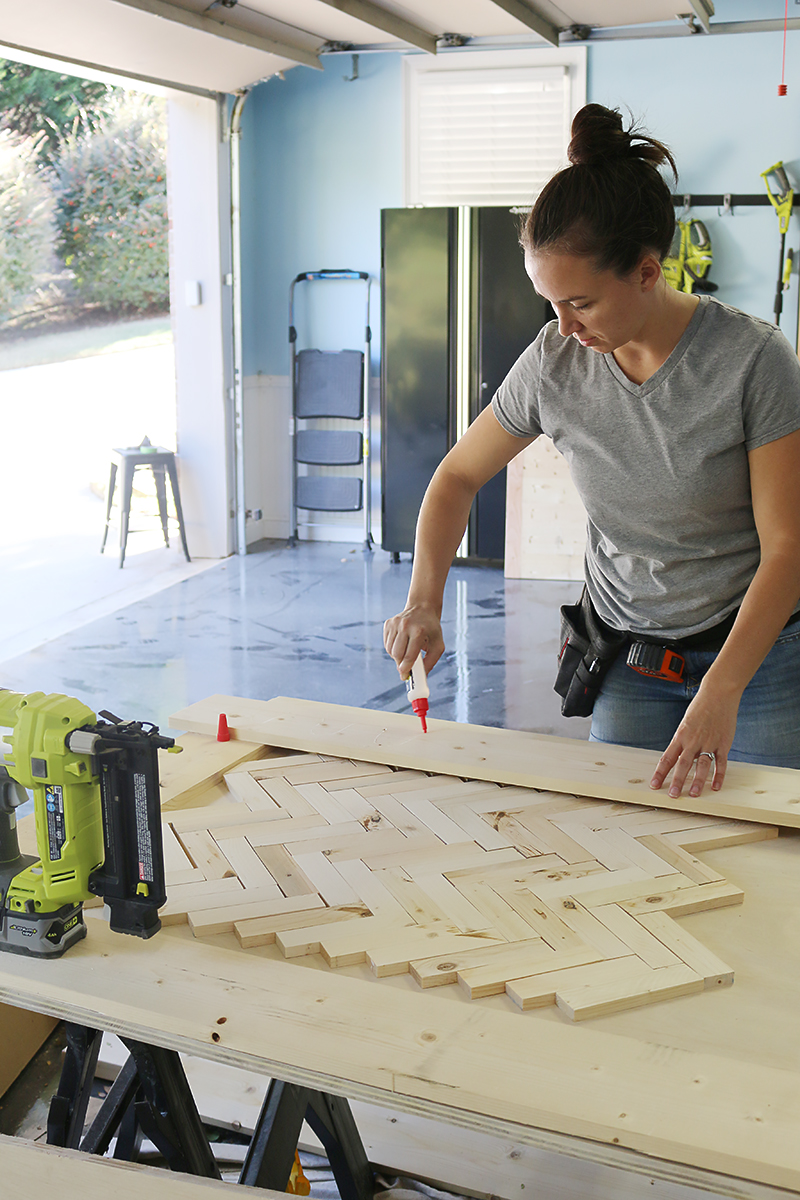
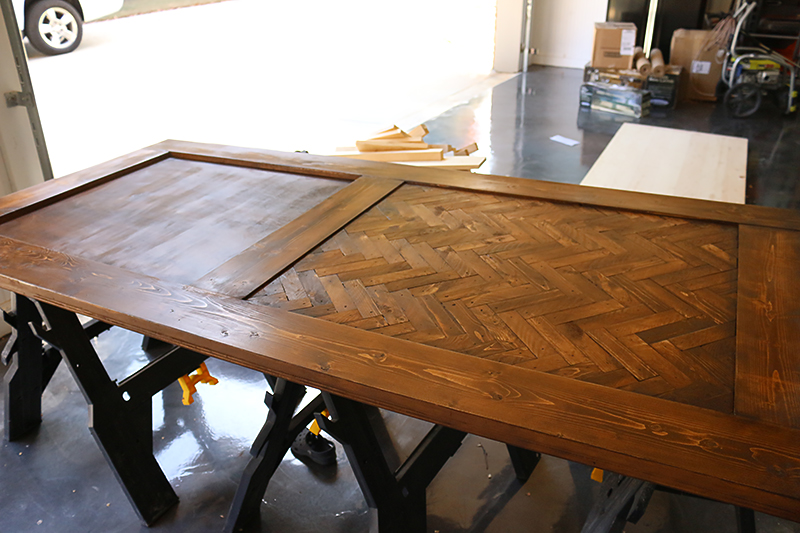
At the end of the day, I felt really good about this thing. It’s like that moment when you realize that you actually know how to put on eyeliner. It’s empowering. Each of the tiles was put in a spot with the glue and LOVE 🙂
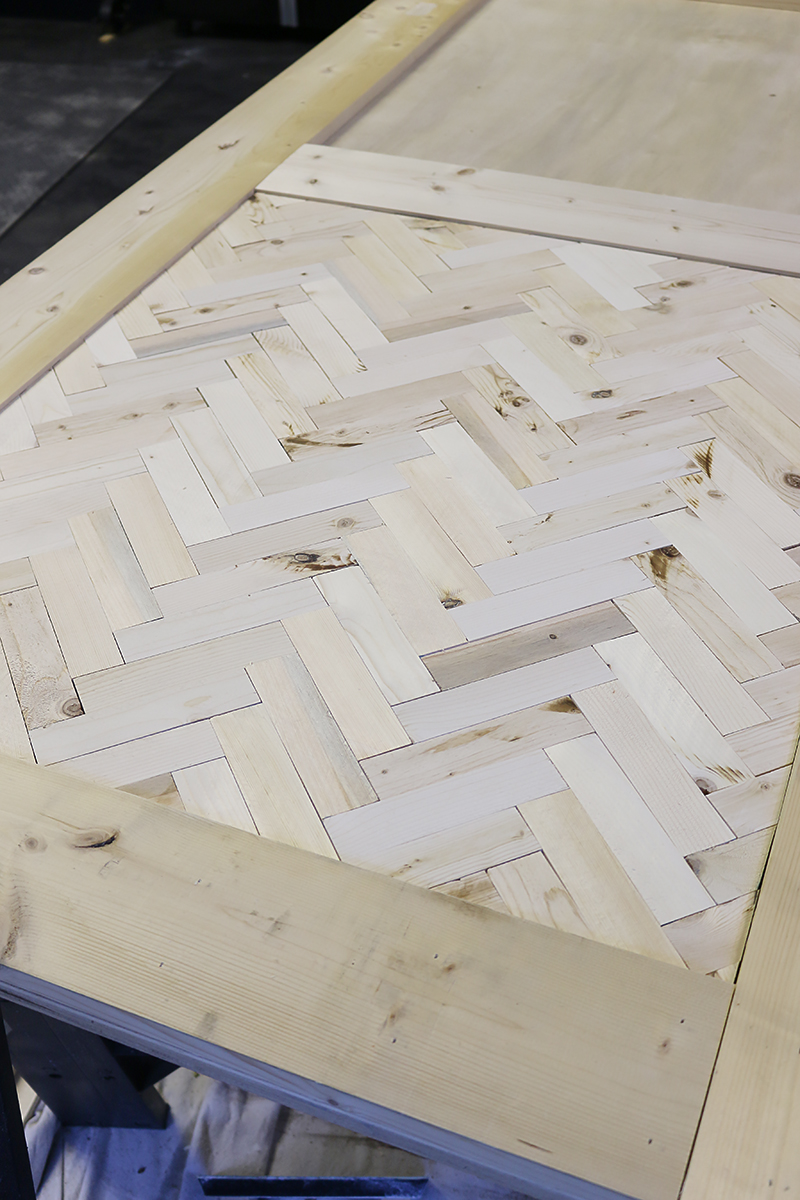
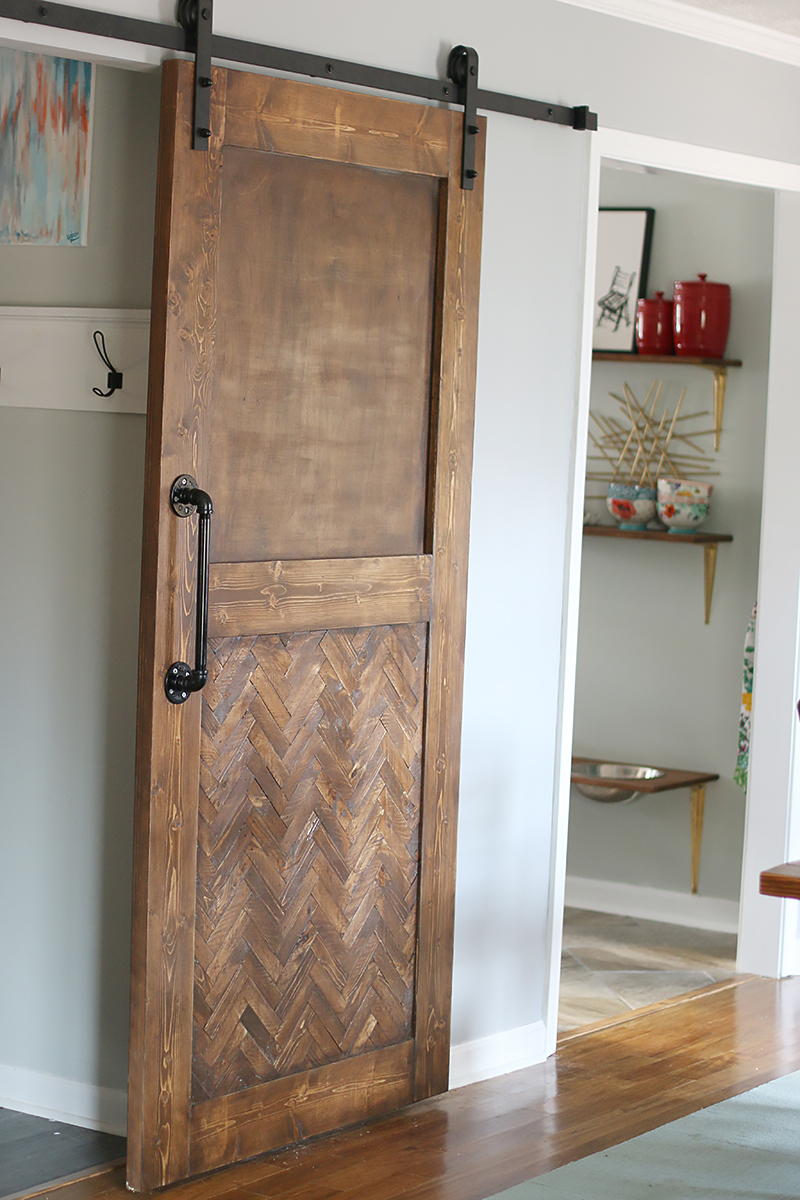
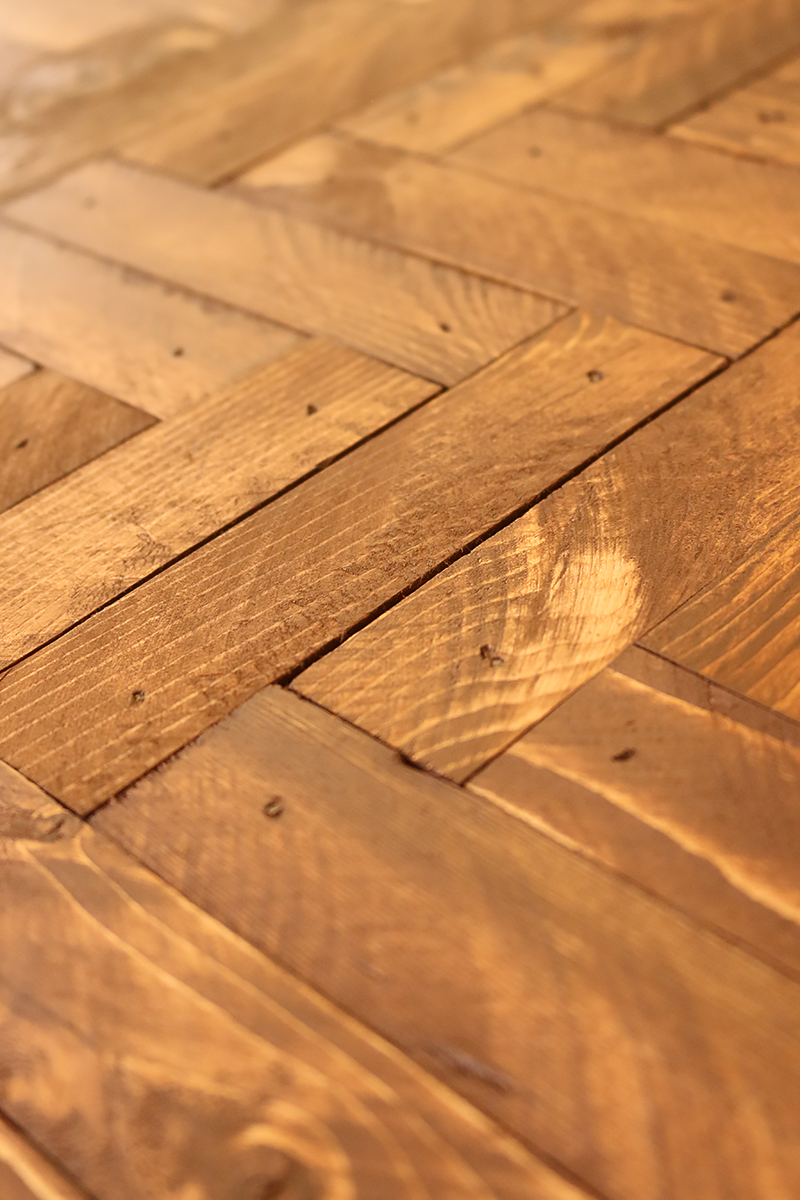
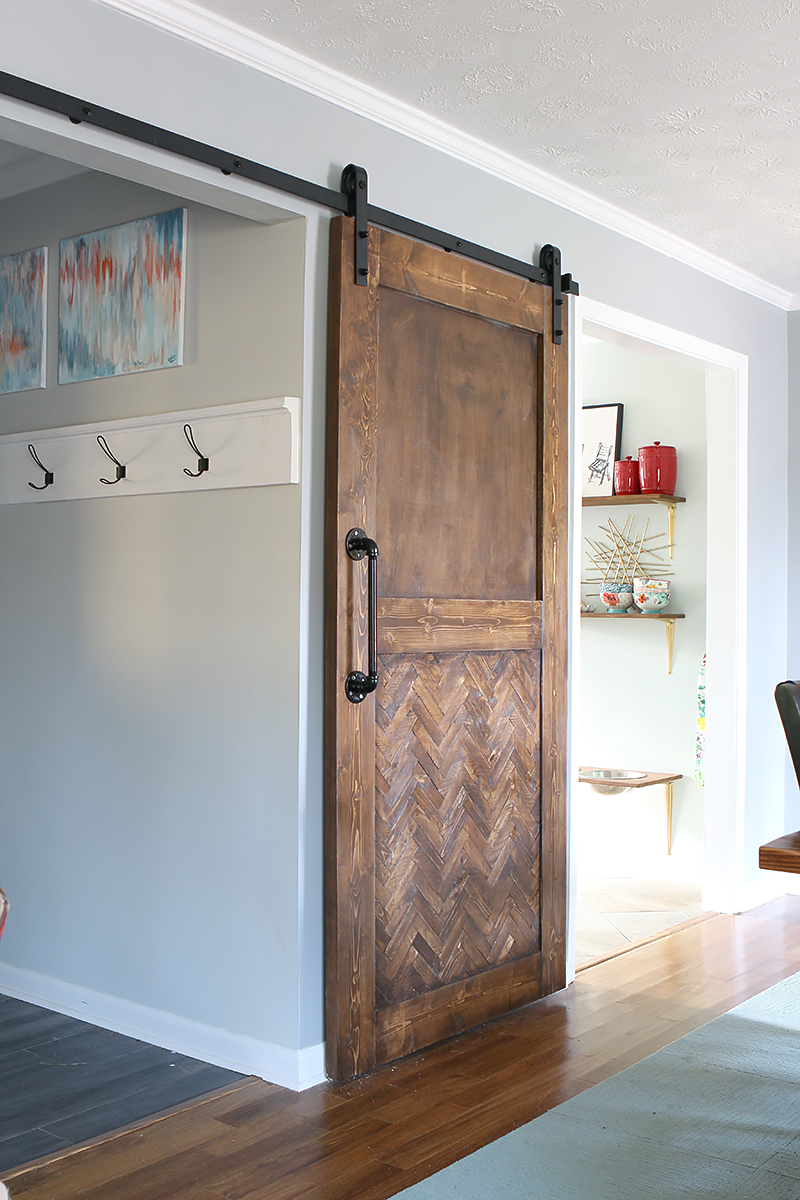
More closeups of this beauty….because it’s gonna be my only herringbone door ever 🙂
I did have to go back through with the brad nailer to fasten all the wood tiles. I also took wood filler and did the sides of the seams of where the trim pieces met up and the edges of the plywood. It helped the entire thing look more finished and intentional.
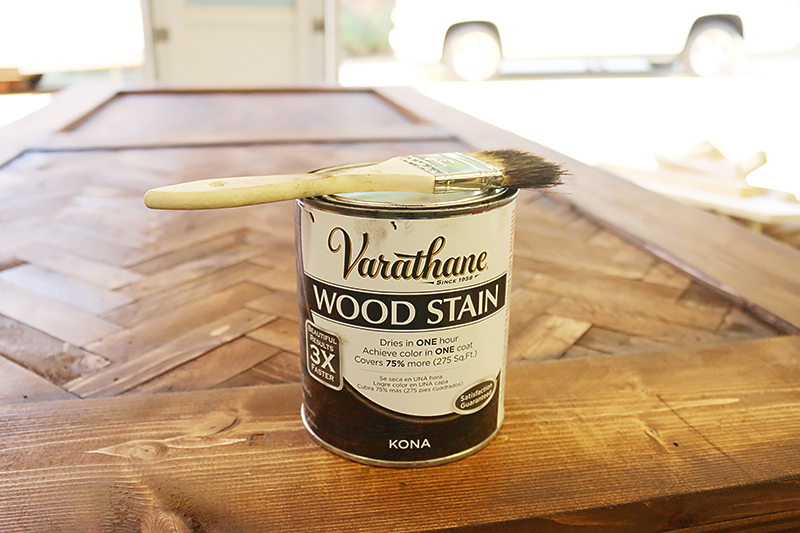
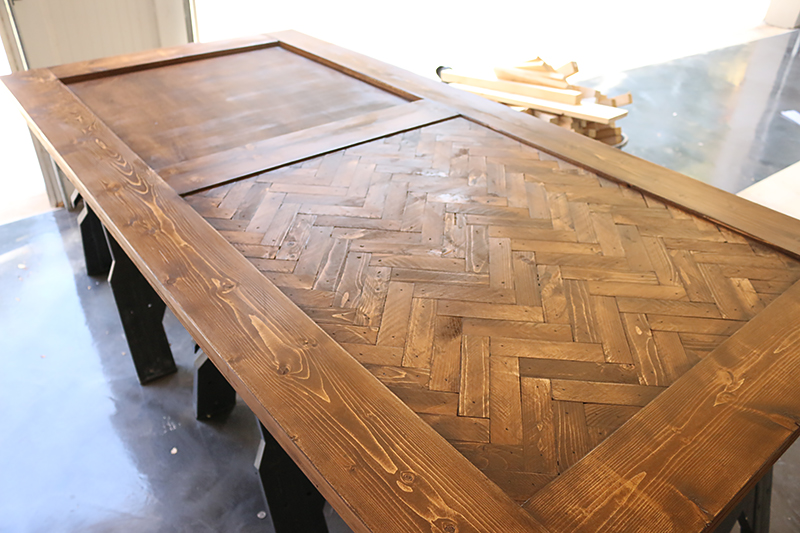
As far as stain goes, I went with Early American as my base. We had already decided to try to get close to the color of the Pedraza’s existing dining chairs.

This is after the first coat…
It definitely is a warmer stain in a mid tone.
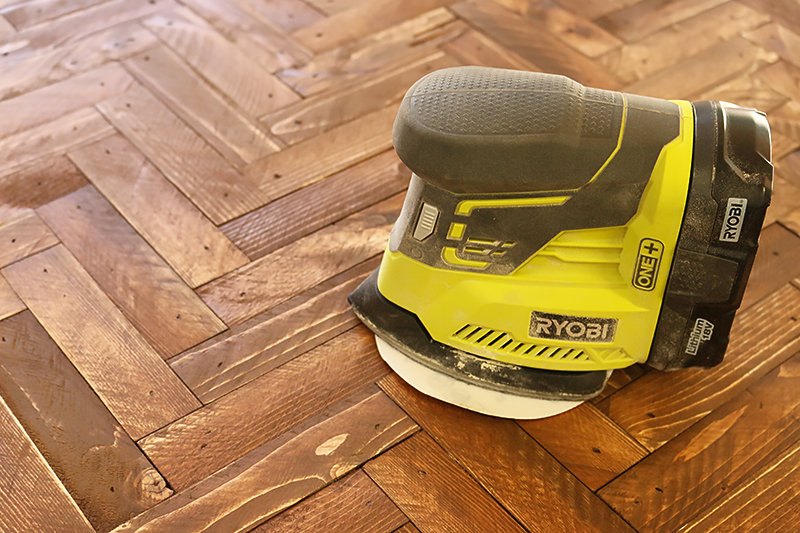
I like this color when it is sanded down just a bit and then dry brushed. I used the Ryobi corner cat with a cheap hack – I use loop back sandpaper meant for a circular sander…it’s cheaper than the ones cut for this bad boy and perfect for the non-corner moments 🙂
Then to make things really pop, I dry brushed the corners and edges and anywhere I want to add a little contrast. I did a tutorial on this technique and literally will never go back. It makes any furniture look SO much more high end.
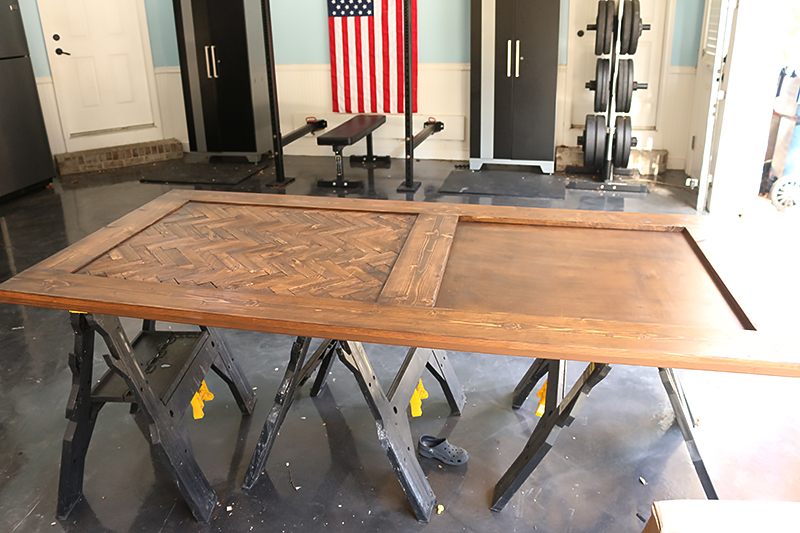
After that it was a couple coats of the Triple Thick Poly and we were in bow-town. As in bow down to this door because it is so awesome 😉
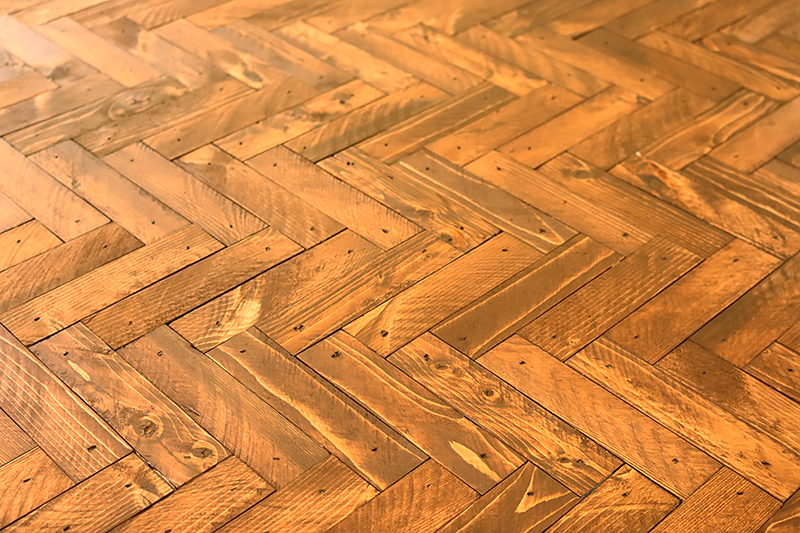
I love how the color variation even helps that herringbone look so freaking good. Sorry mom. I know you hate the word freaking 🙂
And here you go from the other angle.
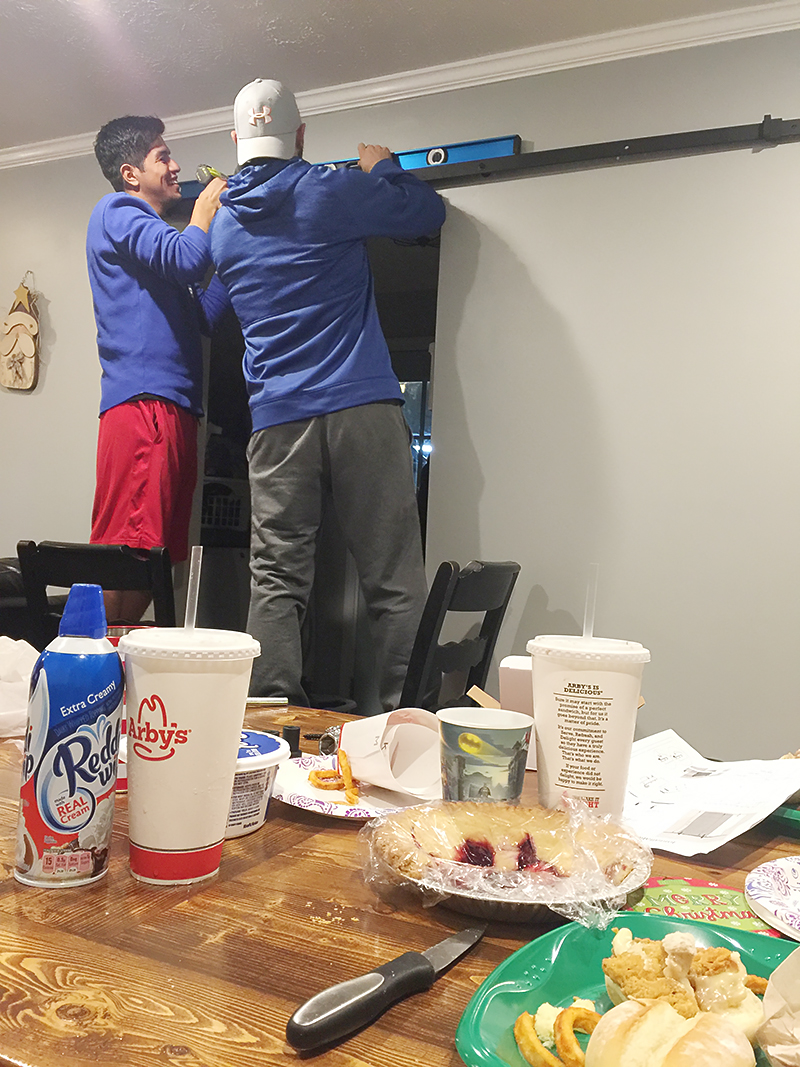
The door hardware was a little tricky. We actually ordered a barn door hardware set that was in stock and shipped right away. When we went to install…it was too short. Oops! My bad. I guess I measured the door opening instead of the door plus margin for the door to cover the opening. It’s frustrating because it set us back in our time but we soon found another option. AND it is now back in stock in all it’s sizes! Here is the link.
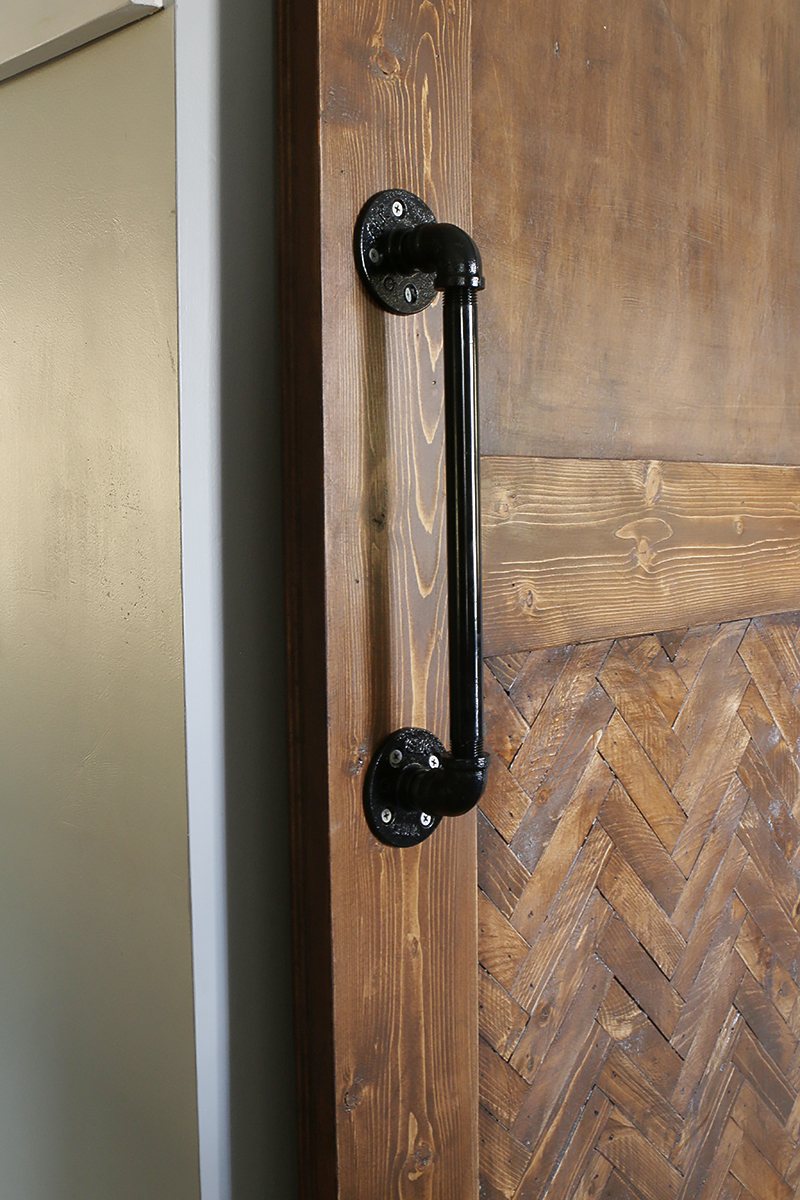
We also DIYed this handle from the plumbing section at Home Depot. It cost us right around $30 which is probably about the same as what we would have paid in other situations.
And after we hung it all up, it worked great. It is the perfect way to tie in a little more warmth into this space and to include wood elements. PLUS we are confident when we say that this is a one of a kind door….which is the best part of DIY….that we get to make things that we won’t find anywhere else.
Okay…so there are only about four other build projects in this space…the table built from their old table legs, the wall mounted broom closet, the DIY range hood and that sweet little dog bowl. Which one is the one you want to see as our next DIY recap? I’m thinking the range hood or broom closet….but I’m sure you can change my mind 🙂 Leave it in the comments and I’ll do whatever y’all vote!