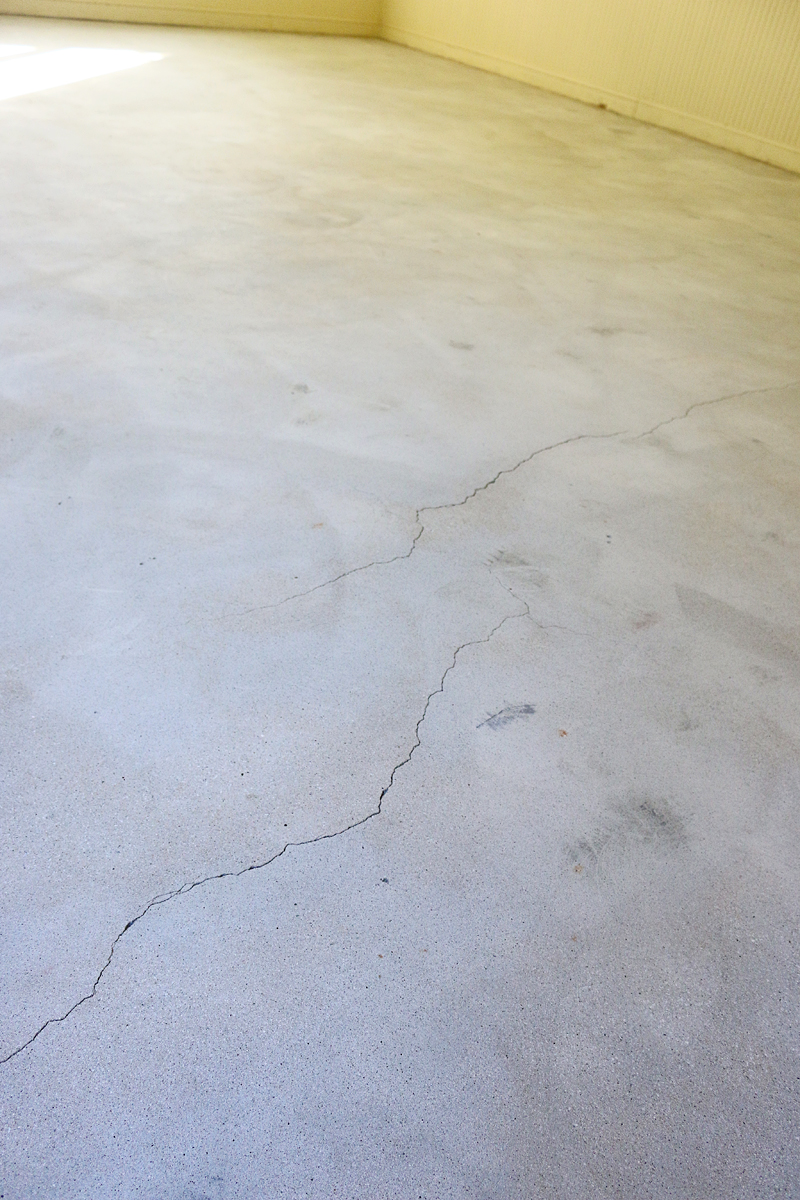
Someone once told me that there is only two types of concrete in this world….the type that has cracks in it and the type that is GOING to have cracks in it. That always stuck with me. Today I want to share a quick tip on how to fill those cracks for good.
Our garage has several cracks in the floor and it definitely needed some repair before we could use the epoxy coating on top.
Now I want to throw a time-out in the mix right now to disclaim something because I think there has been some confusion to a few select people. A few folks have emailed me and expressed a concern and I would like to address it here and now. Some people think that because I tell you the brand of something that it means that they were sponsoring that post…with no disclosure. That’s just simply not true. I would be a very wealthy woman if I was paid a fee every time I named names. In fact, I would just randomly name names JUST TO GET PAID. Yes, that would be amazing and I would buy you all drinks at the bar if I saw you and then invite you on my private yacht but only after you got a personal makeover. But the truth is….if you don’t see that disclaimer at the top of a DIY post…it’s not sponsored. I also have a strict policy of “You can’t tell me what to write” to brands. I have not sold my blog soul to earn a buck. And the fact is…even if a blog post was arranged and the product sucked (sorry mom for the ‘s’ word)….I would NEVER post about it and lie about the validity of that product. I am just not that person. When someone approaches me about a sponsored post and we try it out and it didn’t work out, you as a reader would never even know. We send our formal review sheet back to the company and tell them our thoughts and how we appreciate them allowing us to try the product but we can’t accept any fee and will not be writing about it. AND THEN…we pay taxes on something that failed. Yup. It’s true….everything you receive as a blogger, you pay taxes on. That is why we are VERY careful about our vetting process when it comes to products we get for “free” and make sure we do our due diligence to make sure it is the best solution….because whether we pay full price or just taxes, it is still money out of our pocket. And money coming out the pocket BURNS.
I wanted to clarify that for some folks…because I LOVE being a blogger. But I don’t like being accused of doing something shady. We as bloggers also have responsibilities….like producing new content all the time, making sure projects are fun and fresh, and teaching people that new products and services are out every single day…as well as being honest in our posts and fair to our readers. Over 75% of my content is not sponsored in any way….and the posts that are, I am proud to produce because I believe it is valuable in introducing people to new concepts, projects, services and products AND because I believe I deserve to be paid AND because it helps me sock away money for my kids. And that my friends is called the American dream. Mic drop.
OK so drama and clarification aside….back to cement cracks.
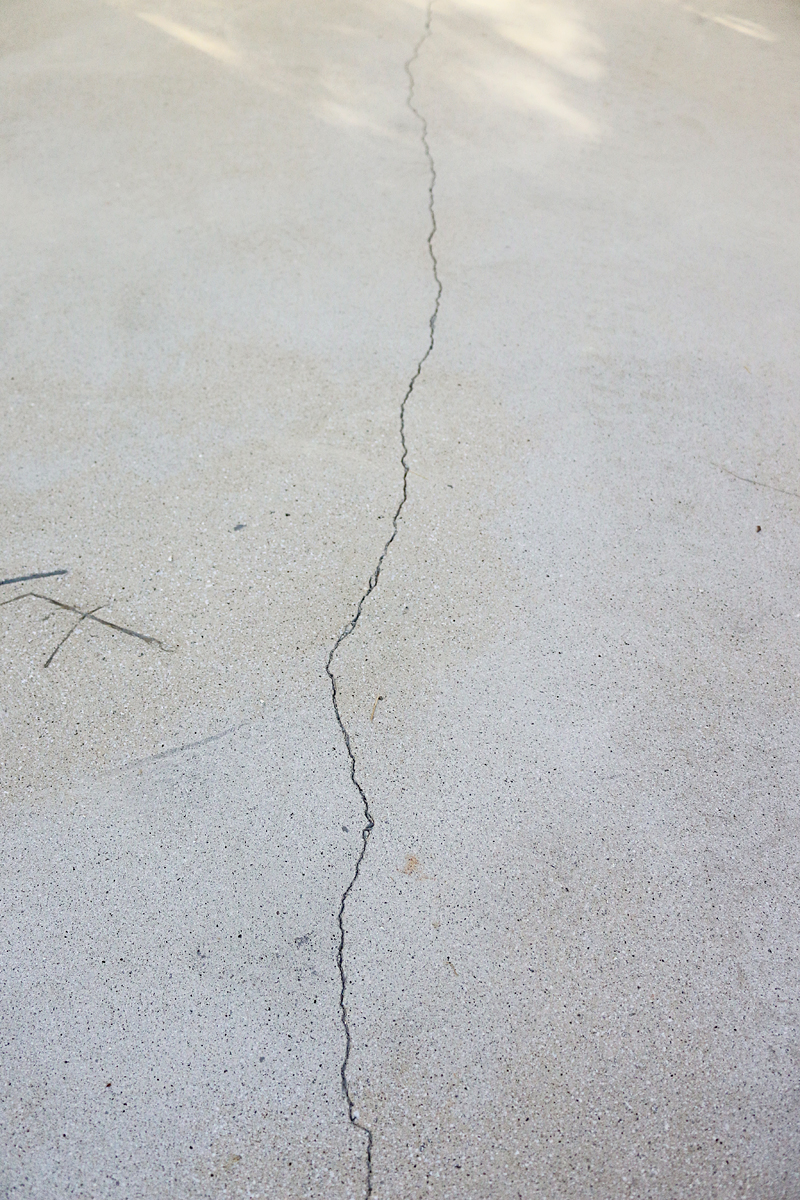
My garage is all banged up and to get it ready for the epoxy finish, I needed those cracks to disappear. If you are looking to do a simple repair like this, it is really inexpensive and there are different products for the size of the crack you have. Make sure you know what size crack you have!
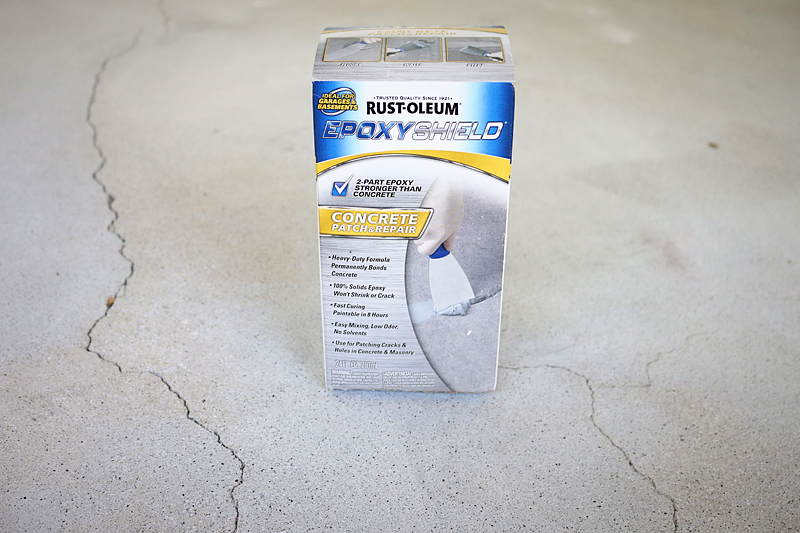
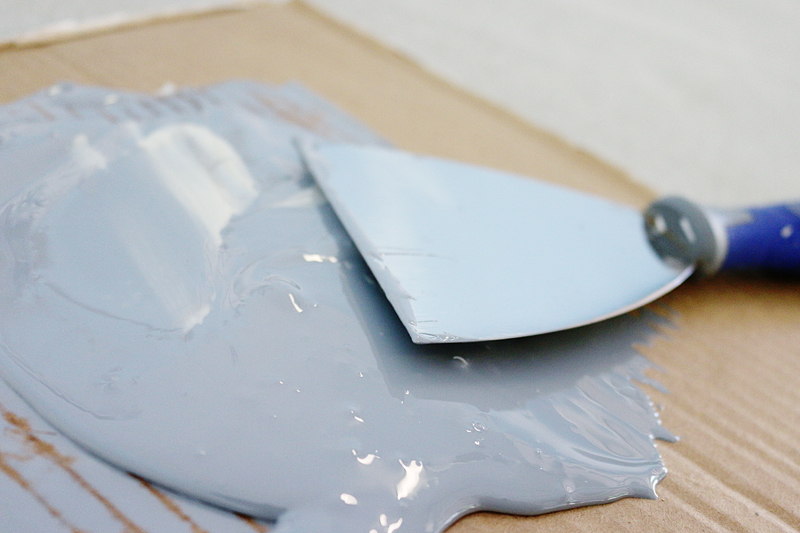
We used Rust-Oleum’s Concrete Patch & Repair.
It is a super fast and super easy process. It has two parts that you mix together to get a crack filler. Basically you use one ‘serving’ of Part A and two ‘servings’ of Part B and mix them together on a piece of cardboard.
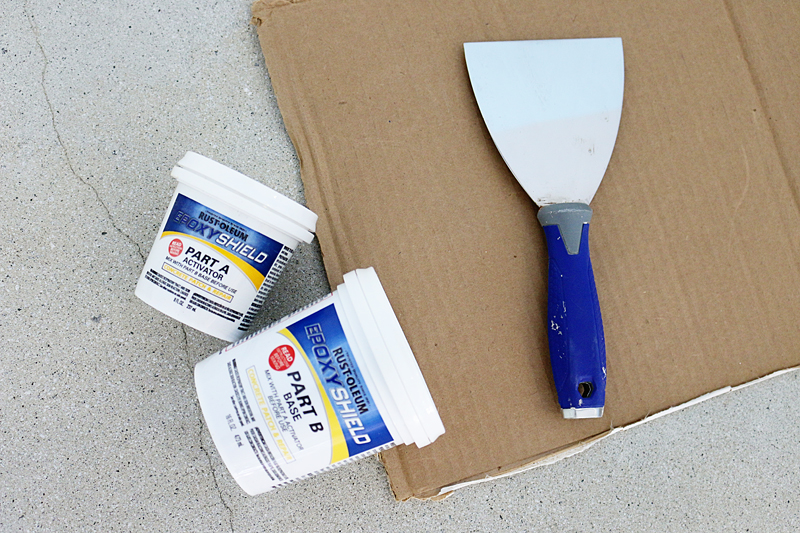
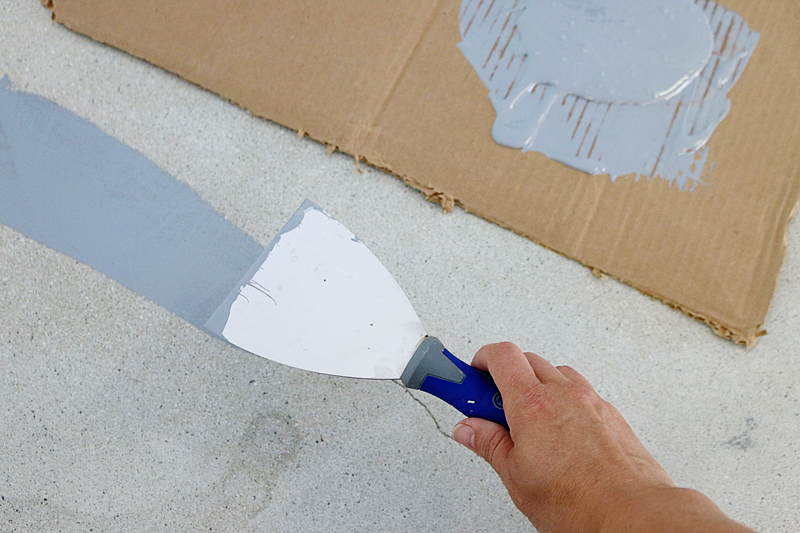
I eyeballed it and did a serving about the size of a tablespoon. I simply wiped and swirled and mixed till the mixture looked shiny and then made sure the cracks were clear of dust and any debri.
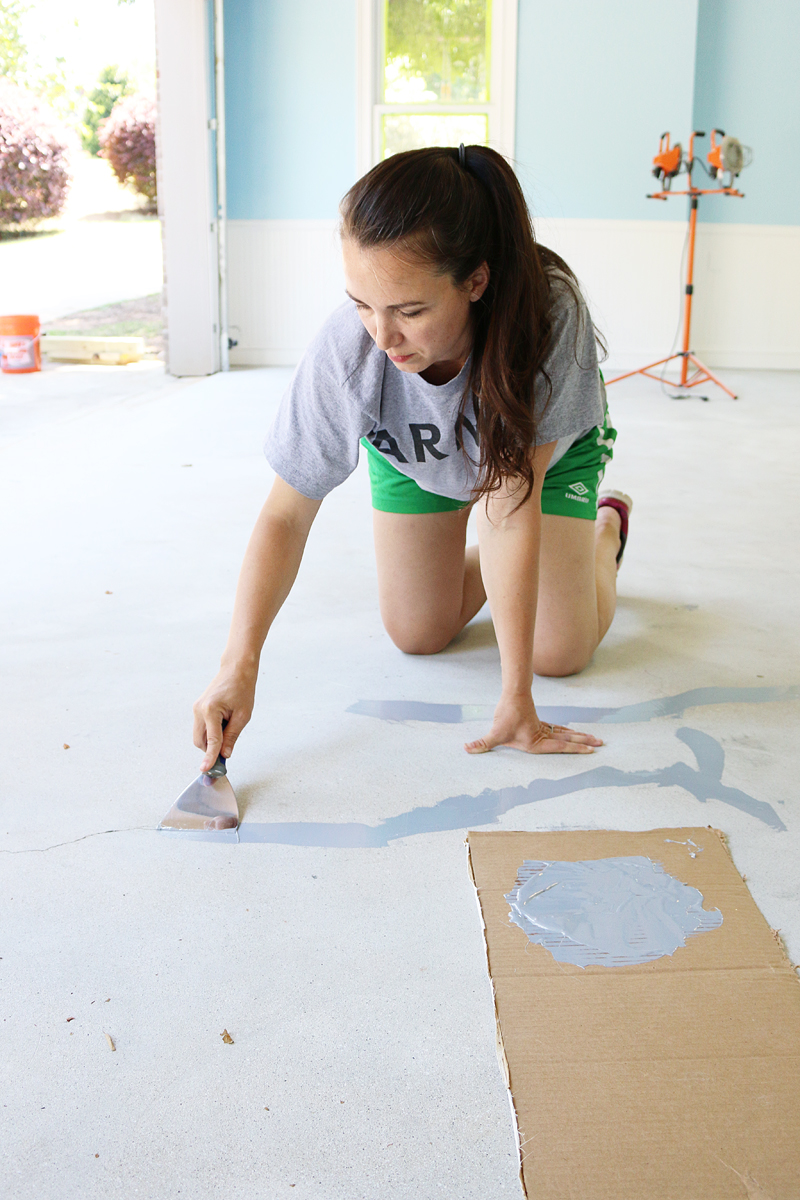
Using a drywall knife, you simply push the mixture into the crack and scrape off any excess. It’s super simple.
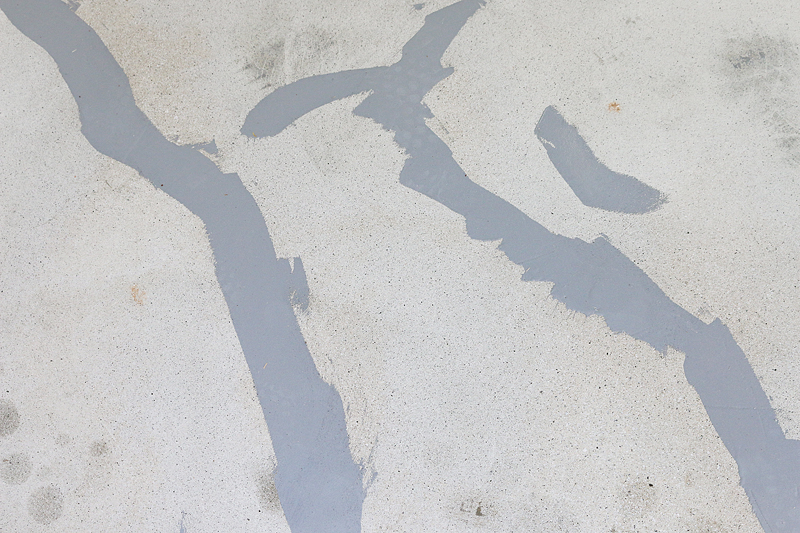
I also discovered some low areas in our floor and some divots that needed a tiny bit of filler and so I just kept on making sure the entire floor was really smooth. This particular product is shiny and stays shiny even when it is dry so that is something to keep in mind. It may not look dry but if you waited the full time….it most likely is rock solid.
Bada boom bada bang. Easy peasy. About four hours later, ours was ready to go. If you are looking for a nap time project – this is a really, really easy one. We have used other cement fillers so I am eager to see how this one holds up! I am also hoping that no future cracks pop up. But if they did, we still have PLENTY left over in this container. In fact, we used about 1/4 of the container and it covered a LOT of cracks….so one package goes a long way.
So there you have it people. Another crack project. I think I have posted about a dozen different posts with crack in the title…so be sure to check those out 🙂 I have a big painting post for you tomorrow about how we finished the floor!