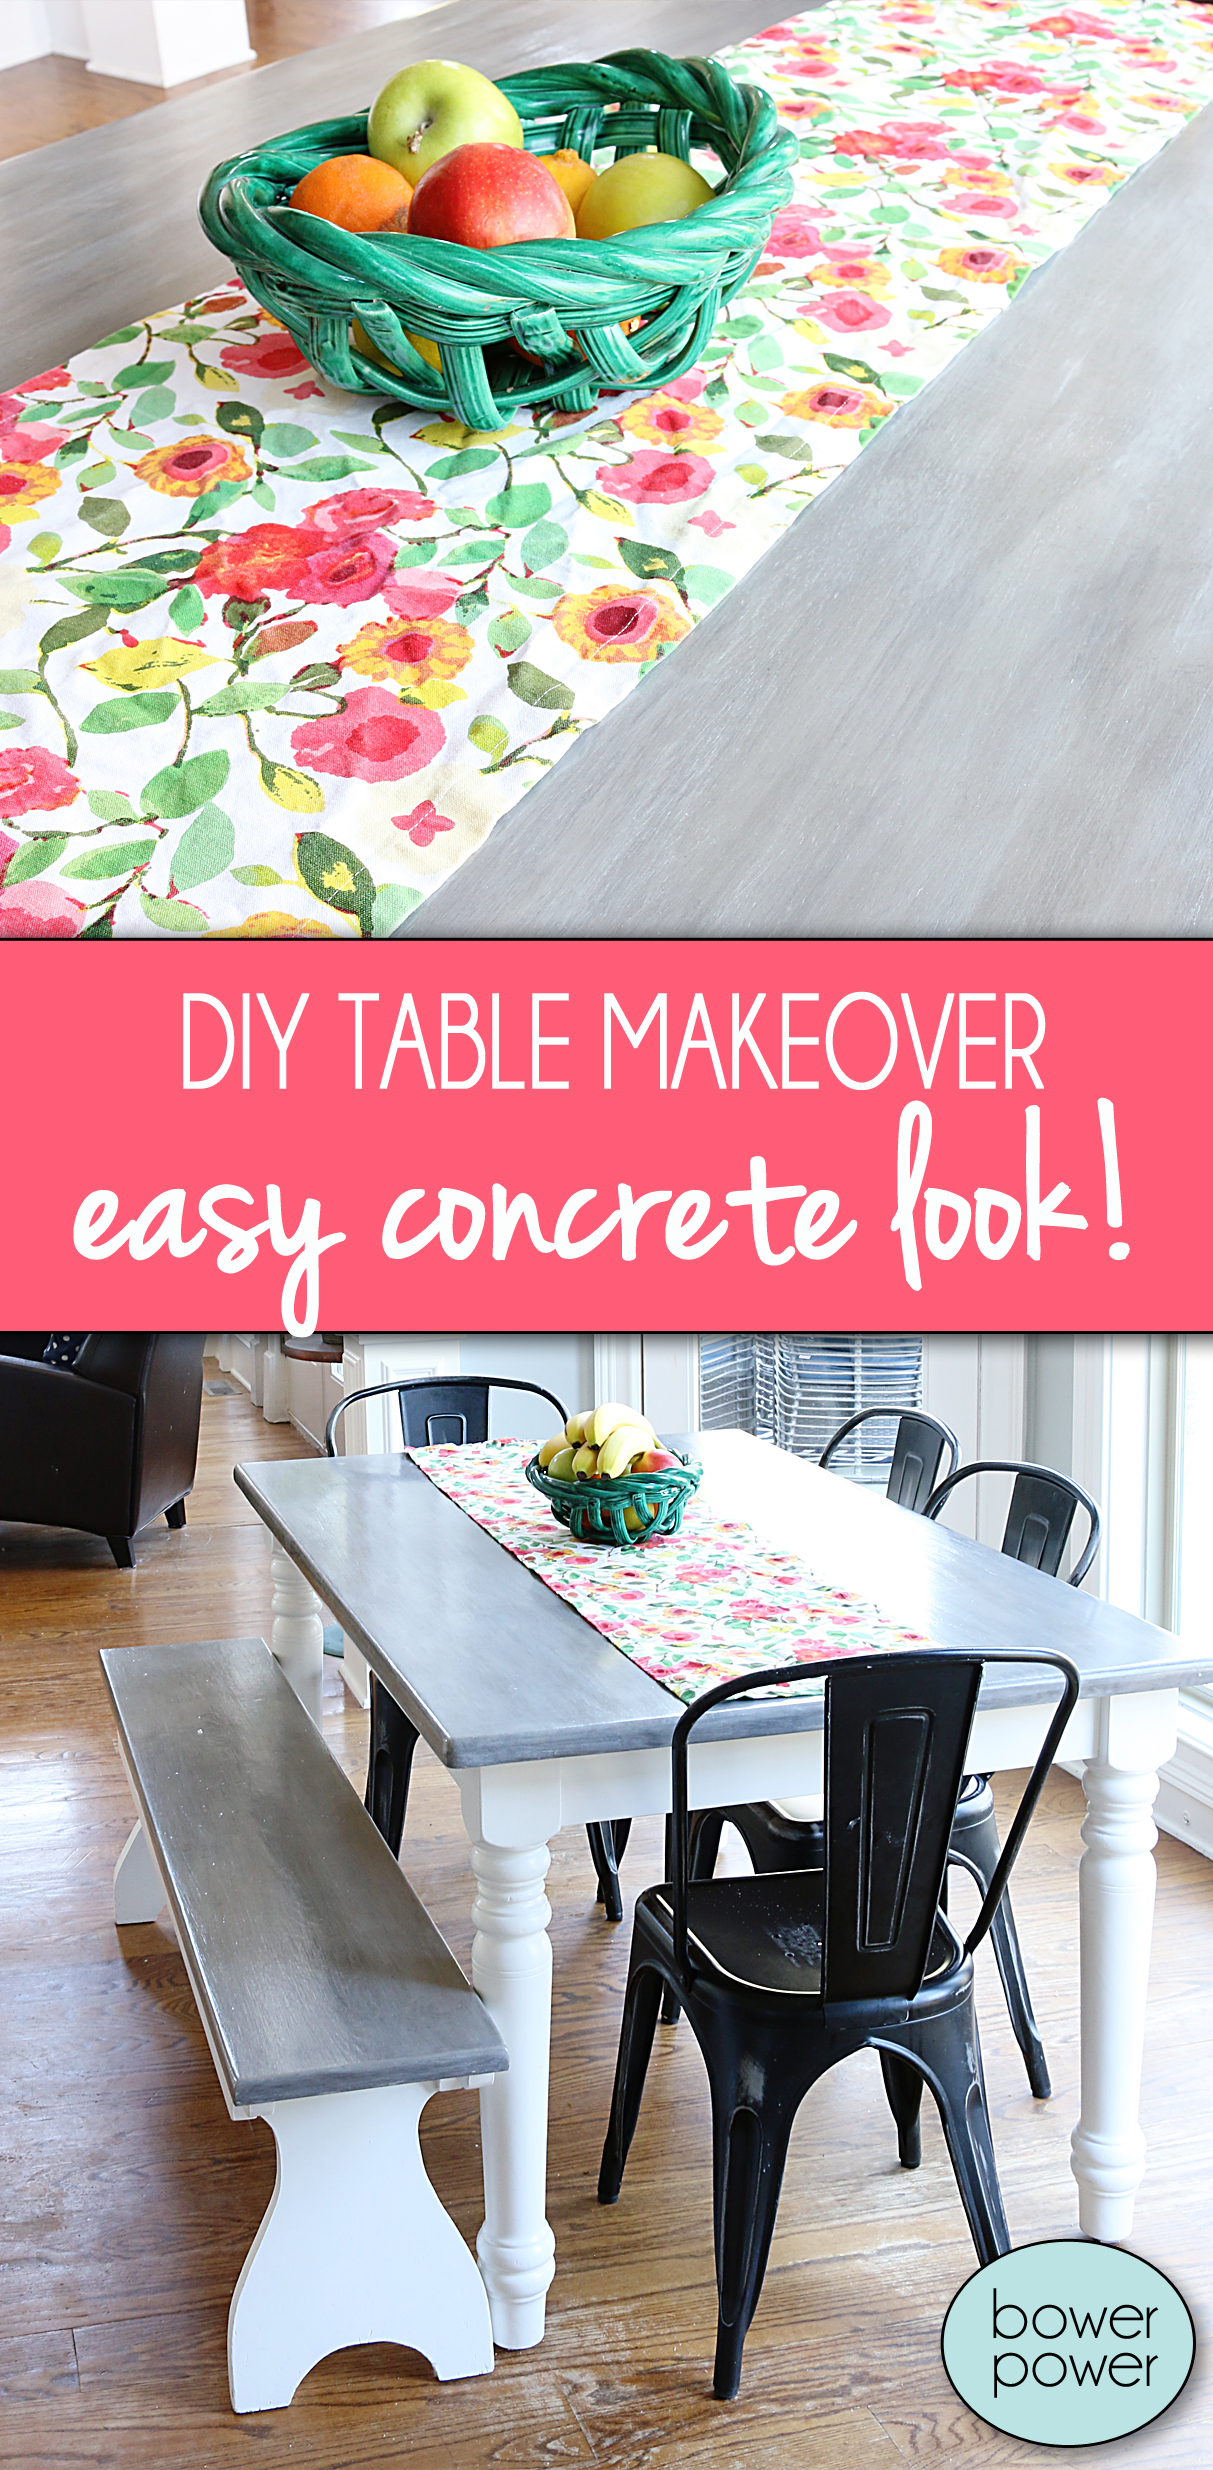
It’s kitchen table makeover time!
Yup. I did it five years ago and it’s high time for a revamp. a do-over. a fixer-upper.
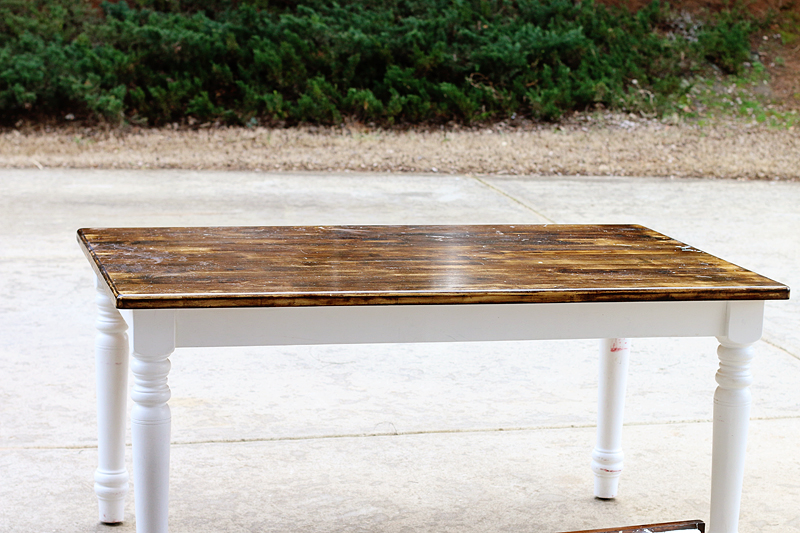
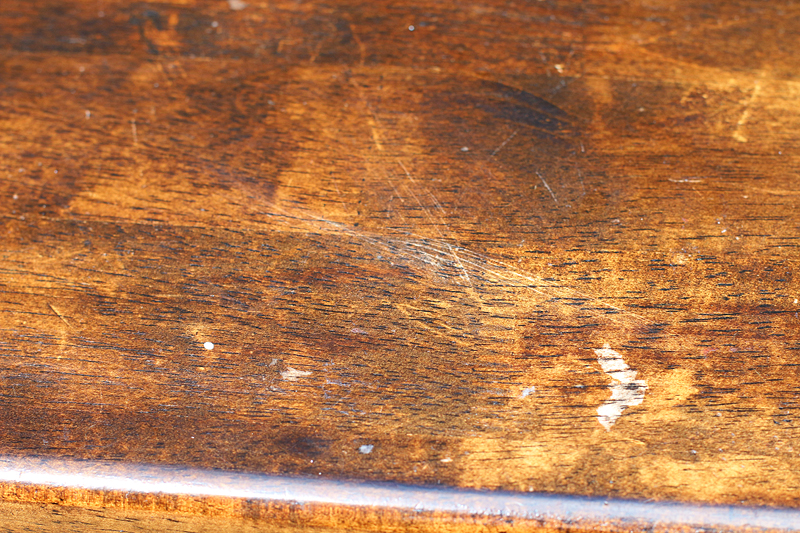
Apparently five years is the life span of a table finish when up against a team of polyurethane super-destroyer vessels named William, Weston and LJ…..bonus point for the world’s messiest baby ever. They gathered together with the single mission of marring my table’s finish till it was just not food acceptable. Now you may be very far away from my table and think…that doesn’t look like it warrants a makeover….
You might even think…it looks ok by me.
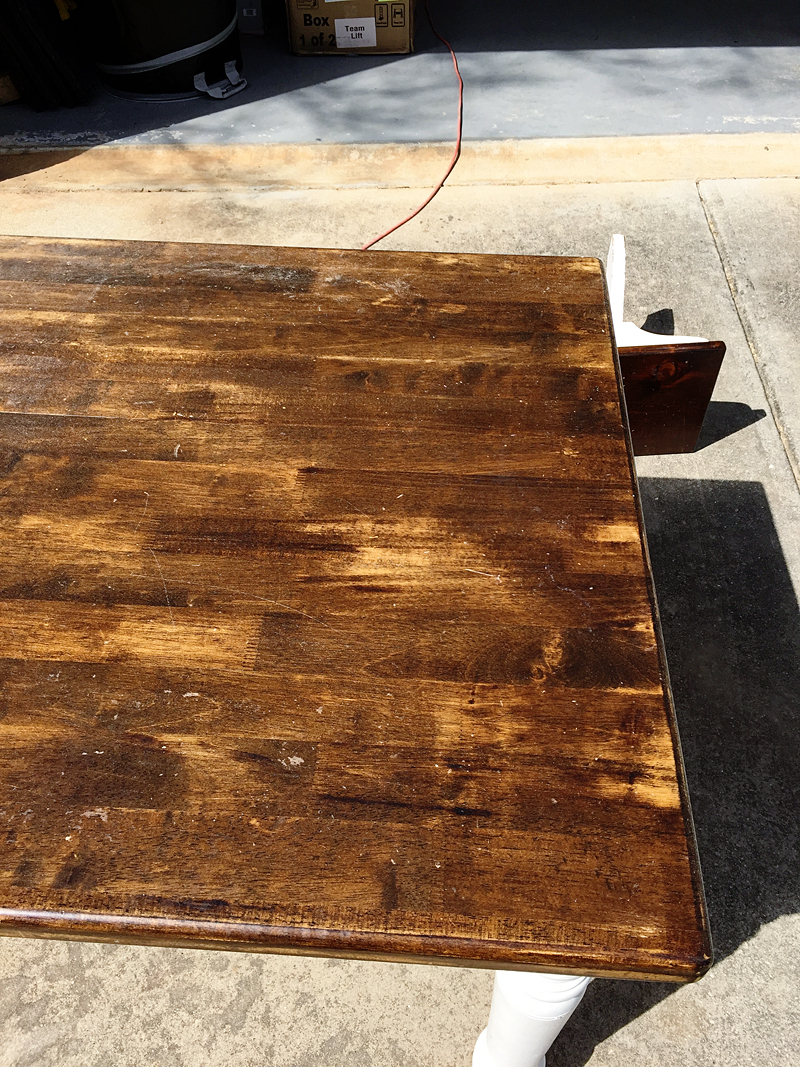
But the fact of the matter is….once polyurethane is cut or flaking or chipped….that is a slippery downhill slope that you my friend can not beat. It is the Everest of poly problems. And once it starts to happen, your table top is no longer food safe. Yup. It’s true. Polyurethane is considered food safe if it is dried and intact. But once it is cut, chipping or flaking – the FDA rips the food safe badge away and sends the finish to timeout with all the other finish losers.
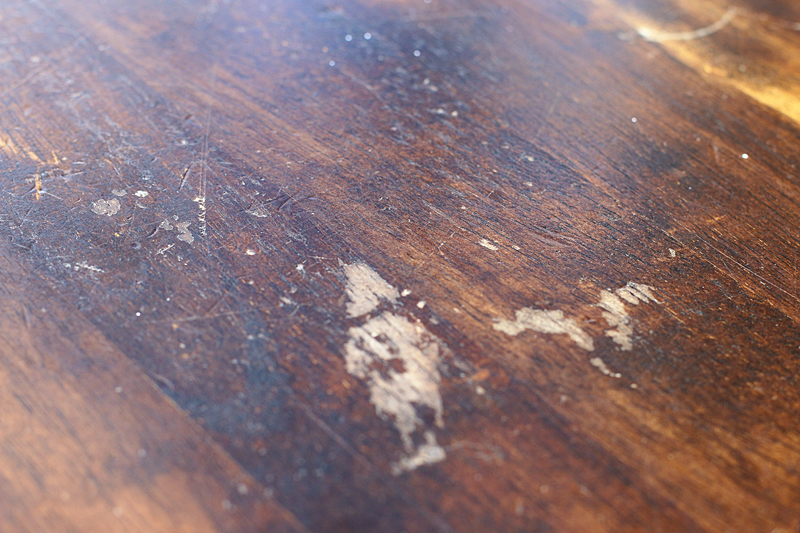
Our table had several areas that had a bunch of tiny little areas that were chipping and I wasn’t about to wait till Maxi Knight’s corner of the table had nicks and cuts too. I mean…he eats directly off this table and the last thing I would want him to consume is some poly chips. (No that’s not true….the last thing would be animal feces….or rotting dead diseased animal…I’ve seen the YouTube videos and they are HORRIFYING.)
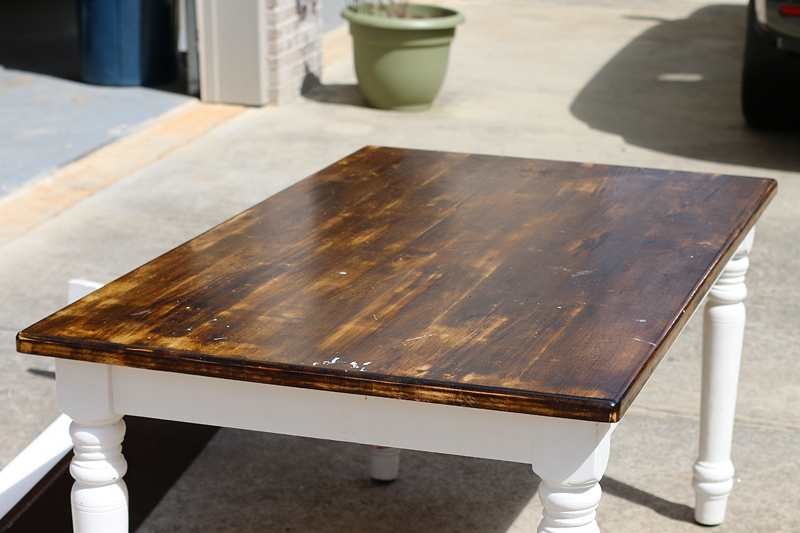
Last time I did several coats and I am grateful it survived this long. I do believe that my table has withstand more punishment than most. Not only is it the place we use for Play-doh and homework but it’s also been a workstation where I assemble furniture, a playspace for crashing monster trucks and heck, I even had a baby on that thing.
No I didn’t….but I wanted to spice things up 🙂
So the fact is – it was ready for a change and so was I.
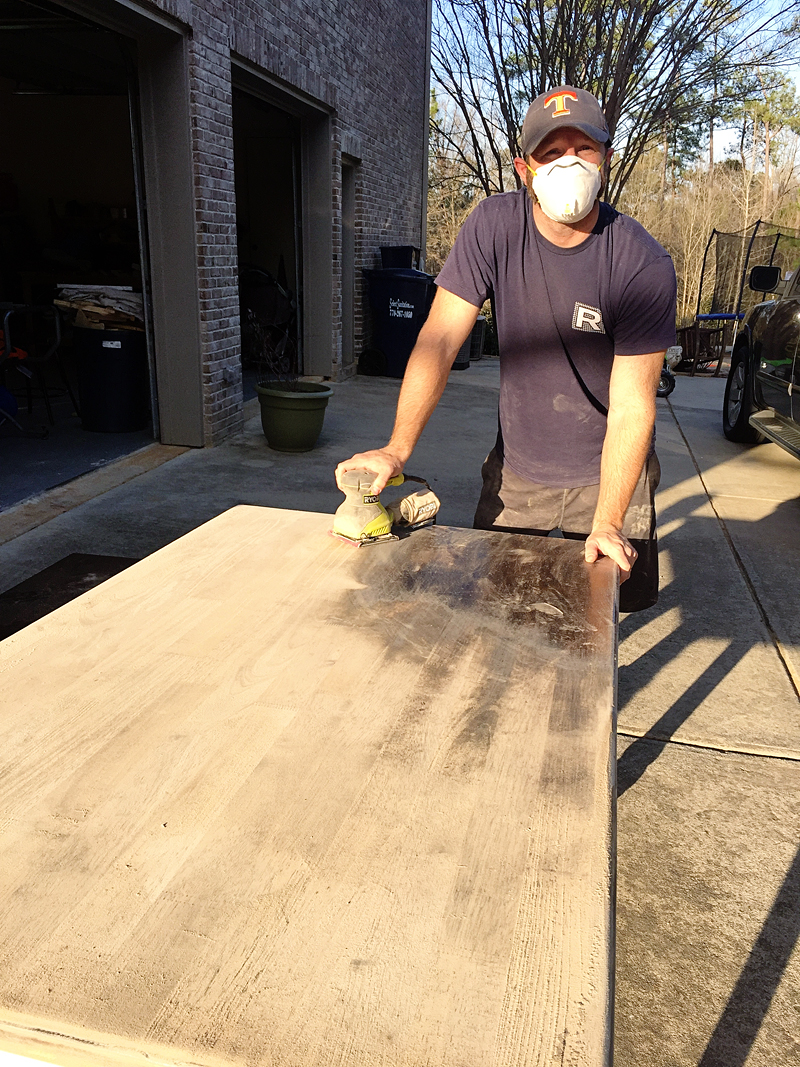
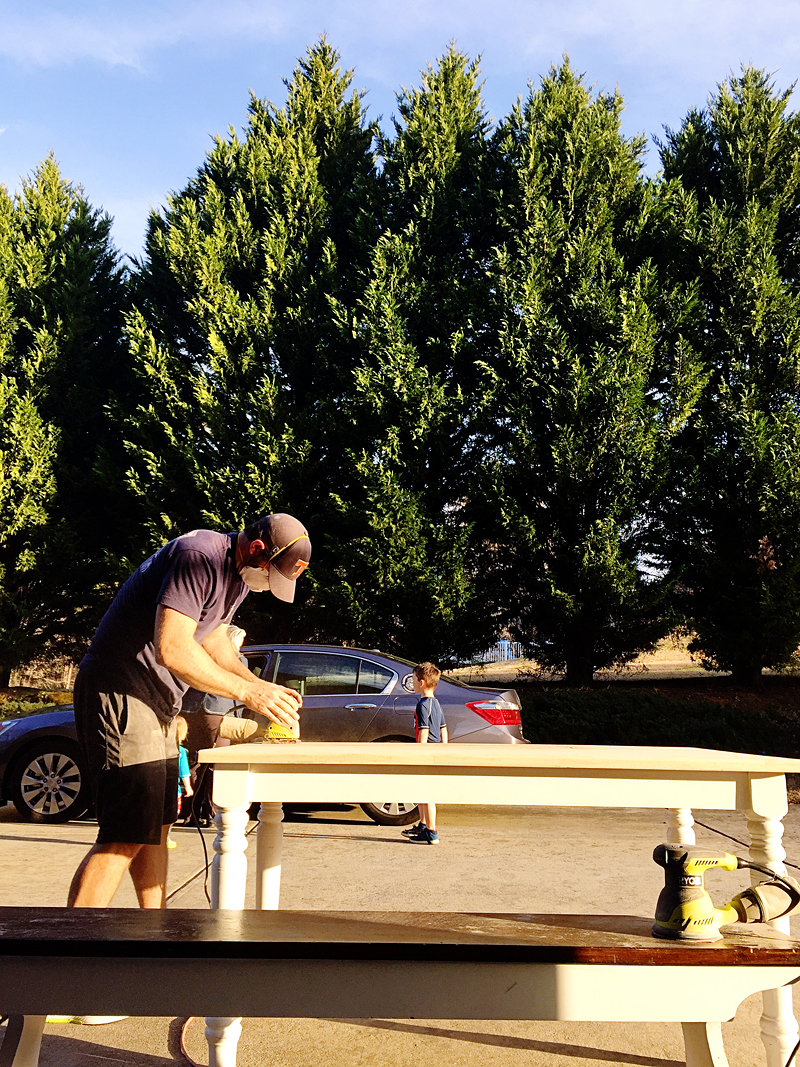
The first thing I did was sand down about a quarter of it with 60 grit.
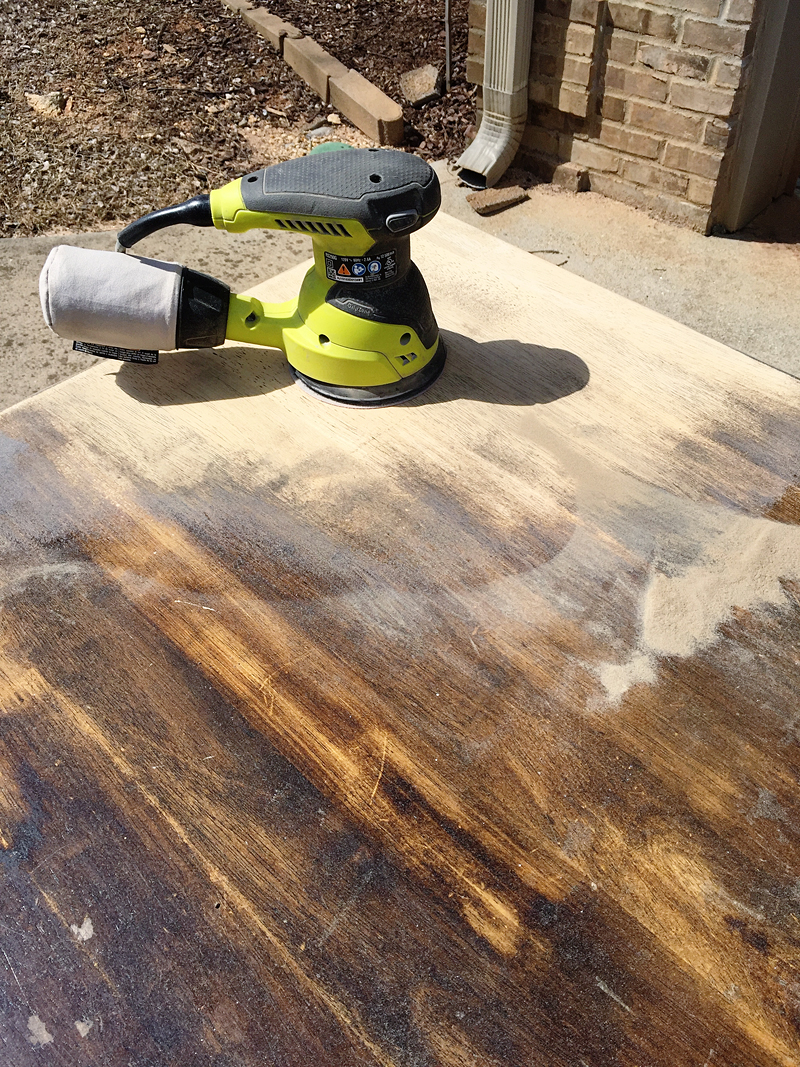
Then I got the sand-master to do the rest.
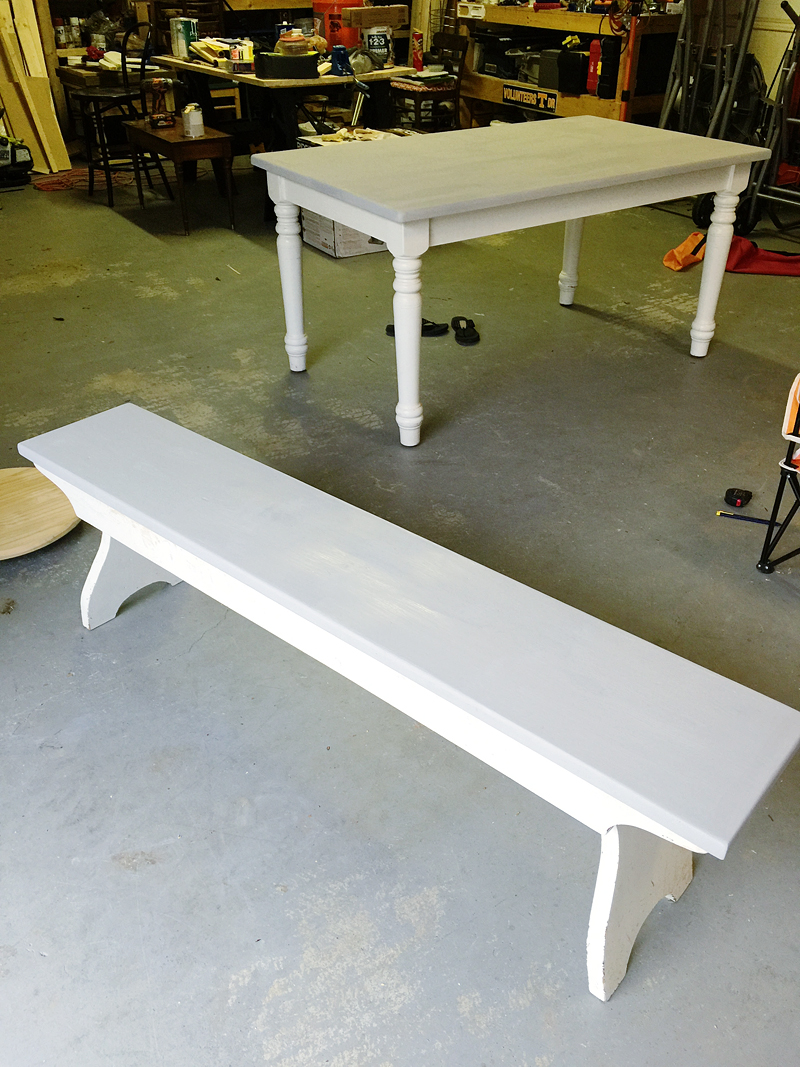
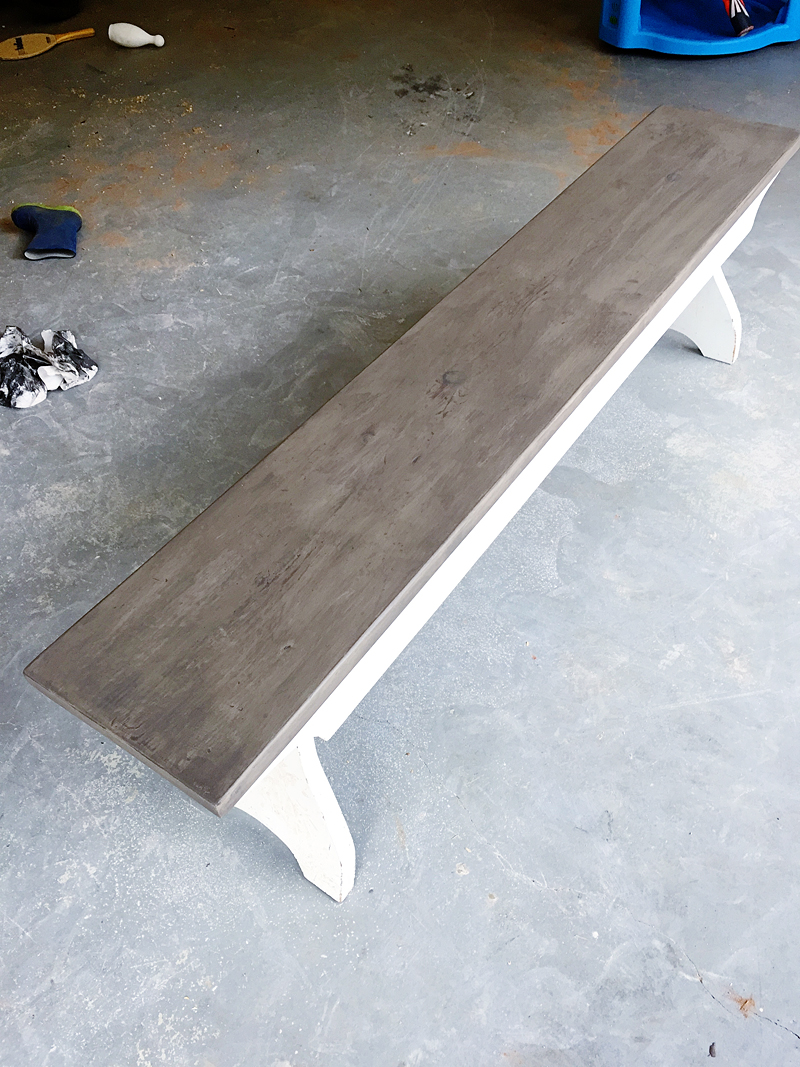
We also have a ‘matching’ bench to do. You may remember that I got the bench at Goodwill and the table at a yard sale for $18. It was a regular ole craft table and the wood isn’t super high quality or anything like that.
When it was sanded completely (60 grit, 120 grit, 200 grit) it was time to decide on the finish.
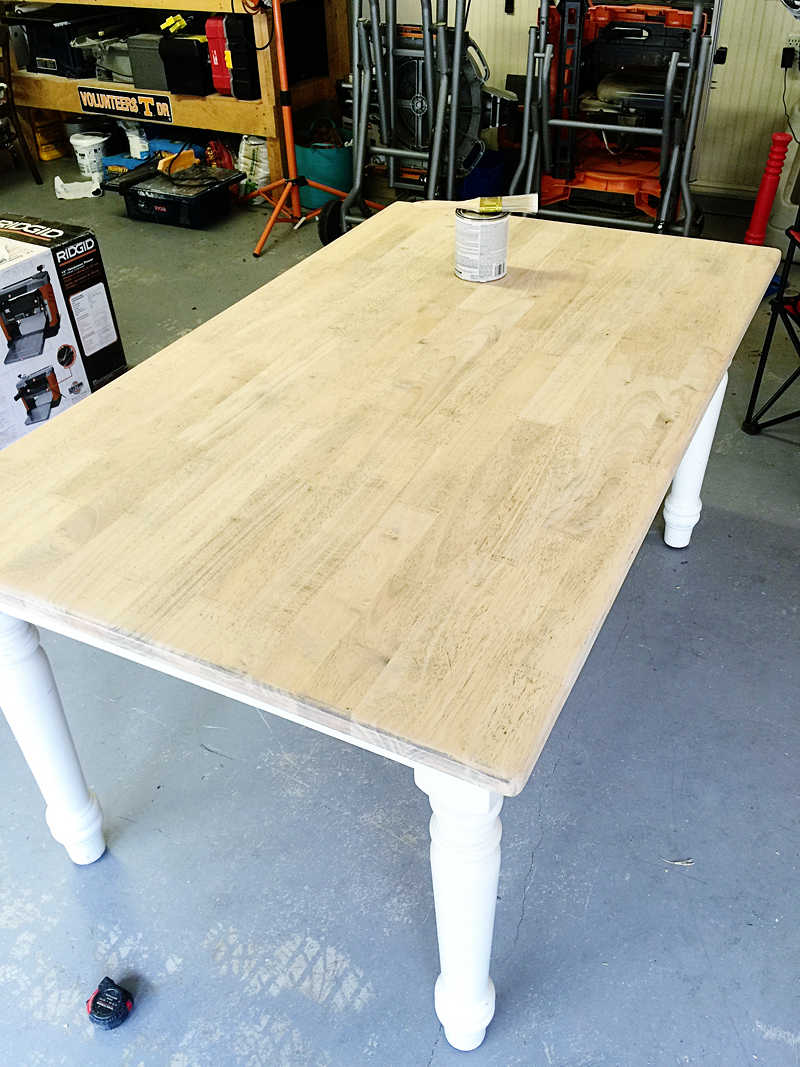
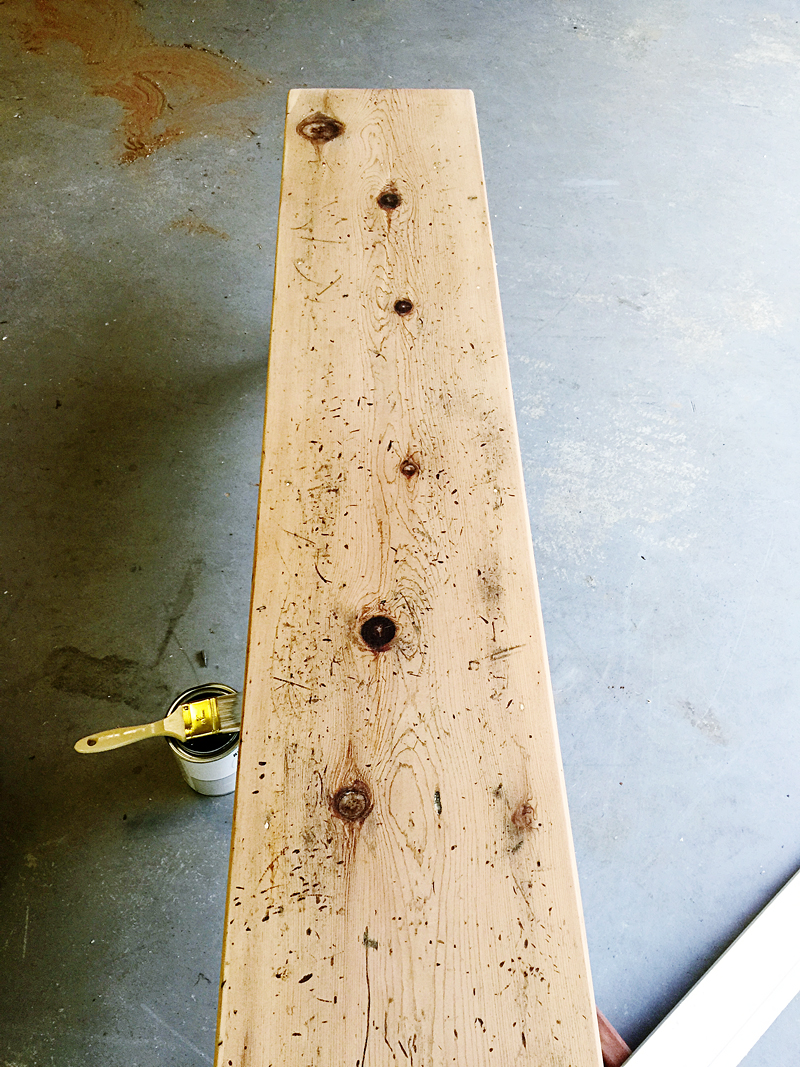
The real decision maker was this bench though. After we got it stripped down, I noticed the knots and the dents (the little marks with stain still in them) would need to be covered up somehow to mask the fact that it was different species of wood than the table. My options were to stain the whole thing dark again….or to paint it. I decided to go the road less traveled 🙂
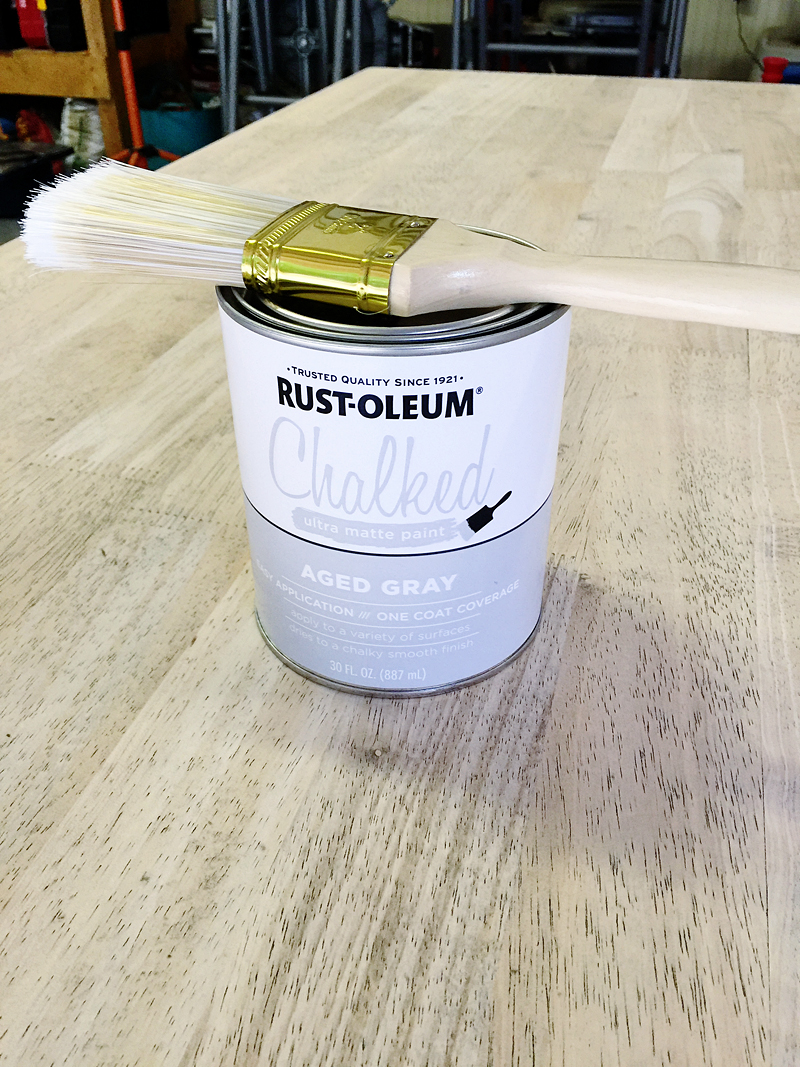
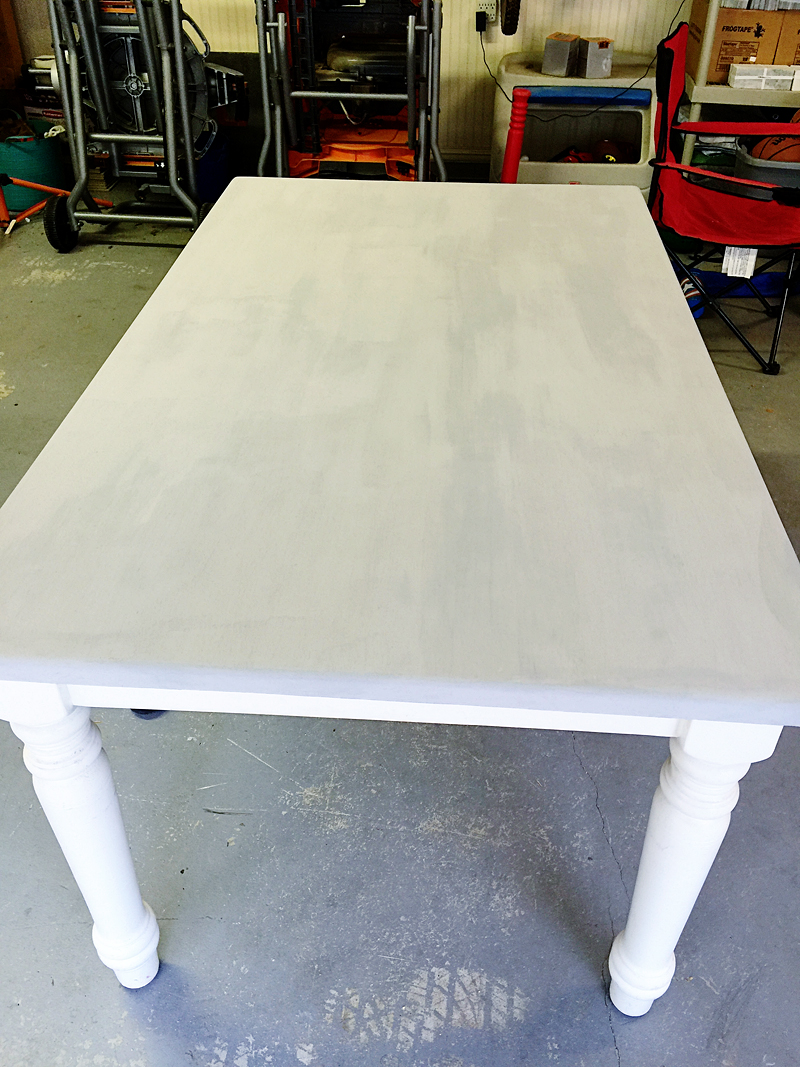
This is my first attempt at using chalk paint on a heavily used surface so this is definitely an experiment of sorts. I decided to go with a light base – Aged Gray by Rust-Oleum looked like the perfect color so the table and the bench both received one regular coat.
Afterward, it looks like this….
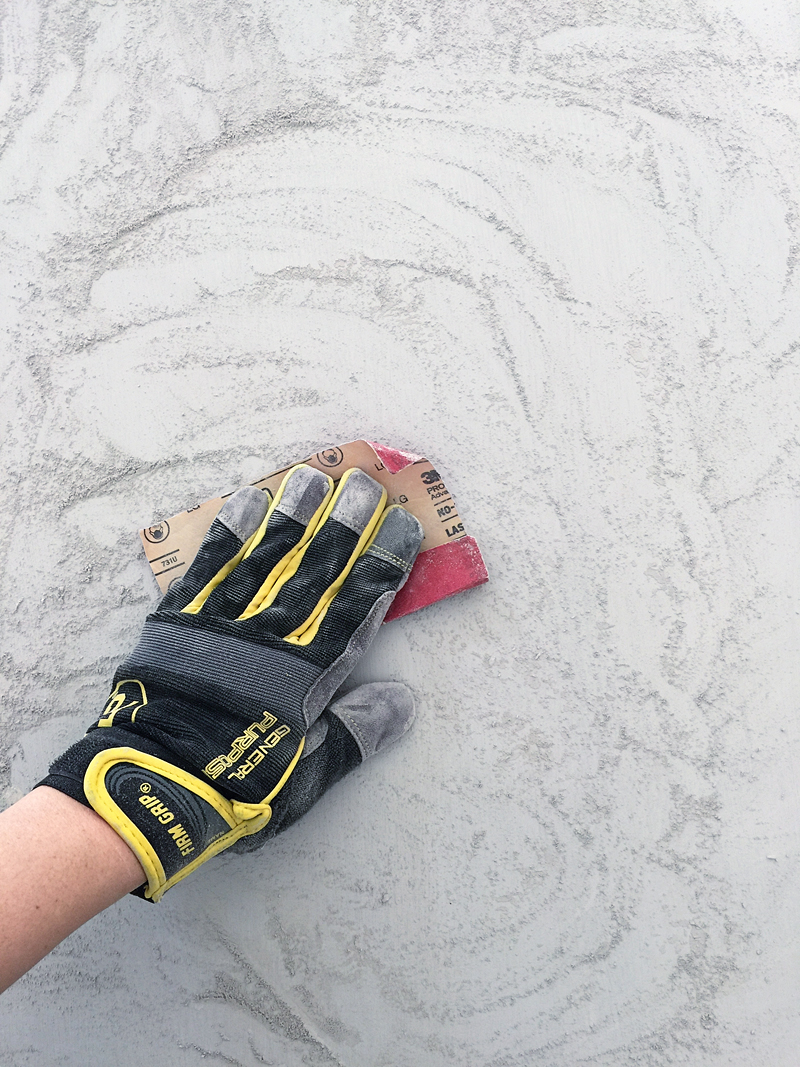
Now if you were used to regular paint and never used chalk paint before, this might worry you a bit. But chalk paint is meant to go on, dry and then be lightly sanded. Sanding removes all the irregularities like brush strokes and makes the finish feel like VELVET.
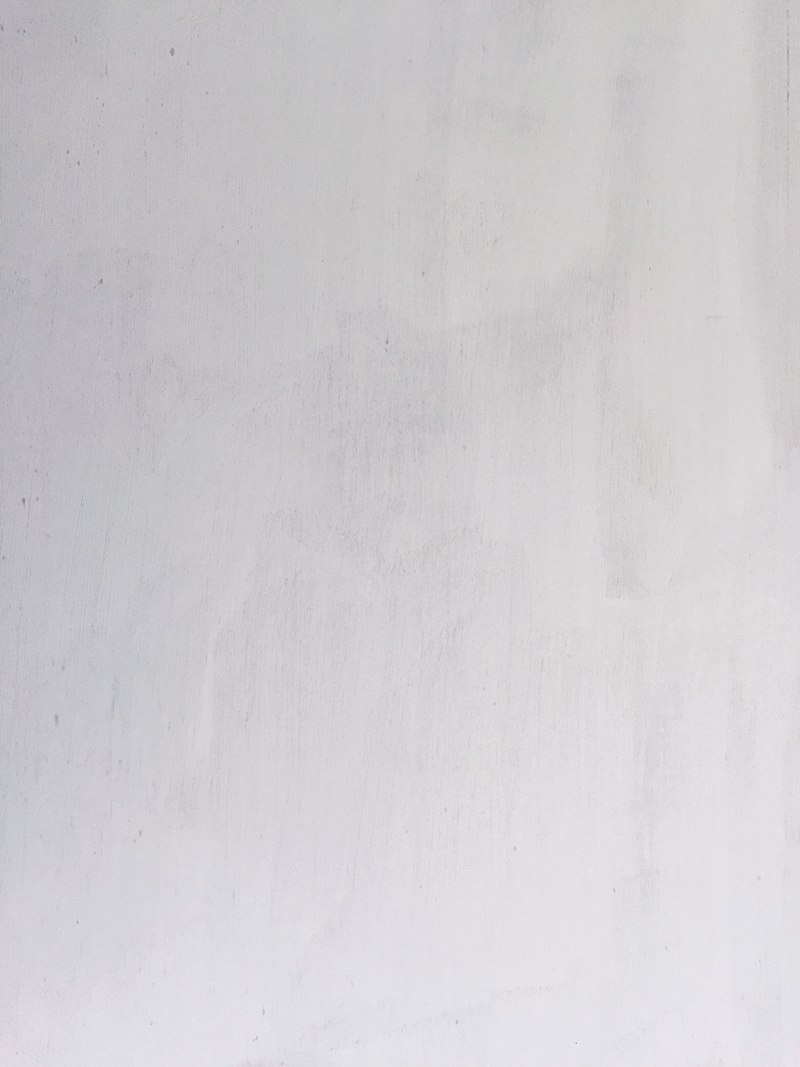
See those marks? You can make them disappear and the paint will feel so so smooth and rich.
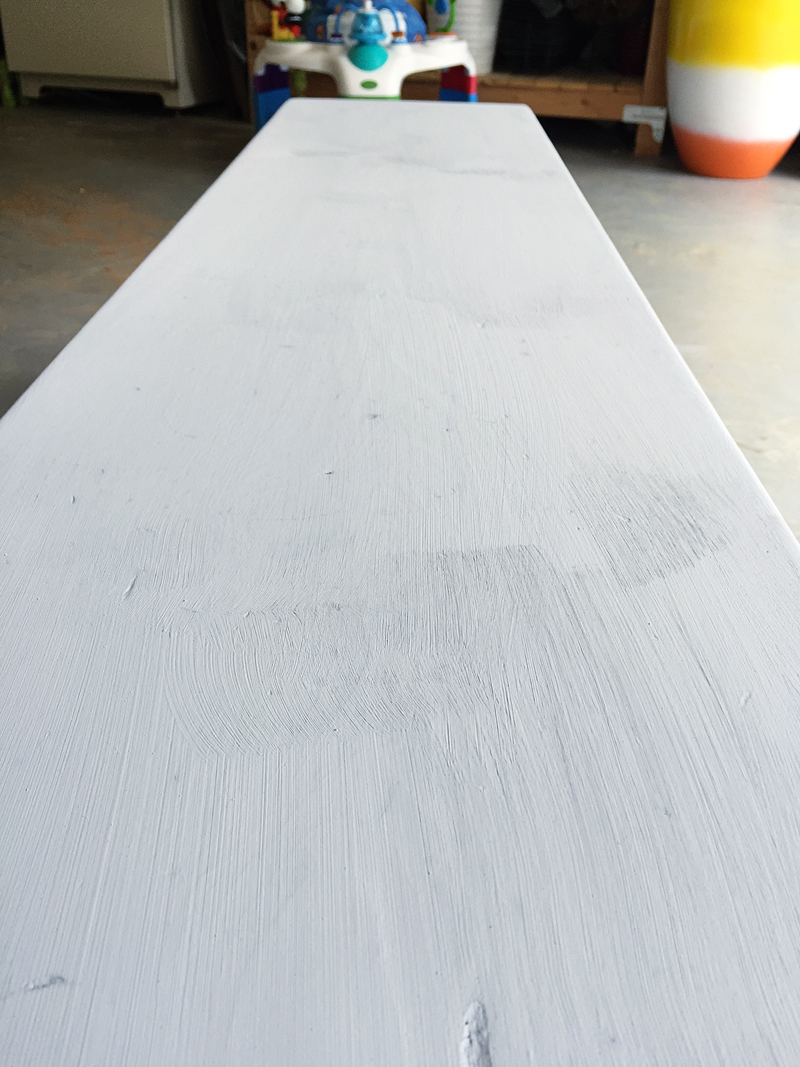
It does produce a lot of chalky dust though 🙂
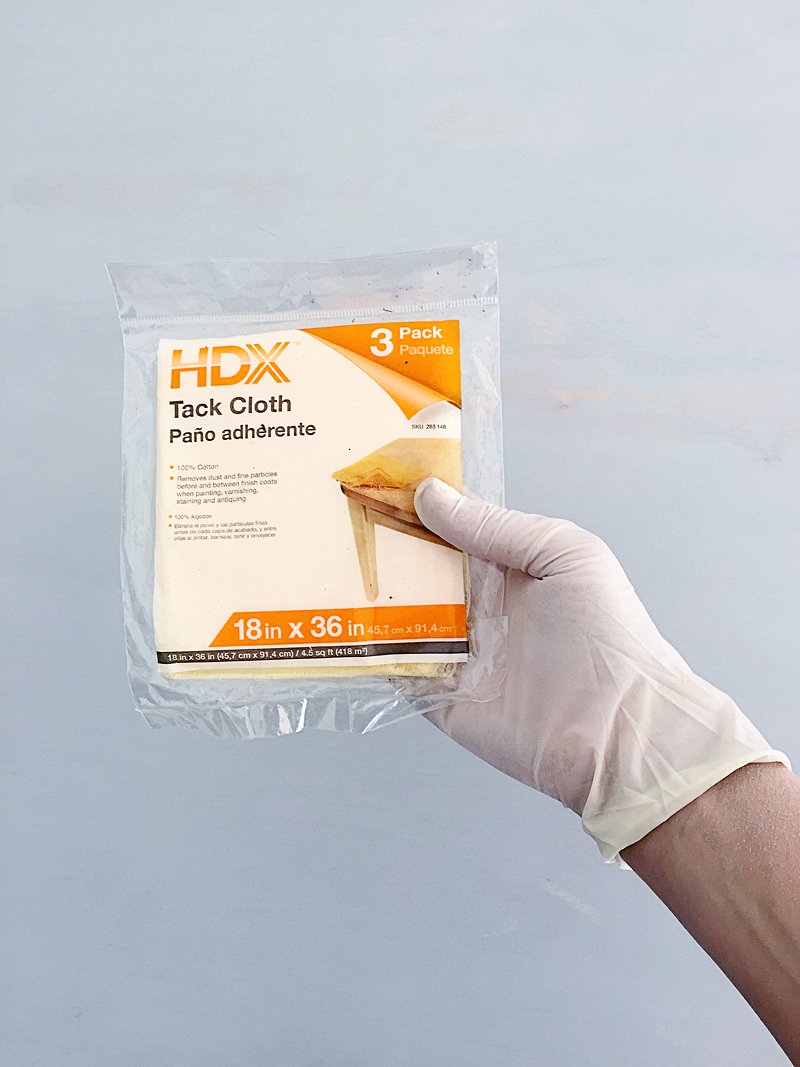
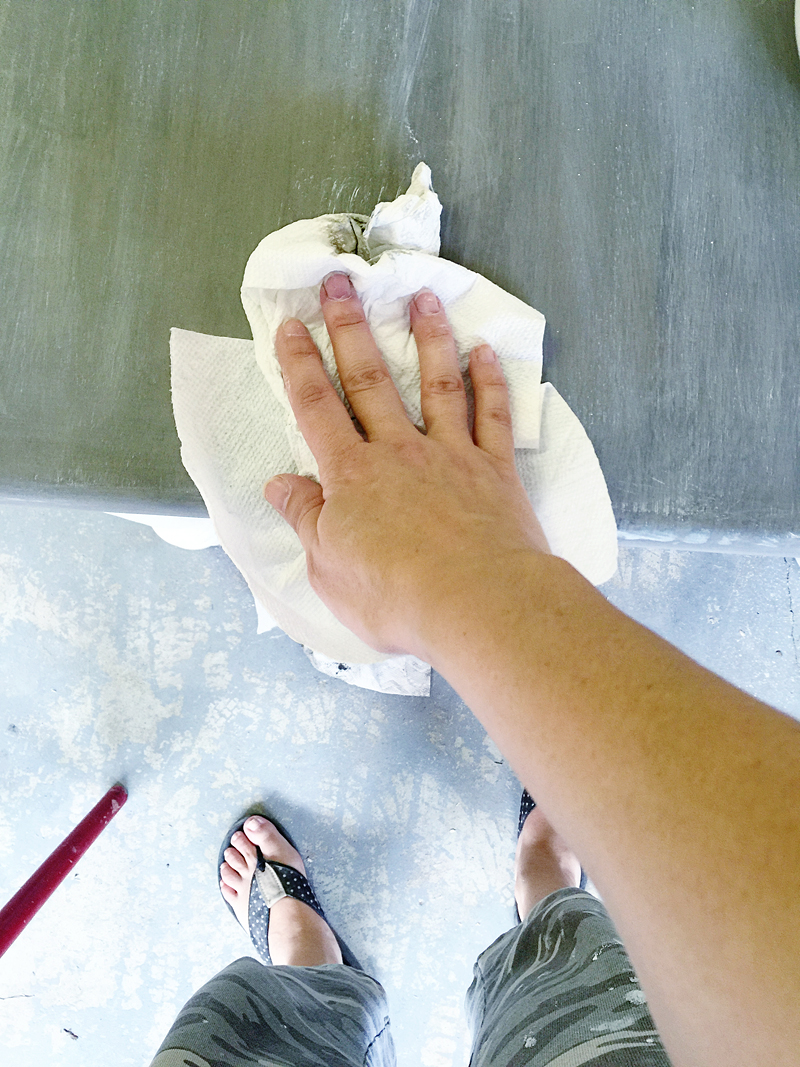
After you are done, you will need to remove all the dust….it helps to brush it off and or wipe it down with an ever so slightly damp rag and then remove all the dust particles with a tack cloth.
Now the chalk paint needs to be sealed. You can use a wax or a poly or a finish specially formulated for chalk paint. But in my case, I felt like the gray would look too stark in my kitchen. So I decided to apply a couple more layers to make it look more like old wood.
I did this by adding one layer of Rust-Oleum’s Briarsmoke stain. OH SWEET JALEPANOS – this color is SO pretty.
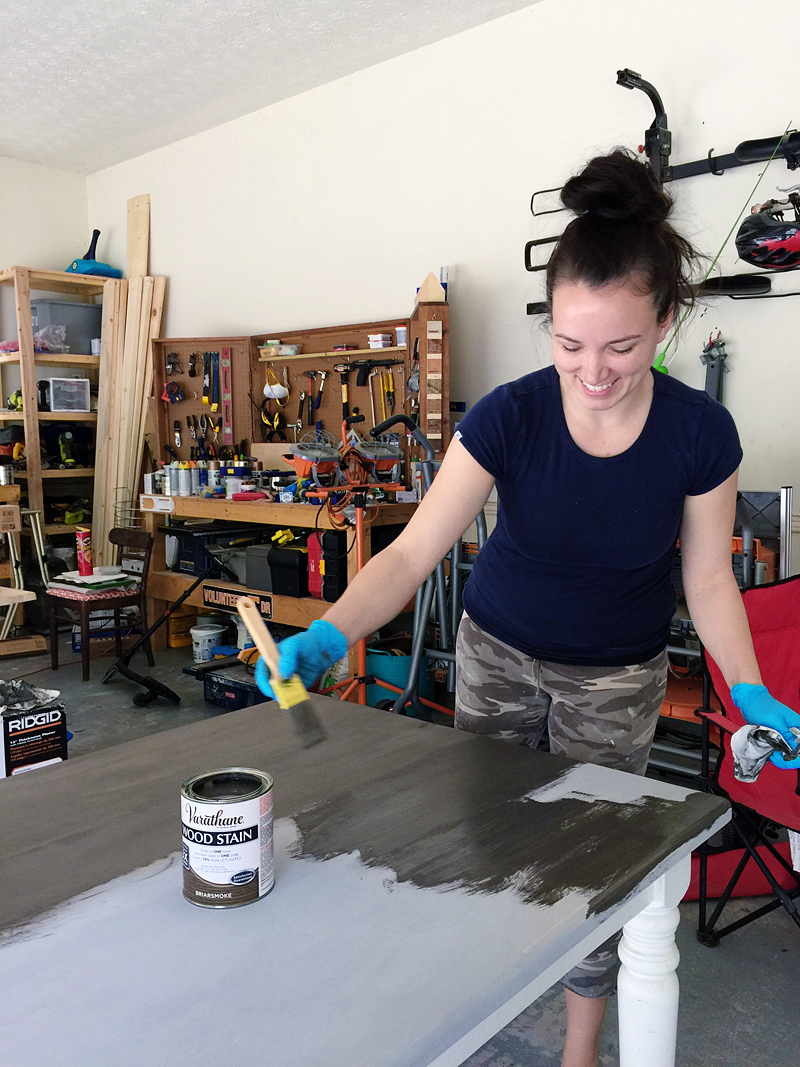
One coat did the trick. I was sure to quickly apply it with a bristle brush and then blend it REALLY well with a rag.
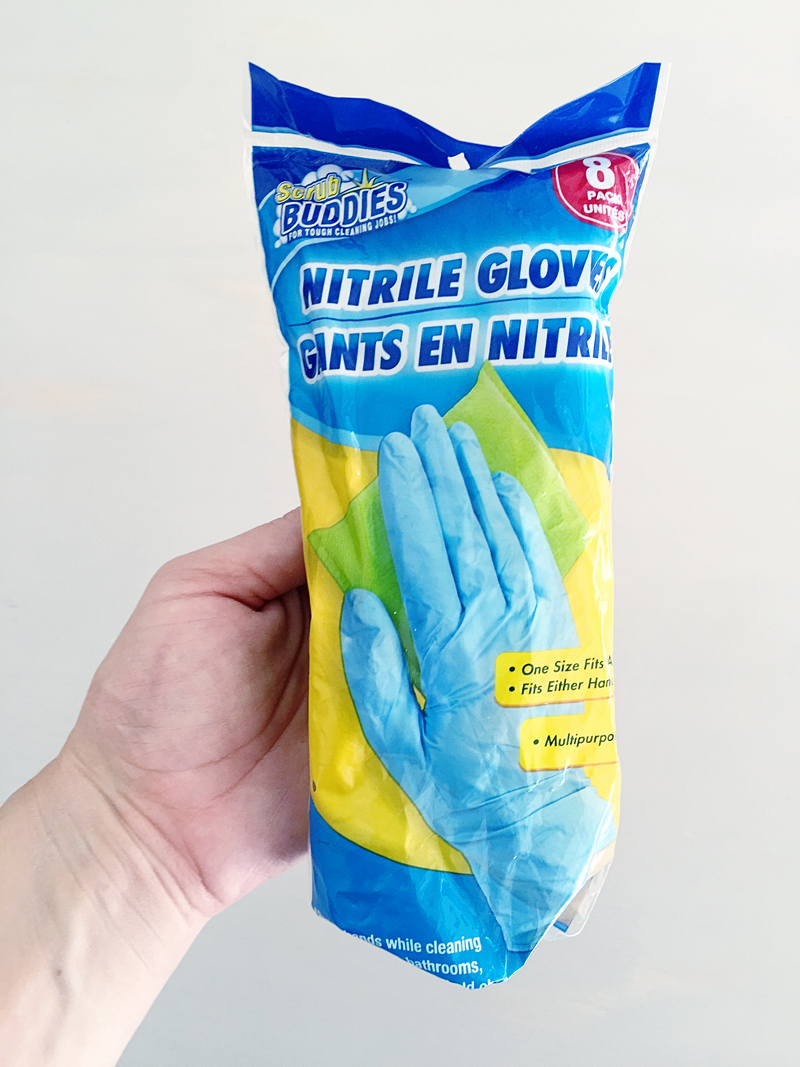
Here is my tip for the day – make sure you use these Nitrile Gloves when you are staining….don’t waste your money on latex or whatever….the NITRILE is the best and thickest gloves and will actually save your manicure. I got a pack of 8 at the Dollar Tree.
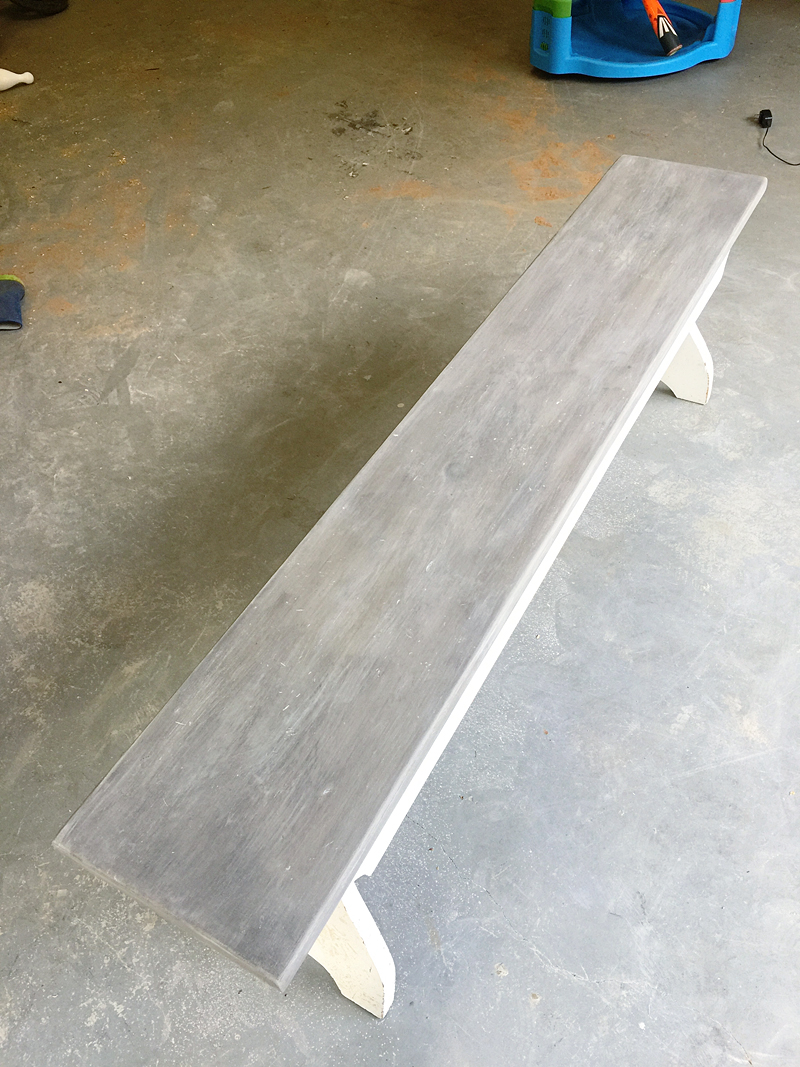
Post paint and post stain…
Now call me crazy but I wanted to add a little more dimension to the table. It was looking so dark and we just went away from the dark finish so I decided to white wash the whole thing. I mixed up equal parts white chalk paint and water in a small bowl.
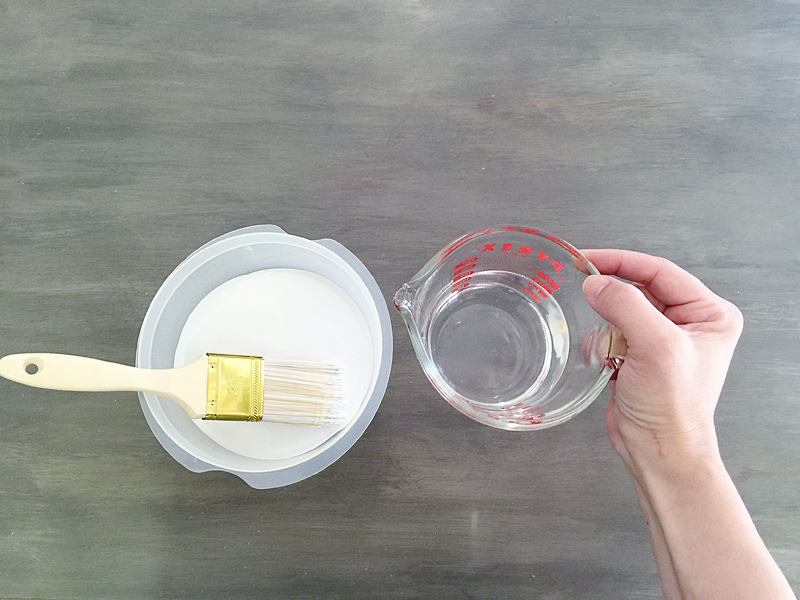
Then I would quickly apply some to the table with a brush, moving the bristles WITH the grain.
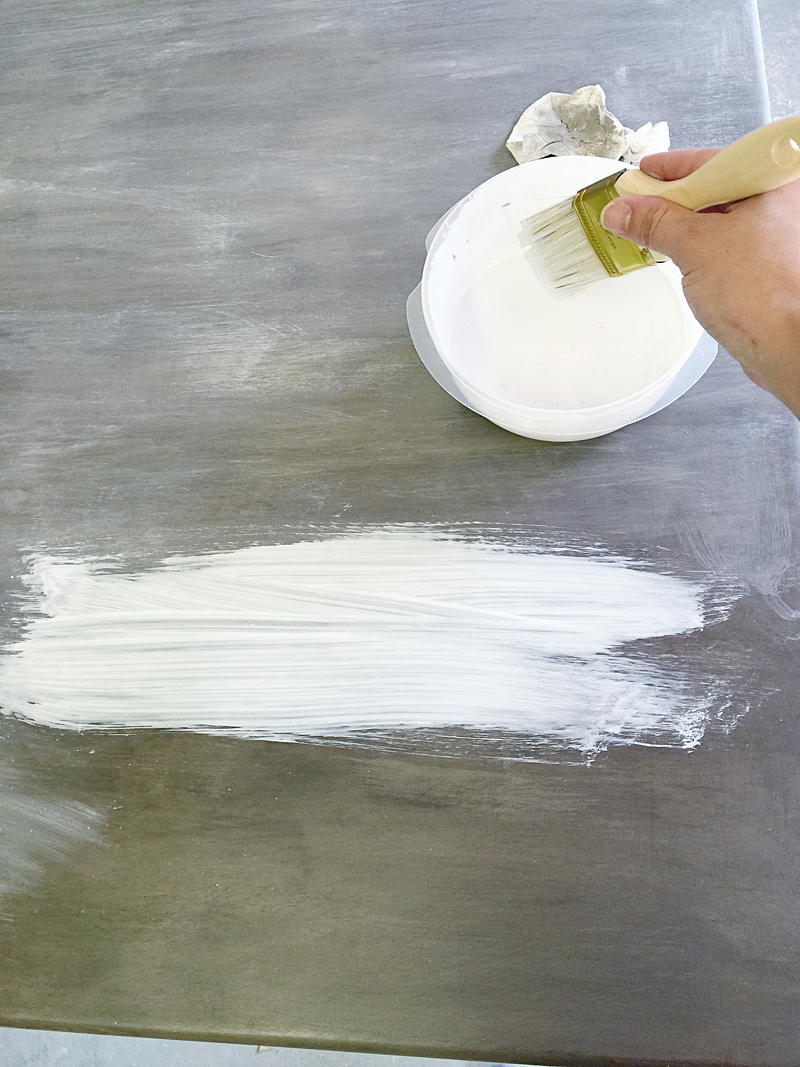
Then I would rub off any excess quickly to give it this worn beachy vibe.
Look how pretty….
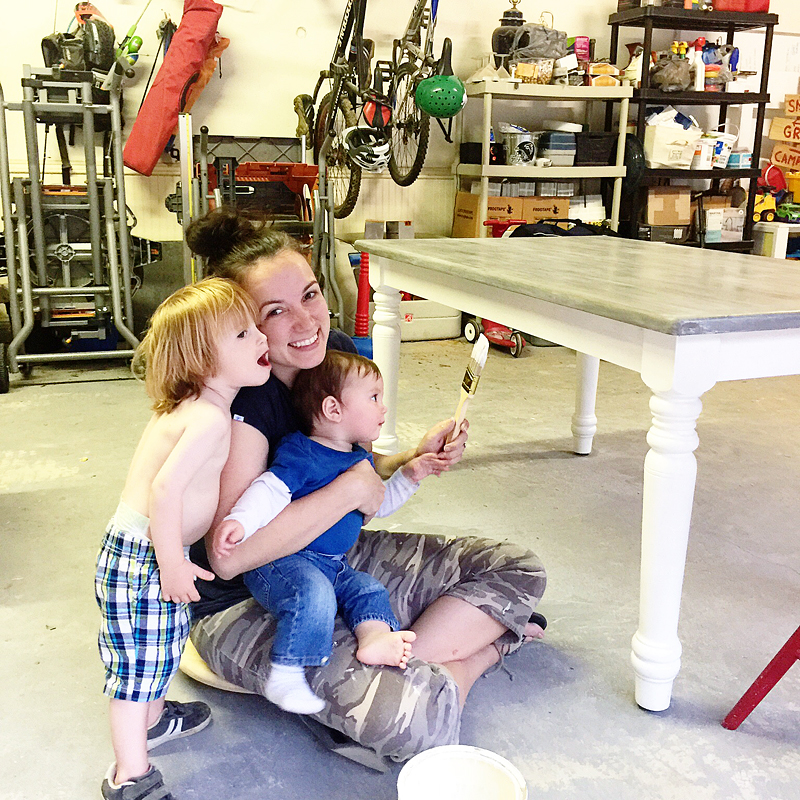
My little partners in white washing crime….(yes LJ is trying to give me a kiss with the wide open mouth!)
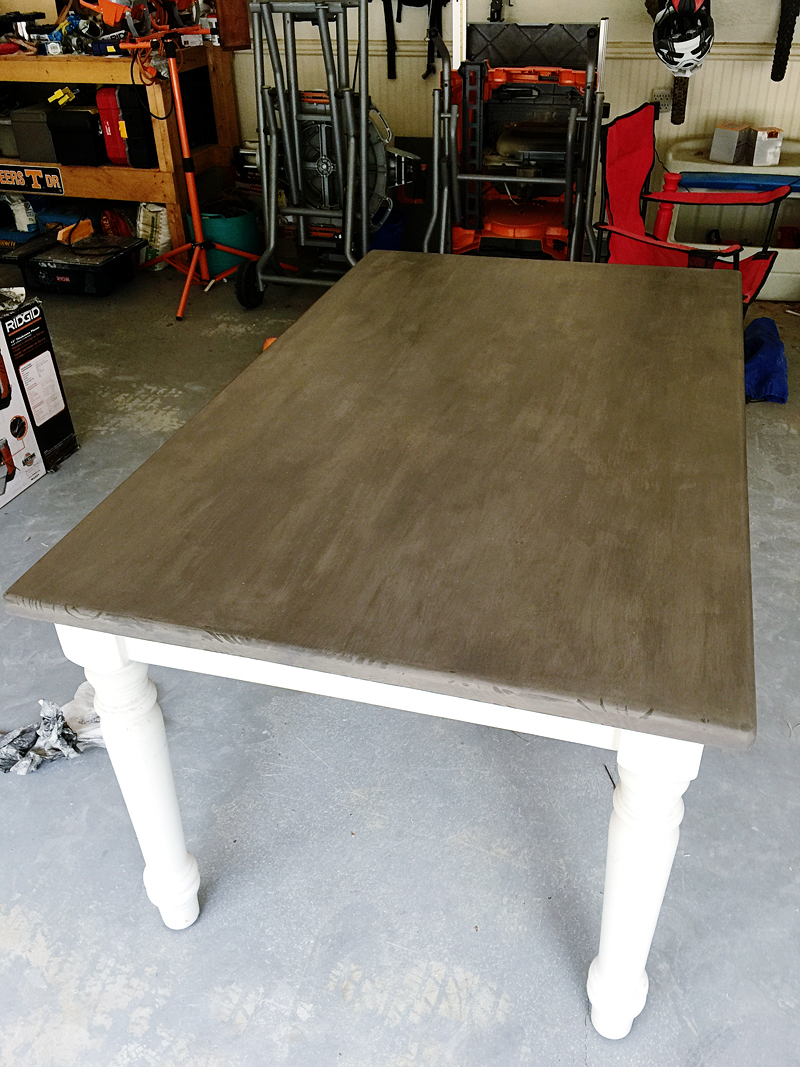
After a light sanding with 400 grit sandpaper and about five coats of poly with sanding in between, the table and bench were moved back into their old home.
This finish is PERFECT for me. I needed something lighter and the medium tones on this finish were exactly what I wanted. It is like a cross between concrete and driftwood.
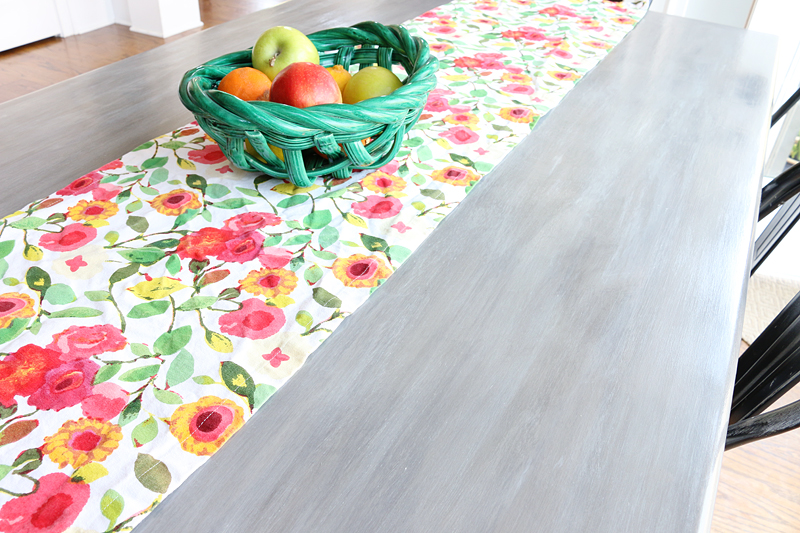
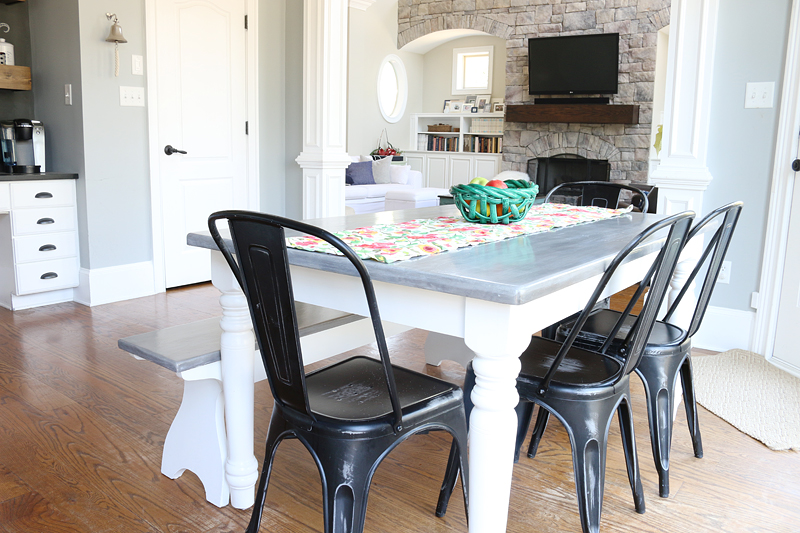
And the bench and table do match perfectly – so the chalk paint base really did work wonders!

I think that in general, I am finding out what works in this house and what doesn’t. It’s only taking five years to get there 🙂
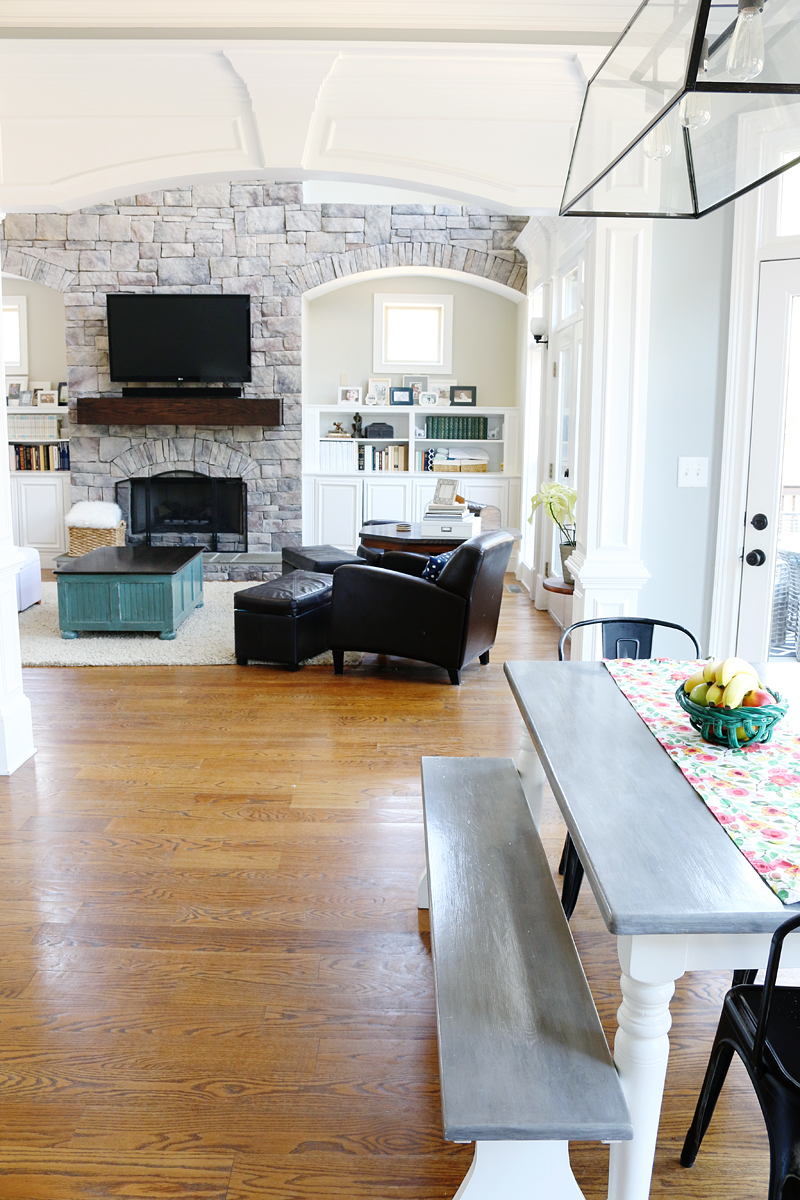
Visually, the new finish helps the table kinda fade into the kitchen nook and I am perfectly okay with that. We have big open spaces and a lot visually interesting with the moldings, stone work and large rooms….so having this piece be the more shy little sister actually helps it feel more intentional.
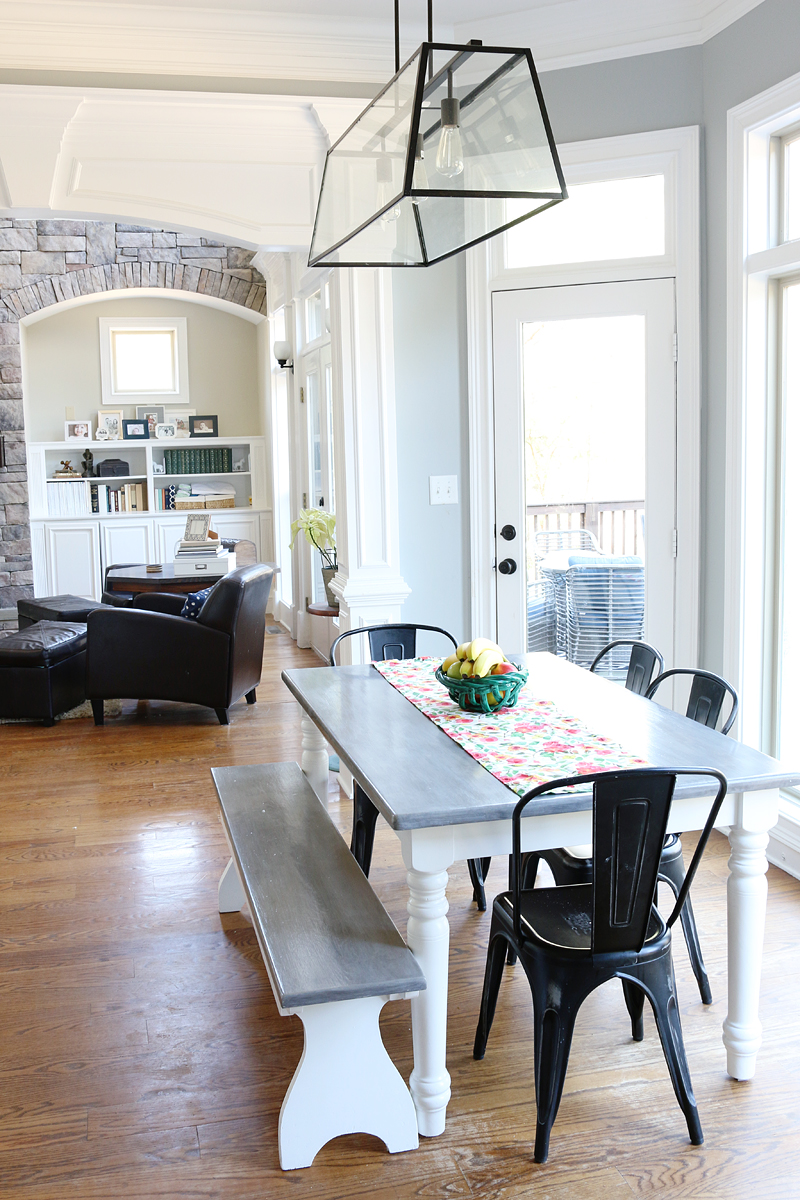
I also touched up the base on both the table and the bench with regular white paint…the same as I had used before. It feels like a brand new table and I love that it is now food safe again! #dontpoisonyourkids
So that’s what I have been up to! What pieces have you guys been refinishing lately?! I’d love to hear about your different techniques! Oh and to see the original makeover of this table – CLICK HERE!