When we started the design process of the basement kitchen, I was super excited to get a double bowl farmhouse style sink. I have never had one and honestly they are just really beautiful in the most simple and honest way. I have fallen in love with photos of kitchens and thought “oh my gosh this is the most gorgeous room ever” (cue the drool and the questions like “do they even cook in there?” “how long would it take for my kids to destroy everything in that space?” and “did that cost 1 million dollars?”). And the funny thing is – majority of the time there is a farmhouse sink present. The irony in that is that farm house sinks aren’t necessarily super pricey! They aren’t like those high end appliances that cost an arm and leg and ten mortgage payments.
So here is the post about how we got our own farmhouse sink and then made it work in our basement kitchen. If you would like to catch up on past basement kitchen posts – here are the links….
- Clearing out the Basement
- Planning the kitchen
- Assembling the Cabinetry
- Saving on appliances
- Building concrete countertop forms
- Screwing up the concrete (attempt 1)
- Successful concrete countertops
- Concrete countertops FAQ
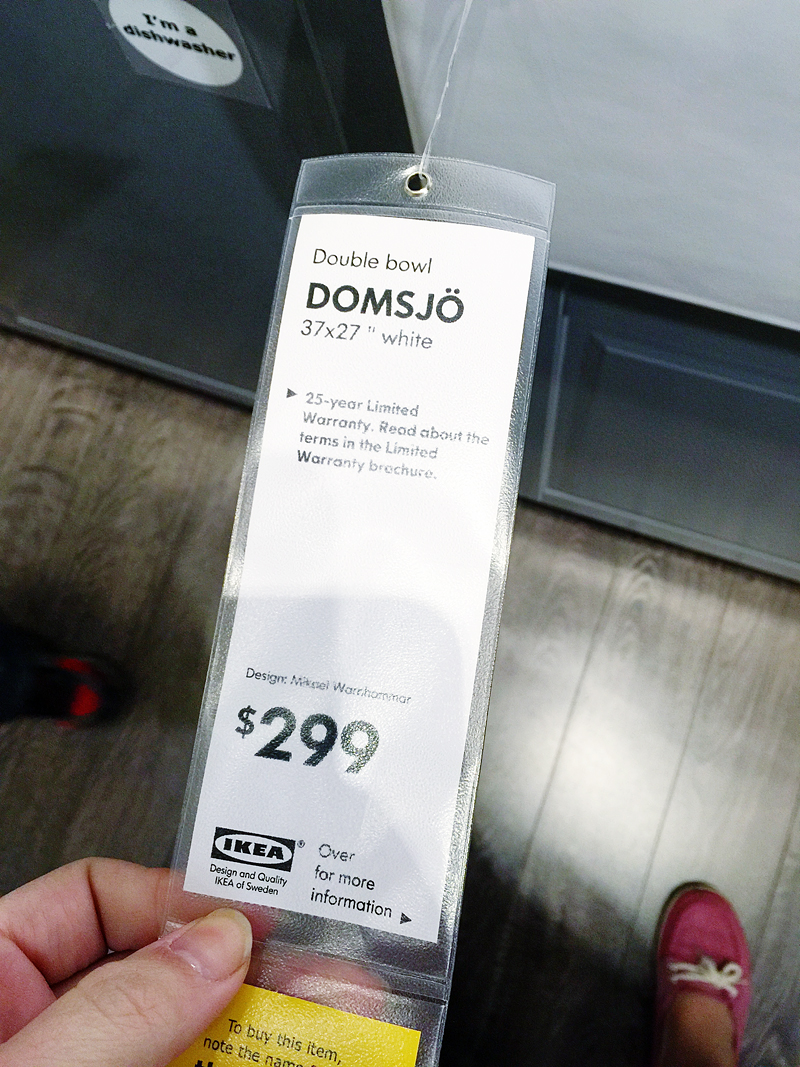
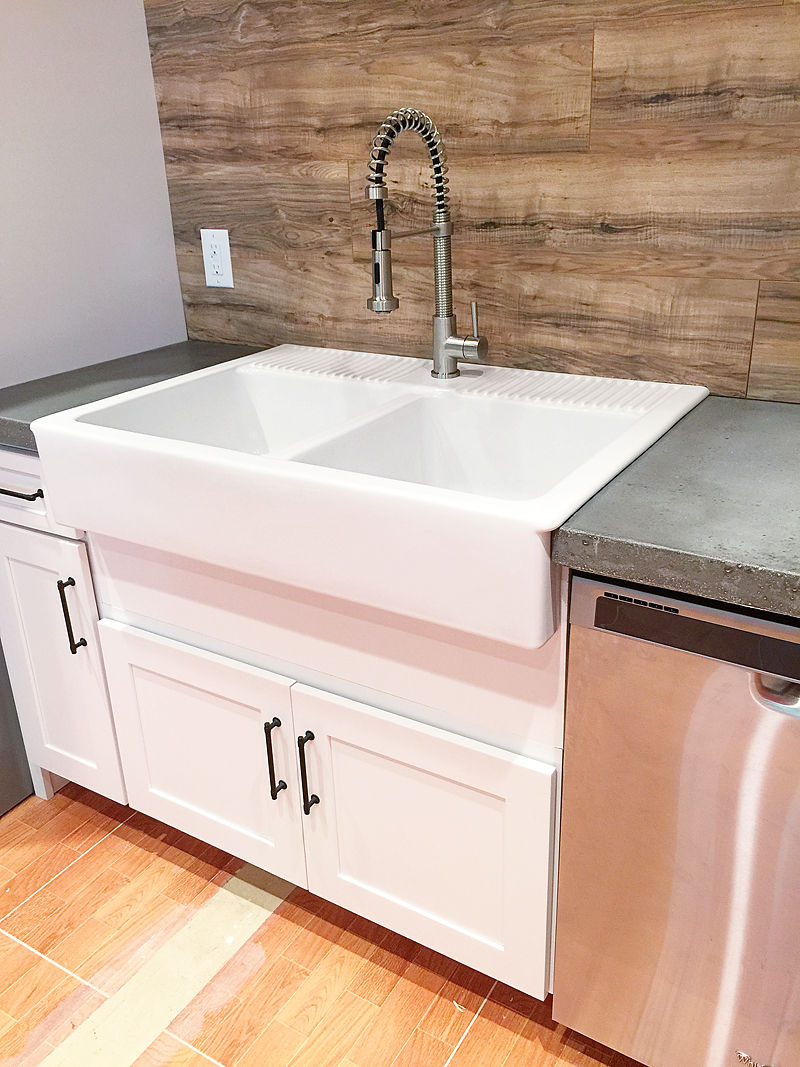
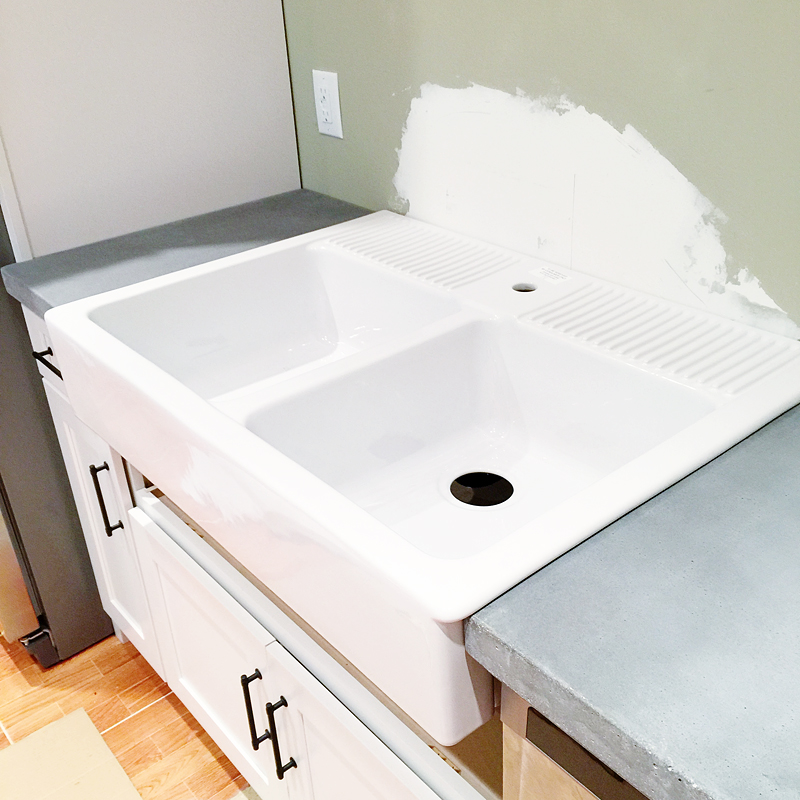
The farmhouse sink that we purchased is from Ikea. It’s the Domsjo double bowl and it measures 37″ by 27″. That means that it should fit over a standard 36″ cabinet pretty perfectly. And if you are ever wondering what we look like at Ikea….it’s like this:

Yes – we are those crazy people that have too many kids and a whole lot of random stuff and we are giving the little ones ANYTHING THEY WANT so that we can get in and out very quickly. Want a whole bucket of swedish meatballs? DONE.
Seriously Ikea…I love you…like a lot…but your wonky carts are enough to drive me up the wall. WHY DO THEY NOT PUSH STRAIGHT!?
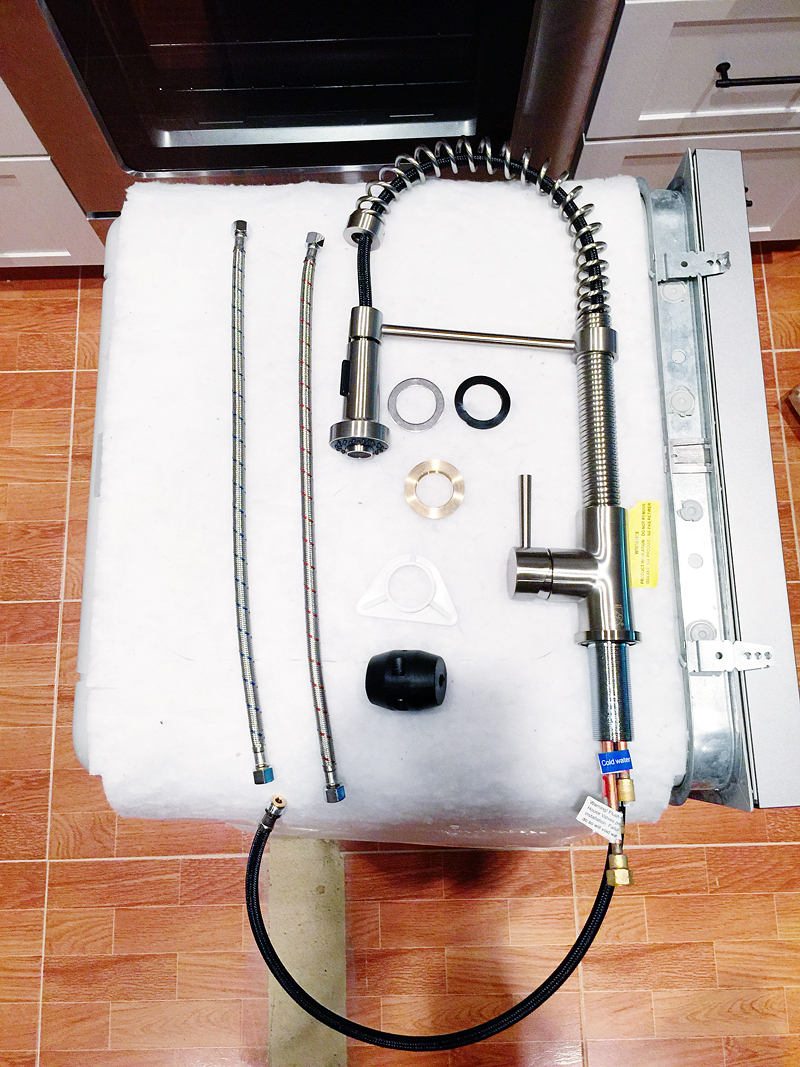
Okay – so after picking up your sink, it’s a good idea to make sure that you also have your faucet picked out and shipped to ya. We wanted to go with a farmhouse industrial vibe so I thought one of these cool stainless versions would play well with our black hardware and concrete countertops.
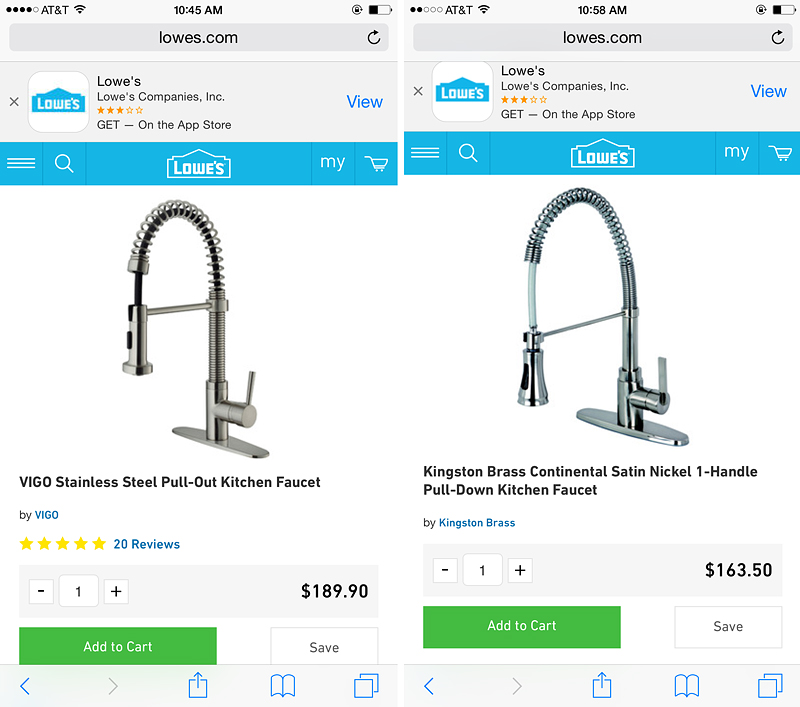
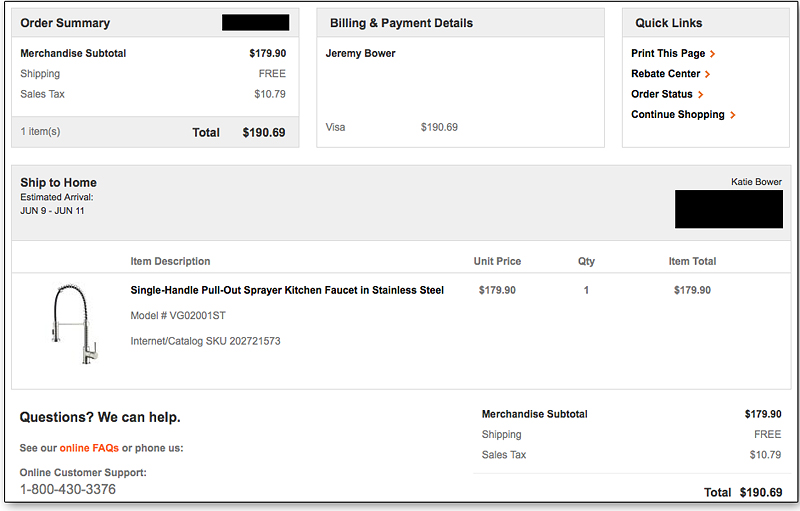
In the end, I liked the black hose and the look of the no-base-plate so I went with an Amazon one that looked really intentional and fit the bill. So overall – the sink cost us $300 (I see that it has gone up in price since then) and then you buy the strainers separately for the drain ($7 each) and then the faucet cost just under $200. Not the cheapest part of the kitchen but probably the most used space so it was worth it to go for what we really wanted.
When the faucet arrived – it was everything I had hoped. I really love the look!
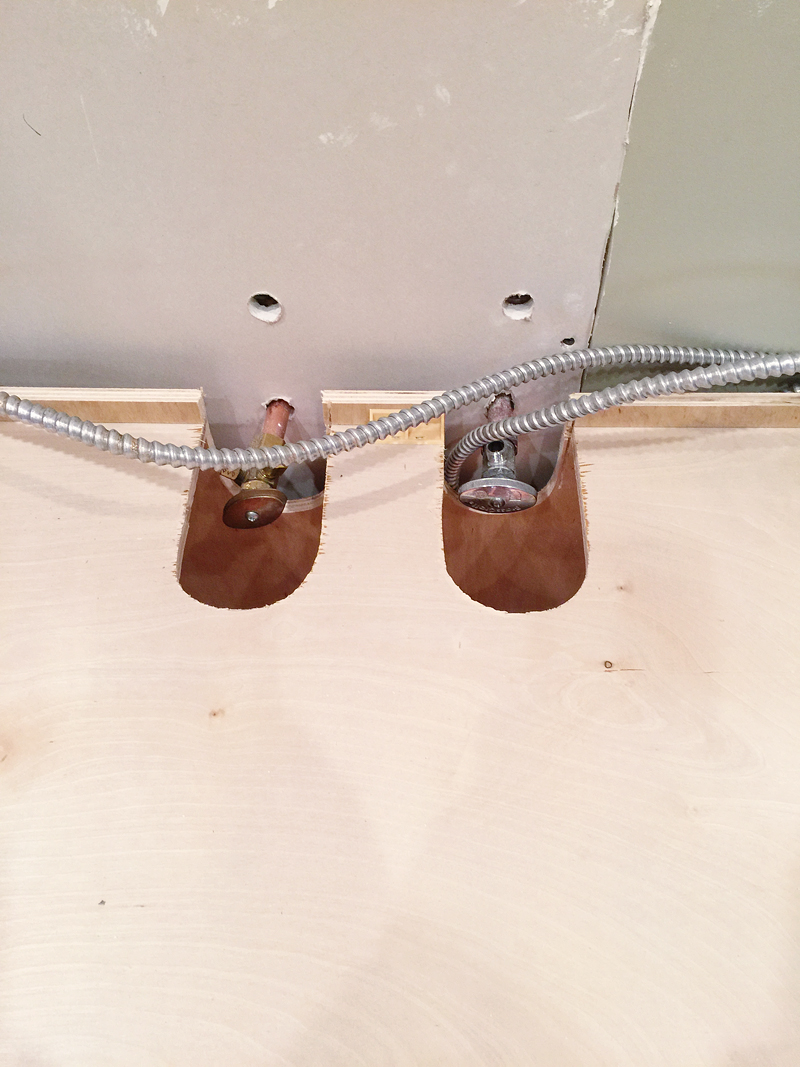
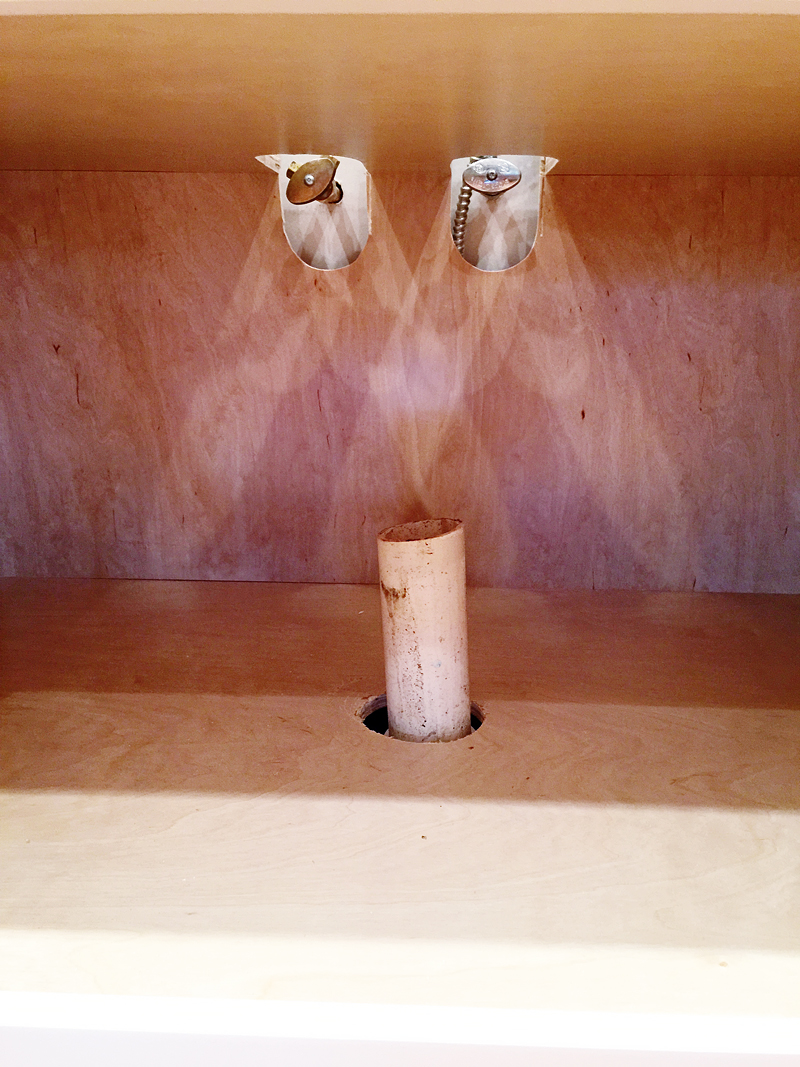
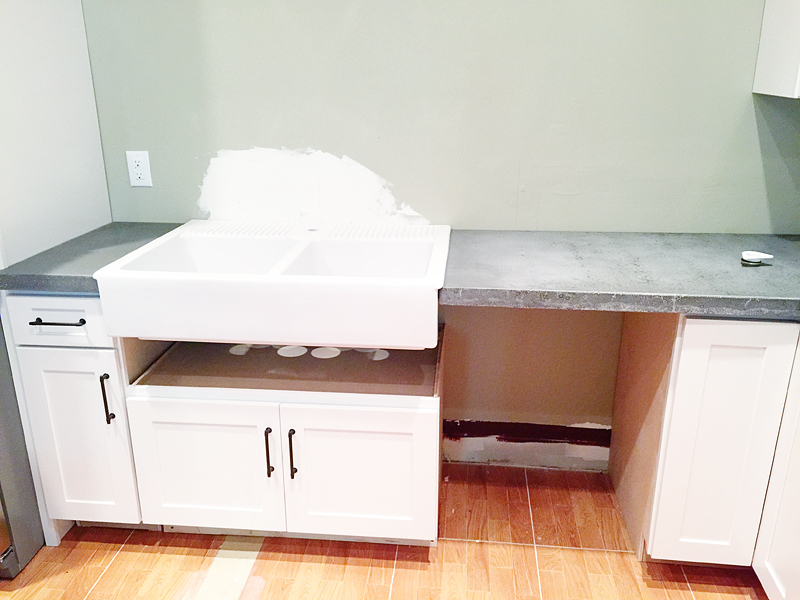
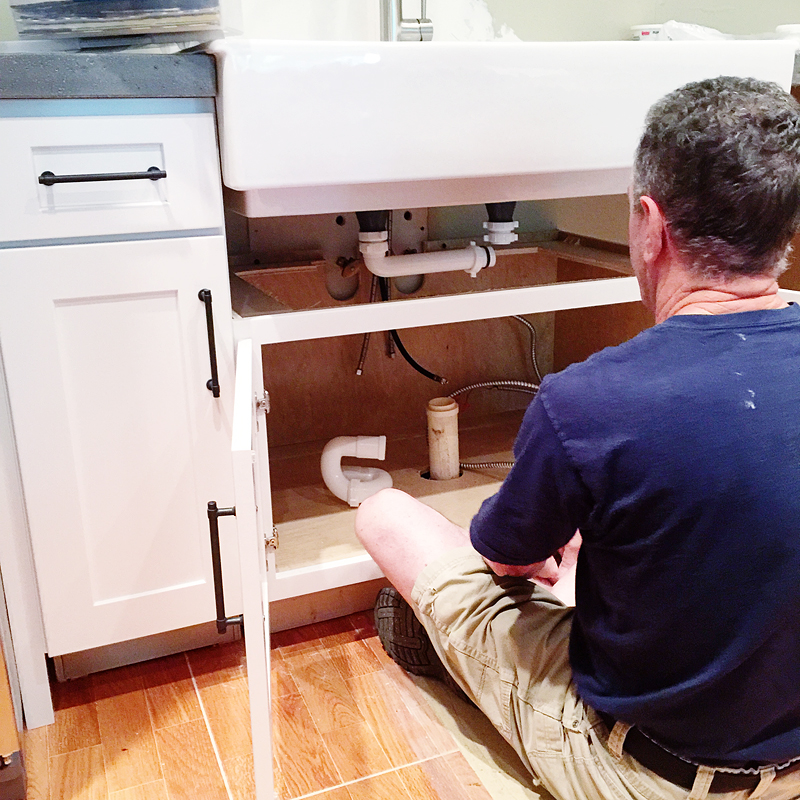
Okay – as you may remember – this is what we are dealing with. A couple water hookups and a drain that our neighbor Super Larry helped tweak to prep it for the sink drain. For the cabinet, we had to purchase an above-the-fridge wall cabinet that was 36″ wide and 26″ deep. This cabinet does not have legs so we had to rip some 2×6’s and 2×4’s to build up the base and align it with the other neighboring cabinet.
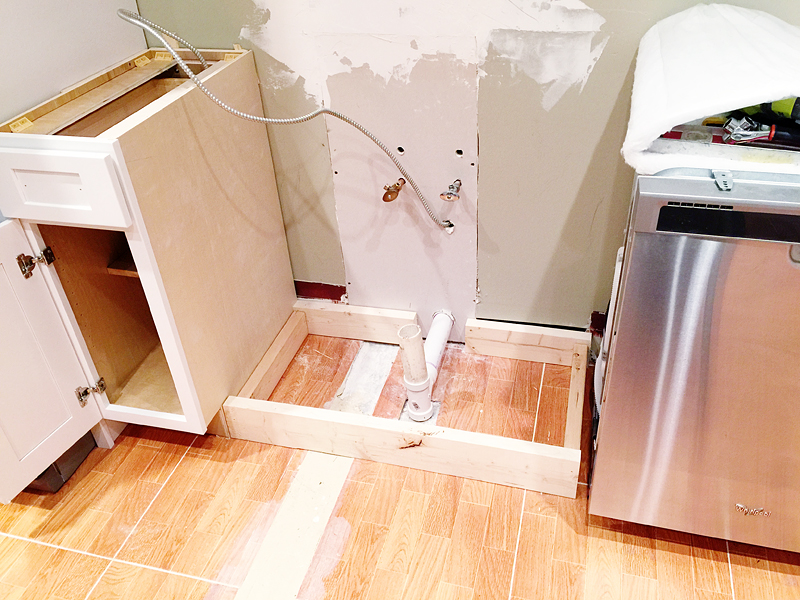
Then came time to fit the cabinet in the space. We knew that we would have to cut out for the water lines and the drain but we did it in step by step ways so that we could make sure we didn’t structurally take off too much of the cabinet.
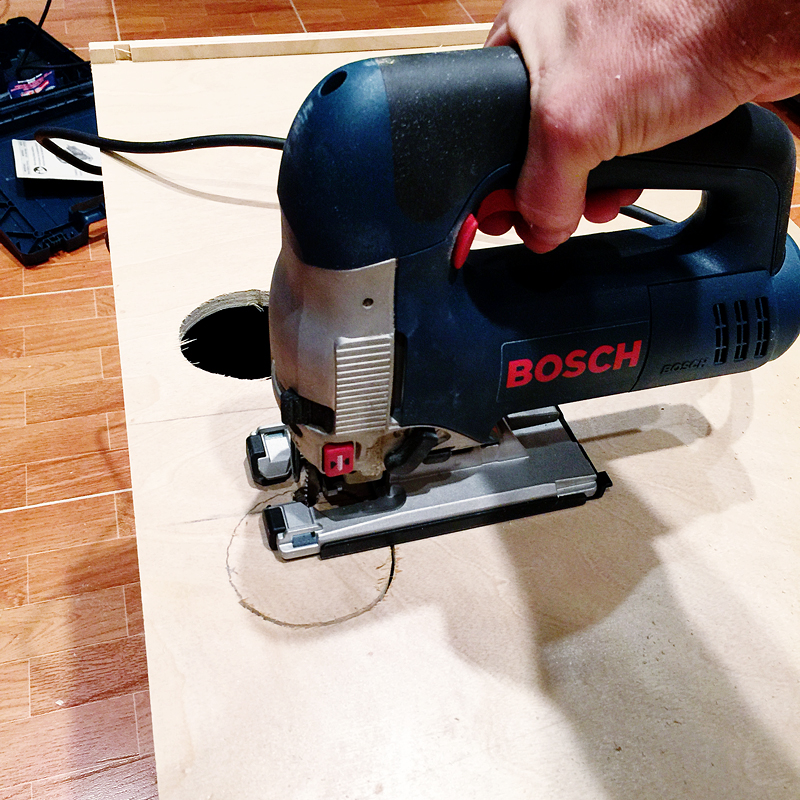
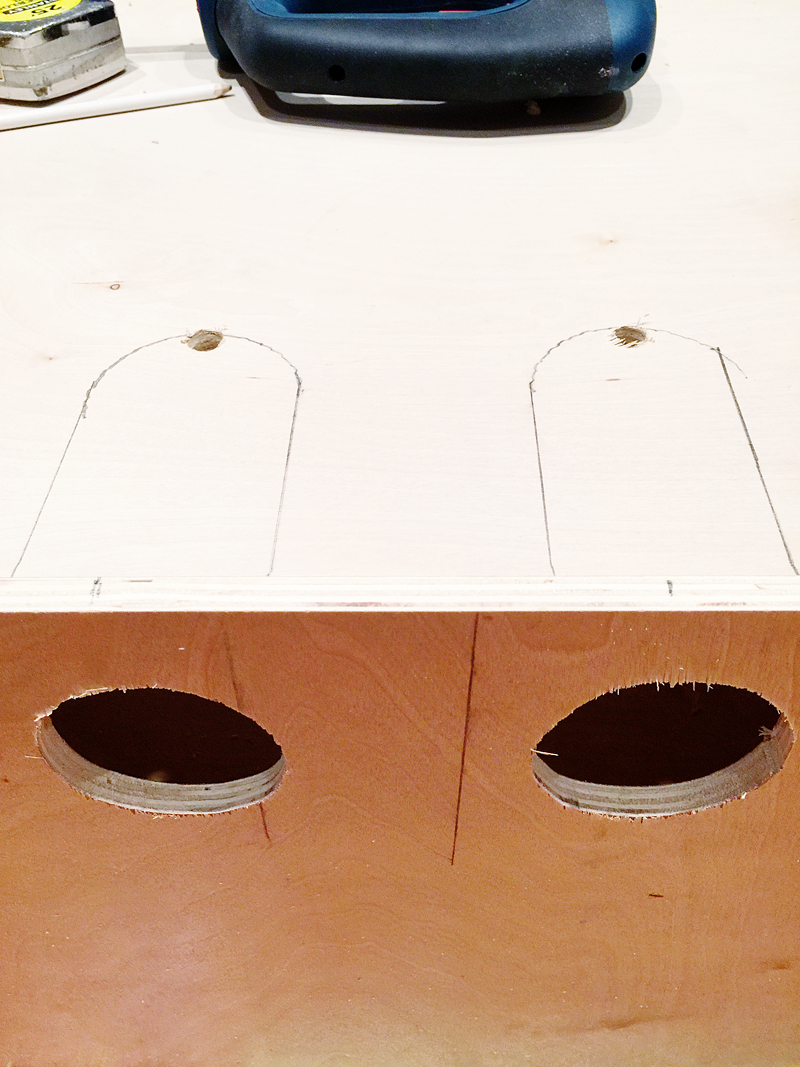
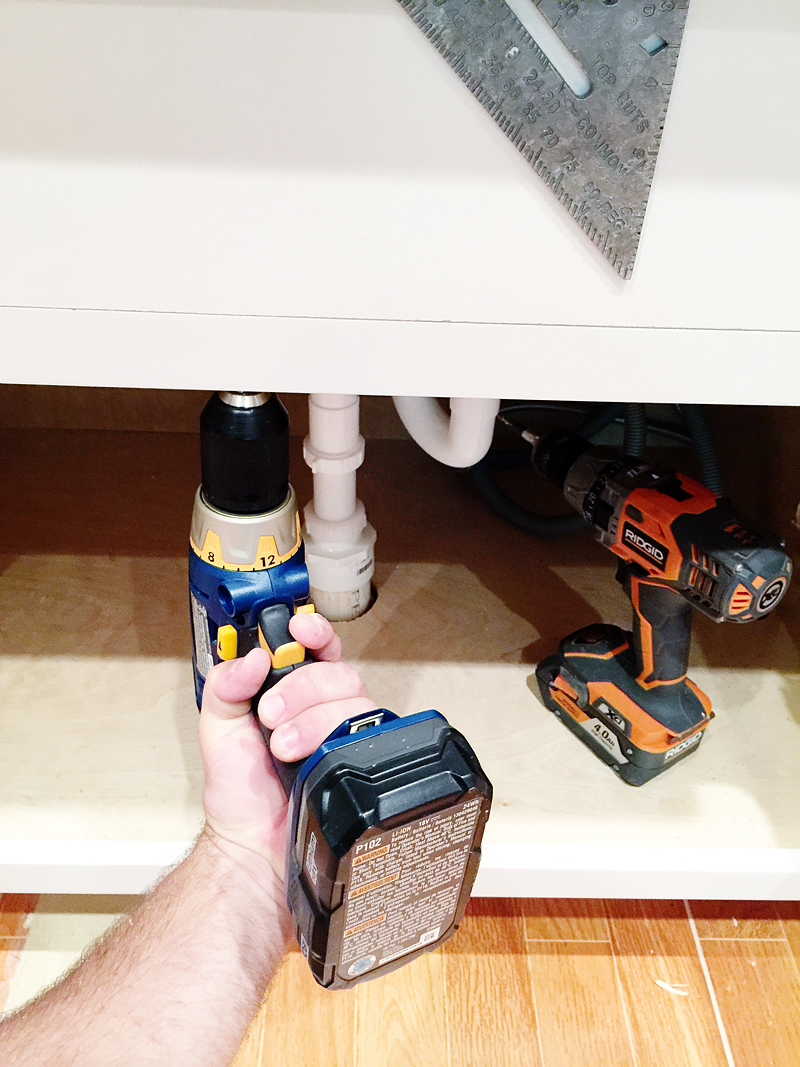
All we did was mark the areas where the current pipes would hit the cabinetry if it was fully in place. Then we drilled a pilot hole to use our jigsaw to remove the excess wood.
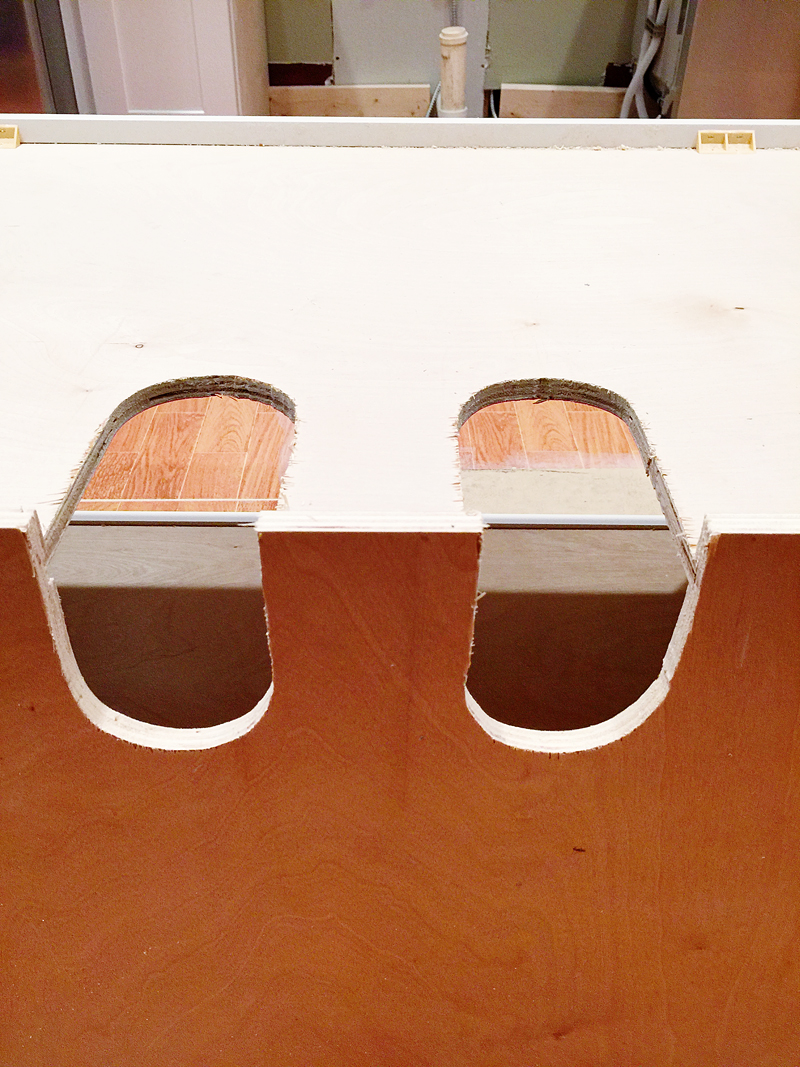
Then Jeremy was able to slide the cabinet over the drain pipe and up against the wall.
Perfect fit! See how they are still able to be accessed from both above and below?
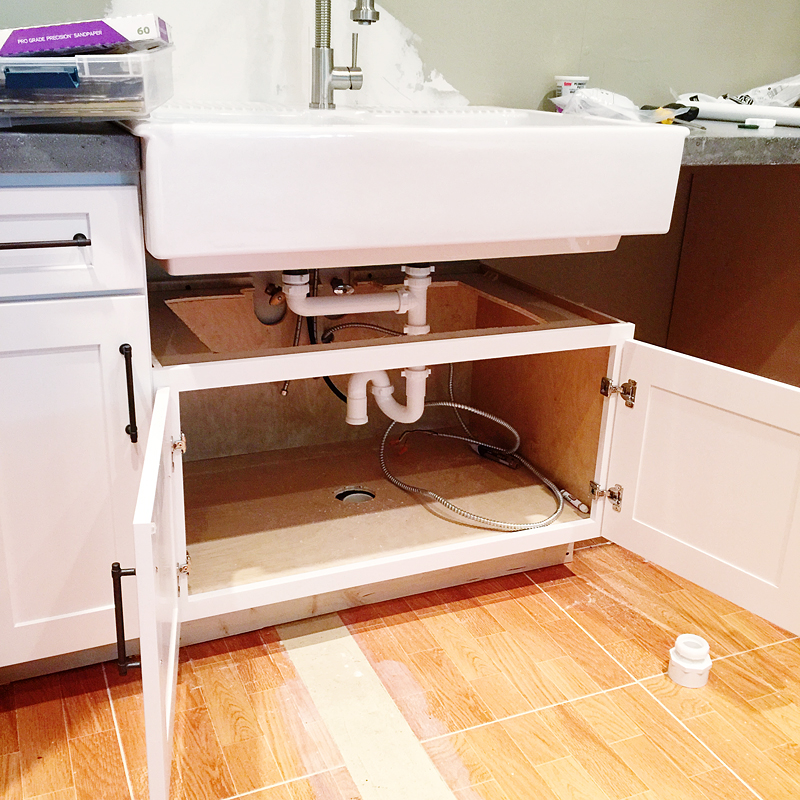
That is when we made the countertops and put those in place.
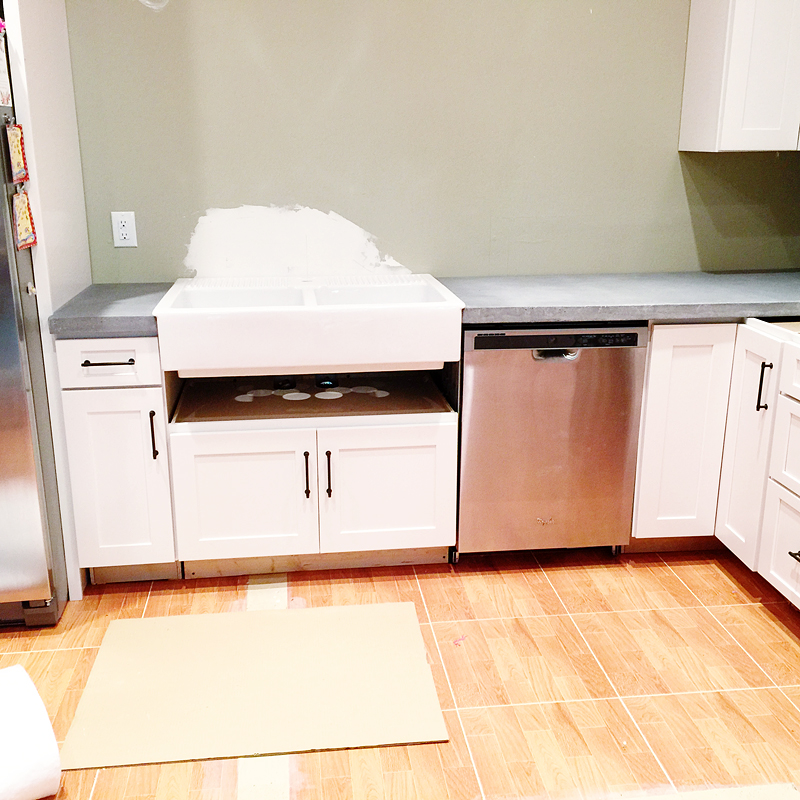
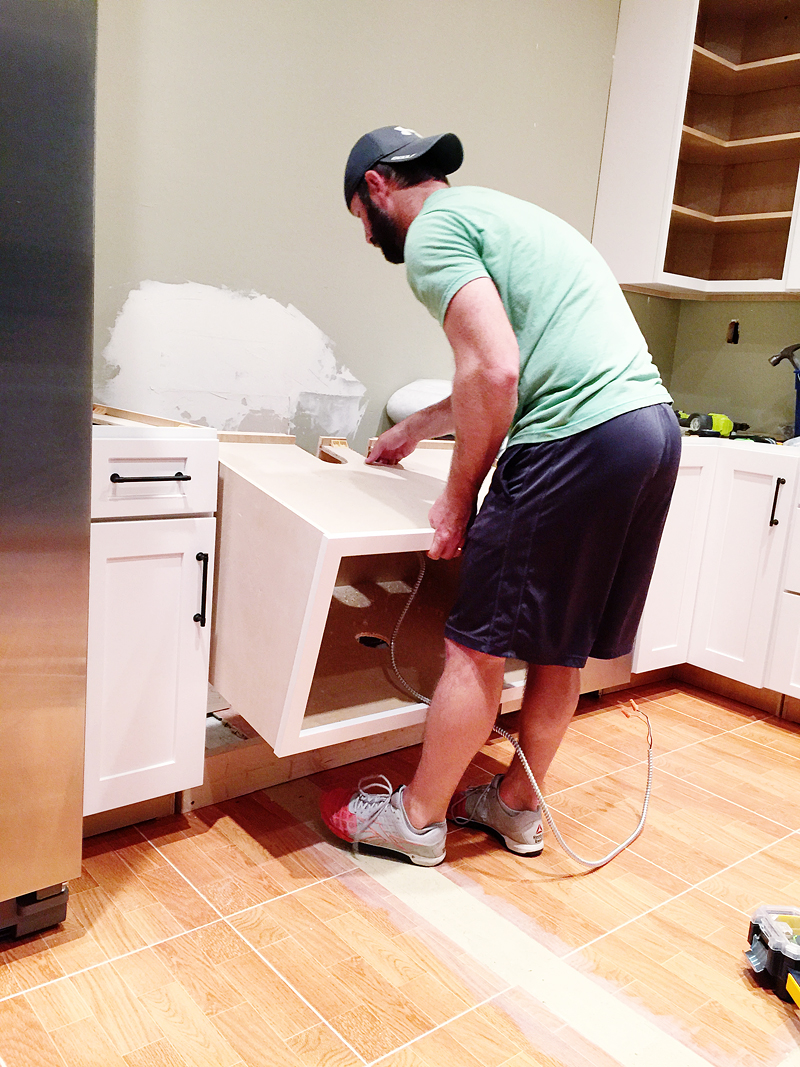
Once the countertops were dry fitted to the cabinetry, we could also slip the appliances in and the sink into place to ensure that everything fit properly!
We loved the look but we weren’t crazy about the fact that the sink was resting on the right hand side with no support other than the countertop that was extended out over the dishwasher.
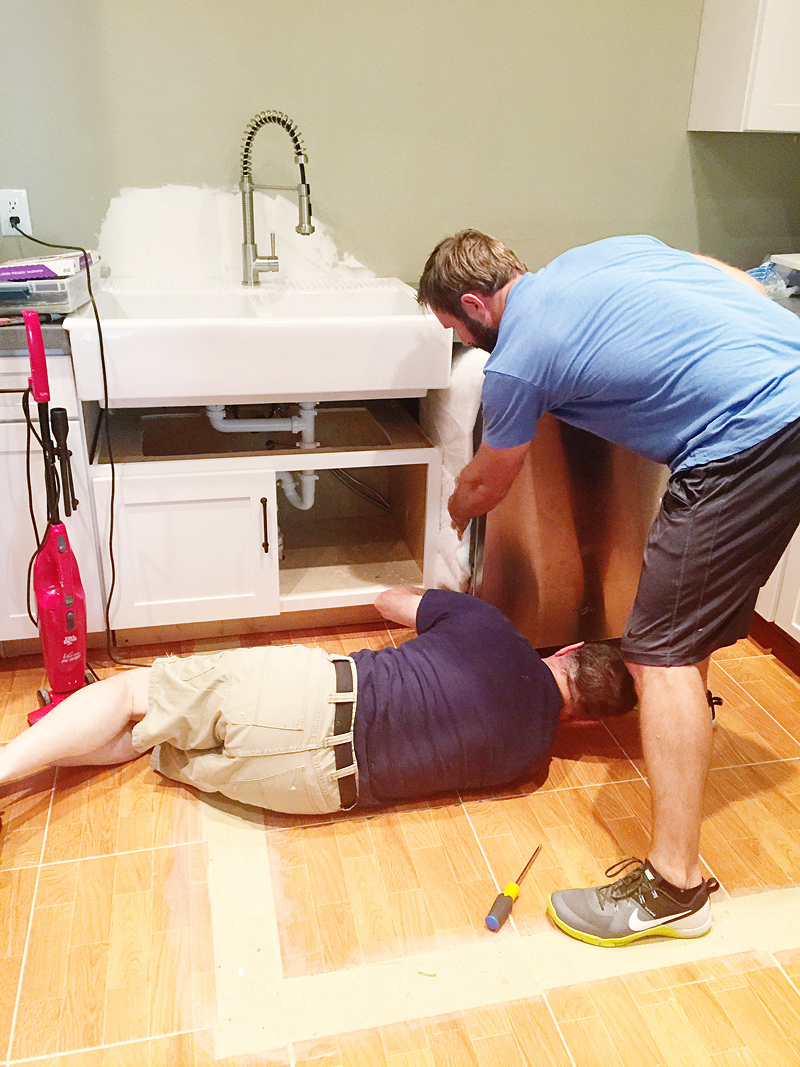
So we knew that we would need to provide additional support to the sink (Jeremy is slightly crazed about making sure nothing ever falls down or is unsupported….ever….like never.) and do the crazy number of hookups (sink drains, the dishwasher and then the faucet) while also having the sink in place while not messing up the front panel that we were putting in place. It’s kinda a jigsaw puzzle in that respect.
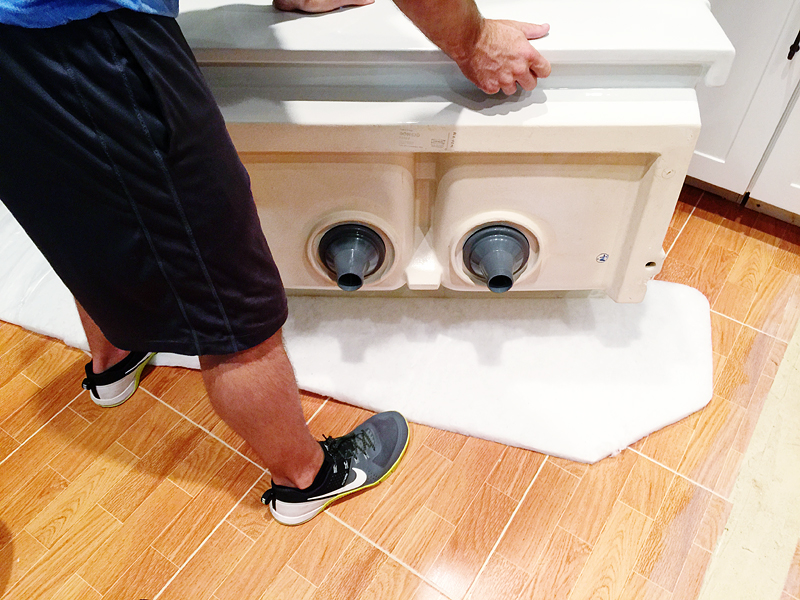
So the first thing we did was remove the dishwasher and marked where the water lines and electrical lines would go to get the dishwasher running again.
Then we made note of the drain placement so that we could cut the top of the base cabinet for the drain pipes.
Jeremy ultimately decided that it was necessary to attach a small piece of wood to the studs under the countertop (behind the dishwasher) and then also another piece to support the back of the sink. He then jigsawed out the cabinet top for access to the sink.
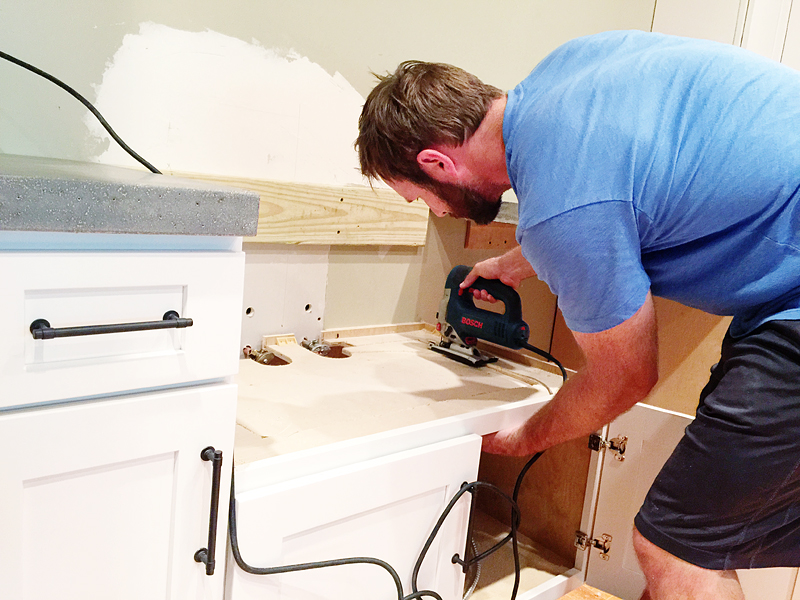
We also had to drill additional holes in the cabinet for the electrical flexible conduit for the dishwasher.
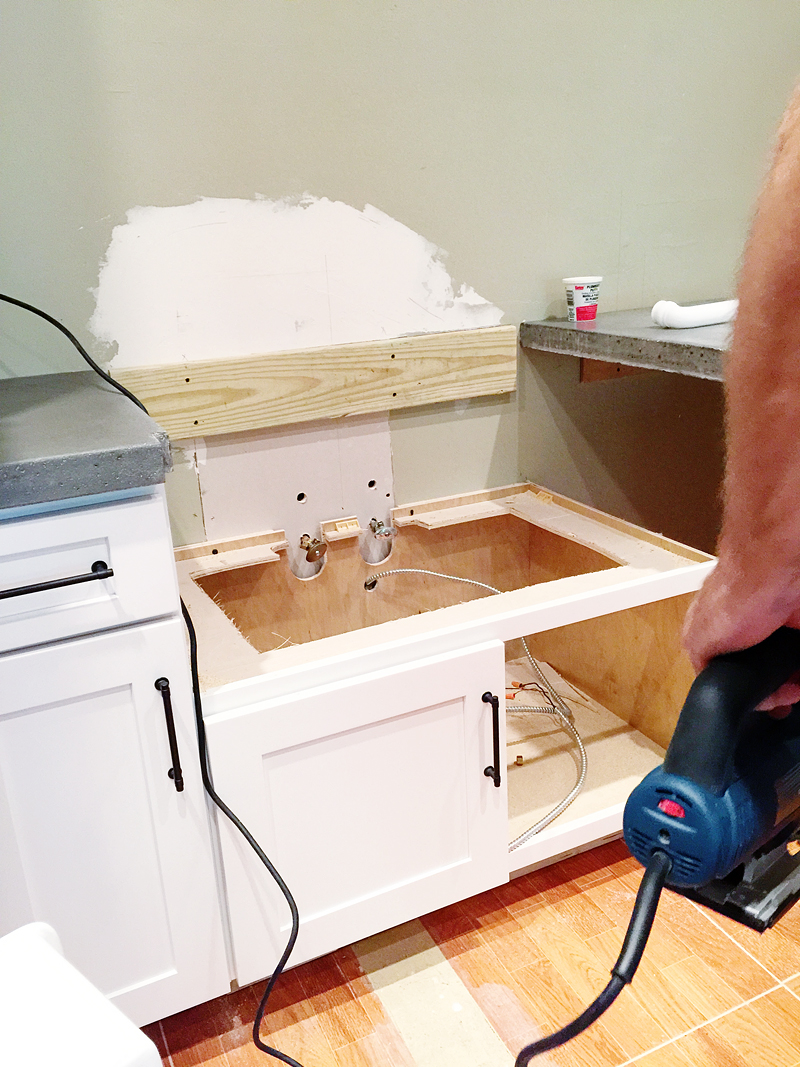
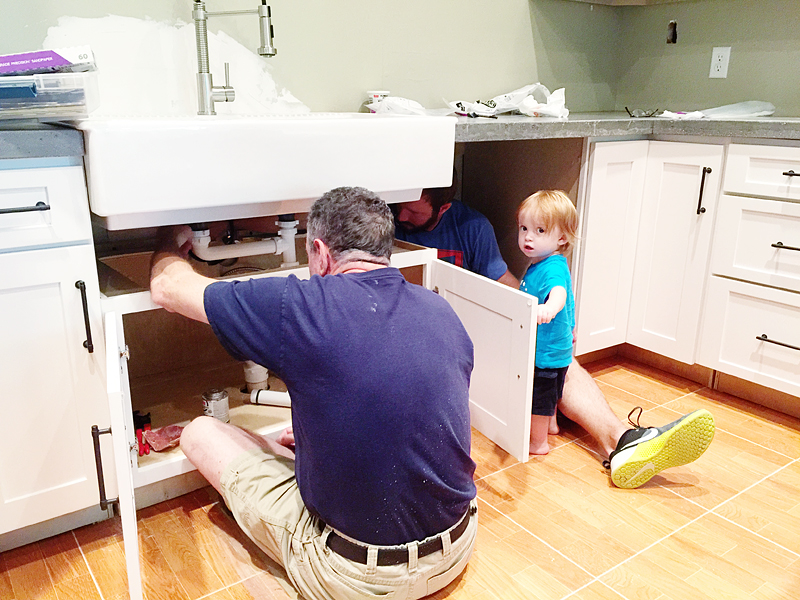
We also recruited Super Larry back over to help with the plumbing. He install the upper parts of the faucet and installed the drains and strainers to get working on the drain itself.
Once that was done, we had to figure out what piece went in next – the dishwasher or the front panel?
Here’s LJ learning all about plumbing. It was his first real plumbing job 🙂
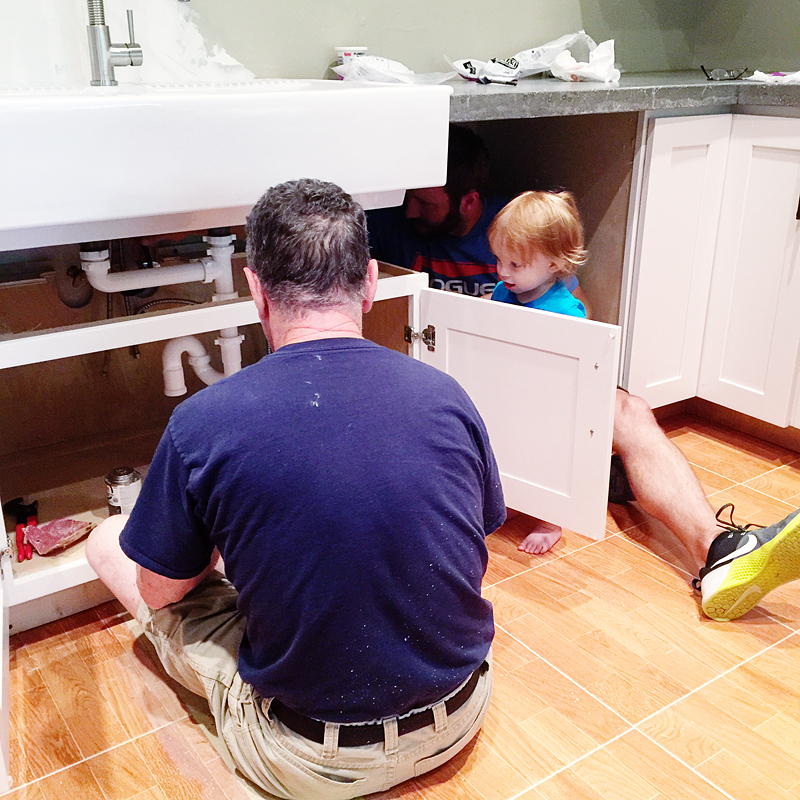
My question is – where is his hard hat?! It’s funny because LJ is my little hat dude….he LOVES hats. And his favorite is this cheap little foam yellow hard hat. I guess construction rules are loose here in the Bower household 🙂
So in retrospect, we probably should have installed the front panel to the sink first but since we needed Super Larry and he had a Super Supper to get to, we rushed into getting the dishwasher in because we had his help!
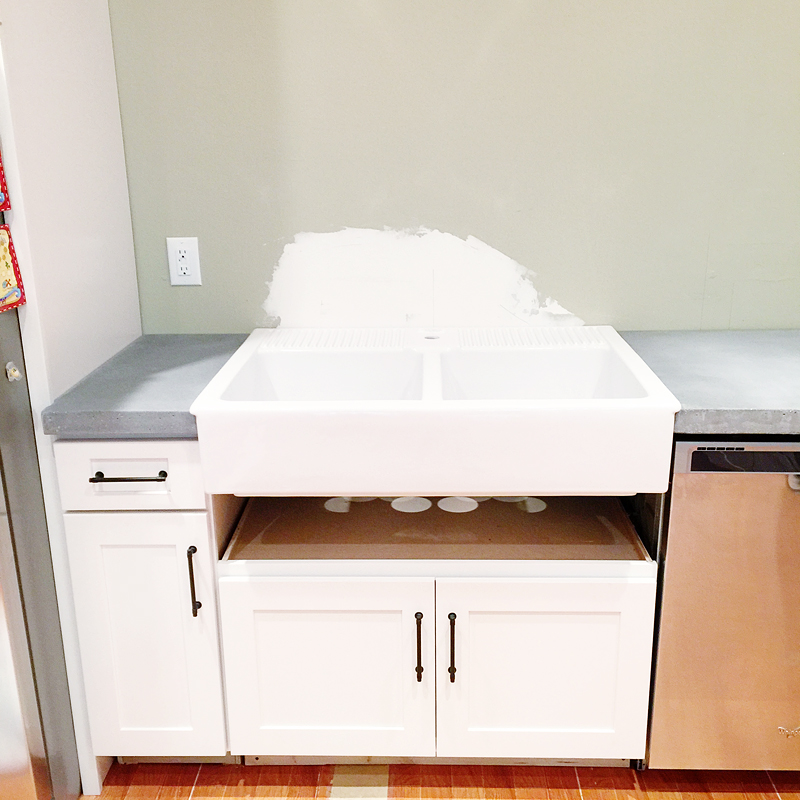
Then Jeremy and I worked on the front panel. We had bought a piece of white shelf from the Home Depot that matched the texture and color of the cabinetry and were able to cut it down to size for the gap above the cabinet and below the sink.
It was a little bit crazy because the sink required us to sand down the top (see the exposed shelf particles) to fit it inside the sink gap. It’s hard to explain but let me attempt – if you slide your hand up under the apron of the sink, there is a little ‘sink gap’ – just a spot for a very thin piece of wood to slide in and nuzzle into place. It would not support the sink at all…but it would allow you to have something that would cover the hole between the cabinet and the sink.
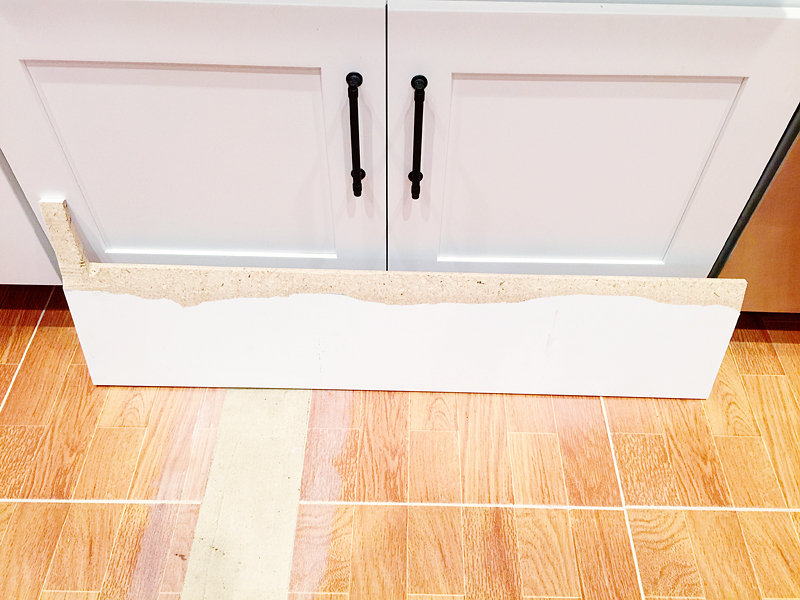
We attached it the same way you would attach a side panel or gap panel….just drilling a pilot hole and screwing it into place from the underneath of the base cabinet frame.
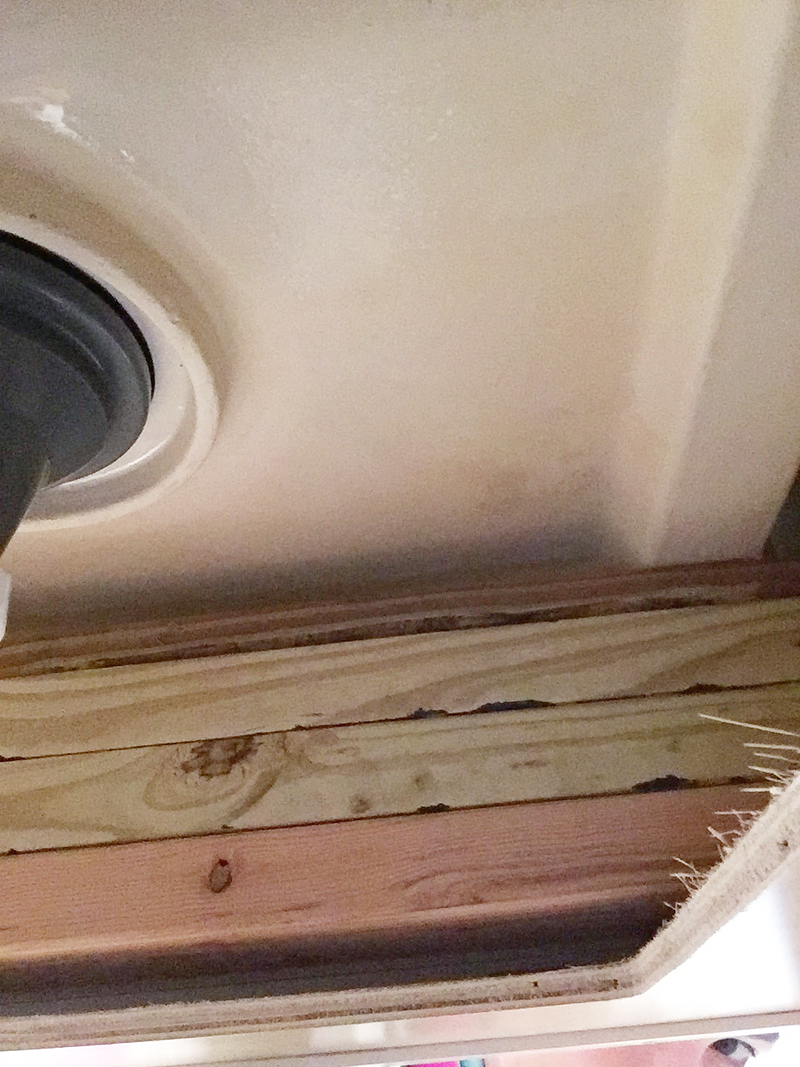
As far as support goes….we really felt like the sink was so heavy that we also wanted to provide additional front support (we already had a 2×4 in the back and the sides would rest on the concrete countertops) but the front didn’t actually rest on anything. That concerned my safety-first boyfriend. So we decided that it wouldn’t hurt to cut some scrap boards to 36″ and wedge them in the spot behind the front panel and under the sink. It took a little finesse but eventually the entire sink is super sturdy and makes us feel 1000% sure that a baby could be bathed in this sink and nothing would collapse.
And from the front – it looks GREAT. You really can’t tell the difference between the cabinet color and texture and the front panel. It completely hides the mess of plumbing and conduit and functional stuff that is behind there!
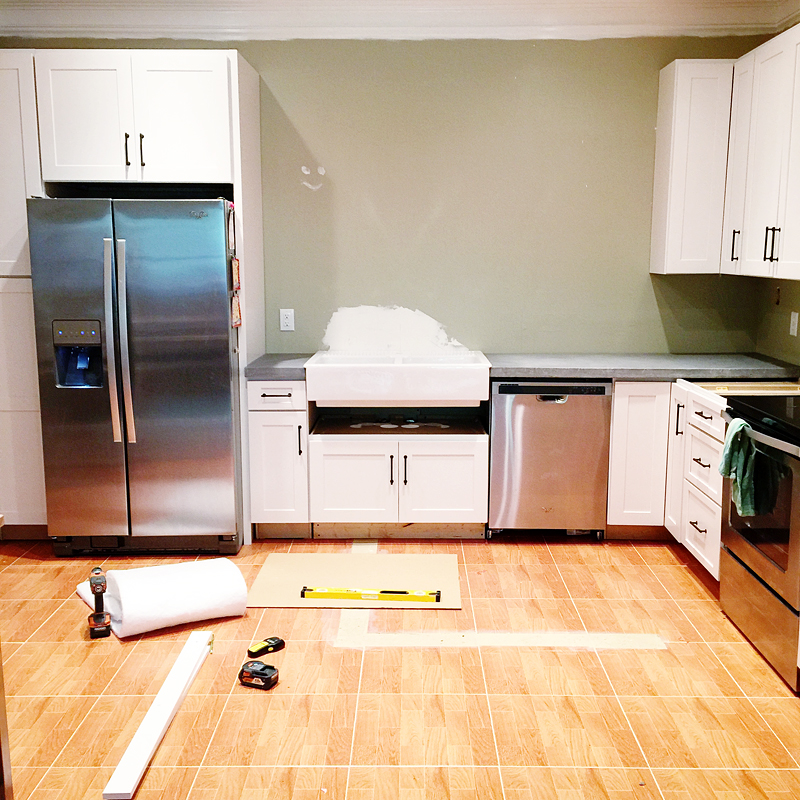
And now for a sneak peek of what is coming tomorrow – backsplash! It’s totally unexpected but I LOVE it. I can’t wait to share it with you! It ridiculously easy to clean, super cheap and fast to install! Stay tuned!!!