Disclaimer – This post is sponsored by Ryobi Outdoor Tools. All opinions are 100% my own.
The title might say it all…but really it doesn’t. I wanted to type “One GIANT patio makeover that cost under $100 and most of what we did was cleaning related and it only took one day” but that felt like a mouthful.
The great part – it’s all true. The other great part – it’s my patio so I get to actually enjoy it…ya know…once it’s not 95 degrees outside. The other other great part – it’s big enough to share with friends so if you are my friends….come to my clean patio and let’s eat something delicious together. I can’t wait to see how many calories I intake on this bad boy 🙂
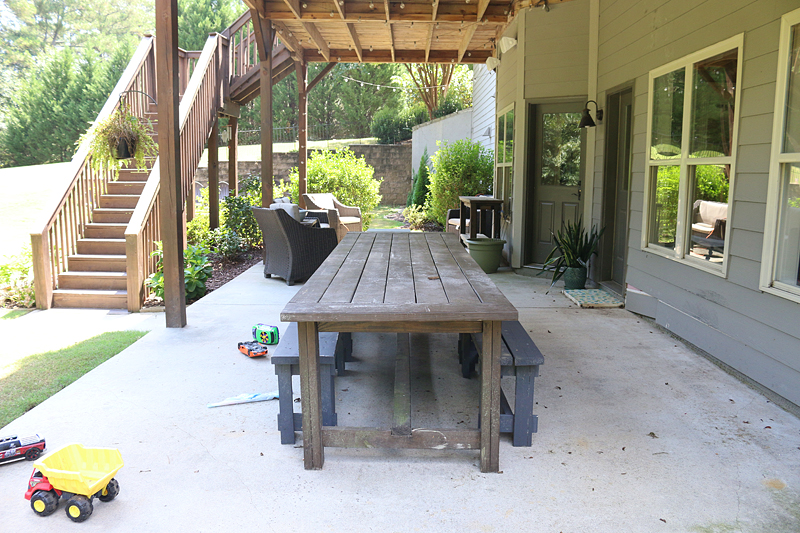
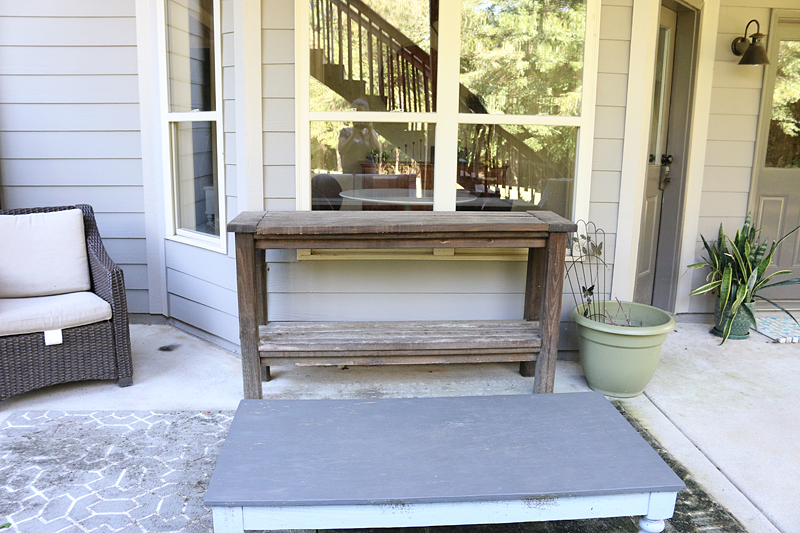
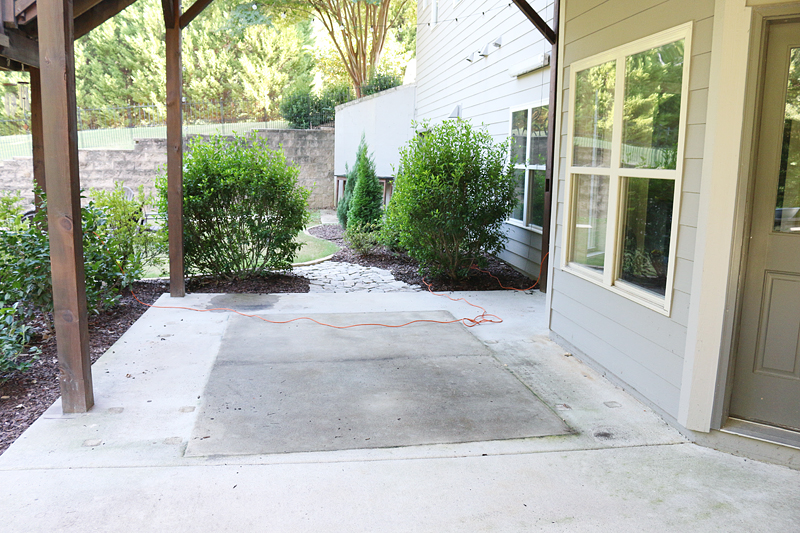
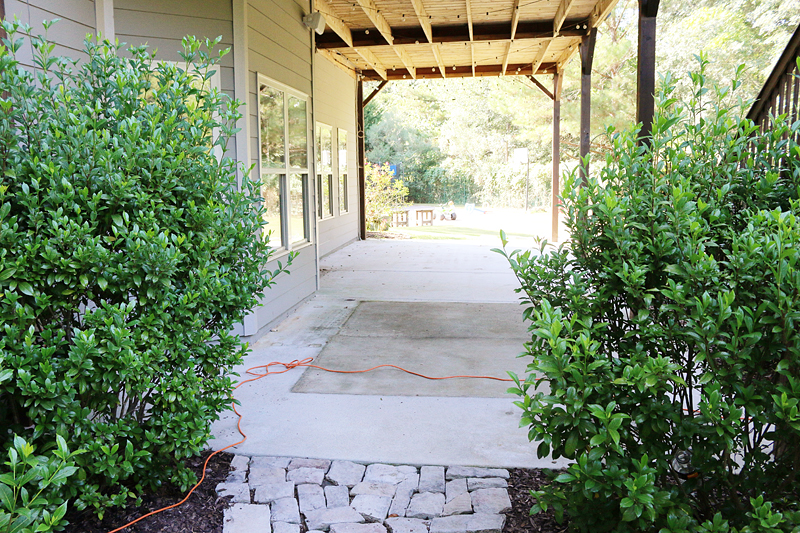
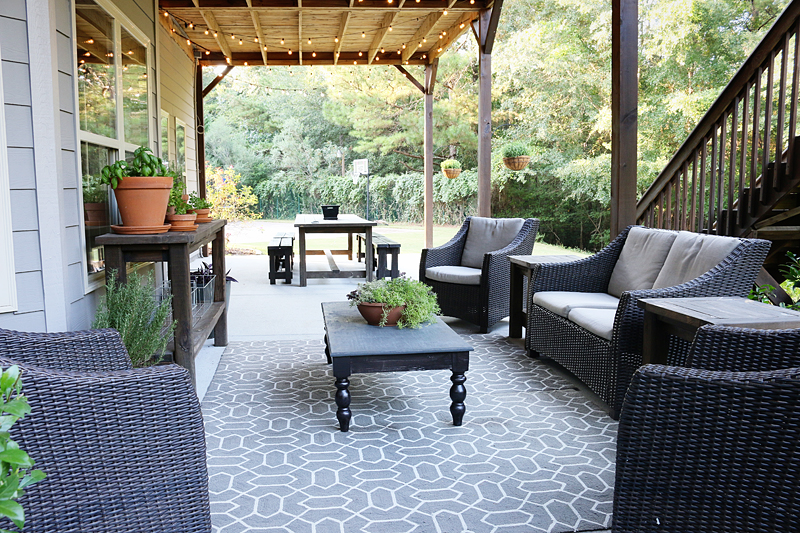
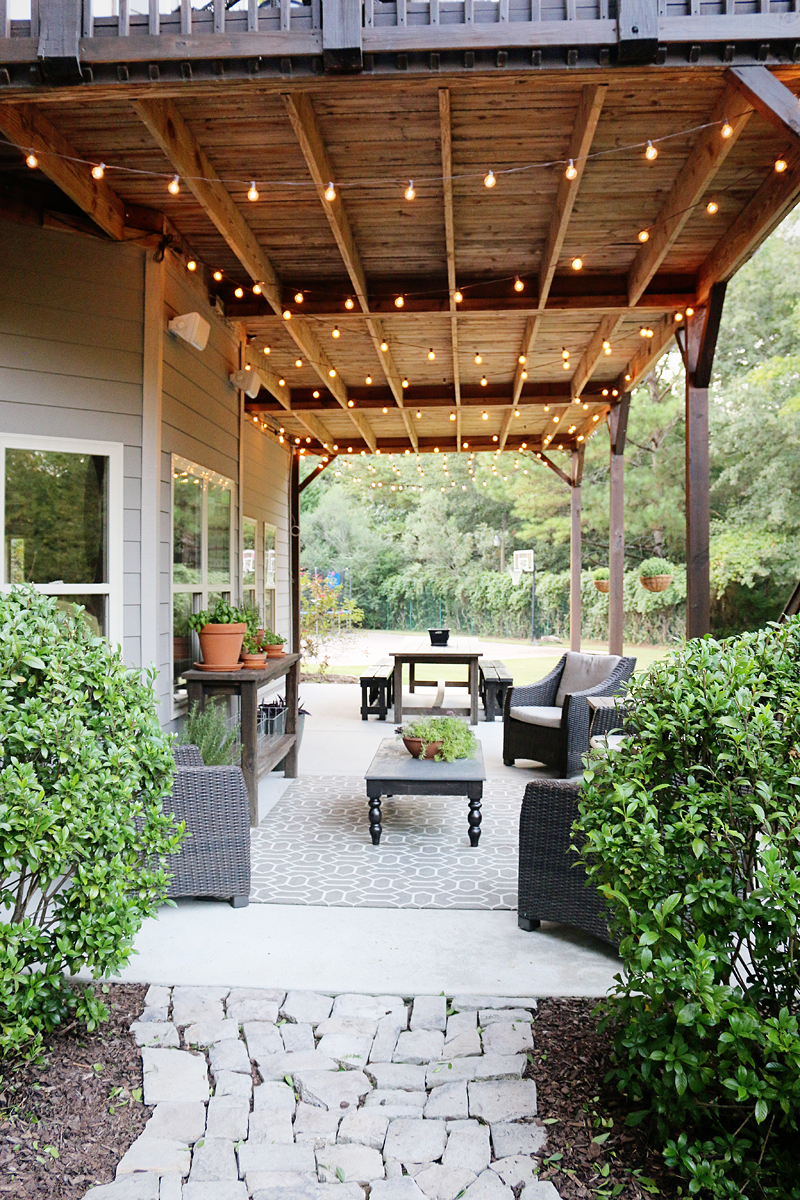
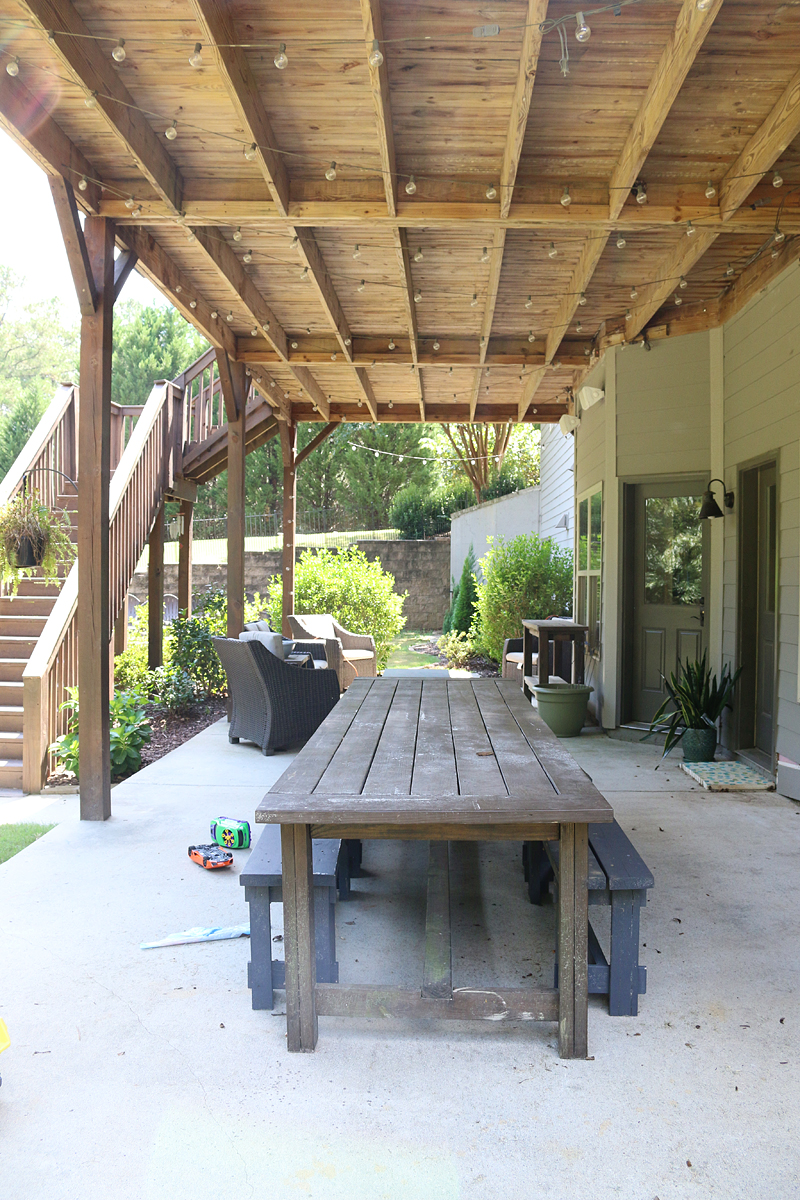
So the patio is what we call our concrete pad that lives under our deck. It’s one big rectangle of concrete that sees the most amount of shade and is accessible to our basement doors. It’s nothing fancy but over the years we have done lots of shindigs down here and slowly but surely have made it more comfortable and suited for our needs.
On one end is a giant table that Jeremy built and we pull up benches I built with my mom as seating. We can comfortably sit between 12 and 14 guests at this mammoth and it’s amazing for parties.
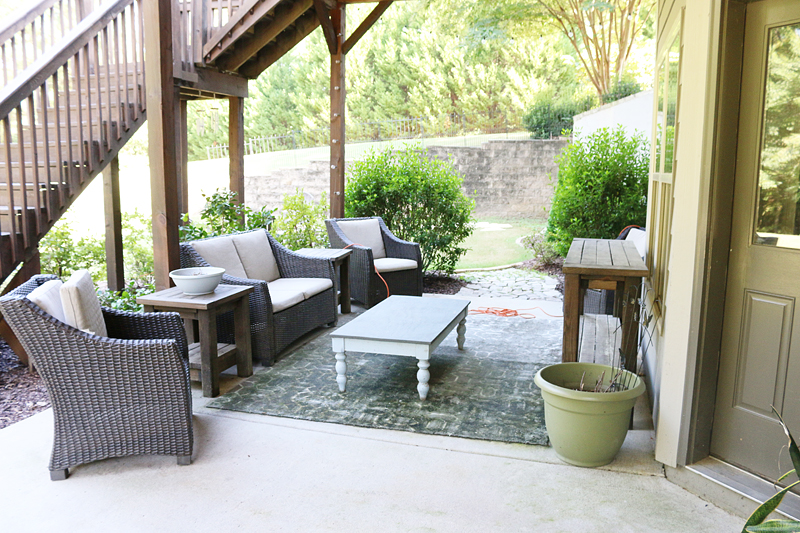
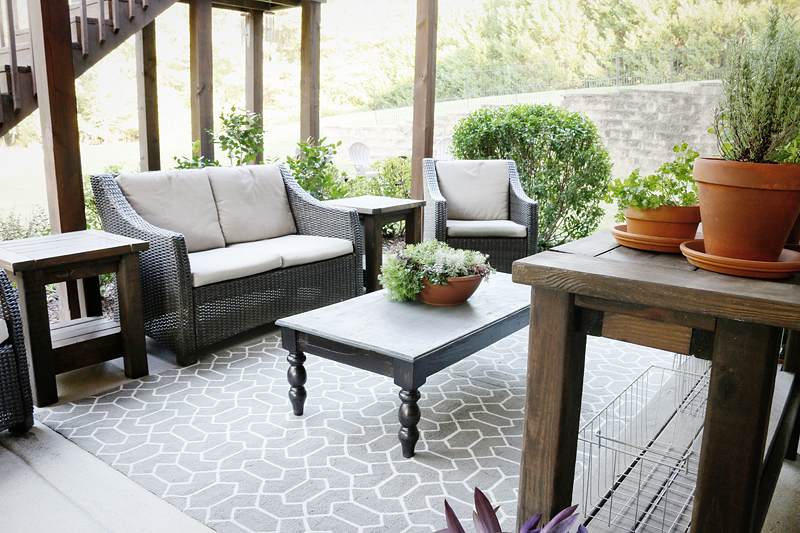
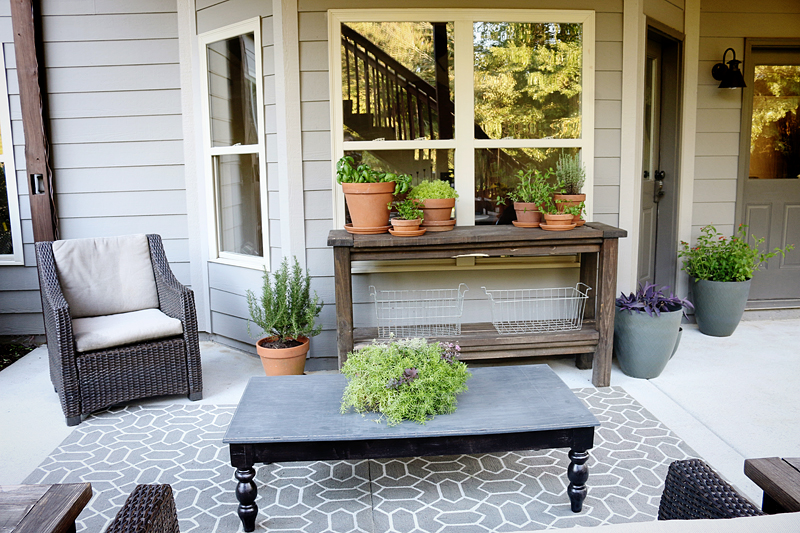
On the far side of the patio is our seating area. We had bought some inexpensive outdoor rugs and got our patio furniture on sale and they have been true champions in holding up in the outdoor weather.
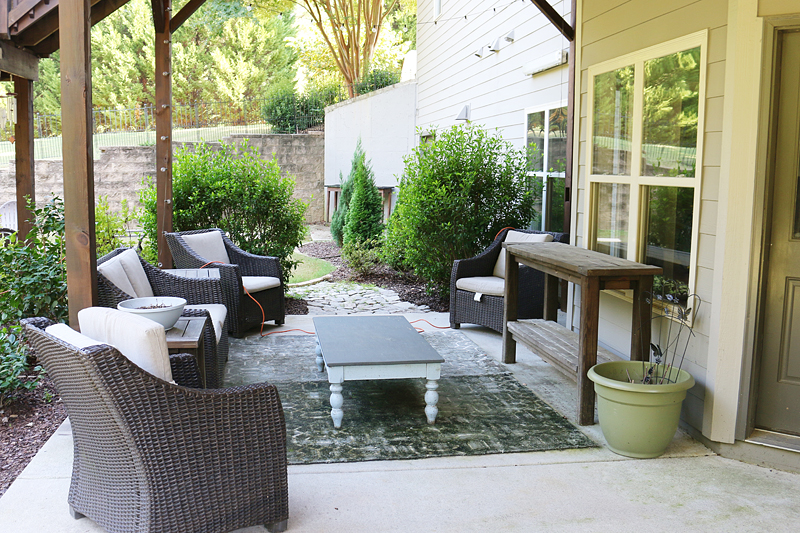
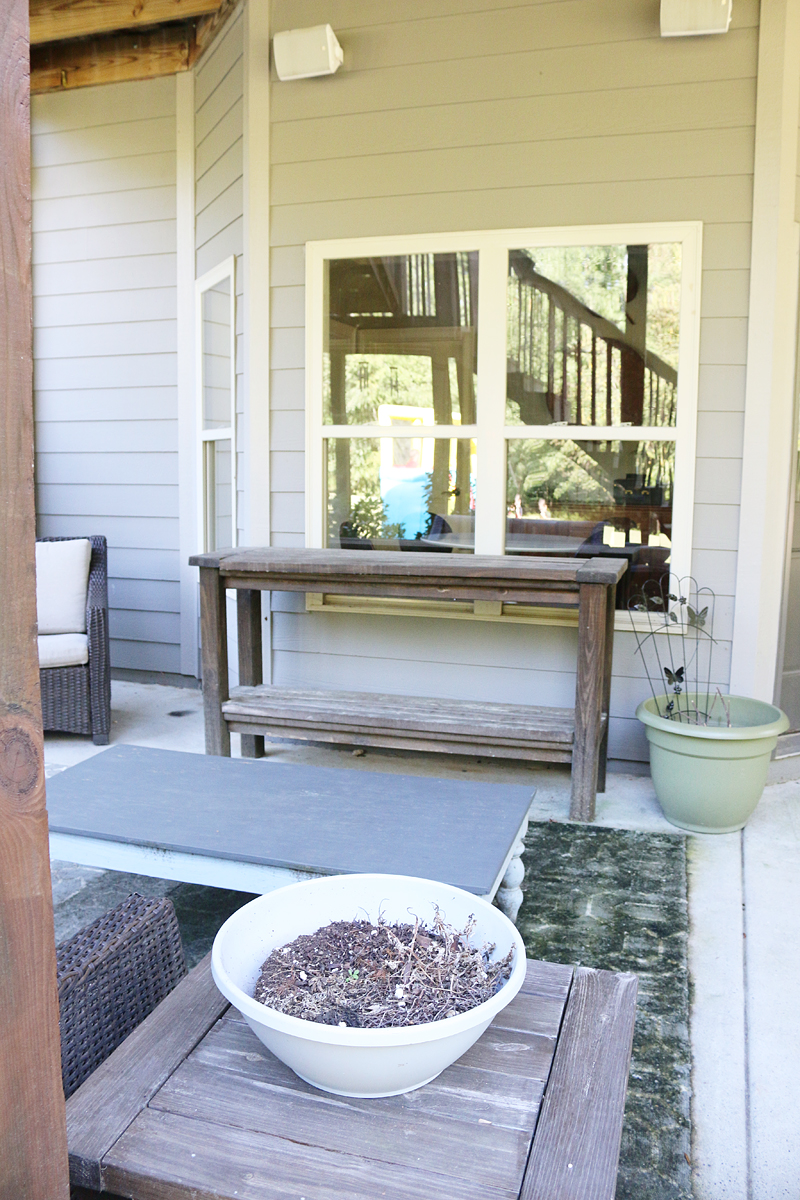
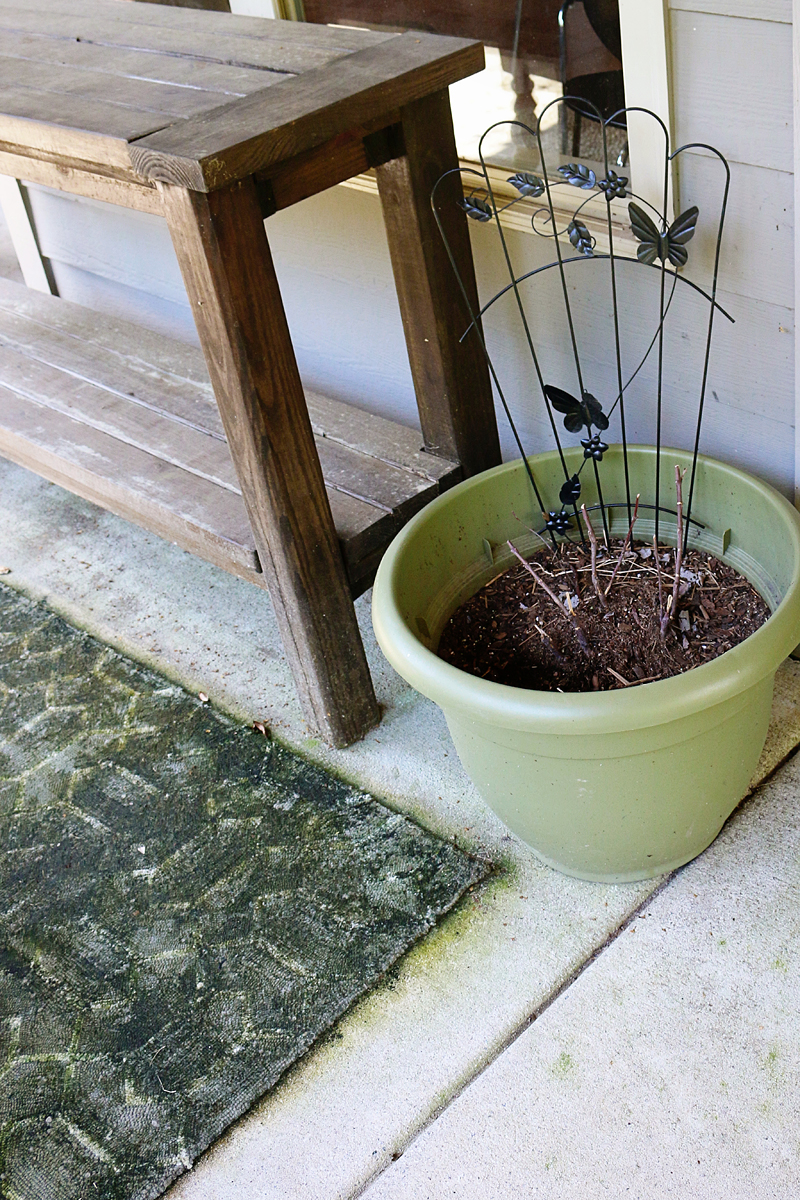
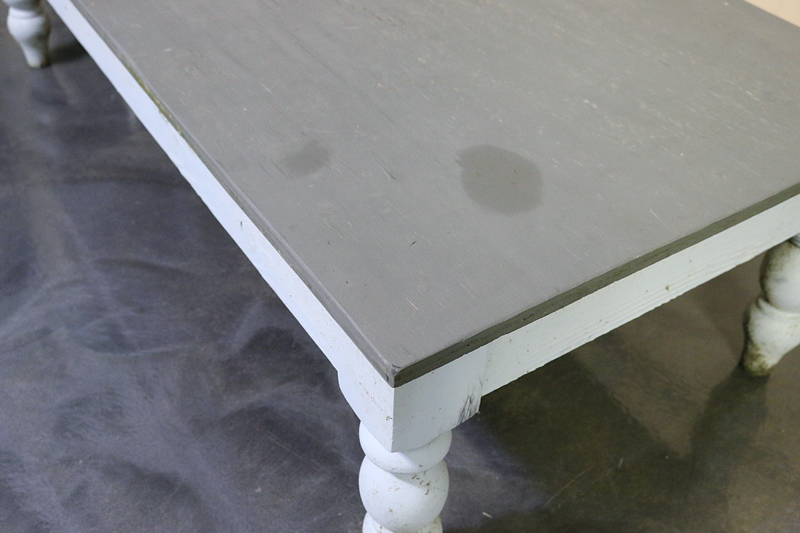
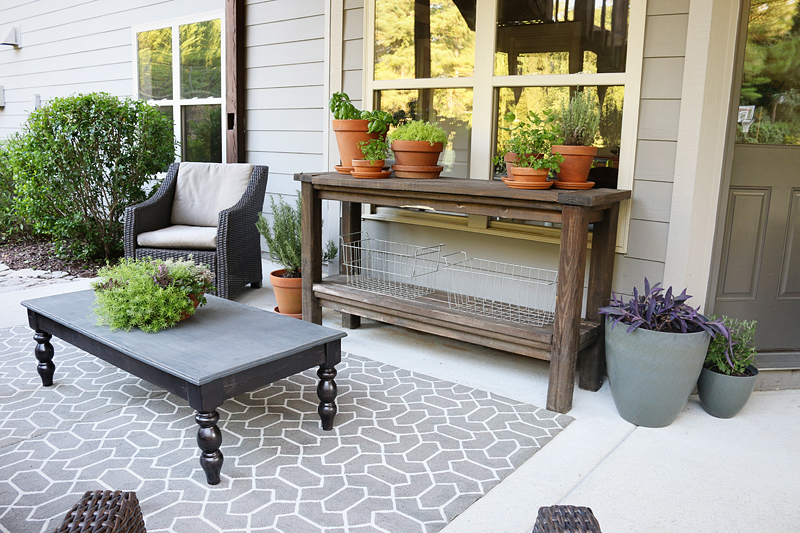
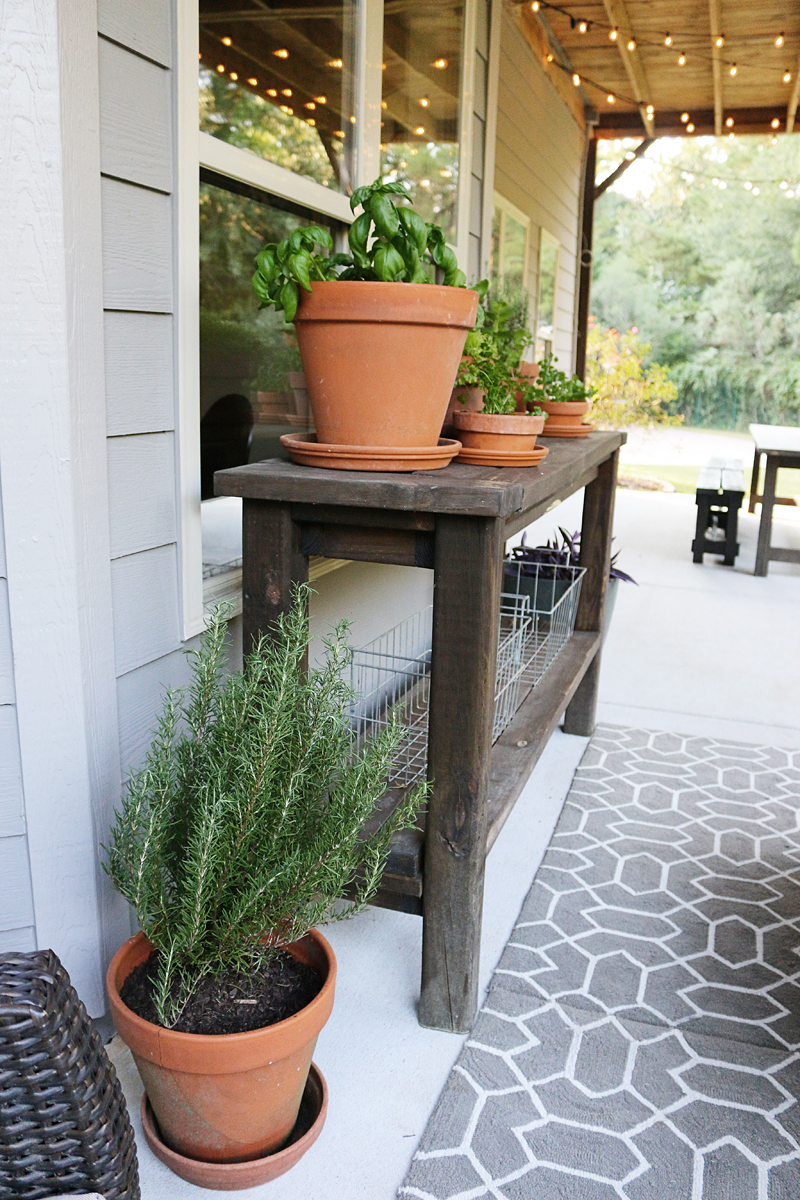
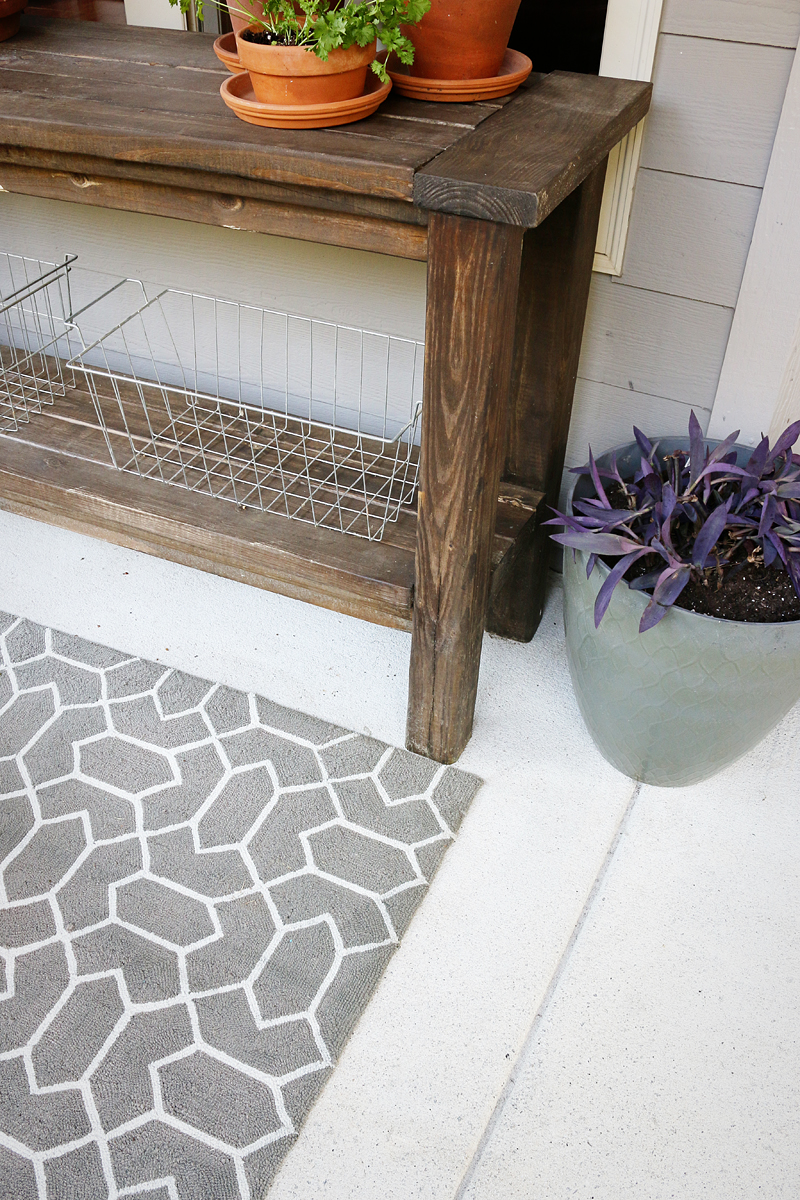
Jeremy also built our side tables and the console table and those beasts are still going strong. We had a coffee table out here that we revamped by making it a chalkboard table for the kids but they rarely use it.
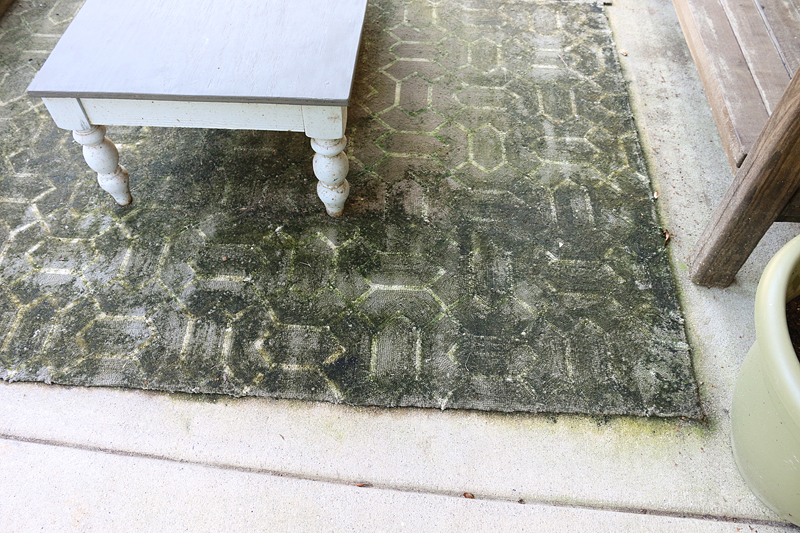
As you can see, the plant life is so prolific. And when I say ‘plant life’ I mean the algae growing on our rug 🙂
Okay. SO let’s just call the cow a cow….this area was nasty. Like licking a Denny’s floor nasty.
The furniture was all covered in a thin film of white mildew. We had not cleaned it in over a year and combine that with a rainy year last year and just being way too busy…it turned into a moldy mosh pit.
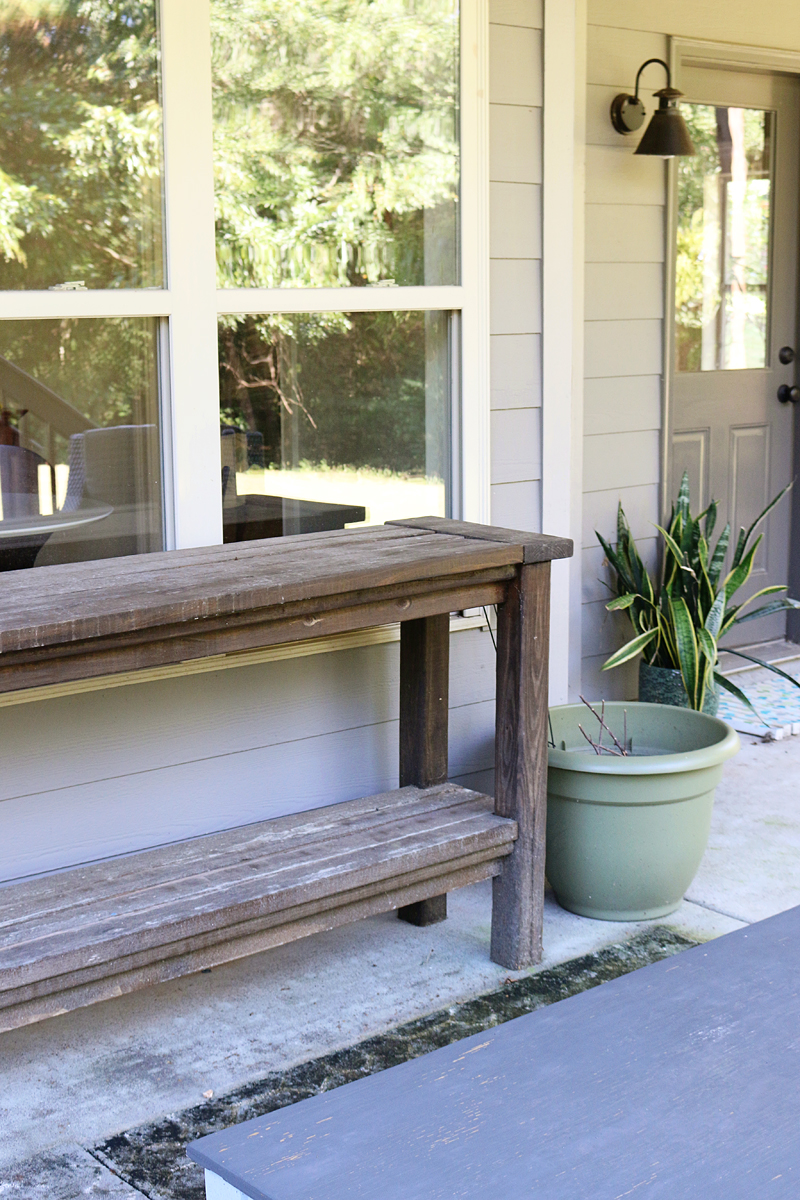
The plants had died, the rug literally was growing legs and the furniture was needing a good scrubbing.
You literally can’t even see the pattern on the rug anymore.
Plus, I felt like the coffee table just didn’t match anything else down here and the benches looked just as bad.
Oh and the pathway leading up to the sitting area? Yeah. Paging maintenance.

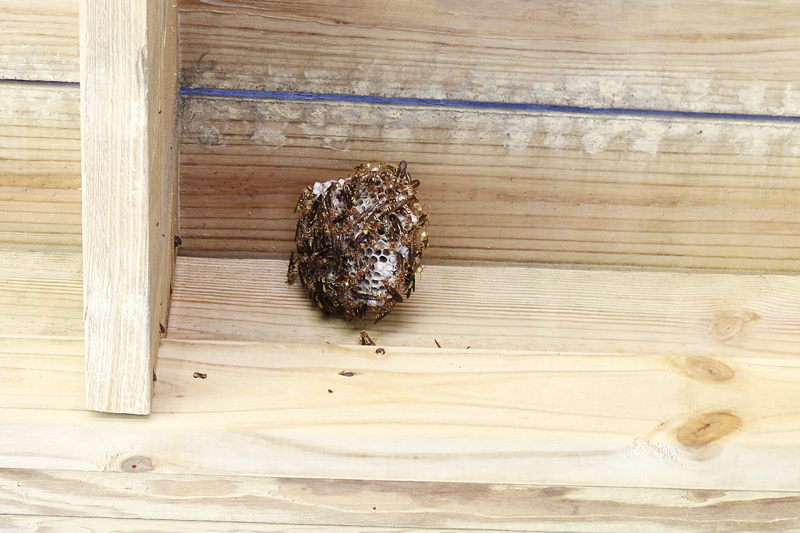
Also this area could kill you. There were several of these paper wasp nests built on the underside of the deck. In our area of Georgia, these are super common….you can find them all over the place and usually we let them be but we recently discovered that Weston likes ‘playing’ with them….so yeah, they needed to go.
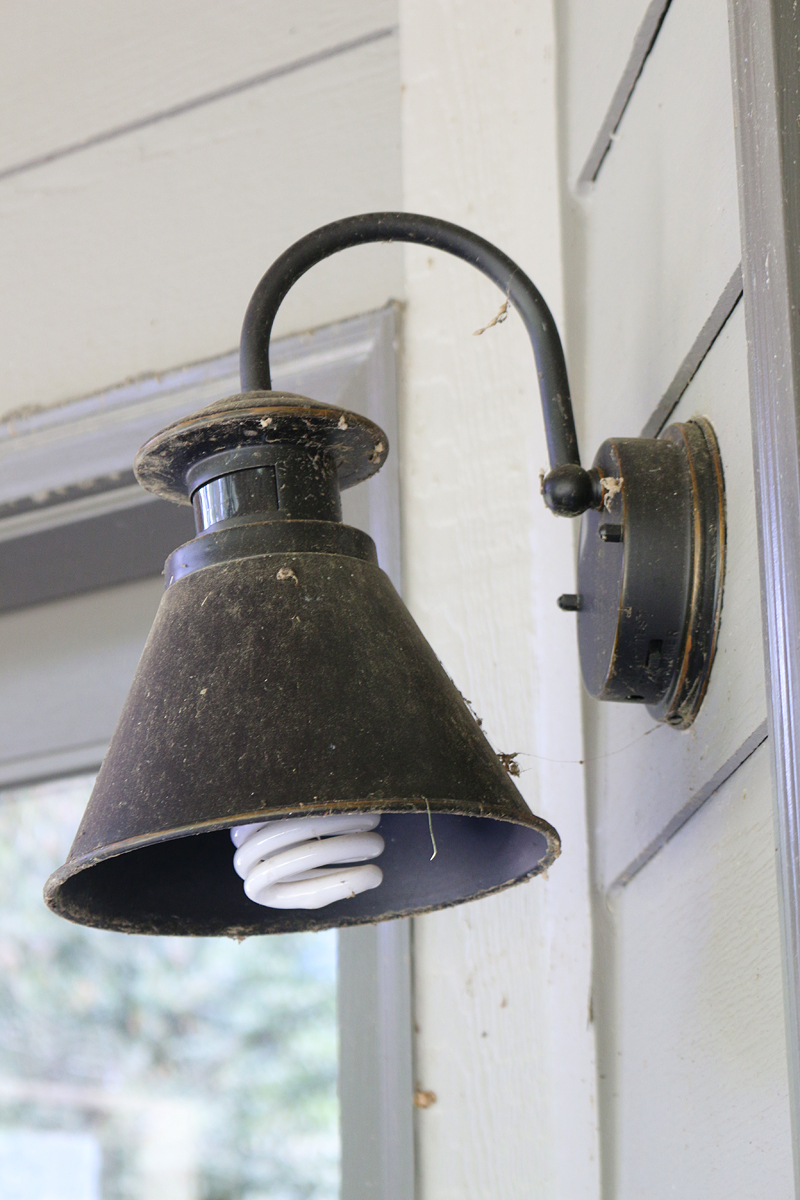
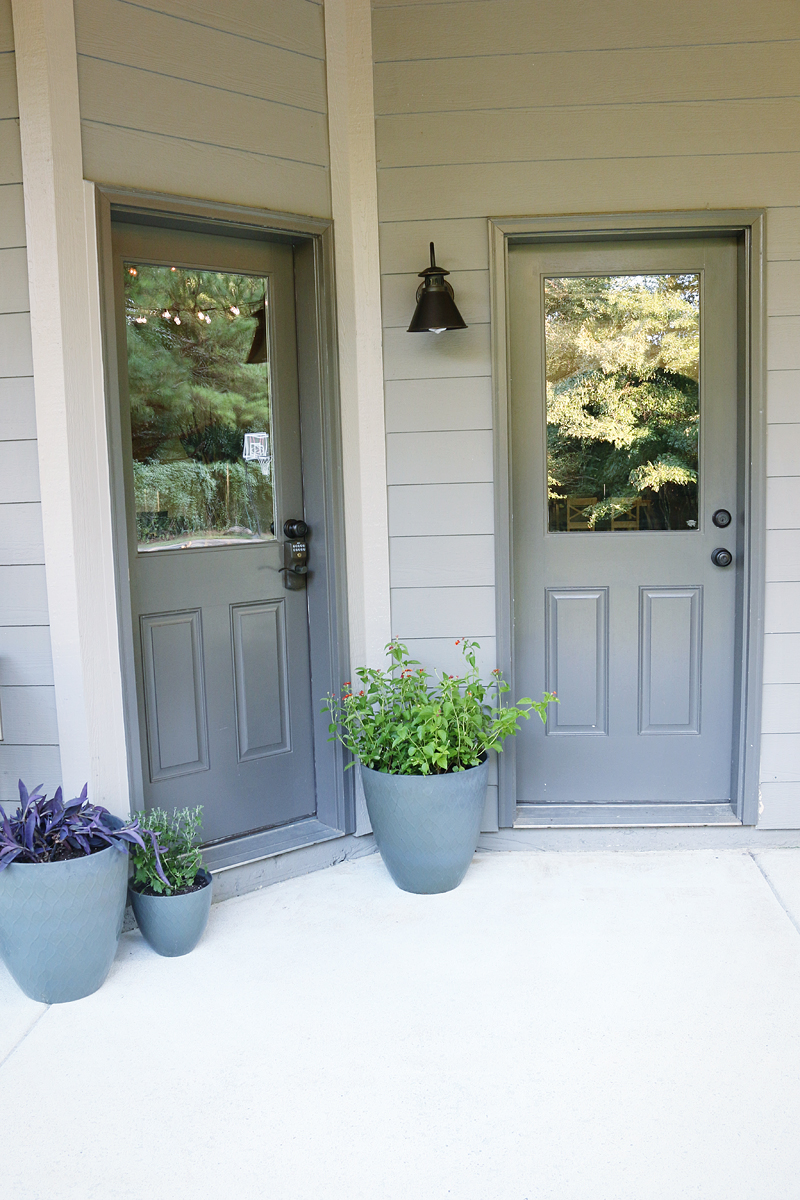
Even our light fixture was poorly neglected.
Oh and did I mention the siding started coming off the house? I don’t really know how that happened. I’m slightly terrified to ask.
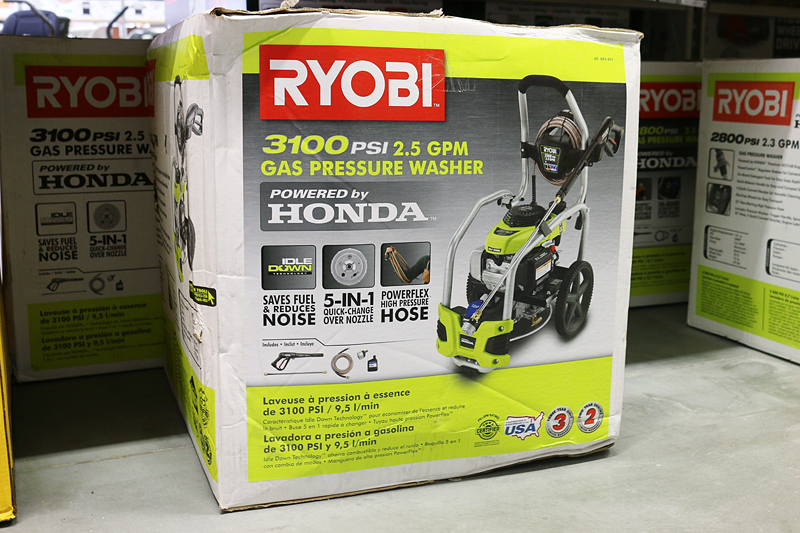
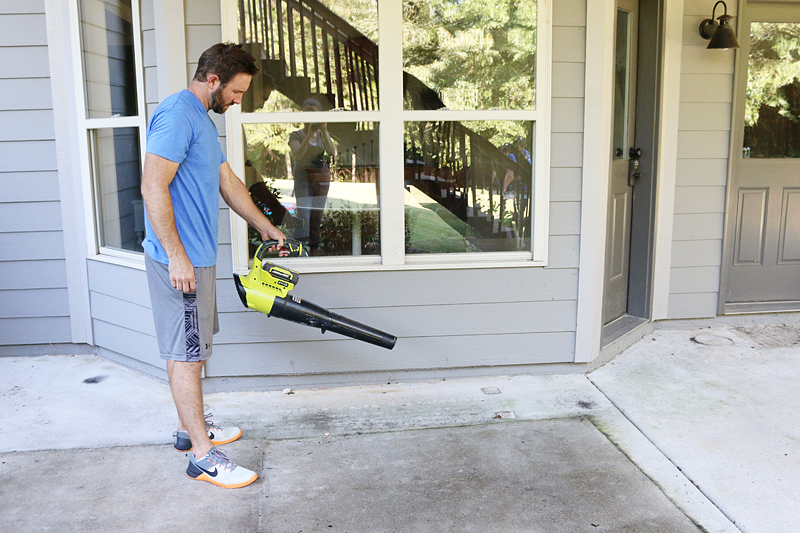
Earlier this summer, Ryobi asked us to review some of their outdoor tools and we decided to pay it forward to a very sweet family. You can see that makeover in this past post. Well one of the items that we loved but didn’t mention in that post was their pressure washer. In the past we borrowed pressure washers to tackle big cleaning projects but we knew that the time was coming where we would need to find our true love, get down on one knee and propose or get rid of this big ole house. So when Ryobi offered us their new gas-powered pressure washer, it felt like a match made in heaven. It has all the features that we need and we fell hard and fast for this baby. This space was the perfect spot to give the beefy 3100 psi pressure washer it’s grand debut.
We started the project by removing everything from the patio.
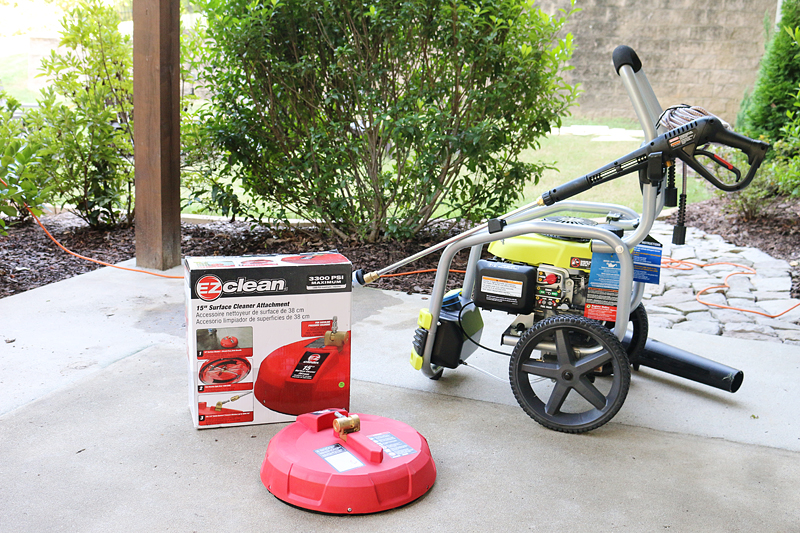
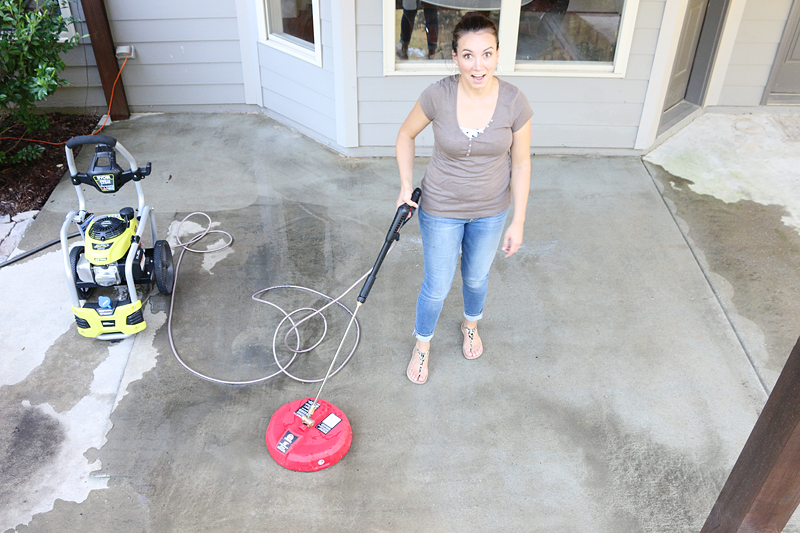
Then we headed to the store to get some plants and cleaning supplies and a bag of soil. Isn’t that ironic? I’m doing a clean up project and I am literally paying money for dirt. This is what our pressure washer looks like….and check out that quick change nozzle…it’s amazing!
Oh and we had to get the wasp spray too….
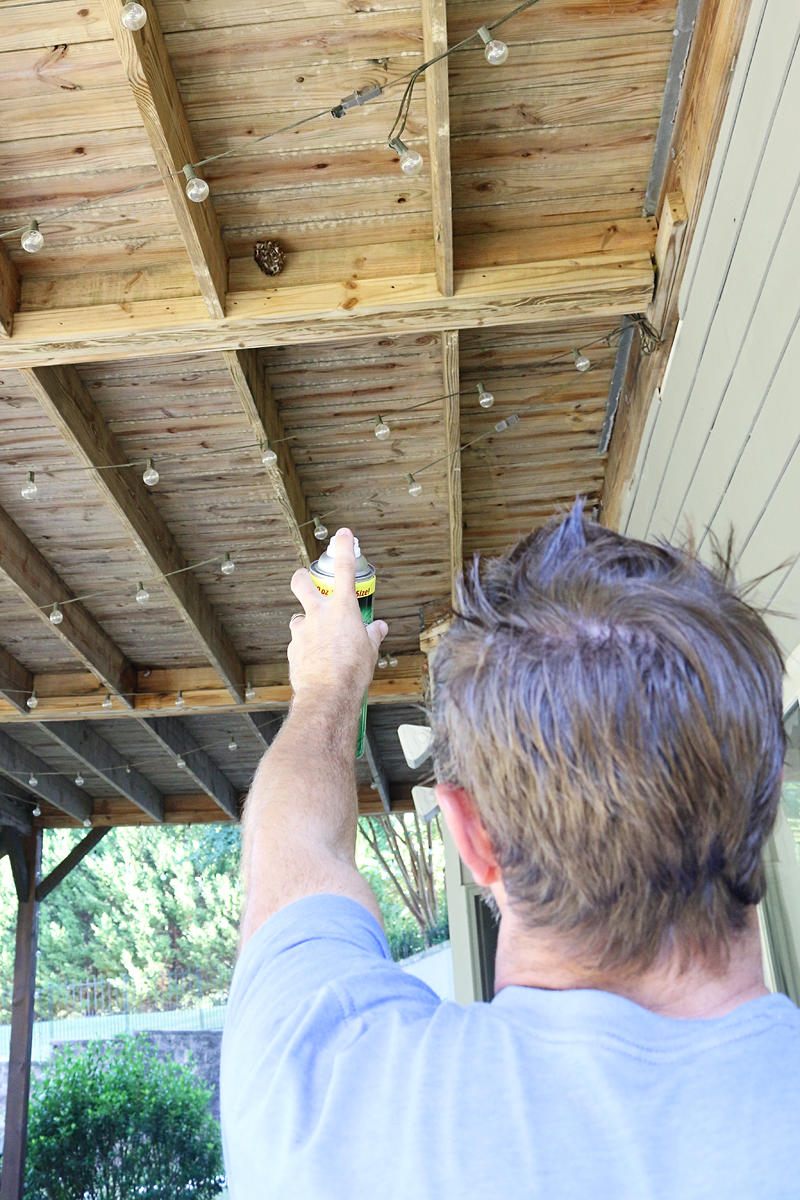
After all the dangerous critters were removed, Jeremy blew off the deck and we broke out the pressure washer.
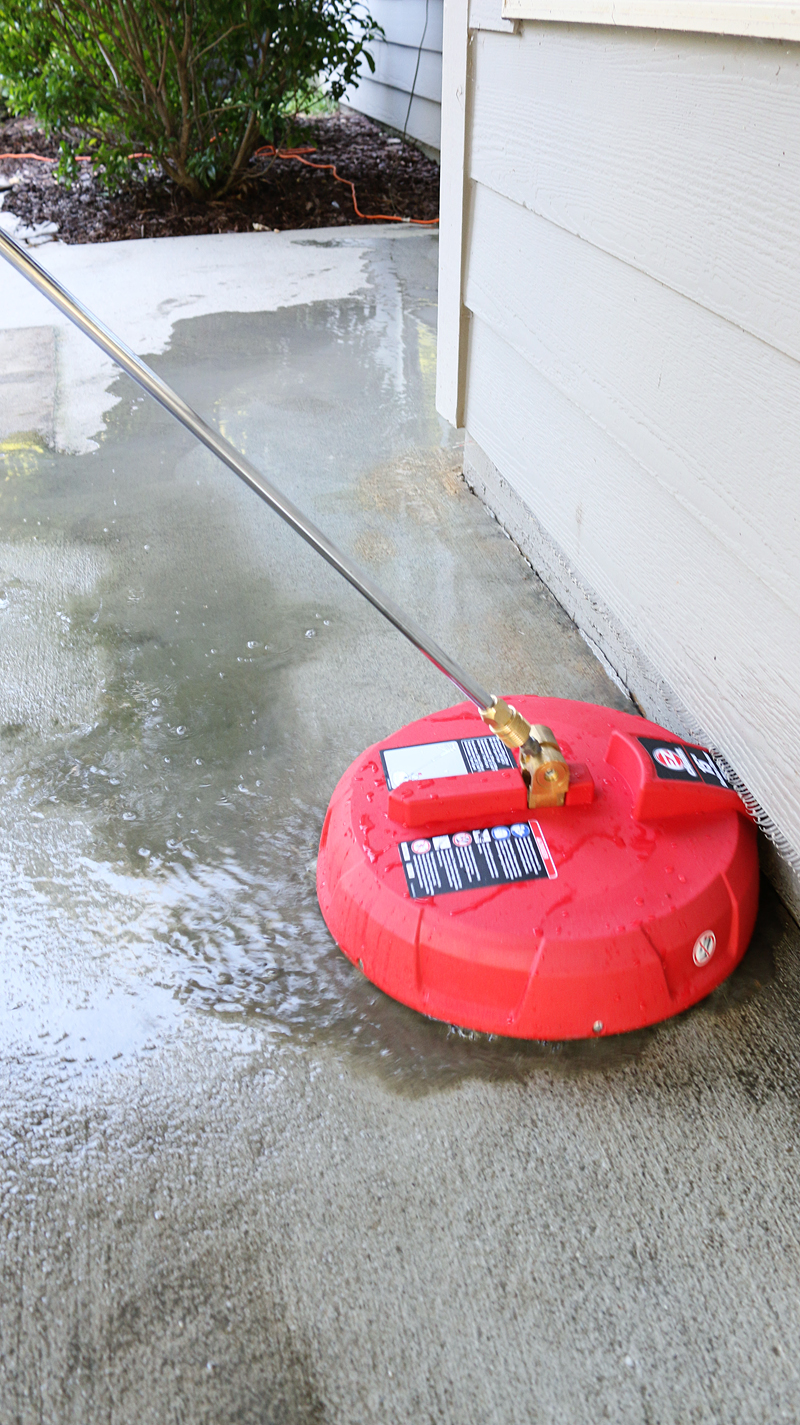
We also received this EZClean surface cleaner attachment and honestly, I didn’t know exactly what it was until Jeremy explained it. It’s like a pressure washer head….it goes directly on the wand and you use to pressure wash a huge surface area at once.
That is of course after you doodle in your grime 🙂
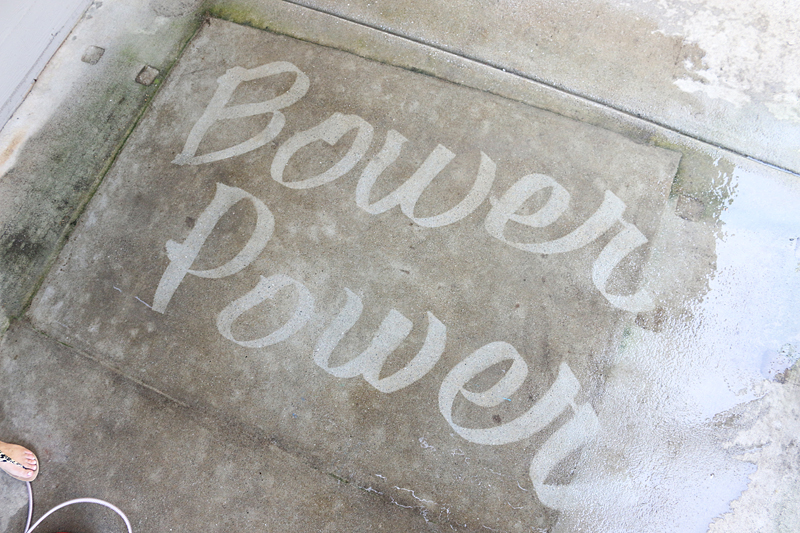
Okay so the only thing I can say is….well, it’s pretty much a big fat YES. Combined with the power of the pressure washer, it did our entire patio in 30 minutes. And no weird streaks where I missed something. No splattering mulch. No forearm cramp. It was super fast and very clean.
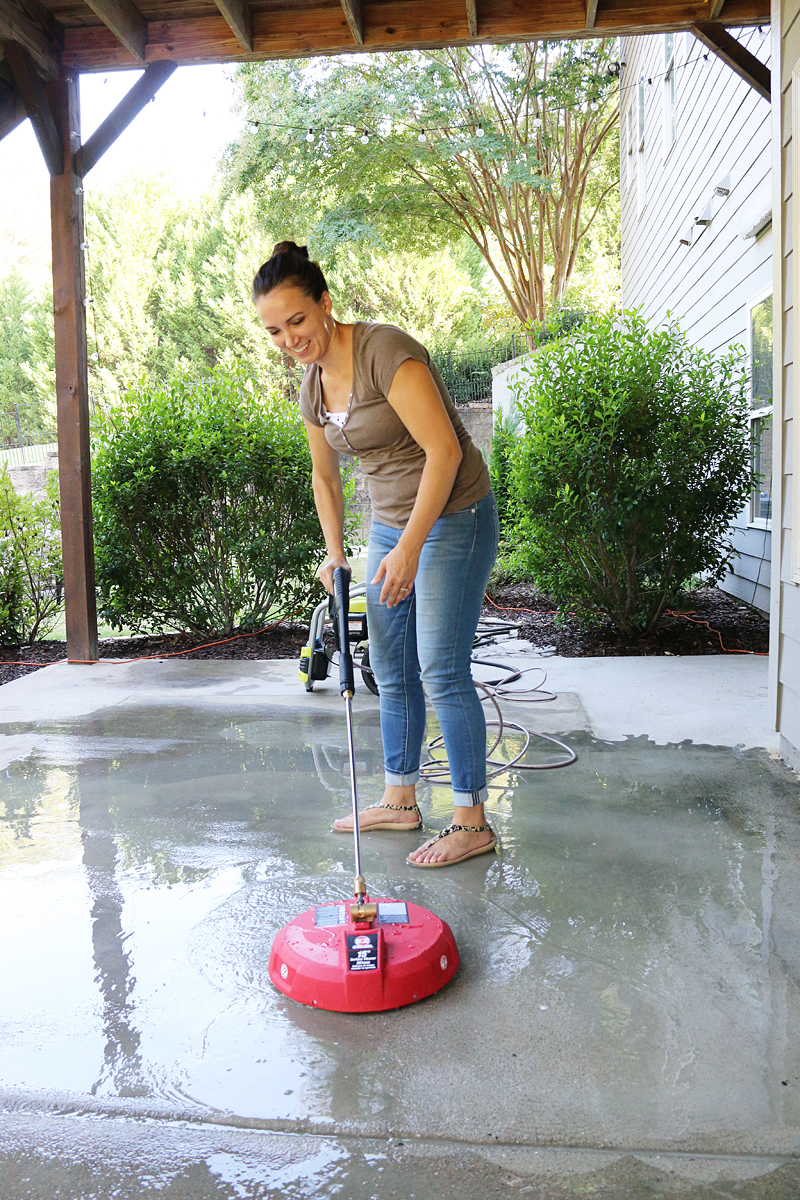
The areas that I missed (like around our pillars and right up close to the house) were easily done with the regular wand attachment but I would take the red surface area attachment all the way up to them with no hesitation.
It wasn’t hard to do either. It felt like I was slowly vacuuming. Kinda like the speed you would do if there was a Cheerio spill.
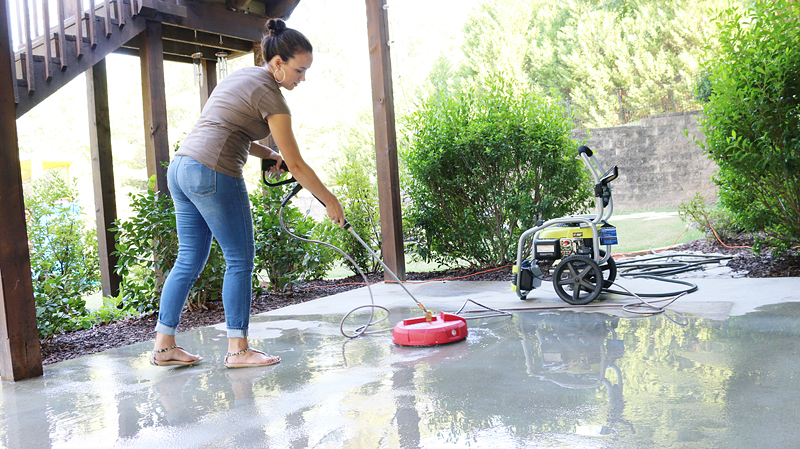
And it was definitely less wet than doing it with the conventional head. I’m sure in the long run it saves you money (less gas to run the pressure washer, less water) and a ton of time. If you see me pressure washing the road…you will know why.
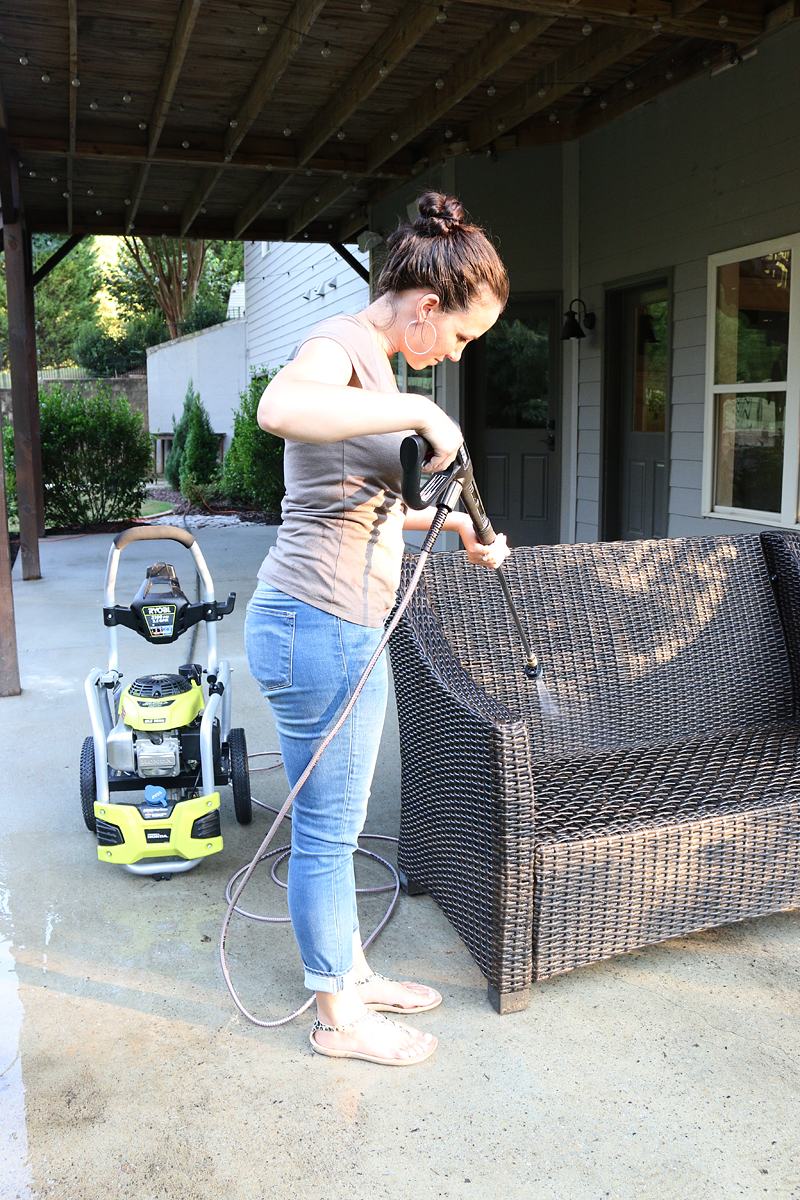
Once I was done rinsing the patio, it was time to do the furniture. Our patio set is that plastic wicker stuff so it’s holds up wonderfully to pressure washing and looks brand new! I even do the cushions!
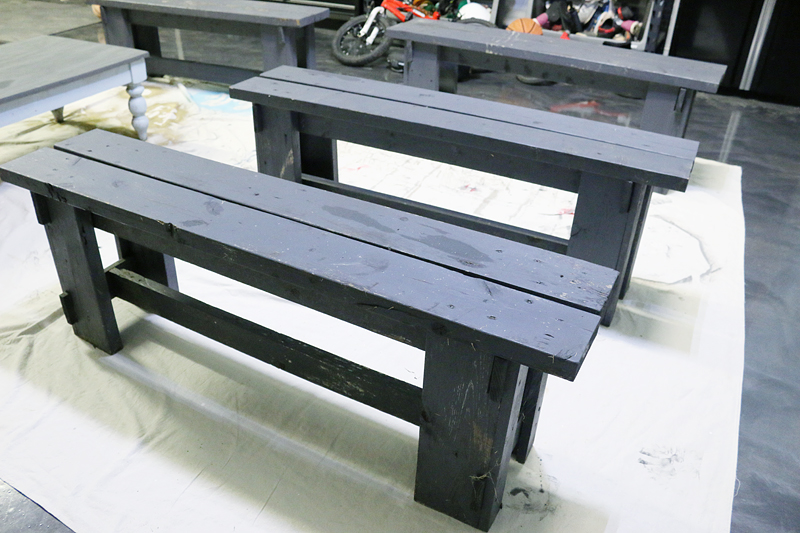
The benches also were cleaned and we brought those in to give a new color.
Since the boys never really played with the chalk table, I thought it was time to reclaim it as my own 🙂
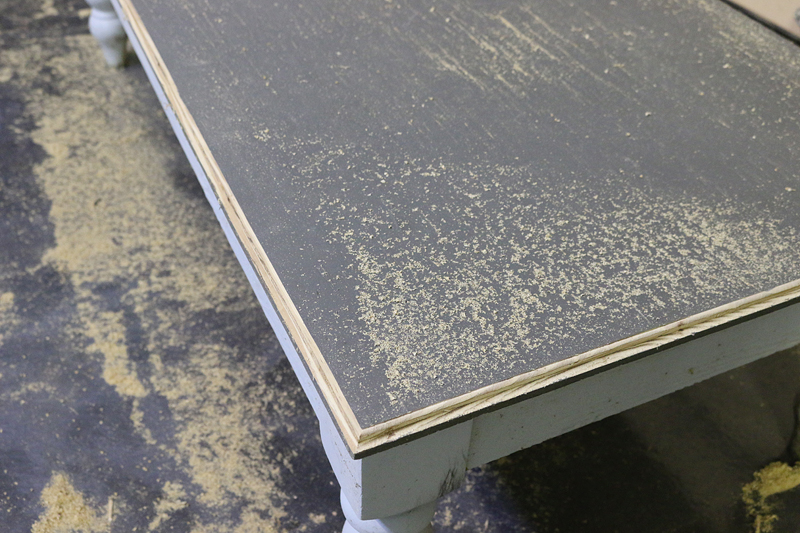
I sanded down everything – including the chalkboard paint top and then used my Ryobi router to add a decorative edge to the corners.
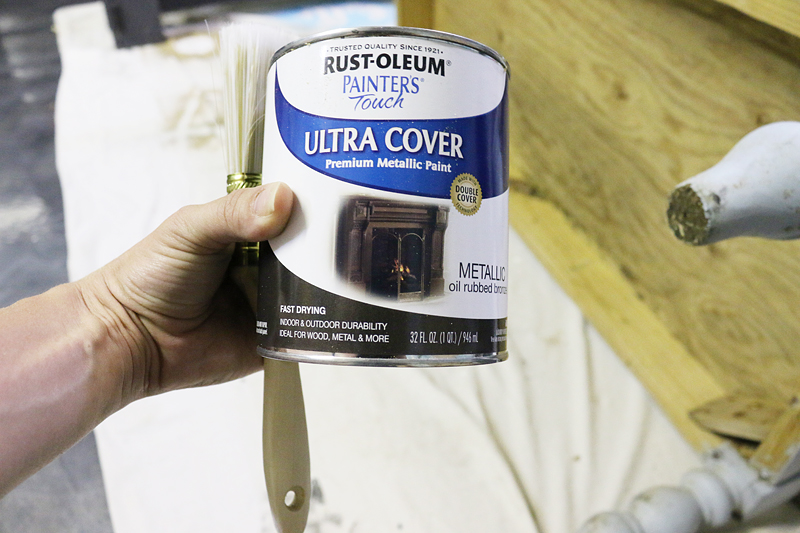
Then everything got a coat of Rust-Oleum’s metallic oil rubbed bronze paint. It is soo sparkly!!!!
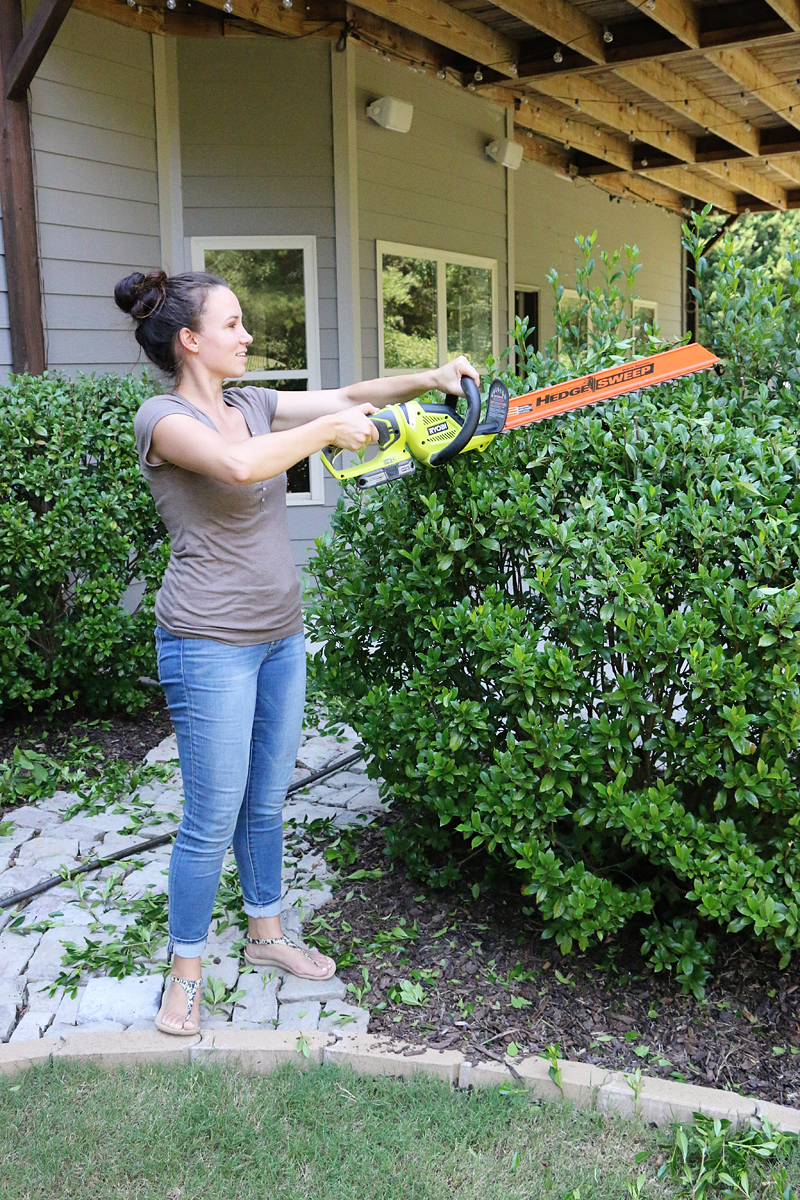
We also trimmed the bushes so they didn’t look like they would eat the house alive.
And I got one of my best helpers to assist me in potting some new fall plants. All the pots I had in my stash and I wanted to have more continuity so I decided to use matching sets in different areas.
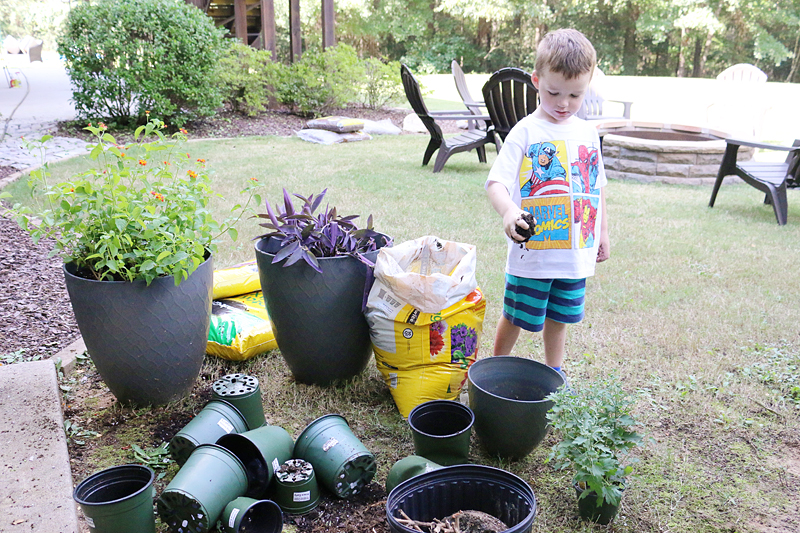
These new plants were beautiful but they also were functional! I decided that a potted herb garden would help me in the kitchen and remind me to water them each day. Speaking of watering – the little clay plates underneath the pots will help SO much with keeping the patio nice and dry.
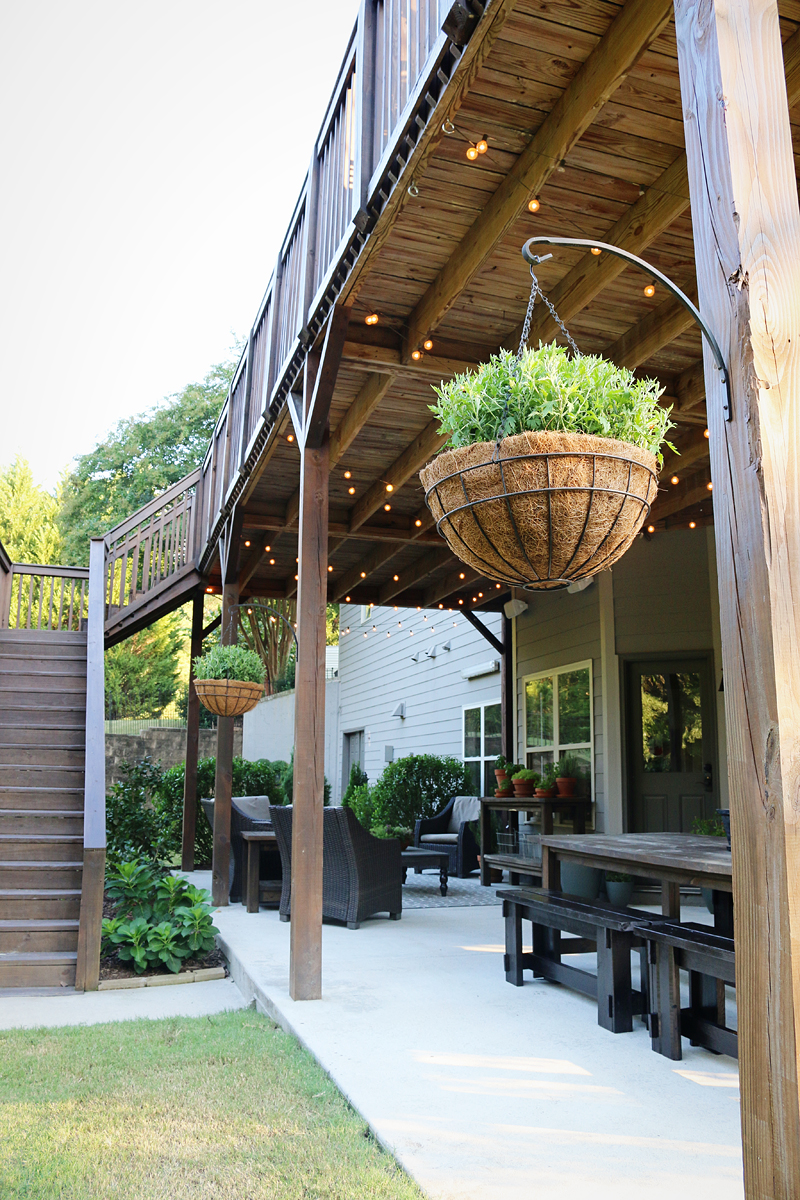
We fixed the lights, cleaned the windows and did a bunch of little details and BOOM….
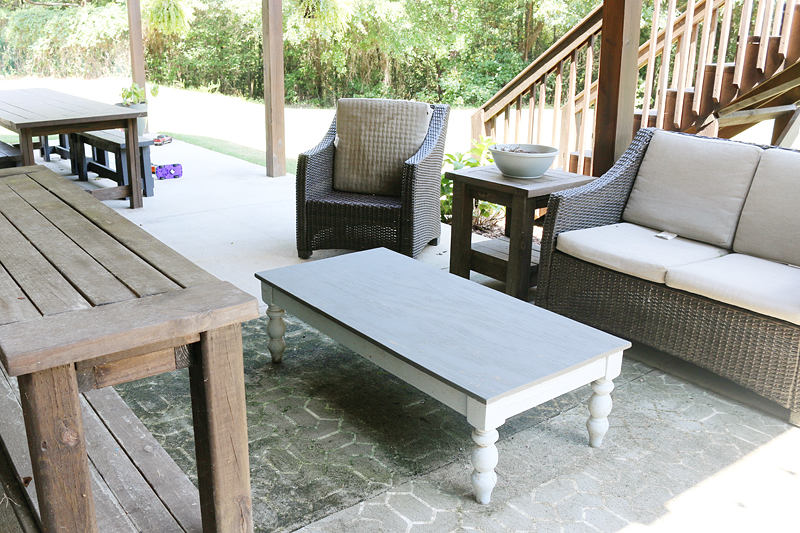
Here is our beautifully cleaned after….
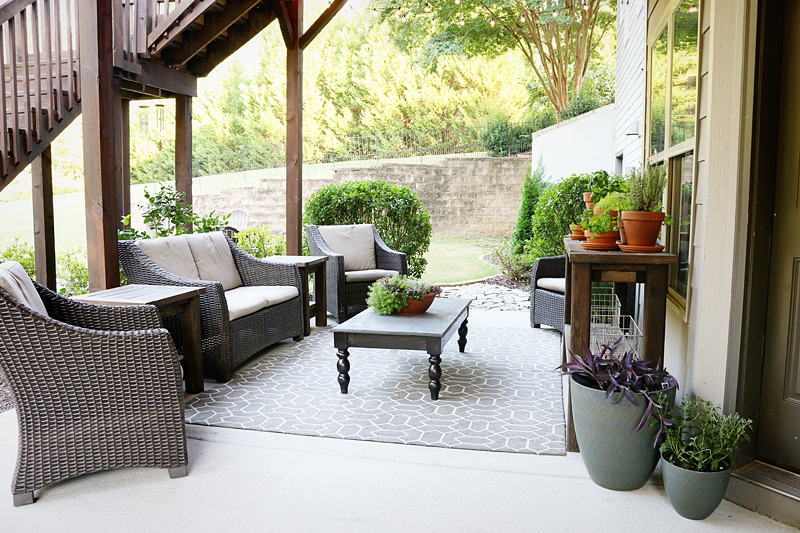
The best part of this makeover is that everything you see will stay out here. So many magazines show off these unbelievable patios and you see these gorgeous styled photos….but all of that stuff is not weather friendly! Seriously – someone needs to pull that $120 feather pillow inside stat! But in the spirit of clean – I wanted to share a space that feels distinctly tidy, manageable and ready to go at literally no-notice.
I’m sure I will style this area later for a party or get together but I wanted to keep it real and share with you how it looks if a complete stranger surprised us. This is proof that a simple space can still look good as long as it is CLEAN.
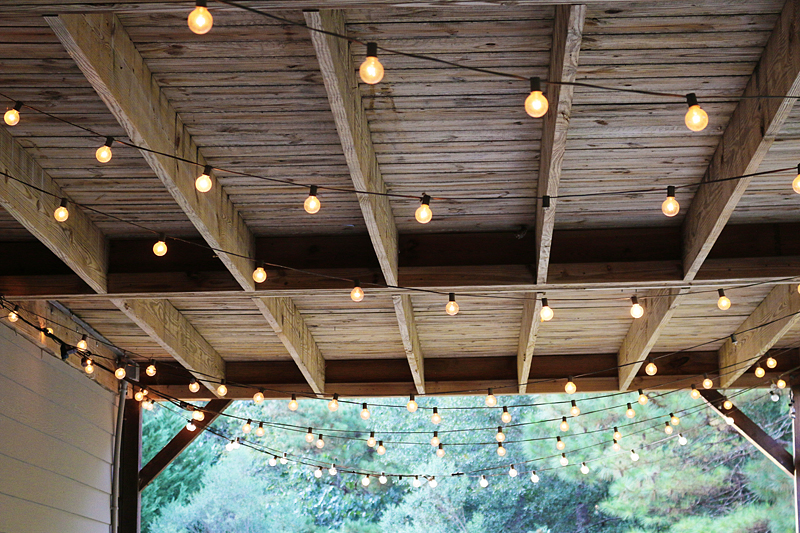
One of my favorite things is definitely the lighting. Before we had a couple fuses burn out and then we never got around to fixing them…why? who the heck knows?! It only took about twenty minutes and Jeremy had these babies running again and they give off such a great vibe.
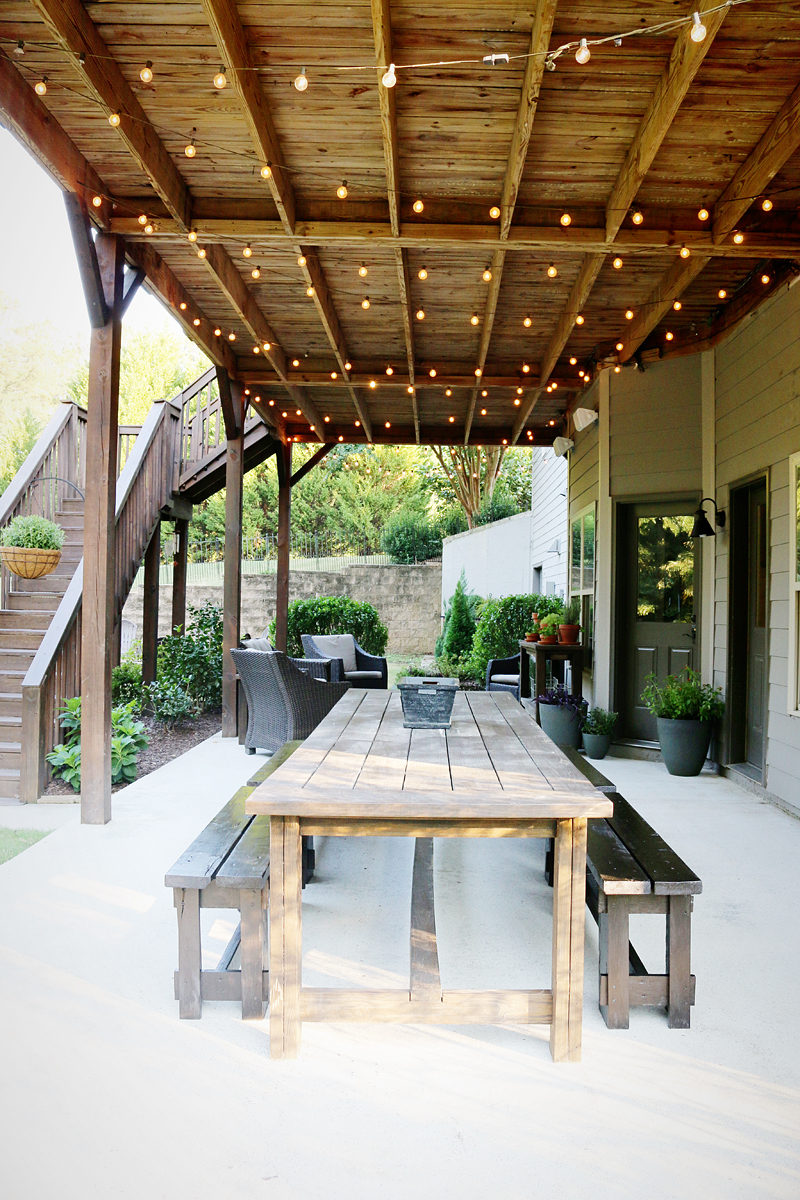
And now we can enjoy this space at night again! Double bonus! Especially because fall equals earlier sunsets.
Also switching the color of the benches and the coffee table base makes such a huge improvement.
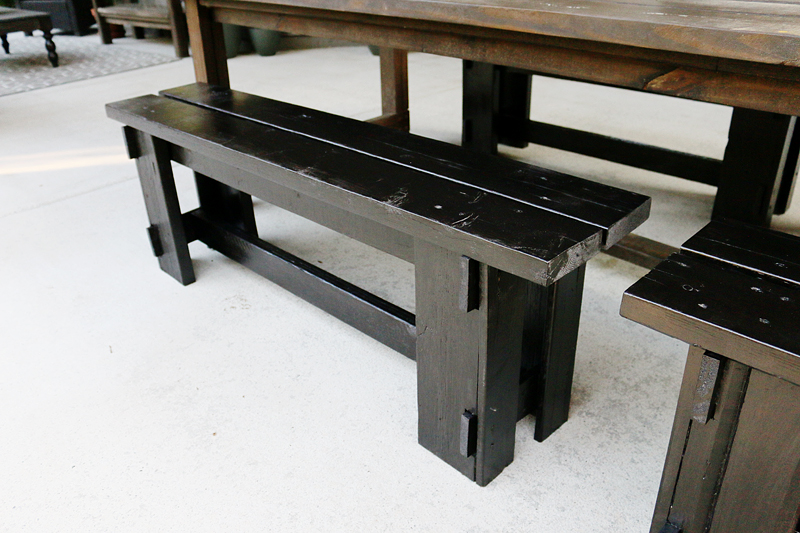
It was only an $8 can of paint and these now look like they are part of the set downstairs instead of looking like add-ons.
Plus they add a little sparkle to the space with the metallic finish. It is the little things!
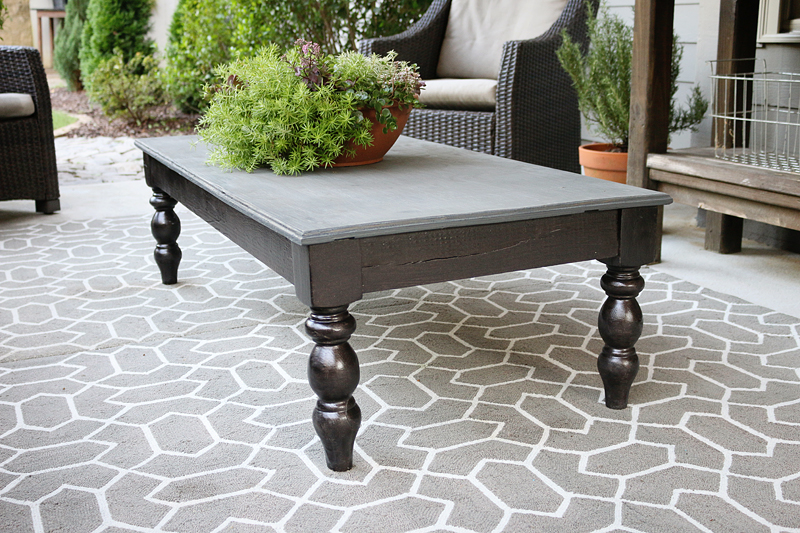
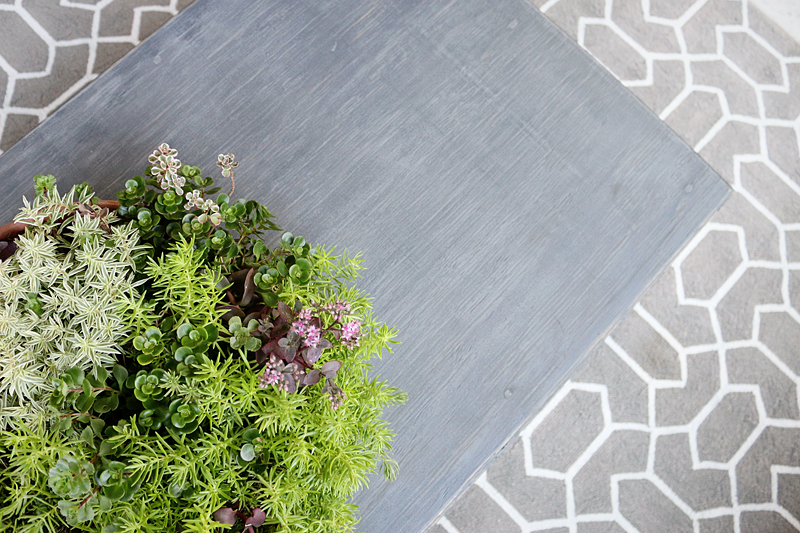
I should also mention that I did a quickie makeover on the top too. Since the edges were routed and just exposed exterior plywood, I sanded it all down, and applied a quick coat of gray stain. After an hour or so, I sanded it all down and it looks like this….so cute, right?!
And yes, this may sound really simple but just cleaning the windows helps tremendously. Windows generally get cleaned at my house when they are covered in yogurt fingerprints and slobbery kiss marks so these were overlooked….but getting that little tiny bit of dust and dirt off really makes them sparkle and shine and reflect basketball hoops 🙂
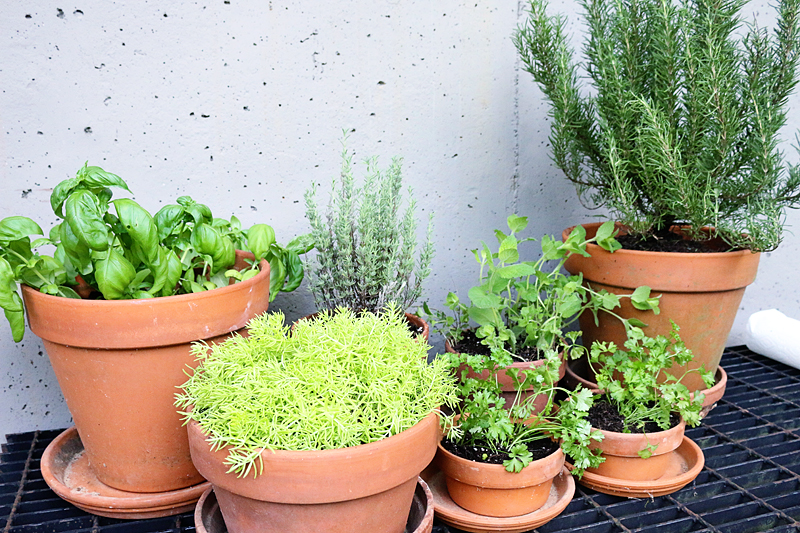
By far, my favorite thing that we added were all the clay pots and the potted herb garden.
Now we have rosemary, apple mint, basil, and more to add to our cuisine. And yes, I will start calling mac n cheese “cuisine” 🙂
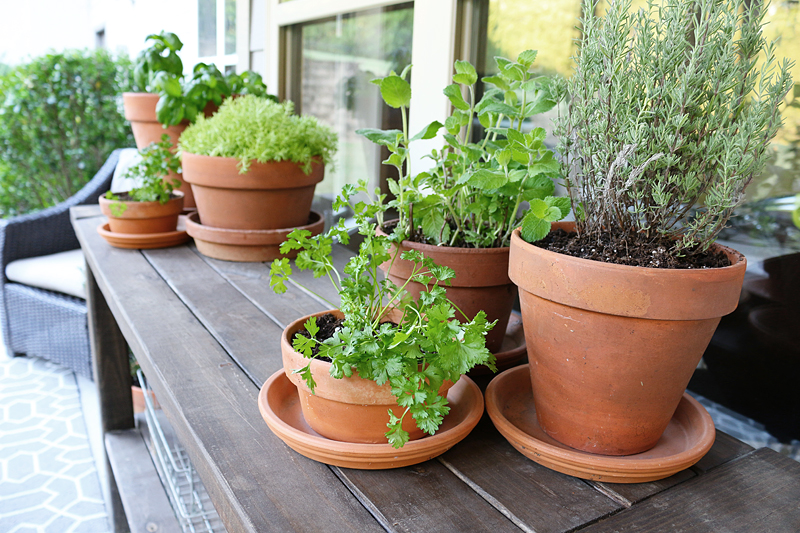
Since all the pots were already in my stash as well as those wire baskets, the total for all my plants pictured here was about $50.
Speaking of plants, I don’t want to forget these bad boys. Everybody loves a good mum.
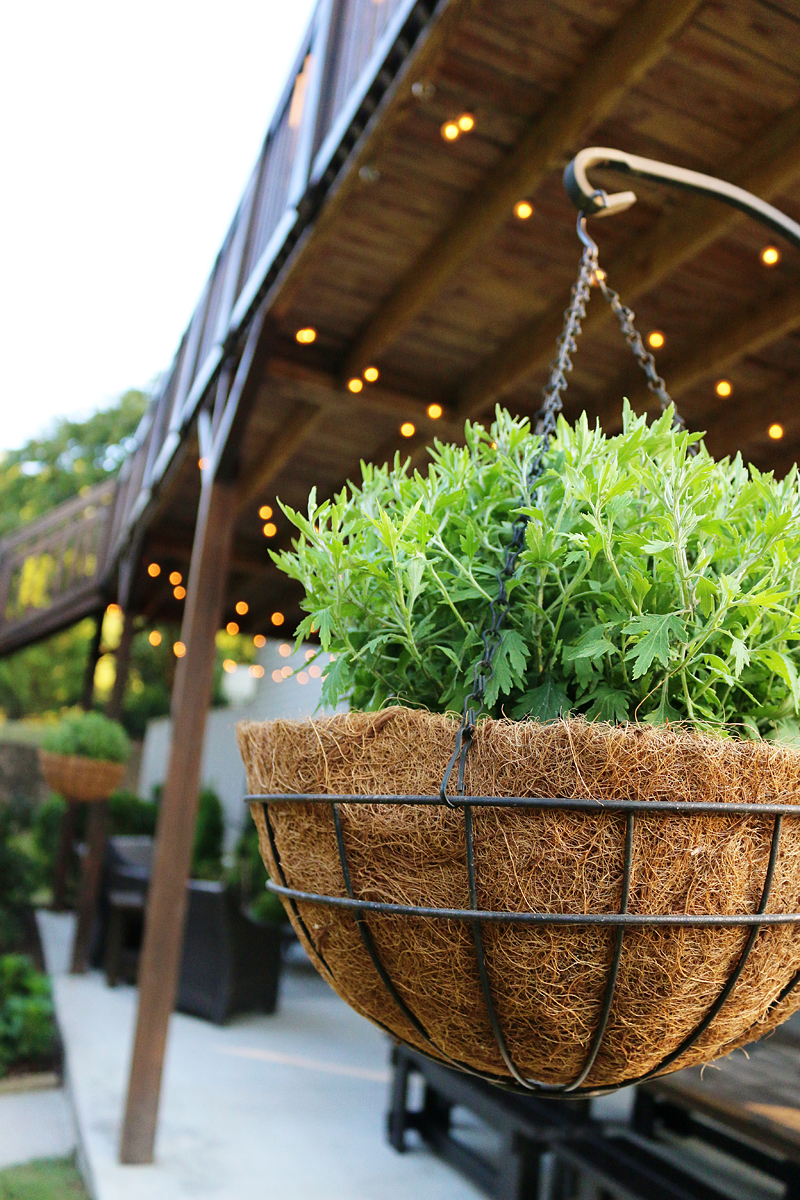
We added two baskets with coco liners filled with smaller mums to our outdoor hooks and they instantly make the place look so classy.
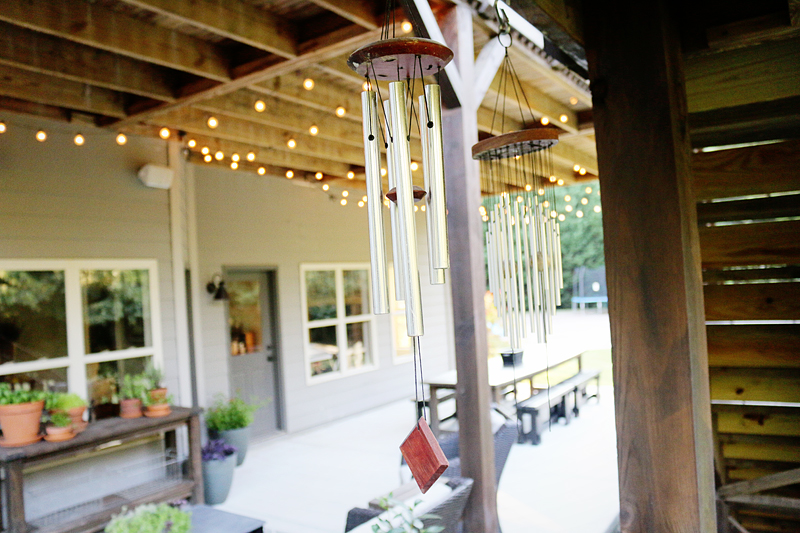
Now I can sit out here and enjoy my wind chimes and gaze at the plants and pinterest a bunch of recipes that I probably won’t ever make 🙂
I mean…why cook when you can create a fun space like this, right?!
And now for the side-by-sides….because really….it is the same space….just cleaner 🙂
And now let’s bring on that fall weather so we can really enjoy it!